Dairy Queen Banana Milkshake: A Creamy Delight You Can’t Resist
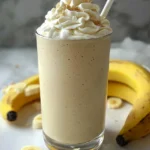
Enjoy a creamy Banana Milkshake made with ripe bananas, vanilla ice cream, and a touch of vanilla extract. This easy-to-make treat is perfect for hot days and can be customized with toppings like whipped cream and chocolate syrup. Ideal for sharing, it yields two large milkshakes that are sure to delight!
- Prep Time: 10 minutes
- Cook Time: 0 minutes
- Total Time: 10 minutes
- Yield: 2 large milkshakes 1x
Ingredients
Scale
- 2 ripe bananas
- 2 cups vanilla ice cream
- 1 cup milk (whole or 2% for creaminess)
- 1 teaspoon vanilla extract
- Whipped cream (for topping)
- Chocolate syrup (optional, for drizzling)
- Maraschino cherries (optional, for garnish)
Instructions
- Select Your Bananas: Choose two ripe bananas with a few brown spots for optimal sweetness.
- Peel and Slice: Peel the bananas and slice them into smaller pieces for easier blending.
- Gather Other Ingredients: Measure out the vanilla ice cream, milk, and vanilla extract.
- Blend the Bananas: In a blender, add the sliced bananas and blend first to break them down.
- Add Ice Cream: Add the two cups of vanilla ice cream to the blender for creaminess.
- Pour in the Milk: Add one cup of milk; adjust for thickness as desired.
- Add Vanilla Extract: Pour in the teaspoon of vanilla extract to enhance flavor.
- Blend Until Smooth: Blend on high speed until completely smooth, about 30 seconds to a minute.
- Taste and Adjust: Taste the milkshake and add more banana or sweetener if desired, then blend again.
- Prepare Your Glasses: Drizzle chocolate syrup inside the glasses for a decorative touch.
- Pour the Milkshake: Pour the milkshake into the prepared glasses, filling them about three-quarters full.
- Top with Whipped Cream: Generously add whipped cream on top of each milkshake.
- Add Toppings: Drizzle chocolate syrup over the whipped cream and add a maraschino cherry if desired.
- Serve Immediately: Enjoy the milkshake fresh with straws.
- Experiment with Flavors: Consider adding peanut butter or spinach for a twist.
- Store Leftovers: Store any leftovers in the freezer and blend again before serving.
- Share with Friends: This recipe makes enough for about two large milkshakesperfect for sharing!
- Clean Up: Rinse and wash your blender and utensils for easy cleanup.
Notes
- For a thicker milkshake, reduce the amount of milk.
- Feel free to customize with additional flavors or toppings.
- Best enjoyed fresh, but can be stored in the freezer if needed.
Find it online: https://anasrecipes.com/dairy-queen-banana-milkshake/