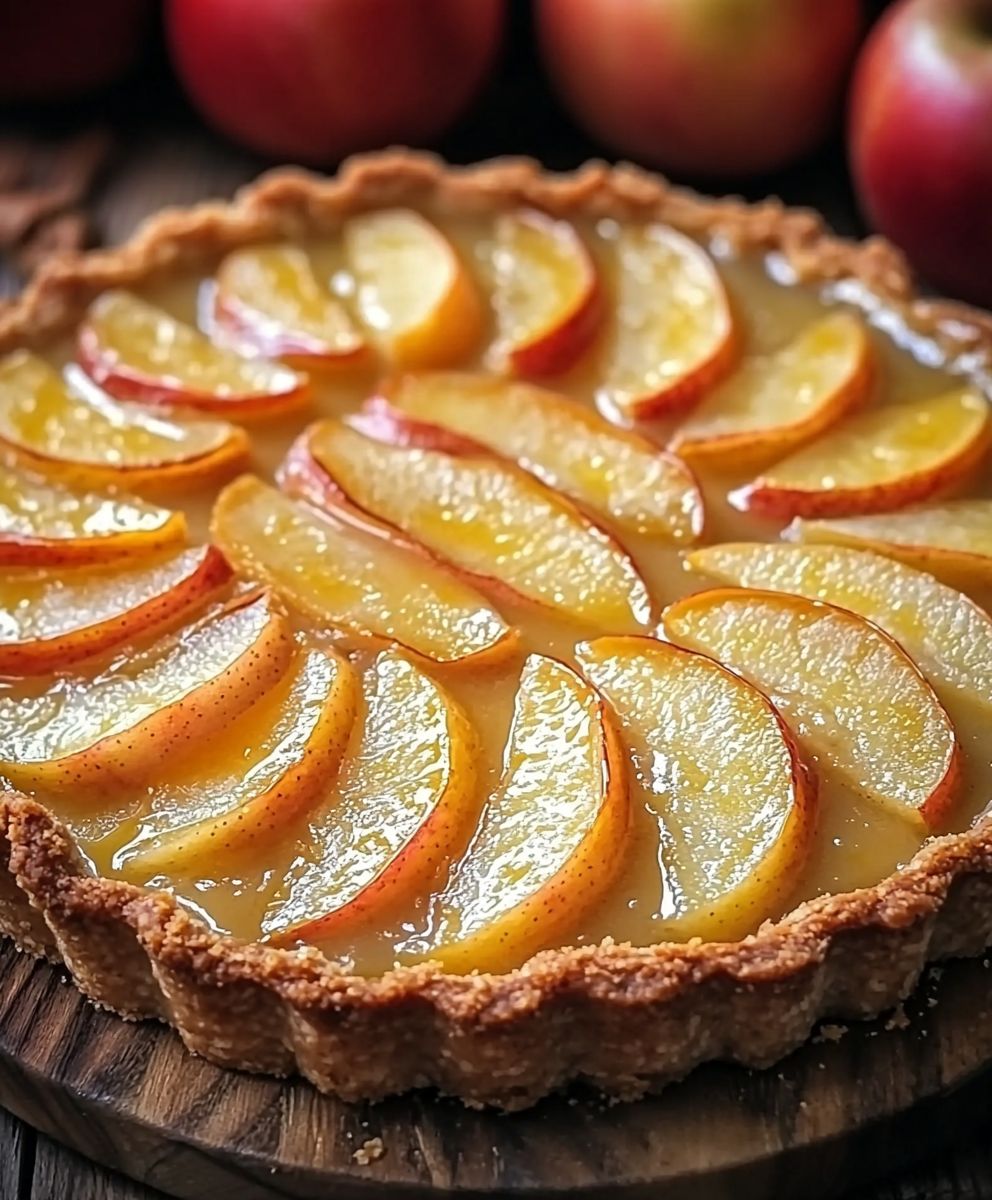
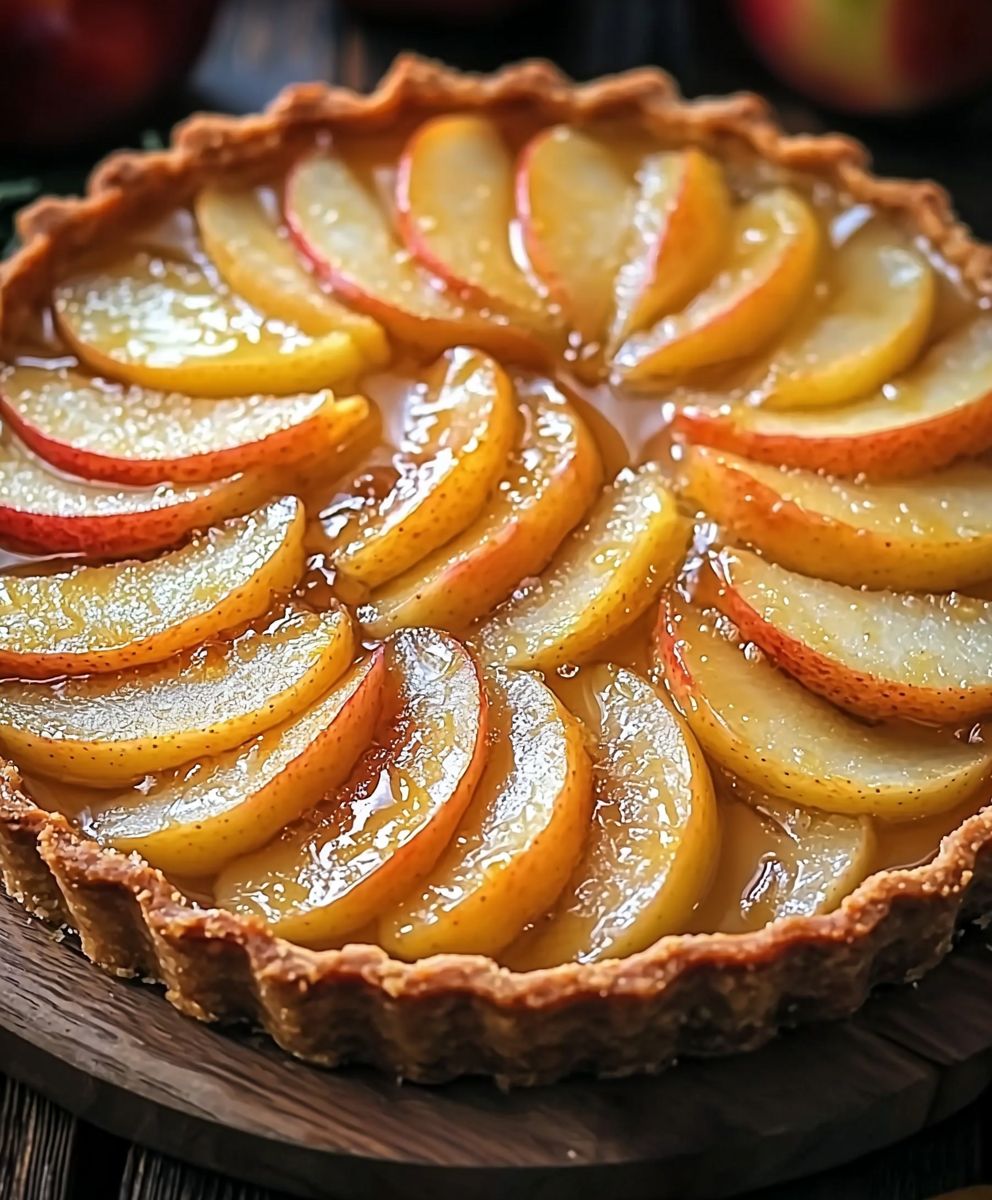
Normandy apple tart: just the name conjures up images of cozy French kitchens, the scent of warm apples and cinnamon filling the air. Have you ever wanted to recreate that quintessential taste of France in your own home? This recipe will guide you through creating a truly authentic and utterly delicious Normandy apple tart.
The history of apple tarts in Normandy is as rich and layered as the dessert itself. Normandy, known for its lush apple orchards and creamy dairy products, has long been a region where apples are celebrated. The “Tarte Normande,” often featuring a creamy custard base alongside the apples, is a testament to the region’s bounty and culinary heritage. It’s a dish that speaks of tradition, passed down through generations, each family adding their own special touch.
What makes a Normandy apple tart so irresistible? It’s the perfect balance of textures and flavors. The crisp, buttery crust gives way to a soft, sweet apple filling, often enhanced by a delicate custard or frangipane. People adore this dessert because it’s comforting, elegant, and surprisingly easy to make. Whether you’re looking for a show-stopping dessert for a special occasion or simply want to treat yourself to a taste of France, this recipe is sure to become a new favorite. So, let’s get baking and bring a little bit of Normandy into your kitchen!
Ingredients:
- For the Pâte Brisée (Shortcrust Pastry):
- 250g (2 cups) all-purpose flour, plus extra for dusting
- 125g (1/2 cup + 2 tablespoons) cold unsalted butter, cubed
- 50g (1/4 cup) cold vegetable shortening, cubed
- 5-7 tablespoons ice water
- 1/2 teaspoon salt
- For the Apple Filling:
- 1 kg (about 6 medium) firm apples, such as Granny Smith, Honeycrisp, or Braeburn
- 50g (1/4 cup) unsalted butter
- 50g (1/4 cup) granulated sugar
- 1 teaspoon ground cinnamon
- 1/4 teaspoon ground nutmeg
- 2 tablespoons Calvados or apple brandy (optional)
- 1 tablespoon lemon juice
- For the Apricot Glaze (Optional):
- 2 tablespoons apricot jam
- 1 tablespoon water
Preparing the Pâte Brisée (Shortcrust Pastry)
This pastry is the foundation of our tart, and it’s crucial to get it right. Don’t be intimidated; with a few tips, you’ll be a pro in no time!
- Combine Dry Ingredients: In a large bowl, whisk together the flour and salt. This ensures the salt is evenly distributed throughout the dough.
- Incorporate the Fats: Add the cold, cubed butter and vegetable shortening to the flour mixture. Using a pastry blender or your fingertips (work quickly to keep the butter cold!), cut the butter and shortening into the flour until the mixture resembles coarse crumbs. You should still see small pieces of butter and shortening these are what create flaky layers!
- Add Ice Water: Gradually add the ice water, one tablespoon at a time, mixing gently after each addition. The amount of water you need will vary depending on the humidity and the flour you’re using. Stop adding water when the dough just comes together and forms a shaggy ball. Be careful not to overwork the dough, as this will develop the gluten and make the pastry tough.
- Shape and Chill: Turn the dough out onto a lightly floured surface. Gently shape it into a disc, about 1 inch thick. Wrap the disc tightly in plastic wrap and refrigerate for at least 1 hour, or preferably 2 hours. This chilling time is essential for relaxing the gluten and allowing the butter to firm up, which will result in a tender and flaky crust. You can even chill it overnight!
Preparing the Apple Filling
The apple filling is where the magic happens! The combination of sweet apples, warm spices, and a touch of Calvados (if you’re feeling fancy) creates a truly irresistible flavor.
- Prepare the Apples: Peel, core, and quarter the apples. Then, slice each quarter into thin slices, about 1/8 inch thick. Uniform slices will ensure even cooking. As you slice the apples, place them in a large bowl and toss them with the lemon juice. This will prevent them from browning.
- Cook the Apples: In a large skillet or sauté pan, melt the butter over medium heat. Add the sliced apples, sugar, cinnamon, and nutmeg. Cook, stirring occasionally, until the apples are softened and slightly caramelized, about 10-15 minutes. You want them to be tender but still hold their shape.
- Add Calvados (Optional): If using Calvados or apple brandy, remove the skillet from the heat and carefully pour it over the apples. Be careful, as it may ignite! Let the alcohol evaporate for a minute or two. This adds a wonderful depth of flavor to the filling.
- Cool the Filling: Remove the apple filling from the skillet and let it cool slightly before assembling the tart. This will prevent the pastry from becoming soggy.
Assembling and Baking the Tart
Now for the fun part putting it all together! This is where your creativity can shine. You can arrange the apple slices in a simple concentric circle pattern or get more elaborate with your design.
- Preheat Oven: Preheat your oven to 375°F (190°C). Place a baking sheet in the oven while it preheats. This will help ensure a crispy bottom crust.
- Roll Out the Pastry: On a lightly floured surface, roll out the chilled pastry into a circle about 12 inches in diameter and about 1/8 inch thick. Rotate the dough as you roll to ensure an even circle and prevent it from sticking to the surface.
- Transfer to Tart Pan: Carefully transfer the rolled-out pastry to a 9-inch tart pan with a removable bottom. Gently press the pastry into the bottom and up the sides of the pan. Trim any excess pastry from the edges by rolling the rolling pin over the top of the pan. Alternatively, you can use a knife to trim the edges neatly.
- Dock the Crust: Use a fork to prick the bottom of the pastry crust all over. This will prevent it from puffing up during baking.
- Arrange the Apple Filling: Arrange the cooled apple filling evenly over the pastry crust. You can create a decorative pattern with the apple slices, such as concentric circles or overlapping rows. Be sure to use all the delicious juices that have accumulated at the bottom of the bowl.
- Bake the Tart: Place the tart pan on the preheated baking sheet in the oven. Bake for 45-55 minutes, or until the crust is golden brown and the apple filling is bubbly and tender. If the crust starts to brown too quickly, you can tent it with aluminum foil.
- Cool the Tart: Remove the tart from the oven and let it cool in the pan for at least 30 minutes before removing it from the tart pan. This will allow the filling to set slightly and prevent the tart from falling apart.
Apricot Glaze (Optional)
A simple apricot glaze adds a beautiful shine and a touch of sweetness to the finished tart. It’s totally optional, but I highly recommend it!
- Prepare the Glaze: In a small saucepan, combine the apricot jam and water. Heat over low heat, stirring constantly, until the jam is melted and smooth.
- Glaze the Tart: Brush the warm apricot glaze evenly over the top of the cooled tart. This will give it a beautiful glossy finish.
Serving and Storing
This Normandy apple tart is best served warm or at room temperature. It’s delicious on its own, or you can serve it with a scoop of vanilla ice cream or a dollop of whipped cream.
To store, cover the tart loosely with plastic wrap and refrigerate for up to 3 days. You can reheat it gently in a low oven before serving.
Tips for Success
- Keep the Butter Cold: This is the most important tip for making flaky pastry. Cold butter creates steam during baking, which separates the layers of dough.
- Don’t Overwork the Dough: Overworking the dough will develop the gluten and make the pastry tough. Mix the dough just until it comes together.
- Chill the Dough: Chilling the dough allows the gluten to relax and the butter to firm up, which will result in a tender and flaky crust.
- Use Firm Apples: Firm apples will hold their shape during baking and won’t turn to mush.
- Adjust Sweetness to Taste: The amount of sugar you need will depend on the sweetness of your apples. Taste the filling and adjust the sugar accordingly.

Conclusion:
This Normandy apple tart isn’t just a dessert; it’s an experience. The combination of the buttery, crumbly crust, the sweet and slightly tart apples, and the subtle warmth of cinnamon creates a symphony of flavors that will transport you straight to a cozy French countryside kitchen. Trust me, once you take that first bite, you’ll understand why I’m so passionate about this recipe. It’s simple enough for a weeknight treat, yet elegant enough to impress at your next dinner party. But what truly makes this tart a must-try is its versatility. While the classic recipe is divine as is, there are endless ways to customize it to your liking. For a richer, more decadent experience, try adding a layer of almond paste beneath the apples. The nutty sweetness of the almond paste complements the apples beautifully and adds a delightful textural contrast. Or, if you’re feeling adventurous, consider incorporating other fruits like pears or cranberries for a unique twist. A sprinkle of chopped walnuts or pecans before baking adds a satisfying crunch. Serving suggestions? Oh, the possibilities! A scoop of vanilla ice cream or a dollop of crème fraîche is the perfect accompaniment to a warm slice of this Normandy apple tart. For a more sophisticated touch, drizzle a bit of salted caramel sauce over the top. And don’t forget the beverage pairing! A glass of chilled cider or a sweet dessert wine will elevate the entire experience. You could even serve it with a warm cup of coffee or tea for a comforting afternoon treat. Beyond the classic pairings, feel free to get creative! I’ve even seen some people enjoy it with a sharp cheddar cheese, the savory notes creating a surprising and delightful contrast to the sweetness of the tart. The beauty of this recipe is that it’s a blank canvas for your culinary creativity. I truly believe that everyone should have this recipe in their repertoire. It’s a crowd-pleaser, a comfort food, and a guaranteed way to impress your friends and family. So, what are you waiting for? Gather your ingredients, preheat your oven, and get ready to create a little bit of magic in your kitchen. I’m so excited for you to try this recipe and experience the joy of baking a truly exceptional dessert. But more than that, I’m eager to hear about your own personal touches and variations. Did you add almond paste? Did you experiment with different fruits? Did you discover a new and exciting serving suggestion? Please, don’t hesitate to share your experiences in the comments below! I love hearing from you and learning about your culinary adventures. Your feedback not only helps me improve my recipes but also inspires other readers to try new things. Let’s create a community of passionate bakers who share a love for delicious food and the joy of sharing it with others. So go ahead, bake this Normandy apple tart, and let me know what you think! I can’t wait to hear from you! Happy baking! PrintNormandy Apple Tart: A Delicious & Easy Recipe
Classic Normandy Apple Tart with flaky shortcrust pastry and tender, spiced apples. Optional apricot glaze for shine and sweetness.
- Prep Time: 45 minutes
- Cook Time: 45 minutes
- Total Time: 150 minutes
- Yield: 8 servings 1x
Ingredients
- 250g (2 cups) all-purpose flour, plus extra for dusting
- 125g (1/2 cup + 2 tablespoons) cold unsalted butter, cubed
- 50g (1/4 cup) cold vegetable shortening, cubed
- 5–7 tablespoons ice water
- 1/2 teaspoon salt
- 1 kg (about 6 medium) firm apples, such as Granny Smith, Honeycrisp, or Braeburn
- 50g (1/4 cup) unsalted butter
- 50g (1/4 cup) granulated sugar
- 1 teaspoon ground cinnamon
- 1/4 teaspoon ground nutmeg
- 2 tablespoons Calvados or apple brandy (optional)
- 1 tablespoon lemon juice
- 2 tablespoons apricot jam
- 1 tablespoon water
Instructions
- In a large bowl, whisk together the flour and salt.
- Add the cold, cubed butter and vegetable shortening to the flour mixture. Using a pastry blender or your fingertips (work quickly to keep the butter cold!), cut the butter and shortening into the flour until the mixture resembles coarse crumbs.
- Gradually add the ice water, one tablespoon at a time, mixing gently after each addition. Stop adding water when the dough just comes together and forms a shaggy ball.
- Turn the dough out onto a lightly floured surface. Gently shape it into a disc, about 1 inch thick. Wrap the disc tightly in plastic wrap and refrigerate for at least 1 hour, or preferably 2 hours (or overnight).
- Peel, core, and quarter the apples. Then, slice each quarter into thin slices, about 1/8 inch thick. Toss the apple slices with the lemon juice in a large bowl.
- In a large skillet or sauté pan, melt the butter over medium heat. Add the sliced apples, sugar, cinnamon, and nutmeg. Cook, stirring occasionally, until the apples are softened and slightly caramelized, about 10-15 minutes.
- If using Calvados or apple brandy, remove the skillet from the heat and carefully pour it over the apples. Let the alcohol evaporate for a minute or two.
- Remove the apple filling from the skillet and let it cool slightly before assembling the tart.
- Preheat your oven to 375°F (190°C). Place a baking sheet in the oven while it preheats.
- On a lightly floured surface, roll out the chilled pastry into a circle about 12 inches in diameter and about 1/8 inch thick.
- Carefully transfer the rolled-out pastry to a 9-inch tart pan with a removable bottom. Gently press the pastry into the bottom and up the sides of the pan. Trim any excess pastry from the edges.
- Use a fork to prick the bottom of the pastry crust all over.
- Arrange the cooled apple filling evenly over the pastry crust.
- Place the tart pan on the preheated baking sheet in the oven. Bake for 45-55 minutes, or until the crust is golden brown and the apple filling is bubbly and tender. If the crust starts to brown too quickly, you can tent it with aluminum foil.
- Remove the tart from the oven and let it cool in the pan for at least 30 minutes before removing it from the tart pan.
- In a small saucepan, combine the apricot jam and water. Heat over low heat, stirring constantly, until the jam is melted and smooth.
- Brush the warm apricot glaze evenly over the top of the cooled tart.
- Serve warm or at room temperature, with ice cream or whipped cream if desired.
- To store, cover the tart loosely with plastic wrap and refrigerate for up to 3 days. Reheat gently in a low oven before serving.
Notes
- Keep the butter cold for a flaky crust.
- Don’t overwork the dough.
- Chill the dough thoroughly.
- Use firm apples that hold their shape.
- Adjust the sweetness of the filling to taste.
- The chilling time for the dough is crucial for developing the flaky texture. Don’t skip it!
- If you don’t have Calvados or apple brandy, you can omit it, but it does add a nice depth of flavor.
- Be careful when adding the Calvados to the hot apples, as it may ignite.
- Docking the crust prevents it from puffing up unevenly during baking.
- If the crust browns too quickly, tent it with foil to prevent burning.
- Cooling the tart before removing it from the pan helps it to set and prevents it from falling apart.


Leave a Comment