
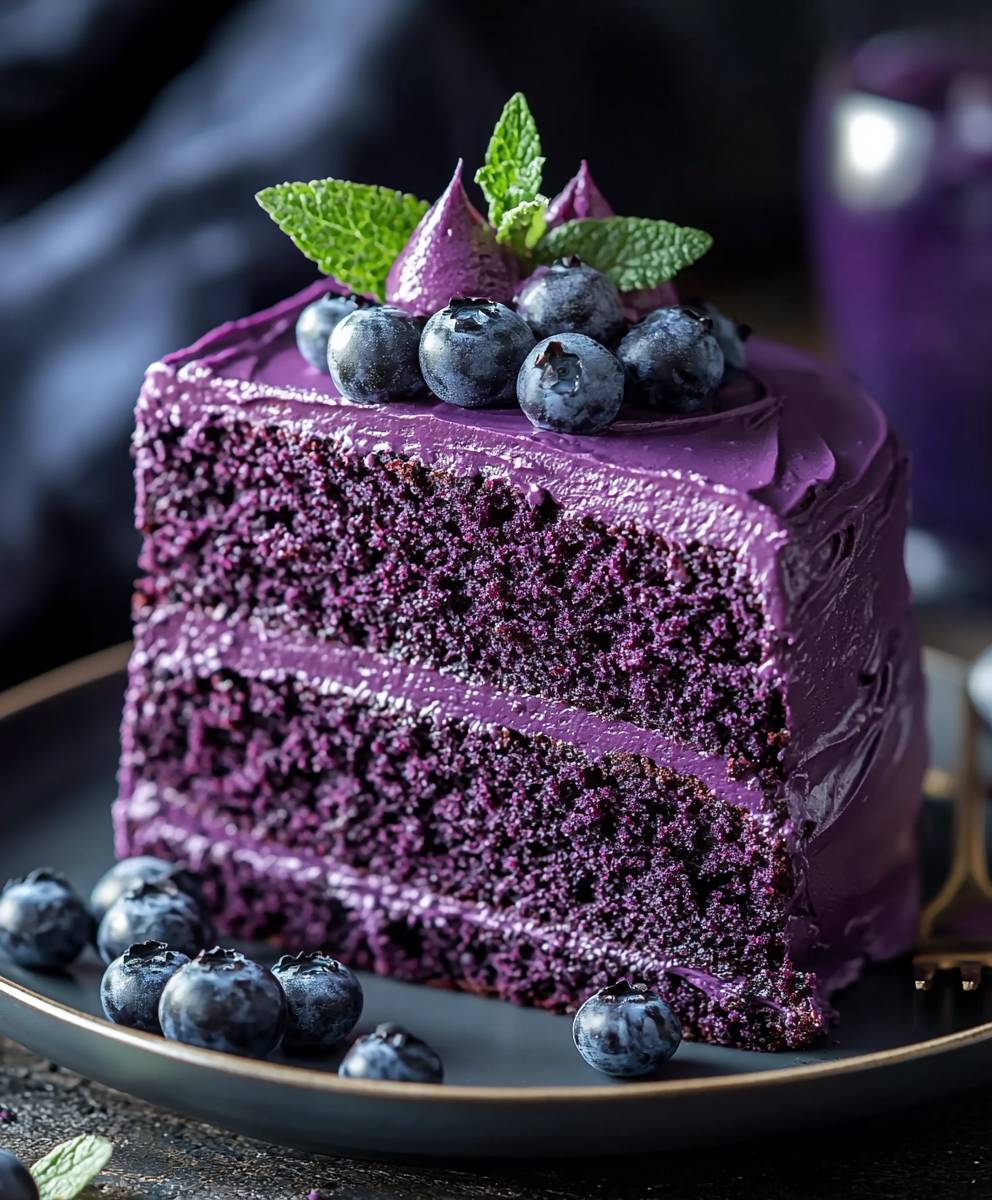
Purple Velvet Cake: Prepare to be captivated by a dessert that’s as visually stunning as it is delicious! Imagine slicing into a cake with a deep, mesmerizing purple hue, its velvety texture practically melting in your mouth. This isn’t just cake; it’s an experience, a showstopper that will leave your guests utterly speechless.
While the classic red velvet cake boasts a rich history rooted in the Victorian era, with its subtle cocoa flavor and tangy buttermilk frosting, Purple Velvet Cake offers a modern, vibrant twist on this beloved classic. The use of natural or artificial coloring to achieve that striking purple shade elevates it from a simple dessert to a work of art. It’s perfect for birthdays, holidays, or any occasion where you want to make a statement.
People adore velvet cakes for their incredibly soft and moist crumb, a result of the chemical reaction between the buttermilk and cocoa powder (or in this case, the ingredients used to create the purple color). The slight tanginess balances the sweetness perfectly, preventing it from being cloying. And let’s not forget the cream cheese frosting the quintessential pairing that adds a luscious, creamy counterpoint to the cake’s delicate texture. This recipe for Purple Velvet Cake is sure to become a new favorite, offering a delightful combination of visual appeal and irresistible flavor.

Ingredients:
- For the Cake:
- 2 ½ cups all-purpose flour
- 2 cups granulated sugar
- ¾ cup unsweetened cocoa powder
- 1 ½ teaspoons baking soda
- 1 ½ teaspoons baking powder
- 1 teaspoon salt
- 1 cup buttermilk
- ½ cup vegetable oil
- 2 large eggs
- 2 teaspoons vanilla extract
- 2 ounces (60ml) purple food coloring (gel or liquid) – adjust for desired intensity
- 1 cup boiling water
- For the Cream Cheese Frosting:
- 8 ounces (225g) cream cheese, softened
- ½ cup (1 stick) unsalted butter, softened
- 4 cups powdered sugar
- 2 teaspoons vanilla extract
- 2-4 tablespoons milk or heavy cream (for desired consistency)
Preparing the Purple Velvet Cake Batter
- Preheat and Prepare: First things first, preheat your oven to 350°F (175°C). Grease and flour two 9-inch round cake pans. You can also line the bottoms with parchment paper rounds for extra insurance against sticking. I find this makes removing the cakes a breeze!
- Dry Ingredients: In a large bowl, whisk together the flour, sugar, cocoa powder, baking soda, baking powder, and salt. Make sure everything is evenly distributed this will help your cake rise beautifully and have a consistent texture.
- Wet Ingredients: In a separate bowl, whisk together the buttermilk, vegetable oil, eggs, and vanilla extract. Don’t be afraid to really get in there and make sure everything is well combined.
- Combine Wet and Dry: Gradually add the wet ingredients to the dry ingredients, mixing on low speed until just combined. Be careful not to overmix! Overmixing can lead to a tough cake.
- Purple Power: Add the purple food coloring to the batter and mix until evenly colored. Start with 2 ounces and add more if you want a more vibrant purple. Remember, the color will deepen slightly as it bakes.
- Boiling Water Boost: Carefully pour the boiling water into the batter and mix until just combined. The batter will be quite thin at this point don’t worry, that’s perfectly normal! The hot water helps to bloom the cocoa powder and create a moist, tender cake.
- Divide and Conquer: Divide the batter evenly between the prepared cake pans. I like to use a kitchen scale to ensure that each pan has the same amount of batter, which helps the cakes bake evenly.
Baking the Purple Velvet Cake
- Bake Time: Bake for 30-35 minutes, or until a wooden skewer inserted into the center comes out clean. Keep a close eye on them ovens can vary, and you don’t want to overbake your cakes!
- Cooling Process: Let the cakes cool in the pans for 10 minutes before inverting them onto a wire rack to cool completely. This prevents them from sticking and allows them to cool evenly. Make sure they are completely cool before frosting!
Preparing the Cream Cheese Frosting
- Cream Cheese and Butter: In a large bowl, beat the softened cream cheese and butter together until smooth and creamy. It’s crucial that both the cream cheese and butter are softened to room temperature this will prevent lumps in your frosting.
- Powdered Sugar Power: Gradually add the powdered sugar, one cup at a time, beating on low speed until combined. Be sure to scrape down the sides of the bowl occasionally to ensure everything is evenly mixed.
- Vanilla Magic: Add the vanilla extract and beat until combined.
- Consistency is Key: Add the milk or heavy cream, one tablespoon at a time, until the frosting reaches your desired consistency. You want it to be smooth, creamy, and easily spreadable. I prefer a slightly thicker frosting for stability, but it’s all about personal preference!
Assembling the Purple Velvet Cake
- Leveling the Cakes: Once the cakes are completely cool, use a serrated knife to level the tops. This will ensure that your cake is even and stable. Don’t throw away those cake scraps! You can crumble them up and use them to decorate the cake later.
- First Layer: Place one cake layer on a serving plate or cake stand. Spread a generous layer of cream cheese frosting evenly over the top.
- Second Layer: Carefully place the second cake layer on top of the frosting.
- Frosting the Cake: Frost the entire cake with the remaining cream cheese frosting. You can create a smooth, even finish or go for a more rustic, textured look it’s up to you!
- Decorate (Optional): If desired, decorate the cake with sprinkles, cake crumbs, or fresh berries. Get creative and have fun with it!
- Chill Out: Refrigerate the cake for at least 30 minutes before serving. This will help the frosting set and make the cake easier to slice.
Tips and Tricks for the Perfect Purple Velvet Cake
- Buttermilk Substitute: If you don’t have buttermilk on hand, you can make a quick substitute by adding 1 tablespoon of white vinegar or lemon juice to a measuring cup and then filling the rest of the cup with milk. Let it sit for 5 minutes before using.
- Food Coloring: Gel food coloring is generally more concentrated than liquid food coloring, so you may need to use less. Start with a small amount and add more until you achieve your desired color.
- Cake Flour: For an even more tender cake, you can substitute 1/4 cup of the all-purpose flour with cornstarch. This will lower the gluten content and result in a softer crumb.
- Room Temperature Ingredients: Using room temperature ingredients, especially the cream cheese and butter for the frosting, is crucial for a smooth and lump-free frosting.
- Don’t Overbake: Overbaking will result in a dry cake. Start checking for doneness a few minutes before the recommended baking time.
- Storage: Store the cake in the refrigerator for up to 3 days. Let it sit at room temperature for about 30 minutes before serving for the best flavor and texture.
Variations and Additions
- Chocolate Chips: Add chocolate chips to the batter for an extra chocolatey treat.
- Nuts: Fold in chopped nuts, such as pecans or walnuts, for added texture and flavor.
- Berry Filling: Add a layer of berry filling between the cake layers for a fruity twist.
- Purple Ombre: Create a stunning purple ombre effect by using different shades of purple food coloring in the frosting.
- Mini Cupcakes: Bake the batter in cupcake liners for individual purple velvet cupcakes. Adjust the baking time accordingly.
Troubleshooting
- Cake is Dry: Make sure you’re not overbaking the cake. Also, ensure you’re using the correct amount of wet ingredients.
- Frosting is Lumpy: Make sure your cream cheese and butter are softened to room temperature before making the frosting.
- Cake is Sinking: This could be due to overmixing the batter or not using enough leavening agents (baking soda and baking powder).
- Frosting is Too Soft: Add more powdered sugar, a tablespoon at a time, until the frosting reaches your desired consistency.
Conclusion:
This Purple Velvet Cake isn’t just a dessert; it’s an experience. From the vibrant, eye-catching color to the incredibly moist and tender crumb, every bite is a celebration. I truly believe this recipe is a must-try for anyone looking to impress, whether it’s for a special occasion or simply to brighten up a weekday. The subtle tang of the buttermilk perfectly complements the sweetness, creating a flavor profile that’s both familiar and uniquely captivating. But the best part? It’s surprisingly easy to make! Don’t let the “velvet” in the name intimidate you. With clear instructions and readily available ingredients, you’ll be whipping up this showstopper in no time. I’ve poured my heart into perfecting this recipe, ensuring that even novice bakers can achieve stunning results. And the possibilities don’t stop there! While I’m partial to the classic cream cheese frosting, feel free to experiment with other flavors. A vanilla bean buttercream would be equally divine, or even a light and airy whipped cream for a less decadent option. For a truly unique twist, consider adding a hint of lavender extract to the frosting to enhance the purple theme. Serving suggestions? This Purple Velvet Cake is perfect on its own, but it also pairs beautifully with fresh berries. A scattering of raspberries or blueberries adds a burst of freshness and complements the cake’s rich flavor. For a more sophisticated presentation, try serving it with a scoop of vanilla ice cream and a drizzle of raspberry coulis. And don’t forget the coffee or tea! A warm beverage is the perfect accompaniment to this delightful treat. Thinking about variations? You could easily adapt this recipe to make cupcakes instead of a full-sized cake. Simply adjust the baking time accordingly. Or, for a truly decadent experience, try adding a layer of chocolate ganache between the cake layers. You could also experiment with different food colorings to create a rainbow velvet cake the possibilities are endless! I’m so excited for you to try this recipe and experience the magic of Purple Velvet Cake for yourself. It’s a guaranteed crowd-pleaser and a surefire way to impress your friends and family. I’ve made this cake countless times, and it always receives rave reviews. So, what are you waiting for? Gather your ingredients, preheat your oven, and get ready to bake! I’m confident that you’ll love this recipe as much as I do. And most importantly, I’d love to hear about your experience! Once you’ve made this Purple Velvet Cake, please come back and share your thoughts in the comments below. Did you make any modifications? What did your friends and family think? I’m always eager to learn from your experiences and see your creative variations. Happy baking! Let me know how your Purple Velvet Cake turns out! PrintPurple Velvet Cake: A Decadent Recipe & Baking Guide
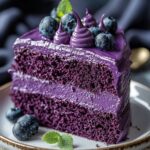
A stunning Purple Velvet Cake with cream cheese frosting. Moist, tender, and perfect for celebrations!
- Prep Time: 30 minutes
- Cook Time: 35 minutes
- Total Time: 65
- Yield: 12 servings 1x
Ingredients
- 2 ½ cups all-purpose flour
- 2 cups granulated sugar
- ¾ cup unsweetened cocoa powder
- 1 ½ teaspoons baking soda
- 1 ½ teaspoons baking powder
- 1 teaspoon salt
- 1 cup buttermilk
- ½ cup vegetable oil
- 2 large eggs
- 2 teaspoons vanilla extract
- 2 ounces (60ml) purple food coloring (gel or liquid) – adjust for desired intensity
- 1 cup boiling water
- 8 ounces (225g) cream cheese, softened
- ½ cup (1 stick) unsalted butter, softened
- 4 cups powdered sugar
- 2 teaspoons vanilla extract
- 2–4 tablespoons milk or heavy cream (for desired consistency)
Instructions
- Preheat your oven to 350°F (175°C). Grease and flour two 9-inch round cake pans. You can also line the bottoms with parchment paper rounds for extra insurance against sticking.
- In a large bowl, whisk together the flour, sugar, cocoa powder, baking soda, baking powder, and salt.
- In a separate bowl, whisk together the buttermilk, vegetable oil, eggs, and vanilla extract.
- Gradually add the wet ingredients to the dry ingredients, mixing on low speed until just combined. Be careful not to overmix!
- Add the purple food coloring to the batter and mix until evenly colored. Start with 2 ounces and add more if you want a more vibrant purple. Remember, the color will deepen slightly as it bakes.
- Carefully pour the boiling water into the batter and mix until just combined. The batter will be quite thin at this point don’t worry, that’s perfectly normal! The hot water helps to bloom the cocoa powder and create a moist, tender cake.
- Divide the batter evenly between the prepared cake pans. I like to use a kitchen scale to ensure that each pan has the same amount of batter, which helps the cakes bake evenly.
- Bake for 30-35 minutes, or until a wooden skewer inserted into the center comes out clean. Keep a close eye on them ovens can vary, and you don’t want to overbake your cakes!
- Let the cakes cool in the pans for 10 minutes before inverting them onto a wire rack to cool completely. This prevents them from sticking and allows them to cool evenly. Make sure they are completely cool before frosting!
- In a large bowl, beat the softened cream cheese and butter together until smooth and creamy. It’s crucial that both the cream cheese and butter are softened to room temperature this will prevent lumps in your frosting.
- Gradually add the powdered sugar, one cup at a time, beating on low speed until combined. Be sure to scrape down the sides of the bowl occasionally to ensure everything is evenly mixed.
- Add the vanilla extract and beat until combined.
- Add the milk or heavy cream, one tablespoon at a time, until the frosting reaches your desired consistency. You want it to be smooth, creamy, and easily spreadable. I prefer a slightly thicker frosting for stability, but it’s all about personal preference!
- Once the cakes are completely cool, use a serrated knife to level the tops. This will ensure that your cake is even and stable. Don’t throw away those cake scraps! You can crumble them up and use them to decorate the cake later.
- Place one cake layer on a serving plate or cake stand. Spread a generous layer of cream cheese frosting evenly over the top.
- Carefully place the second cake layer on top of the frosting.
- Frost the entire cake with the remaining cream cheese frosting. You can create a smooth, even finish or go for a more rustic, textured look it’s up to you!
- If desired, decorate the cake with sprinkles, cake crumbs, or fresh berries. Get creative and have fun with it!
- Refrigerate the cake for at least 30 minutes before serving. This will help the frosting set and make the cake easier to slice.
Notes
- Buttermilk Substitute: If you don’t have buttermilk on hand, you can make a quick substitute by adding 1 tablespoon of white vinegar or lemon juice to a measuring cup and then filling the rest of the cup with milk. Let it sit for 5 minutes before using.
- Food Coloring: Gel food coloring is generally more concentrated than liquid food coloring, so you may need to use less. Start with a small amount and add more until you achieve your desired color.
- Cake Flour: For an even more tender cake, you can substitute 1/4 cup of the all-purpose flour with cornstarch. This will lower the gluten content and result in a softer crumb.
- Room Temperature Ingredients: Using room temperature ingredients, especially the cream cheese and butter for the frosting, is crucial for a smooth and lump-free frosting.
- Don’t Overbake: Overbaking will result in a dry cake. Start checking for doneness a few minutes before the recommended baking time.
- Storage: Store the cake in the refrigerator for up to 3 days. Let it sit at room temperature for about 30 minutes before serving for the best flavor and texture.
Leave a Comment