
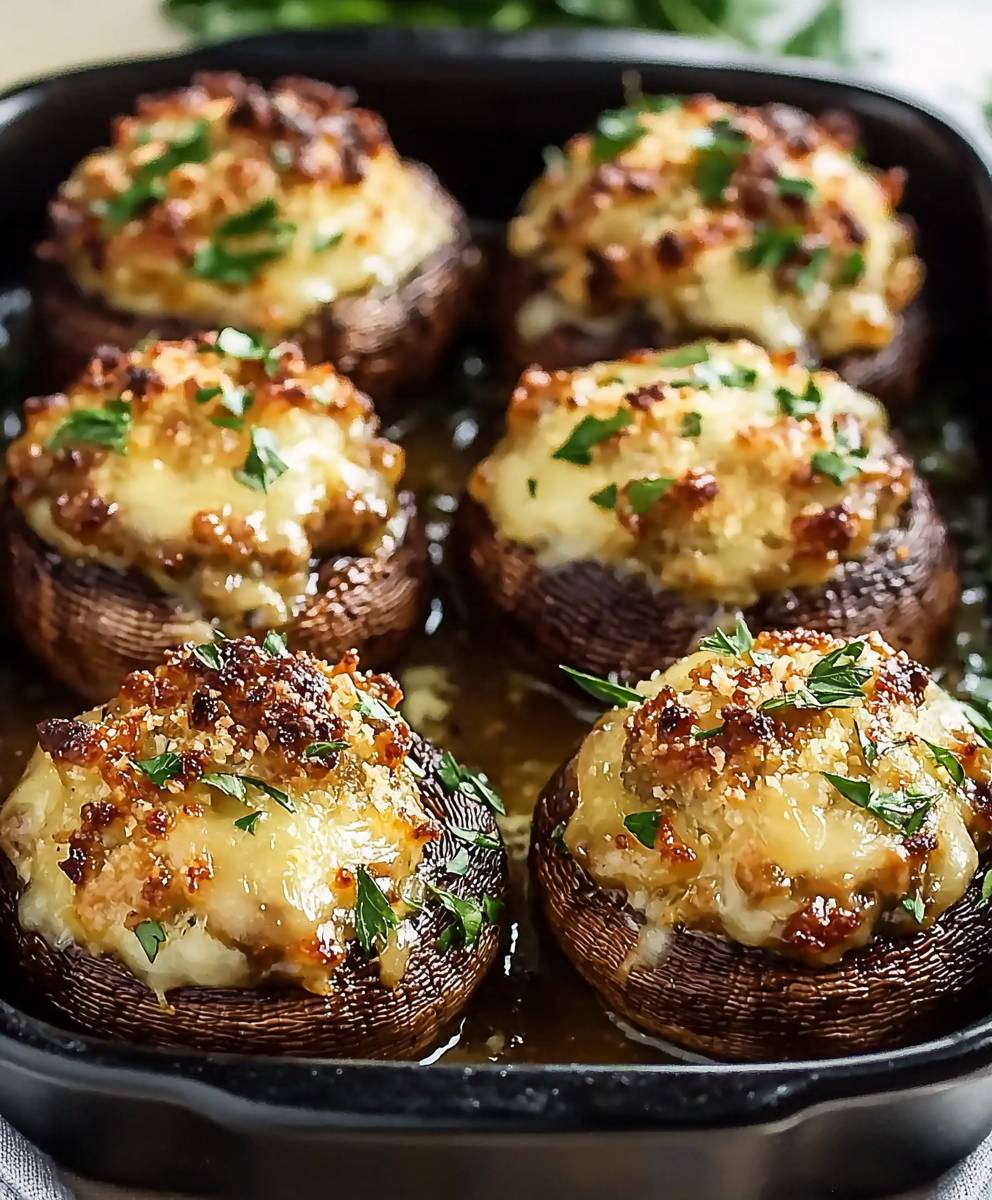
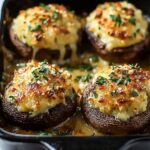
Olive Garden Stuffed Mushrooms: Prepare to be transported to your favorite Italian-American restaurant without ever leaving your kitchen! Imagine biting into a plump, juicy mushroom cap, overflowing with a savory, cheesy, and utterly irresistible filling. That’s precisely what this recipe delivers, and trust me, it’s even better than you remember.
While the exact origins of stuffed mushrooms are somewhat debated, the concept of filling mushrooms with delicious ingredients has been around for centuries, spanning various cultures. From classic French preparations to rustic Italian versions, the idea of enhancing the earthy flavor of mushrooms with complementary fillings is a culinary tradition. Olive Garden’s take on this classic appetizer has become a beloved favorite, known for its creamy, decadent filling and satisfying texture.
What makes Olive Garden Stuffed Mushrooms so incredibly popular? It’s a combination of factors. The rich, umami flavor of the mushrooms pairs perfectly with the creamy, cheesy filling, creating a symphony of textures and tastes in every bite. They’re also incredibly convenient to make at home, perfect for impressing guests at your next dinner party or simply enjoying as a satisfying appetizer on a cozy night in. Plus, who can resist that warm, comforting feeling that comes with recreating a restaurant favorite in your own kitchen? Let’s get started!

Ingredients:
- For the Mushroom Caps:
- 24 large white or cremini mushroom caps (about 2 inches in diameter), stems removed and reserved
- 2 tablespoons olive oil
- 1/4 teaspoon salt
- 1/8 teaspoon black pepper
- For the Stuffing:
- 1 tablespoon olive oil
- 1/2 cup finely chopped onion
- 2 cloves garlic, minced
- 1/2 cup finely chopped reserved mushroom stems
- 1/2 cup Italian breadcrumbs
- 1/4 cup grated Parmesan cheese
- 1/4 cup grated Romano cheese
- 1/4 cup heavy cream
- 1/4 cup chopped fresh parsley
- 1 large egg, lightly beaten
- 1/4 teaspoon salt
- 1/8 teaspoon black pepper
- 1/4 teaspoon garlic powder
- 1/8 teaspoon dried oregano
- 1/8 teaspoon dried basil
- For the Cheese Topping:
- 1/2 cup shredded mozzarella cheese
- 1/4 cup grated Parmesan cheese
Preparing the Mushroom Caps
Okay, let’s get started with prepping our mushrooms! This is a crucial step, as we want to make sure they’re nice and clean and ready to absorb all those delicious flavors.
- Clean the Mushrooms: Gently wipe each mushroom cap with a damp paper towel to remove any dirt or debris. Avoid soaking them in water, as they can become waterlogged.
- Remove the Stems: If you haven’t already, carefully remove the stems from the mushroom caps. Don’t throw them away! We’ll be using them in the stuffing.
- Prepare for Roasting: Preheat your oven to 375°F (190°C). Lightly grease a baking sheet or line it with parchment paper. This will prevent the mushrooms from sticking.
- Season the Caps: In a bowl, toss the mushroom caps with 2 tablespoons of olive oil, 1/4 teaspoon of salt, and 1/8 teaspoon of black pepper. Make sure each cap is evenly coated.
- Pre-Bake the Caps: Arrange the mushroom caps, open-side up, on the prepared baking sheet. Bake for 10-12 minutes, or until they start to soften and release some of their moisture. This step helps to prevent the stuffing from becoming soggy.
- Drain Excess Moisture: Carefully remove the baking sheet from the oven. If there’s a lot of liquid in the mushroom caps, gently drain it off. You can use a spoon to carefully tilt each cap and pour out the excess liquid.
Making the Delicious Stuffing
Now for the heart of the recipe the savory, cheesy stuffing! This is where all the magic happens, so pay close attention to the details.
- Sauté the Aromatics: Heat 1 tablespoon of olive oil in a skillet over medium heat. Add the finely chopped onion and cook until softened and translucent, about 5 minutes.
- Add Garlic and Mushroom Stems: Add the minced garlic and finely chopped mushroom stems to the skillet. Cook for another 2-3 minutes, until the garlic is fragrant and the mushroom stems are tender. Be careful not to burn the garlic!
- Combine the Ingredients: In a large bowl, combine the sautéed onion, garlic, and mushroom stems with the Italian breadcrumbs, Parmesan cheese, Romano cheese, heavy cream, chopped fresh parsley, lightly beaten egg, salt, pepper, garlic powder, dried oregano, and dried basil.
- Mix Well: Use a spoon or your hands to thoroughly mix all the ingredients together until they are well combined. The mixture should be moist but not too wet. If it seems too dry, add a little more heavy cream, a teaspoon at a time. If it seems too wet, add a little more breadcrumbs, a tablespoon at a time.
- Taste and Adjust Seasoning: Taste the stuffing mixture and adjust the seasoning as needed. You might want to add a little more salt, pepper, or garlic powder to suit your taste.
Stuffing and Baking the Mushrooms
Almost there! Now we’re going to stuff those pre-baked mushroom caps with our amazing filling and bake them to golden perfection.
- Stuff the Mushroom Caps: Using a spoon, carefully fill each mushroom cap with the stuffing mixture. Mound the stuffing slightly on top of each cap.
- Add the Cheese Topping: In a small bowl, combine the shredded mozzarella cheese and grated Parmesan cheese. Sprinkle this cheese mixture evenly over the stuffed mushroom caps.
- Bake to Golden Brown: Return the baking sheet to the oven and bake for 15-20 minutes, or until the cheese is melted, bubbly, and lightly golden brown. The stuffing should be heated through and slightly firm to the touch.
- Broil for Extra Color (Optional): If you want the cheese to be even more golden brown, you can broil the mushrooms for the last 1-2 minutes of baking. Keep a close eye on them to prevent burning!
- Let Cool Slightly: Remove the baking sheet from the oven and let the stuffed mushrooms cool for a few minutes before serving. This will allow the cheese to set slightly and prevent you from burning your mouth.
Serving Suggestions
These Olive Garden-inspired stuffed mushrooms are fantastic as an appetizer, side dish, or even a light meal. Here are a few serving suggestions:
- As an Appetizer: Serve the stuffed mushrooms on a platter with a side of marinara sauce or a creamy dipping sauce.
- As a Side Dish: Pair the stuffed mushrooms with grilled chicken, steak, or fish. They also go well with pasta dishes.
- As a Light Meal: Serve the stuffed mushrooms with a side salad or a bowl of soup for a satisfying and healthy meal.
- Garnish: Garnish the stuffed mushrooms with a sprinkle of fresh parsley or a drizzle of olive oil before serving.
Tips and Variations
Want to customize this recipe to your liking? Here are a few tips and variations to try:
- Type of Mushrooms: While this recipe calls for white or cremini mushrooms, you can also use other types of mushrooms, such as portobello or shiitake. Just adjust the cooking time accordingly.
- Type of Cheese: Feel free to experiment with different types of cheese in the stuffing and topping. Provolone, Asiago, or Fontina would all be delicious choices.
- Add Meat: For a heartier stuffing, add cooked and crumbled Italian sausage or ground beef to the mixture.
- Spice it Up: Add a pinch of red pepper flakes to the stuffing for a little bit of heat.
- Make it Gluten-Free: Use gluten-free breadcrumbs to make this recipe gluten-free.
- Make it Vegetarian: Ensure your Parmesan and Romano cheeses are vegetarian-friendly, as some contain animal rennet.
- Prepare Ahead: You can prepare the stuffing mixture ahead of time and store it in the refrigerator for up to 24 hours. You can also stuff the mushroom caps ahead of time and store them in the refrigerator until you’re ready to bake them. Just add a few minutes to the baking time.
Storage Instructions
If you have any leftover stuffed mushrooms, store them in an airtight container in the refrigerator for up to 3 days. Reheat them in the oven or microwave until heated through.
Nutritional Information (Approximate)
Please note that the nutritional information is an estimate and may vary depending on the specific ingredients used.
- Calories: Approximately 150-200 per serving (3-4 mushrooms)
- Fat: 10-15 grams
- Protein: 5-8 grams
- Carbohydrates: 8-12 grams
Enjoy your homemade Olive Garden Stuffed Mushrooms! I hope you love them as much as I do!
Conclusion:
This isn’t just another mushroom recipe; it’s a culinary adventure that brings the magic of Olive Garden right into your kitchen. The rich, savory filling, the perfectly browned mushrooms, and the overall comforting experience make these Olive Garden Stuffed Mushrooms an absolute must-try. Seriously, if you’re looking for an appetizer that will impress your guests or a satisfying snack for yourself, look no further. But why is this recipe so special? It’s the combination of textures and flavors that truly elevates it. The earthy mushrooms provide a delightful base, while the creamy, cheesy filling bursts with garlic, herbs, and that unmistakable Italian flair. It’s a symphony of deliciousness in every bite! Plus, it’s surprisingly easy to make. You don’t need to be a professional chef to whip up a batch of these beauties. The step-by-step instructions ensure that even beginner cooks can achieve restaurant-quality results. And the best part? This recipe is incredibly versatile. While they’re fantastic as an appetizer, you can also serve them as a side dish alongside grilled chicken or steak. Imagine a perfectly cooked steak, accompanied by a generous helping of these savory stuffed mushrooms. Pure bliss! Looking for variations? Get creative! Try adding a sprinkle of breadcrumbs on top before baking for extra crunch. Or, if you’re feeling adventurous, incorporate some crumbled Italian sausage into the filling for a heartier flavor. You could even experiment with different types of cheese, like provolone or mozzarella, to customize the taste to your liking. For a vegetarian option, consider adding finely chopped spinach or artichoke hearts to the filling. The possibilities are endless! These Olive Garden Stuffed Mushrooms are also perfect for parties and gatherings. They’re always a crowd-pleaser, and they can be made ahead of time, which is a huge time-saver when you’re entertaining. Simply prepare the mushrooms and filling, stuff them, and refrigerate them until you’re ready to bake. Then, pop them in the oven, and you’ll have a delicious appetizer ready in minutes. I truly believe that this recipe will become a staple in your kitchen. It’s a guaranteed hit with family and friends, and it’s a fantastic way to add a touch of elegance to any meal. So, what are you waiting for? Gather your ingredients, preheat your oven, and get ready to experience the magic of these incredible stuffed mushrooms. I’m so excited for you to try this recipe! Once you do, I’d love to hear about your experience. Did you make any variations? What did your family and friends think? Share your photos and stories in the comments below. Your feedback is invaluable, and it helps me to continue creating delicious and easy-to-follow recipes that you’ll love. Happy cooking, and enjoy every single bite of these amazing Olive Garden Stuffed Mushrooms! I can’t wait to hear from you! PrintOlive Garden Stuffed Mushrooms: The Ultimate Copycat Recipe
Savory stuffed mushroom caps with a cheesy, herby breadcrumb filling, inspired by Olive Garden. Great as a starter, side, or light meal.
- Prep Time: 30 minutes
- Cook Time: 35 minutes
- Total Time: 65 minutes
- Yield: 24 stuffed mushrooms 1x
Ingredients
- 24 large white or cremini mushroom caps (about 2 inches in diameter), stems removed and reserved
- 2 tablespoons olive oil
- 1/4 teaspoon salt
- 1/8 teaspoon black pepper
- 1 tablespoon olive oil
- 1/2 cup finely chopped onion
- 2 cloves garlic, minced
- 1/2 cup finely chopped reserved mushroom stems
- 1/2 cup Italian breadcrumbs
- 1/4 cup grated Parmesan cheese
- 1/4 cup grated Romano cheese
- 1/4 cup heavy cream
- 1/4 cup chopped fresh parsley
- 1 large egg, lightly beaten
- 1/4 teaspoon salt
- 1/8 teaspoon black pepper
- 1/4 teaspoon garlic powder
- 1/8 teaspoon dried oregano
- 1/8 teaspoon dried basil
- 1/2 cup shredded mozzarella cheese
- 1/4 cup grated Parmesan cheese
Instructions
- Clean the Mushrooms: Gently wipe each mushroom cap with a damp paper towel to remove any dirt or debris. Avoid soaking them in water.
- Remove the Stems: Carefully remove the stems from the mushroom caps and reserve.
- Preheat Oven: Preheat your oven to 375°F (190°C). Lightly grease a baking sheet or line it with parchment paper.
- Season the Caps: In a bowl, toss the mushroom caps with 2 tablespoons of olive oil, 1/4 teaspoon of salt, and 1/8 teaspoon of black pepper.
- Pre-Bake the Caps: Arrange the mushroom caps, open-side up, on the prepared baking sheet. Bake for 10-12 minutes, or until they start to soften and release some of their moisture.
- Drain Excess Moisture: Carefully remove the baking sheet from the oven. If there’s a lot of liquid in the mushroom caps, gently drain it off.
- Sauté Aromatics: Heat 1 tablespoon of olive oil in a skillet over medium heat. Add the finely chopped onion and cook until softened and translucent, about 5 minutes.
- Add Garlic and Mushroom Stems: Add the minced garlic and finely chopped mushroom stems to the skillet. Cook for another 2-3 minutes, until the garlic is fragrant and the mushroom stems are tender.
- Combine Stuffing Ingredients: In a large bowl, combine the sautéed onion, garlic, and mushroom stems with the Italian breadcrumbs, Parmesan cheese, Romano cheese, heavy cream, chopped fresh parsley, lightly beaten egg, salt, pepper, garlic powder, dried oregano, and dried basil.
- Mix Well: Thoroughly mix all the stuffing ingredients together until they are well combined. The mixture should be moist but not too wet. Adjust with more cream or breadcrumbs as needed.
- Taste and Adjust Seasoning: Taste the stuffing mixture and adjust the seasoning as needed.
- Stuff the Mushroom Caps: Using a spoon, carefully fill each mushroom cap with the stuffing mixture. Mound the stuffing slightly on top of each cap.
- Add Cheese Topping: In a small bowl, combine the shredded mozzarella cheese and grated Parmesan cheese. Sprinkle this cheese mixture evenly over the stuffed mushroom caps.
- Bake to Golden Brown: Return the baking sheet to the oven and bake for 15-20 minutes, or until the cheese is melted, bubbly, and lightly golden brown. The stuffing should be heated through and slightly firm to the touch.
- Broil (Optional): If you want the cheese to be even more golden brown, you can broil the mushrooms for the last 1-2 minutes of baking. Watch carefully to prevent burning.
- Let Cool Slightly: Remove the baking sheet from the oven and let the stuffed mushrooms cool for a few minutes before serving.
Notes
- Mushroom Type: You can use other types of mushrooms like portobello or shiitake. Adjust cooking time accordingly.
- Cheese Variations: Experiment with different cheeses like Provolone, Asiago, or Fontina.
- Add Meat: For a heartier stuffing, add cooked and crumbled Italian sausage or ground beef.
- Spice it Up: Add a pinch of red pepper flakes to the stuffing for heat.
- Gluten-Free: Use gluten-free breadcrumbs.
- Vegetarian: Ensure Parmesan and Romano cheeses are vegetarian-friendly.
- Prepare Ahead: Stuffing can be made 24 hours in advance. Stuffed mushrooms can be prepared ahead and stored in the refrigerator until ready to bake.
- Storage: Store leftovers in an airtight container in the refrigerator for up to 3 days. Reheat in the oven or microwave.
- Serving Suggestions: Serve as an appetizer with marinara sauce, as a side dish with grilled meats or pasta, or as a light meal with salad or soup. Garnish with fresh parsley or olive oil.


Leave a Comment