
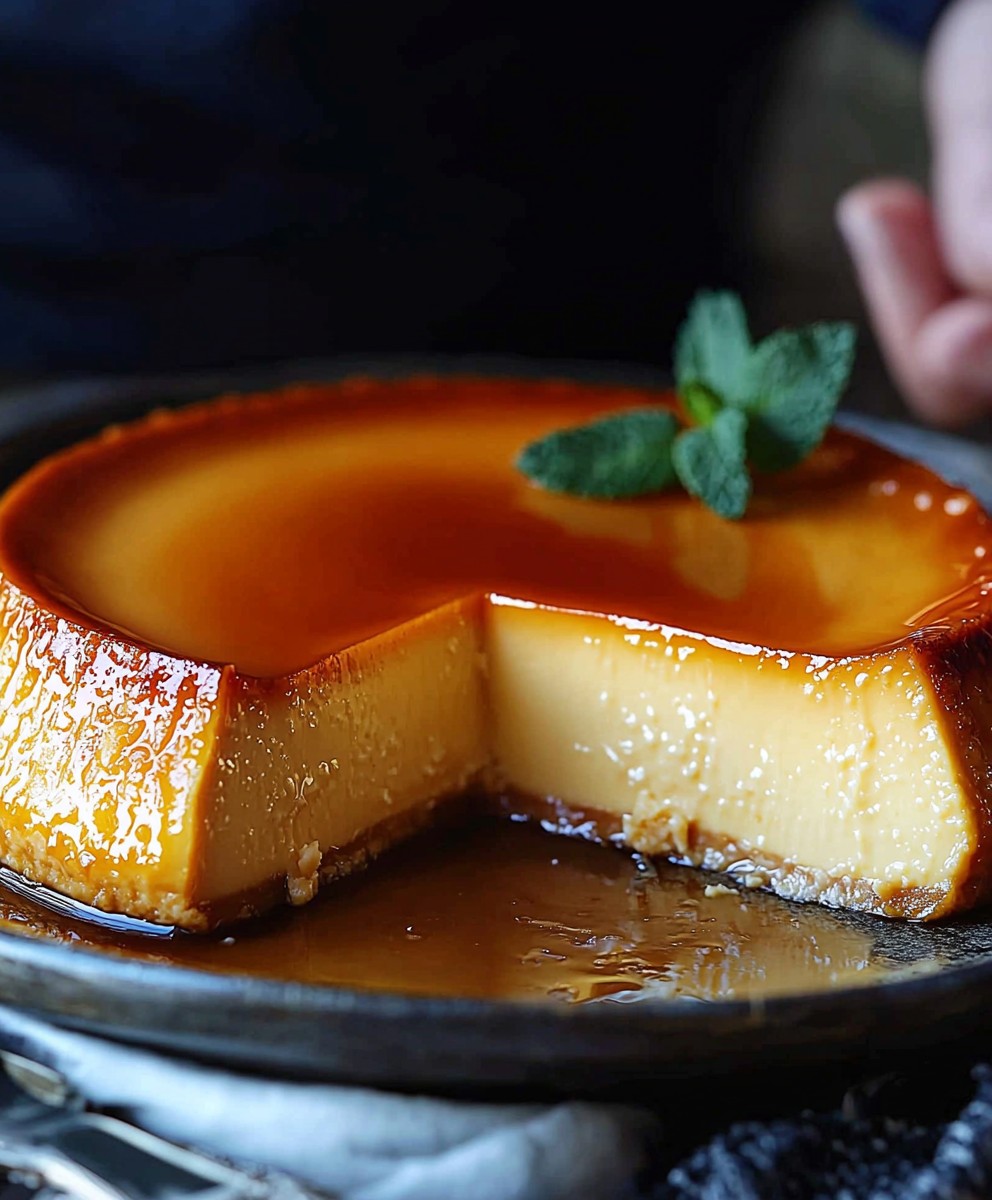
Mexican Flan, a dessert that’s as rich in history as it is in flavor, is about to become your new favorite indulgence. Imagine a silky smooth custard, infused with the warm embrace of vanilla and caramel, melting in your mouth with every spoonful. Have I got your attention? This isn’t just a dessert; it’s an experience, a journey to the heart of Mexican culinary tradition.
The origins of flan can be traced back to the Roman Empire, but it was the Spanish who brought it to Mexico, where it was lovingly embraced and adapted with local ingredients and flavors. Over centuries, Mexican Flan has evolved into a beloved staple, gracing tables at family gatherings, festive celebrations, and everything in between. Its enduring popularity stems from its exquisite taste, its luxuriously creamy texture, and the sheer comfort it provides.
What makes flan so irresistible? It’s the perfect balance of sweetness and richness, the satisfying wobble of the custard, and the delightful contrast between the smooth base and the slightly bitter caramel topping. Plus, while it may seem fancy, flan is surprisingly simple to make at home. So, are you ready to unlock the secrets to creating the perfect Mexican Flan? Let’s get started!

Ingredients:
- 1 (12 ounce) can evaporated milk
- 1 (14 ounce) can sweetened condensed milk
- 5 large eggs
- 1 teaspoon vanilla extract
- ½ cup granulated sugar
- ¼ cup water
- Pinch of salt
Making the Caramel:
- First, we’re going to tackle the caramel. This is the foundation of our flan, and getting it right is key. In a heavy-bottomed saucepan (I prefer stainless steel for this), combine the ½ cup of granulated sugar and the ¼ cup of water.
- Place the saucepan over medium heat. Now, this is where patience comes in. Don’t stir! I know it’s tempting, but stirring can cause the sugar to crystallize, and we don’t want that. Just let the sugar dissolve slowly in the water.
- As the sugar dissolves, it will start to bubble. Keep a close eye on it. The color will gradually change from clear to a light golden brown, then to a deeper amber. This is the caramelization process.
- The key is to watch the color carefully. You want a rich amber color, but you don’t want it to burn. Burnt caramel tastes bitter and will ruin the flavor of your flan. I usually take it off the heat just before it reaches my desired color, as it will continue to cook from the residual heat.
- Once the caramel reaches a beautiful amber color, immediately pour it into your flan mold or ramekins. I’m using a 9-inch round cake pan today, but individual ramekins work great too. Swirl the caramel around to coat the bottom of the pan evenly. Be careful, as the caramel is extremely hot!
- Set the caramel-coated pan aside to cool and harden while we prepare the flan mixture. This usually takes about 15-20 minutes.
Preparing the Flan Mixture:
- Now, let’s move on to the flan itself. In a blender, combine the evaporated milk, sweetened condensed milk, eggs, vanilla extract, and a pinch of salt.
- Blend everything together until it’s smooth and creamy. I usually blend it for about 1-2 minutes to make sure all the ingredients are well incorporated.
- Give the mixture a quick taste. It should be sweet and vanilla-y. If you want a stronger vanilla flavor, you can add a little more vanilla extract.
- Once the caramel in your pan has hardened, gently pour the flan mixture over the caramel. Pour it slowly to avoid disturbing the caramel layer.
Cooking the Flan:
- Now, we’re going to cook the flan using a water bath, also known as a bain-marie. This helps to ensure that the flan cooks evenly and doesn’t curdle.
- Preheat your oven to 350°F (175°C).
- Find a larger baking pan that your flan pan can fit inside. I usually use a roasting pan.
- Place the flan pan inside the larger baking pan.
- Carefully pour hot water into the larger baking pan, filling it about halfway up the sides of the flan pan. The water should come about halfway up the sides of the flan pan.
- Carefully transfer the entire setup to the preheated oven.
- Bake for about 50-60 minutes, or until the flan is set but still slightly jiggly in the center. The cooking time may vary depending on your oven and the size of your flan pan.
- To check if the flan is done, gently shake the pan. The edges should be set, but the center should still have a slight wobble. You can also insert a knife into the center; it should come out mostly clean.
- Once the flan is done, carefully remove it from the water bath and let it cool completely at room temperature. This usually takes about an hour.
- After it has cooled to room temperature, cover the flan with plastic wrap and refrigerate it for at least 4 hours, or preferably overnight. This allows the flan to set completely and develop its flavor.
Unmolding and Serving:
- Now for the fun part: unmolding the flan! This can be a little tricky, but with a little patience, you’ll get it.
- Run a thin knife or spatula around the edge of the flan to loosen it from the pan.
- Place a serving plate over the top of the flan pan.
- Holding the plate firmly against the pan, quickly invert the flan onto the plate.
- If the flan doesn’t release immediately, gently tap the bottom of the pan. You can also try running the bottom of the pan under warm water for a few seconds to help loosen the caramel.
- Once the flan releases, the caramel will drizzle down the sides, creating a beautiful and delicious sauce.
- Serve the flan chilled. You can garnish it with fresh berries, whipped cream, or a sprinkle of cinnamon, if desired.
- Enjoy your homemade Mexican flan! I promise, it’s worth the effort. The creamy texture and rich caramel flavor are simply irresistible.
Tips for Success:
- Don’t overcook the caramel. Burnt caramel will ruin the flavor of your flan. Watch it carefully and remove it from the heat just before it reaches your desired color.
- Use a water bath. This helps to ensure that the flan cooks evenly and doesn’t curdle.
- Refrigerate the flan for at least 4 hours. This allows the flan to set completely and develop its flavor.
- Be patient when unmolding the flan. If it doesn’t release immediately, gently tap the bottom of the pan or run it under warm water.
Variations:
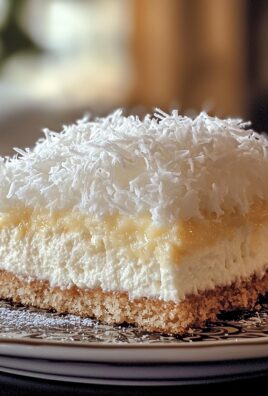
- Coconut Flan: Add ½ cup of shredded coconut to the flan mixture.
- Coffee Flan: Add 2 tablespoons of instant coffee to the flan mixture.
- Chocolate Flan: Add ¼ cup of cocoa powder to the flan mixture.
- Orange Flan: Add 2 tablespoons of orange zest to the flan mixture.
I hope you enjoy this recipe as much as I do! It’s a classic dessert that’s perfect for any occasion. Don’t be intimidated by the steps; it’s easier than it looks. And the results are well worth the effort. Happy baking!
Conclusion:
This isn’t just another dessert recipe; it’s an invitation to experience a little slice of Mexican sunshine right in your own kitchen. The creamy, dreamy texture, the rich caramel notes, and the subtle hint of vanilla all combine to create a truly unforgettable treat. I genuinely believe that this Mexican Flan recipe is a must-try for anyone who appreciates authentic flavors and simple elegance. It’s surprisingly easy to make, and the results are guaranteed to impress your family and friends.
But why is it a must-try? Because it’s more than just a dessert; it’s a cultural experience. It’s a taste of Mexico, a celebration of tradition, and a testament to the power of simple ingredients transformed into something extraordinary. The flan itself is incredibly versatile. While it’s absolutely divine on its own, drizzled with a little extra caramel sauce, there are so many ways to elevate it even further.
For a truly decadent experience, try serving it with a dollop of freshly whipped cream and a sprinkle of cinnamon. The cool cream provides a delightful contrast to the warm caramel, and the cinnamon adds a touch of spice that complements the vanilla perfectly. Another fantastic option is to pair it with fresh berries. The tartness of raspberries or strawberries cuts through the richness of the flan, creating a balanced and refreshing dessert.
If you’re feeling adventurous, you could even try adding a splash of coffee liqueur to the caramel sauce for a mocha-inspired twist. Or, for a more tropical vibe, consider incorporating a hint of coconut extract into the flan mixture. The possibilities are endless!
And don’t be afraid to experiment with different toppings and garnishes. A few toasted almonds, a sprinkle of cocoa powder, or even a drizzle of chocolate sauce can all add a unique touch to your Mexican Flan. The key is to have fun and let your creativity shine.
Beyond the flavor, this recipe is also a fantastic way to learn a new skill and expand your culinary repertoire. It’s a great project to tackle with kids, teaching them about different cultures and the joy of baking. Plus, the satisfaction of creating something so beautiful and delicious from scratch is truly rewarding.
I’m so confident that you’ll love this recipe that I urge you to give it a try. Don’t be intimidated by the idea of making caramel; it’s easier than you think! Just follow the instructions carefully, and you’ll be rewarded with a perfectly caramelized, golden-brown topping.
Once you’ve made your own Mexican Flan, I would absolutely love to hear about your experience. Did you try any variations? What toppings did you use? Did your family and friends enjoy it? Please share your photos and comments in the comments section below. Your feedback is invaluable, and it helps me to continue creating recipes that you’ll love.
So, what are you waiting for? Gather your ingredients, preheat your oven, and get ready to embark on a delicious culinary adventure. I promise you won’t be disappointed. This Mexican Flan is a guaranteed crowd-pleaser, and it’s sure to become a new favorite in your household. Happy baking! Let me know how it turns out!
Mexican Flan: The Ultimate Guide to Making Perfect Flan
Creamy, rich custard dessert with a smooth caramel topping. Perfect for any occasion!
Ingredients
- 1 (12 ounce) can evaporated milk
- 1 (14 ounce) can sweetened condensed milk
- 5 large eggs
- 1 teaspoon vanilla extract
- ½ cup granulated sugar
- ¼ cup water
- Pinch of salt
Instructions
- In a heavy-bottomed saucepan, combine the ½ cup of granulated sugar and the ¼ cup of water.
- Place the saucepan over medium heat. Do not stir! Let the sugar dissolve slowly in the water.
- As the sugar dissolves, it will start to bubble. Keep a close eye on it. The color will gradually change from clear to a light golden brown, then to a deeper amber.
- Watch the color carefully. You want a rich amber color, but you don’t want it to burn. Remove it from the heat just before it reaches your desired color, as it will continue to cook from the residual heat.
- Once the caramel reaches a beautiful amber color, immediately pour it into your flan mold or ramekins. Swirl the caramel around to coat the bottom of the pan evenly. Be careful, as the caramel is extremely hot!
- Set the caramel-coated pan aside to cool and harden while we prepare the flan mixture. This usually takes about 15-20 minutes.
- In a blender, combine the evaporated milk, sweetened condensed milk, eggs, vanilla extract, and a pinch of salt.
- Blend everything together until it’s smooth and creamy. Blend it for about 1-2 minutes to make sure all the ingredients are well incorporated.
- Give the mixture a quick taste. It should be sweet and vanilla-y. If you want a stronger vanilla flavor, you can add a little more vanilla extract.
- Once the caramel in your pan has hardened, gently pour the flan mixture over the caramel. Pour it slowly to avoid disturbing the caramel layer.
- Preheat your oven to 350°F (175°C).
- Find a larger baking pan that your flan pan can fit inside.
- Place the flan pan inside the larger baking pan.
- Carefully pour hot water into the larger baking pan, filling it about halfway up the sides of the flan pan.
- Carefully transfer the entire setup to the preheated oven.
- Bake for about 50-60 minutes, or until the flan is set but still slightly jiggly in the center. The cooking time may vary depending on your oven and the size of your flan pan.
- To check if the flan is done, gently shake the pan. The edges should be set, but the center should still have a slight wobble. You can also insert a knife into the center; it should come out mostly clean.
- Once the flan is done, carefully remove it from the water bath and let it cool completely at room temperature. This usually takes about an hour.
- After it has cooled to room temperature, cover the flan with plastic wrap and refrigerate it for at least 4 hours, or preferably overnight. This allows the flan to set completely and develop its flavor.
- Run a thin knife or spatula around the edge of the flan to loosen it from the pan.
- Place a serving plate over the top of the flan pan.
- Holding the plate firmly against the pan, quickly invert the flan onto the plate.
- If the flan doesn’t release immediately, gently tap the bottom of the pan. You can also try running the bottom of the pan under warm water for a few seconds to help loosen the caramel.
- Once the flan releases, the caramel will drizzle down the sides, creating a beautiful and delicious sauce.
- Serve the flan chilled. You can garnish it with fresh berries, whipped cream, or a sprinkle of cinnamon, if desired.
Notes
- Don’t overcook the caramel. Burnt caramel will ruin the flavor of your flan. Watch it carefully and remove it from the heat just before it reaches your desired color.
- Use a water bath. This helps to ensure that the flan cooks evenly and doesn’t curdle.
- Refrigerate the flan for at least 4 hours. This allows the flan to set completely and develop its flavor.
- Be patient when unmolding the flan. If it doesn’t release immediately, gently tap the bottom of the pan or run it under warm water.
- Coconut Flan: Add ½ cup of shredded coconut to the flan mixture.
- Coffee Flan: Add 2 tablespoons of instant coffee to the flan mixture.
- Chocolate Flan: Add ¼ cup of cocoa powder to the flan mixture.
- Orange Flan: Add 2 tablespoons of orange zest to the flan mixture.


Leave a Comment