
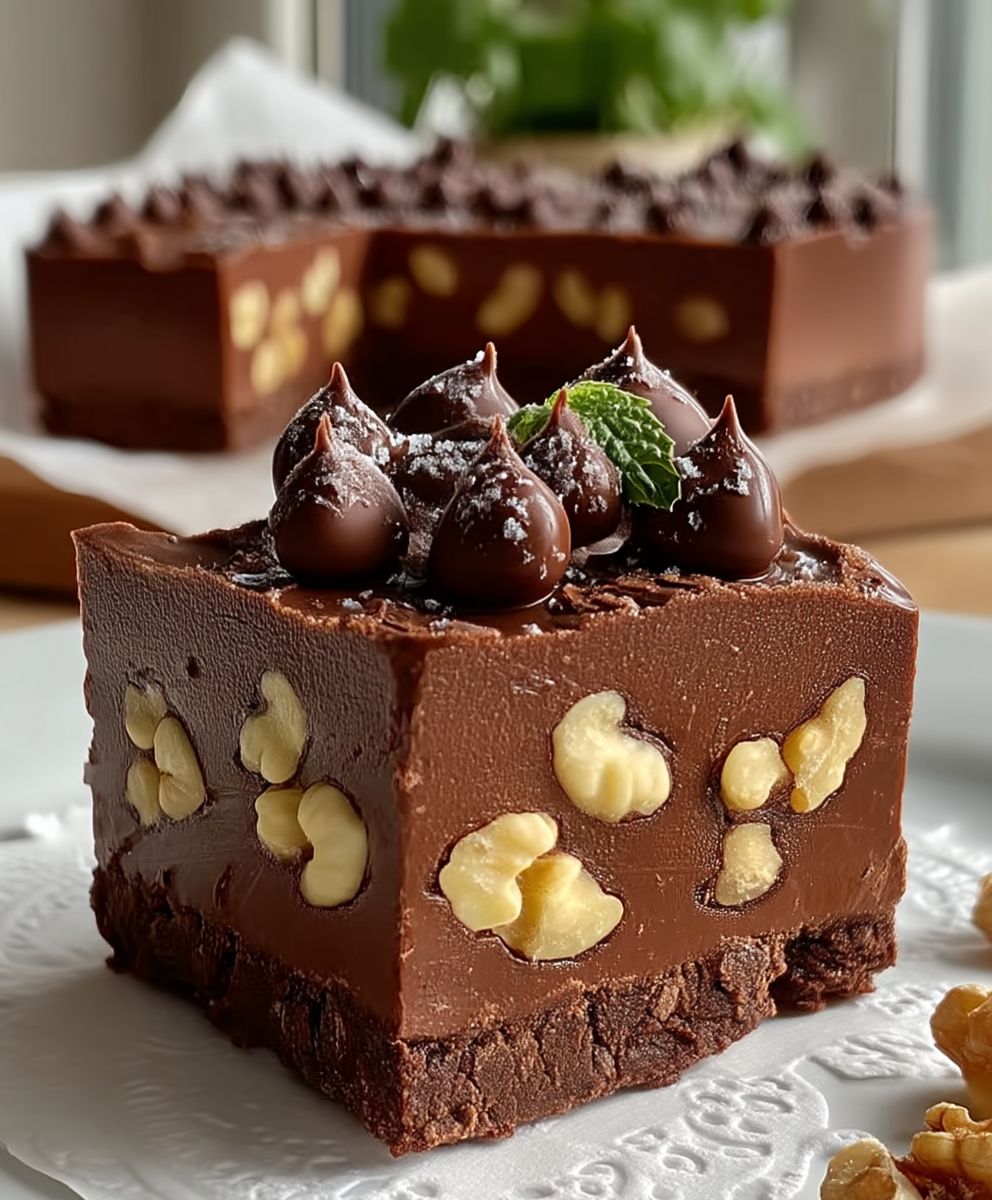
Chocolate Walnut Fudge, a decadent treat that transcends generations, is more than just a dessert; it’s a symbol of comfort, celebration, and pure indulgence. Have you ever wondered how something so simple could evoke such powerful feelings of nostalgia and joy? I know I have! This recipe isn’t just about combining ingredients; it’s about creating an experience, a moment of pure bliss that melts in your mouth and warms your soul.
While the exact origins of fudge are debated, many believe it emerged in the late 19th century, possibly as a happy accident during a batch of caramels gone awry. Whatever its true beginnings, fudge quickly became a beloved confection, and the addition of walnuts elevated it to a new level of sophistication. The subtle crunch of the walnuts perfectly complements the smooth, rich chocolate, creating a symphony of textures and flavors that’s simply irresistible.
People adore Chocolate Walnut Fudge for its unparalleled taste and satisfying texture. The deep, intense chocolate flavor, combined with the nutty undertones of the walnuts, creates a harmonious balance that’s both comforting and exciting. Plus, its relatively simple preparation makes it a perfect treat for both experienced bakers and kitchen novices alike. Whether you’re looking for a delightful holiday gift, a crowd-pleasing dessert for a party, or simply a sweet indulgence for yourself, this recipe is guaranteed to deliver a truly unforgettable experience. So, let’s dive in and create some magic!

Ingredients:
- 1 cup (2 sticks) unsalted butter, softened
- 3 cups granulated sugar
- 3/4 cup unsweetened cocoa powder
- 1/2 cup milk
- 1 teaspoon vanilla extract
- 1/2 teaspoon salt
- 3 cups powdered sugar, sifted
- 1 cup chopped walnuts
Preparing the Fudge Base
- First, grab a large, heavy-bottomed saucepan. This is important because it will help distribute the heat evenly and prevent the fudge from scorching. Add the softened butter, granulated sugar, cocoa powder, and milk to the saucepan.
- Now, place the saucepan over medium heat. It’s crucial to stir the mixture constantly with a wooden spoon or a heat-resistant spatula. This prevents the sugar from sticking to the bottom and burning. Continue stirring until the butter is completely melted and the sugar is dissolved. You’ll notice the mixture becoming smooth and glossy.
- Once the butter and sugar are fully melted, bring the mixture to a rolling boil. A rolling boil means that the mixture continues to boil even while you’re stirring it. Use a candy thermometer to monitor the temperature. You want the mixture to reach 234°F (112°C), which is the soft-ball stage. This is the key to getting that perfect fudge consistency.
- Continue boiling and stirring constantly until the candy thermometer registers 234°F (112°C). This might take a few minutes, so be patient and keep stirring! If you don’t have a candy thermometer, you can test for the soft-ball stage by dropping a small amount of the mixture into a bowl of cold water. If it forms a soft, pliable ball that you can flatten between your fingers, it’s ready.
- Once the mixture reaches the soft-ball stage, immediately remove the saucepan from the heat. It’s important to take it off the heat right away to prevent it from overcooking and becoming too hard.
Cooling and Finishing the Fudge
- Now, add the vanilla extract and salt to the hot fudge mixture. Stir well to combine. The vanilla extract will enhance the chocolate flavor, and the salt will balance the sweetness.
- Next, gradually add the sifted powdered sugar to the mixture. It’s important to sift the powdered sugar to remove any lumps, which will ensure a smooth and creamy fudge. Add the powdered sugar in batches, stirring well after each addition until it’s fully incorporated. The mixture will become thick and somewhat difficult to stir, but keep going!
- Once all the powdered sugar is incorporated, stir in the chopped walnuts. Make sure the walnuts are evenly distributed throughout the fudge. I like to use roughly chopped walnuts for a nice texture, but you can adjust the size to your preference. You can also toast the walnuts lightly before adding them for a more intense flavor.
- Prepare an 8×8 inch square baking pan by lining it with parchment paper. Make sure the parchment paper overhangs the sides of the pan, which will make it easier to lift the fudge out later.
- Pour the fudge mixture into the prepared baking pan and spread it evenly with a spatula. You want to create a smooth and uniform surface.
- Now, let the fudge cool completely at room temperature. This usually takes several hours, or you can speed up the process by refrigerating it for at least 2 hours. The fudge needs to be firm enough to cut into squares.
Cutting and Storing the Fudge
- Once the fudge is firm, lift it out of the baking pan using the parchment paper overhang. Place it on a cutting board.
- Use a sharp knife to cut the fudge into squares. I usually cut it into 1-inch squares, but you can adjust the size to your liking. For clean cuts, you can run the knife under hot water and wipe it dry between each cut.
- Store the fudge in an airtight container at room temperature for up to a week, or in the refrigerator for up to two weeks. You can also freeze the fudge for longer storage. Wrap it tightly in plastic wrap and then place it in a freezer bag. It can be stored in the freezer for up to 2-3 months.
Tips for Perfect Fudge:
- Use high-quality ingredients: The better the quality of your ingredients, the better the fudge will taste. Use good quality butter, cocoa powder, and vanilla extract.
- Don’t overcook the mixture: Overcooking the mixture will result in hard, crumbly fudge. Use a candy thermometer to ensure that you reach the soft-ball stage (234°F or 112°C).
- Stir constantly: Stirring constantly while cooking the mixture prevents the sugar from burning and ensures a smooth, creamy fudge.
- Sift the powdered sugar: Sifting the powdered sugar removes any lumps and ensures a smooth fudge.
- Cool completely: Let the fudge cool completely before cutting it into squares. This will prevent it from being too soft and sticky.
Variations:
- Add different nuts: Instead of walnuts, you can use pecans, almonds, or macadamia nuts.
- Add dried fruit: Add dried cranberries, cherries, or raisins for a chewy texture and added flavor.
- Add chocolate chips: Stir in chocolate chips (milk chocolate, dark chocolate, or white chocolate) for an extra chocolatey treat.
- Add peanut butter: Swirl in peanut butter for a peanut butter fudge variation.
- Add peppermint extract: Add peppermint extract for a festive holiday fudge.
Conclusion:
And there you have it! This Chocolate Walnut Fudge recipe is truly a must-try for anyone who loves rich, decadent desserts. It’s incredibly easy to make, requires minimal ingredients, and delivers a flavor explosion that will leave you wanting more. I know, I know, I’m biased, but trust me on this one! The combination of the intense chocolate, the crunchy walnuts, and the smooth, melt-in-your-mouth texture is simply divine.
What makes this fudge so special is its versatility. While it’s absolutely perfect as is, there are so many ways you can customize it to your liking. Feeling adventurous? Try adding a pinch of sea salt to enhance the sweetness and create a delightful salty-sweet contrast. Or, for a festive twist, stir in some dried cranberries and orange zest during the final stages of preparation. Imagine the vibrant colors and the burst of citrusy flavor!
For serving suggestions, the possibilities are endless. Of course, you can simply cut the fudge into squares and enjoy it as a standalone treat. But why stop there? Crumble it over ice cream for an extra layer of indulgence. Use it as a topping for brownies or cakes. Or, get creative and incorporate it into your favorite cookie recipe. I’ve even seen people melt it down and use it as a chocolate fondue!
If you’re planning a holiday gathering or a special occasion, this Chocolate Walnut Fudge is the perfect dessert to share with your loved ones. It’s guaranteed to be a crowd-pleaser, and it’s a thoughtful homemade gift that everyone will appreciate. Package it in a pretty box or tin, and you’ll have a present that’s both delicious and heartfelt.
Don’t be intimidated by the thought of making fudge. This recipe is foolproof, even for beginner bakers. Just follow the instructions carefully, and you’ll be rewarded with a batch of fudge that’s better than anything you can buy in a store. The key is to use high-quality chocolate and to be patient during the melting process. Don’t rush it, and don’t overcook it.
I’m so confident that you’ll love this recipe that I urge you to try it as soon as possible. Gather your ingredients, put on your apron, and get ready to create some magic in the kitchen. And when you do, please, please, please share your experience with me! I’d love to hear how it turned out, what variations you tried, and what your friends and family thought.
You can leave a comment below, tag me on social media, or send me an email. I’m always eager to connect with fellow food lovers and to learn from your experiences. After all, cooking is a collaborative art, and we can all learn from each other.
So go ahead, give this Chocolate Walnut Fudge recipe a try. I promise you won’t be disappointed. It’s a simple, satisfying, and utterly delicious treat that’s perfect for any occasion. Happy baking! And remember, the best desserts are made with love. I can’t wait to hear about your fudge-making adventures! Let me know if you have any questions, and I’ll do my best to help. Enjoy!
Chocolate Walnut Fudge: The Ultimate Decadent Recipe
Rich, creamy, classic chocolate fudge with walnuts. Easy to make, perfect for gifting or enjoying!
Ingredients
- 1 cup (2 sticks) unsalted butter, softened
- 3 cups granulated sugar
- 3/4 cup unsweetened cocoa powder
- 1/2 cup milk
- 1 teaspoon vanilla extract
- 1/2 teaspoon salt
- 3 cups powdered sugar, sifted
- 1 cup chopped walnuts
Instructions
- In a large, heavy-bottomed saucepan, combine softened butter, granulated sugar, cocoa powder, and milk.
- Place the saucepan over medium heat. Stir constantly with a wooden spoon or heat-resistant spatula until the butter is completely melted and the sugar is dissolved. The mixture should be smooth and glossy.
- Bring the mixture to a rolling boil, stirring constantly. Use a candy thermometer to monitor the temperature.
- Continue boiling and stirring until the candy thermometer registers 234°F (112°C), the soft-ball stage. If you don’t have a candy thermometer, test for the soft-ball stage by dropping a small amount of the mixture into a bowl of cold water. If it forms a soft, pliable ball that you can flatten between your fingers, it’s ready.
- Remove the saucepan from the heat immediately.
- Add the vanilla extract and salt to the hot fudge mixture. Stir well to combine.
- Gradually add the sifted powdered sugar to the mixture in batches, stirring well after each addition until fully incorporated. The mixture will become thick.
- Stir in the chopped walnuts, ensuring they are evenly distributed.
- Line an 8×8 inch square baking pan with parchment paper, allowing the paper to overhang the sides.
- Pour the fudge mixture into the prepared baking pan and spread it evenly with a spatula.
- Let the fudge cool completely at room temperature for several hours, or refrigerate for at least 2 hours until firm.
- Once the fudge is firm, lift it out of the baking pan using the parchment paper overhang. Place it on a cutting board.
- Use a sharp knife to cut the fudge into squares. For clean cuts, run the knife under hot water and wipe it dry between each cut.
- Store the fudge in an airtight container at room temperature for up to a week, or in the refrigerator for up to two weeks. For longer storage, freeze the fudge wrapped tightly in plastic wrap and then placed in a freezer bag for up to 2-3 months.
Notes
- Use high-quality ingredients: The better the quality of your ingredients, the better the fudge will taste. Use good quality butter, cocoa powder, and vanilla extract.
- Don’t overcook the mixture: Overcooking the mixture will result in hard, crumbly fudge. Use a candy thermometer to ensure that you reach the soft-ball stage (234°F or 112°C).
- Stir constantly: Stirring constantly while cooking the mixture prevents the sugar from burning and ensures a smooth, creamy fudge.
- Sift the powdered sugar: Sifting the powdered sugar removes any lumps and ensures a smooth fudge.
- Cool completely: Let the fudge cool completely before cutting it into squares. This will prevent it from being too soft and sticky.


Leave a Comment