
Belgian Yeasted Waffles: Prepare to embark on a culinary journey that will redefine your breakfast expectations! Imagine sinking your teeth into a waffle that’s not just crispy on the outside, but boasts a light, airy interior with a depth of flavor you never thought possible. Forget those flat, lifeless waffles of the past; we’re talking about a breakfast experience that’s truly extraordinary.
The history of waffles is rich and fascinating, with roots tracing back to medieval Europe. However, it’s the Belgian waffle, particularly the yeasted variety, that has captured hearts (and stomachs!) worldwide. These aren’t your average waffles; the addition of yeast creates a unique fermentation process, resulting in a waffle with a slightly tangy, complex flavor profile and an unparalleled texture.
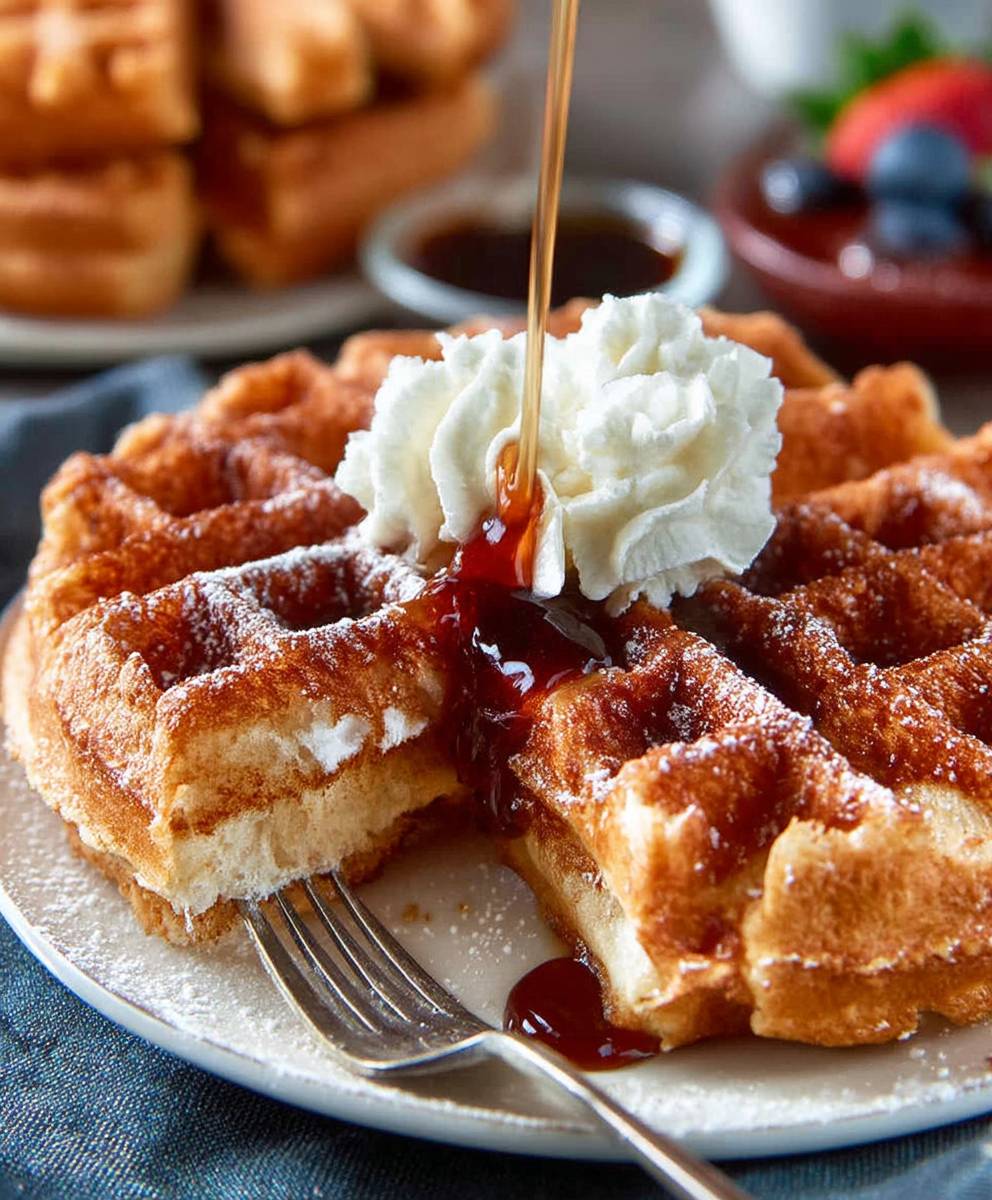
What makes Belgian Yeasted Waffles so irresistible? It’s a combination of factors. The yeasted batter creates a light and airy interior, while the deep pockets are perfect for holding pools of melted butter, maple syrup, fresh berries, or whatever toppings your heart desires. The slight tang from the yeast balances the sweetness beautifully, making them a delightful treat for any time of day. Plus, the process, while requiring a little patience for the yeast to do its magic, is surprisingly simple, making it a perfect weekend project for both seasoned bakers and kitchen novices alike. Get ready to elevate your breakfast game with this classic recipe!

Ingredients:
- For the Sponge:
- 1 cup (240ml) lukewarm milk (105-115°F)
- 2 teaspoons (7g) active dry yeast
- 1 tablespoon (13g) granulated sugar
- 1 1/2 cups (195g) all-purpose flour
- For the Batter:
- 2 large eggs, separated
- 1/4 cup (50g) granulated sugar
- 1/2 teaspoon vanilla extract
- 1/2 teaspoon salt
- 1/2 cup (113g) unsalted butter, melted and cooled slightly
- 1/2 cup (60g) all-purpose flour
- Optional Toppings:
- Powdered sugar
- Fresh berries (strawberries, blueberries, raspberries)
- Whipped cream
- Maple syrup
- Chocolate sauce
Preparing the Sponge:
This first step is crucial for developing that wonderful yeasty flavor and light, airy texture that makes Belgian waffles so special. Don’t skip it!
- Activate the Yeast: In a large bowl, combine the lukewarm milk, active dry yeast, and 1 tablespoon of granulated sugar. Make sure your milk isn’t too hot, or it will kill the yeast. Too cold, and the yeast won’t activate properly. The ideal temperature is between 105-115°F. Give it a gentle stir and let it sit for about 5-10 minutes, or until the mixture becomes foamy. This foam indicates that the yeast is active and ready to go. If it doesn’t foam, your yeast might be old and you’ll need to start with a fresh batch.
- Combine with Flour: Once the yeast mixture is foamy, add the 1 1/2 cups of all-purpose flour. Stir until just combined. Don’t overmix at this stage; a few lumps are perfectly fine. We’re just looking to bring the flour and yeast mixture together.
- Let it Rest: Cover the bowl with plastic wrap or a clean kitchen towel and let it rest in a warm place for about 30 minutes to 1 hour. The sponge will become bubbly and almost double in size. This resting period allows the yeast to work its magic, creating those lovely air pockets that contribute to the waffle’s light and airy texture. I usually put mine in a slightly warmed oven (turned off, of course!) or on top of the refrigerator.
Preparing the Batter:
While the sponge is doing its thing, you can get everything ready for the main batter. This part is all about adding richness and flavor!
- Separate the Eggs: Carefully separate the eggs, placing the yolks in a medium bowl and the whites in a clean, grease-free bowl. It’s important that no yolk gets into the whites, as this will prevent them from whipping properly.
- Whisk the Yolks: In the bowl with the egg yolks, add the 1/4 cup of granulated sugar, vanilla extract, and salt. Whisk until the mixture is pale yellow and slightly thickened. This usually takes about 2-3 minutes of vigorous whisking. The sugar will dissolve into the yolks, creating a smooth and creamy base.
- Melt and Cool the Butter: Melt the 1/2 cup of unsalted butter in a microwave or in a saucepan over low heat. Let it cool slightly before adding it to the egg yolk mixture. Hot butter can cook the eggs, so make sure it’s just warm, not scalding.
- Combine Wet Ingredients: Gradually whisk the melted and cooled butter into the egg yolk mixture until well combined. The mixture should be smooth and emulsified.
- Add to Sponge: Once the sponge has rested and become bubbly, gently fold the egg yolk mixture into the sponge. Be careful not to deflate the sponge too much. We want to keep those air pockets intact!
- Add Remaining Flour: Add the remaining 1/2 cup of all-purpose flour to the batter and gently fold it in until just combined. Again, don’t overmix. A few lumps are okay.
- Whip the Egg Whites: In the bowl with the egg whites, use an electric mixer (handheld or stand mixer) to whip the egg whites until stiff peaks form. This is a crucial step for achieving that light and airy texture. Start on low speed and gradually increase to high speed. You’ll know the egg whites are ready when they form stiff, glossy peaks that hold their shape when you lift the beaters.
- Fold in Egg Whites: Gently fold the whipped egg whites into the batter in two additions. Be very careful not to deflate the egg whites. Use a spatula and fold from the bottom up, gently turning the batter over. The batter should be light and airy.
Cooking the Waffles:
Now for the fun part! Getting that golden-brown, crispy exterior and fluffy interior is the key to waffle perfection.
- Preheat the Waffle Iron: Preheat your waffle iron according to the manufacturer’s instructions. Most waffle irons have an indicator light that will tell you when it’s ready. It’s important to have the waffle iron properly preheated to ensure even cooking and a crispy exterior.
- Grease the Waffle Iron: Lightly grease the waffle iron with cooking spray or melted butter. This will prevent the waffles from sticking and make them easier to remove.
- Pour the Batter: Pour the batter onto the preheated waffle iron, using the amount recommended by the manufacturer. Be careful not to overfill the waffle iron, as the batter will expand during cooking.
- Cook the Waffles: Close the waffle iron and cook the waffles according to the manufacturer’s instructions, or until they are golden brown and crispy. This usually takes about 3-5 minutes, but it can vary depending on your waffle iron.
- Remove the Waffles: Carefully remove the waffles from the waffle iron using a fork or tongs. Be careful not to scratch the surface of the waffle iron.
- Keep Warm (Optional): If you’re making a large batch of waffles, you can keep them warm in a preheated oven (200°F) until you’re ready to serve them. Place the waffles on a wire rack in a single layer to prevent them from becoming soggy.
Serving and Enjoying:
This is where you get to personalize your waffles and make them your own! The possibilities are endless.
- Add Toppings: Serve the waffles immediately with your favorite toppings. Some popular choices include powdered sugar, fresh berries, whipped cream, maple syrup, and chocolate sauce.
- Get Creative: Don’t be afraid to get creative with your toppings! Try adding Nutella, peanut butter, bananas, or even a scoop of ice cream.
- Enjoy! Enjoy your delicious homemade Belgian waffles! They’re perfect for breakfast, brunch, or even a special dessert.
Conclusion:
And there you have it! These Belgian Yeasted Waffles are truly something special, and I genuinely believe they’re a must-try for any waffle enthusiast. The overnight fermentation process might seem a little daunting at first, but trust me, the resulting flavor and texture are well worth the minimal effort. You’ll be rewarded with waffles that are incredibly light and airy on the inside, yet perfectly crisp and golden brown on the outside a delightful contrast that will have you reaching for seconds (and thirds!).
What sets these waffles apart is that subtle tang from the yeast, which adds a depth of flavor you simply won’t find in your average waffle recipe. It elevates them from a simple breakfast treat to a truly memorable culinary experience. Plus, the yeasted batter creates a more complex structure, resulting in waffles that hold their shape beautifully and won’t get soggy under your favorite toppings.
But the best part? These waffles are incredibly versatile! While they’re absolutely divine served simply with a dusting of powdered sugar and a drizzle of maple syrup, the possibilities are endless. For a truly decadent experience, try topping them with fresh berries, whipped cream, and a scoop of vanilla ice cream. Or, if you’re feeling adventurous, go savory! A fried egg, crispy bacon, and a sprinkle of chives make for a surprisingly delicious and satisfying meal.
Here are a few more serving suggestions to get your creative juices flowing:
- Berry Bliss: Top with mixed berries (strawberries, blueberries, raspberries), a dollop of Greek yogurt, and a drizzle of honey.
- Chocolate Lover’s Dream: Drizzle with melted chocolate, sprinkle with chocolate shavings, and add a scoop of chocolate ice cream.
- Savory Sensation: Top with smoked salmon, cream cheese, capers, and red onion.
- Peaches and Cream: Top with sliced peaches, whipped cream, and a sprinkle of cinnamon.
- Nutty Delight: Top with chopped nuts (pecans, walnuts, almonds), a drizzle of maple syrup, and a dollop of peanut butter.
Don’t be afraid to experiment and find your own favorite combinations! That’s the beauty of these Belgian Yeasted Waffles they’re a blank canvas for your culinary creativity.
I truly hope you’ll give this recipe a try. I’m confident that you’ll be amazed by the results. The slight tang from the yeast, the crispy exterior, and the light, airy interior all come together to create a waffle experience that is truly unforgettable.
Once you’ve made them, I’d absolutely love to hear about your experience! Did you try any interesting variations? What were your favorite toppings? Share your photos and stories in the comments below I can’t wait to see what you create! Happy waffle-making! And remember, the secret ingredient is always love (and a little bit of yeast!). I am sure that you will enjoy this recipe for Belgian Yeasted Waffles as much as I do.
Belgian Yeasted Waffles: The Ultimate Guide to Light & Fluffy Perfection
Light and airy Belgian waffles with a delightful yeasty flavor, perfect for a weekend brunch.
Ingredients
- 1 cup (240ml) lukewarm milk (105-115°F)
- 2 teaspoons (7g) active dry yeast
- 1 tablespoon (13g) granulated sugar
- 1 1/2 cups (195g) all-purpose flour
- 2 large eggs, separated
- 1/4 cup (50g) granulated sugar
- 1/2 teaspoon vanilla extract
- 1/2 teaspoon salt
- 1/2 cup (113g) unsalted butter, melted and cooled slightly
- 1/2 cup (60g) all-purpose flour
- Powdered sugar
- Fresh berries (strawberries, blueberries, raspberries)
- Whipped cream
- Maple syrup
- Chocolate sauce
Instructions
- In a large bowl, combine the lukewarm milk, active dry yeast, and 1 tablespoon of granulated sugar. Make sure your milk isn’t too hot, or it will kill the yeast. Too cold, and the yeast won’t activate properly. The ideal temperature is between 105-115°F. Give it a gentle stir and let it sit for about 5-10 minutes, or until the mixture becomes foamy. This foam indicates that the yeast is active and ready to go. If it doesn’t foam, your yeast might be old and you’ll need to start with a fresh batch.
- Once the yeast mixture is foamy, add the 1 1/2 cups of all-purpose flour. Stir until just combined. Don’t overmix at this stage; a few lumps are perfectly fine. We’re just looking to bring the flour and yeast mixture together.
- Cover the bowl with plastic wrap or a clean kitchen towel and let it rest in a warm place for about 30 minutes to 1 hour. The sponge will become bubbly and almost double in size. This resting period allows the yeast to work its magic, creating those lovely air pockets that contribute to the waffle’s light and airy texture. I usually put mine in a slightly warmed oven (turned off, of course!) or on top of the refrigerator.
- Carefully separate the eggs, placing the yolks in a medium bowl and the whites in a clean, grease-free bowl. It’s important that no yolk gets into the whites, as this will prevent them from whipping properly.
- In the bowl with the egg yolks, add the 1/4 cup of granulated sugar, vanilla extract, and salt. Whisk until the mixture is pale yellow and slightly thickened. This usually takes about 2-3 minutes of vigorous whisking. The sugar will dissolve into the yolks, creating a smooth and creamy base.
- Melt the 1/2 cup of unsalted butter in a microwave or in a saucepan over low heat. Let it cool slightly before adding it to the egg yolk mixture. Hot butter can cook the eggs, so make sure it’s just warm, not scalding.
- Gradually whisk the melted and cooled butter into the egg yolk mixture until well combined. The mixture should be smooth and emulsified.
- Once the sponge has rested and become bubbly, gently fold the egg yolk mixture into the sponge. Be careful not to deflate the sponge too much. We want to keep those air pockets intact!
- Add the remaining 1/2 cup of all-purpose flour to the batter and gently fold it in until just combined. Again, don’t overmix. A few lumps are okay.
- In the bowl with the egg whites, use an electric mixer (handheld or stand mixer) to whip the egg whites until stiff peaks form. This is a crucial step for achieving that light and airy texture. Start on low speed and gradually increase to high speed. You’ll know the egg whites are ready when they form stiff, glossy peaks that hold their shape when you lift the beaters.
- Gently fold the whipped egg whites into the batter in two additions. Be very careful not to deflate the egg whites. Use a spatula and fold from the bottom up, gently turning the batter over. The batter should be light and airy.
- Preheat your waffle iron according to the manufacturer’s instructions. Most waffle irons have an indicator light that will tell you when it’s ready. It’s important to have the waffle iron properly preheated to ensure even cooking and a crispy exterior.
- Lightly grease the waffle iron with cooking spray or melted butter. This will prevent the waffles from sticking and make them easier to remove.
- Pour the batter onto the preheated waffle iron, using the amount recommended by the manufacturer. Be careful not to overfill the waffle iron, as the batter will expand during cooking.
- Close the waffle iron and cook the waffles according to the manufacturer’s instructions, or until they are golden brown and crispy. This usually takes about 3-5 minutes, but it can vary depending on your waffle iron.
- Carefully remove the waffles from the waffle iron using a fork or tongs. Be careful not to scratch the surface of the waffle iron.
- If you’re making a large batch of waffles, you can keep them warm in a preheated oven (200°F) until you’re ready to serve them. Place the waffles on a wire rack in a single layer to prevent them from becoming soggy.
- Serve the waffles immediately with your favorite toppings. Some popular choices include powdered sugar, fresh berries, whipped cream, maple syrup, and chocolate sauce.
- Don’t be afraid to get creative with your toppings! Try adding Nutella, peanut butter, bananas, or even a scoop of ice cream.
- Enjoy your delicious homemade Belgian waffles! They’re perfect for breakfast, brunch, or even a special dessert.
Notes
- Make sure your milk is between 105-115°F to properly activate the yeast.
- Don’t overmix the sponge or batter. A few lumps are okay.
- Whip the egg whites until stiff peaks form for a light and airy texture.
- Gently fold in the egg whites to avoid deflating them.
- Preheat your waffle iron properly for even cooking and a crispy exterior.


Leave a Comment