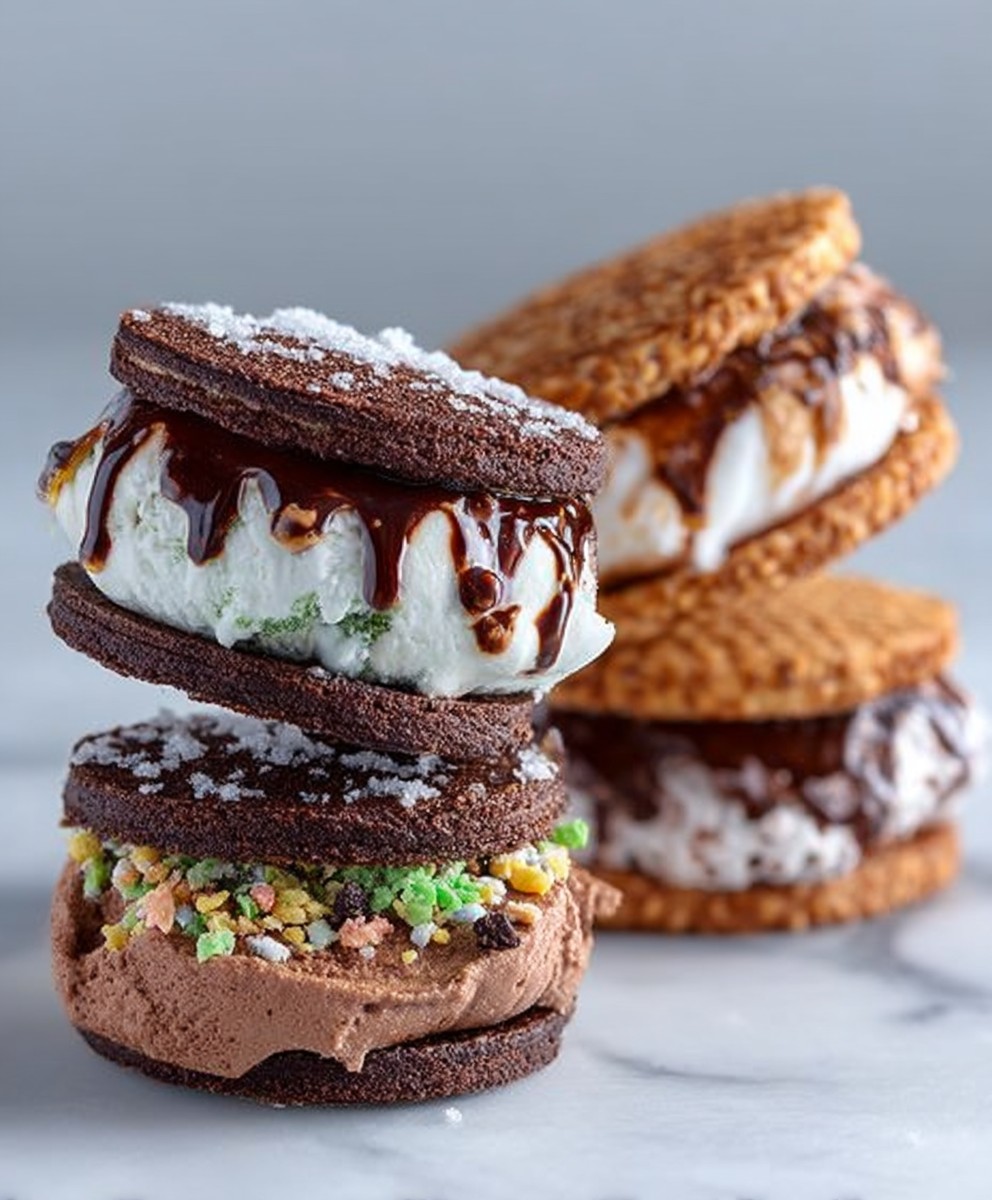
Ice Cream Sandwiches Homemade just the thought conjures up images of carefree summer days, sticky fingers, and pure, unadulterated joy, doesn’t it? Forget the store-bought versions that are often too sweet and lacking in that special something. We’re talking about crafting the ultimate frozen treat from scratch, a personalized masterpiece that will have everyone begging for more.
While the exact origins of the ice cream sandwich are debated, its popularity exploded in the early 20th century, becoming a symbol of American summertime fun. Think about it: two perfectly baked cookies embracing a creamy, cold center. What’s not to love? The beauty of ice cream sandwiches homemade lies in their versatility. You can customize every element, from the type of cookie (chocolate chip, oatmeal raisin, peanut butter the possibilities are endless!) to the flavor of the ice cream.
People adore homemade ice cream sandwiches because they offer a delightful combination of textures and flavors. The soft, chewy cookies provide a comforting contrast to the smooth, cold ice cream. Plus, the ability to control the ingredients means you can tailor the sweetness and richness to your exact preferences. Ready to ditch the processed stuff and create some unforgettable memories? Let’s get started!
Ingredients:
- For the Chocolate Cookies:
- 2 cups (250g) all-purpose flour
- ¾ cup (75g) unsweetened cocoa powder
- 1 teaspoon baking soda
- ½ teaspoon baking powder
- ½ teaspoon salt
- 1 cup (2 sticks or 226g) unsalted butter, softened
- 1 cup (200g) granulated sugar
- ½ cup (100g) packed light brown sugar
- 2 large eggs
- 2 teaspoons vanilla extract
- ½ cup (120ml) milk
- For the Vanilla Ice Cream:
- 2 cups (480ml) heavy cream
- 1 cup (240ml) whole milk
- ¾ cup (150g) granulated sugar
- 1 vanilla bean, split lengthwise and seeds scraped (or 2 teaspoons vanilla extract)
- Pinch of salt
- 6 large egg yolks
Making the Chocolate Cookies:
- Combine Dry Ingredients: In a medium bowl, whisk together the flour, cocoa powder, baking soda, baking powder, and salt. Make sure everything is evenly distributed. This ensures a consistent flavor and texture in your cookies.
- Cream Butter and Sugars: In a large bowl (or the bowl of a stand mixer), cream together the softened butter, granulated sugar, and brown sugar until light and fluffy. This usually takes about 3-5 minutes. Scrape down the sides of the bowl as needed to ensure everything is evenly incorporated. The creaming process is crucial for creating a tender cookie.
- Add Eggs and Vanilla: Beat in the eggs one at a time, then stir in the vanilla extract. Make sure each egg is fully incorporated before adding the next. This prevents the batter from curdling.
- Alternate Wet and Dry Ingredients: Gradually add the dry ingredients to the wet ingredients, alternating with the milk, beginning and ending with the dry ingredients. Mix until just combined. Be careful not to overmix, as this can result in tough cookies. Overmixing develops the gluten in the flour, leading to a less tender texture.
- Chill the Dough: Cover the dough and chill in the refrigerator for at least 2 hours, or preferably overnight. Chilling the dough allows the gluten to relax, which results in a more tender cookie. It also prevents the cookies from spreading too much during baking.
- Preheat Oven and Prepare Baking Sheets: Preheat oven to 350°F (175°C). Line baking sheets with parchment paper or silicone baking mats. Parchment paper prevents the cookies from sticking and makes cleanup easier.
- Scoop and Bake: Scoop rounded tablespoons of dough onto the prepared baking sheets, leaving about 2 inches between each cookie. For uniform cookies, use a cookie scoop.
- Bake: Bake for 10-12 minutes, or until the edges are set and the centers are slightly soft. The cookies will continue to bake slightly as they cool on the baking sheet.
- Cool: Let the cookies cool on the baking sheets for a few minutes before transferring them to a wire rack to cool completely. This prevents the cookies from breaking.
Making the Vanilla Ice Cream:
- Prepare the Cream Mixture: In a medium saucepan, combine the heavy cream, whole milk, sugar, vanilla bean (if using), and salt. If using vanilla extract, add it later.
- Heat the Cream Mixture: Heat the mixture over medium heat, stirring occasionally, until the sugar is dissolved and the mixture is steaming but not boiling. Remove from heat.
- Temper the Egg Yolks: In a separate bowl, whisk the egg yolks until light and pale. Slowly drizzle a small amount of the hot cream mixture into the egg yolks, whisking constantly to temper them. This prevents the eggs from scrambling when added to the hot cream.
- Combine and Cook: Pour the tempered egg yolk mixture back into the saucepan with the remaining cream mixture. Cook over low heat, stirring constantly with a wooden spoon, until the mixture thickens enough to coat the back of the spoon. This usually takes about 5-10 minutes. The mixture should reach a temperature of 170-175°F (77-79°C). Be careful not to overheat the mixture, as this can cause the eggs to curdle.
- Strain and Cool: Strain the mixture through a fine-mesh sieve into a clean bowl to remove any cooked egg particles or vanilla bean solids. If using a vanilla bean, remove it before straining. If using vanilla extract, stir it in now.
- Chill: Cover the bowl with plastic wrap, pressing it directly onto the surface of the custard to prevent a skin from forming. Chill in the refrigerator for at least 4 hours, or preferably overnight. This allows the flavors to meld and the custard to fully chill.
- Churn: Pour the chilled custard into an ice cream maker and churn according to the manufacturer’s instructions. The churning process incorporates air into the mixture, creating a smooth and creamy texture.
- Harden: Transfer the churned ice cream to an airtight container and freeze for at least 2 hours to harden. This allows the ice cream to firm up and become scoopable.
Assembling the Ice Cream Sandwiches:
- Soften Ice Cream Slightly: Let the ice cream sit at room temperature for a few minutes to soften slightly. This will make it easier to spread.
- Assemble Sandwiches: Place a scoop of ice cream on the flat side of one cookie. Top with another cookie, flat side down. Gently press the cookies together to distribute the ice cream evenly.
- Smooth Edges (Optional): Use a knife or spatula to smooth the edges of the ice cream, if desired.
- Freeze: Wrap each ice cream sandwich individually in plastic wrap and freeze for at least 30 minutes to firm up. This will prevent the ice cream from melting too quickly when you eat them.
- Serve: Enjoy your homemade ice cream sandwiches! They are best enjoyed immediately after removing them from the freezer.

Conclusion:
So, there you have it! These homemade Ice Cream Sandwiches are truly a must-try. Forget the store-bought versions that are often bland and overly processed. This recipe allows you to create a truly personalized and delicious treat that will impress your family and friends. The combination of the chewy, slightly salty cookies and the creamy, customizable ice cream is simply irresistible. I promise, once you taste these, you’ll never go back to the pre-packaged kind!
But why are these sandwiches so special? It’s the control you have over every single ingredient. You know exactly what’s going into them, and you can tailor the flavors to your exact preferences. Want a richer, more decadent cookie? Add a little extra butter or brown sugar. Prefer a lighter, more refreshing ice cream? Opt for a fruit-based sorbet or a low-fat frozen yogurt. The possibilities are endless!
And speaking of possibilities, let’s talk about serving suggestions and variations. These Ice Cream Sandwiches are perfect for any occasion. Serve them at your next backyard barbecue, bring them to a potluck, or simply enjoy them as a sweet treat on a hot summer day. For a fun twist, try rolling the edges of the sandwiches in sprinkles, chopped nuts, mini chocolate chips, or even toasted coconut flakes. This adds a delightful textural element and a pop of color.
Serving Suggestions and Fun Variations:
* Cookie Swaps: Experiment with different cookie recipes! Try using chocolate chip cookies, oatmeal raisin cookies, or even gingerbread cookies for a festive holiday treat.
* Ice Cream Adventures: Don’t limit yourself to vanilla or chocolate ice cream. Get creative with flavors like salted caramel, mint chocolate chip, strawberry cheesecake, or even lavender honey.
* Dipping Delights: Dip the finished sandwiches in melted chocolate and let them harden for an extra layer of indulgence.
* Mini Sandwiches: Use smaller cookies to create bite-sized sandwiches that are perfect for parties or for portion control.
* Themed Sandwiches: Create themed sandwiches for holidays or special occasions. For example, use red and green sprinkles for Christmas or orange and black sprinkles for Halloween.
I truly believe that making these Ice Cream Sandwiches is a rewarding experience. It’s a fun project to do with kids, and it’s a great way to unleash your creativity in the kitchen. Plus, the end result is a delicious and satisfying treat that everyone will love.
So, what are you waiting for? Gather your ingredients, preheat your oven, and get ready to create some magic! I’m confident that you’ll be thrilled with the results. And most importantly, don’t be afraid to experiment and make these sandwiches your own.
I’m so excited for you to try this recipe! Once you’ve made your own batch of homemade Ice Cream Sandwiches, I’d love to hear about your experience. Share your photos and comments on social media using [Your Hashtag Here] and let me know what variations you tried. Did you discover a new favorite cookie and ice cream combination? Did you add any unique toppings or fillings? I can’t wait to see what you come up with! Happy baking (and sandwich-making)!
Ice Cream Sandwiches Homemade: The Ultimate Guide to Delicious Frozen Treats
Decadent chocolate cookies sandwiching creamy vanilla ice cream. The perfect homemade treat for any occasion!
Ingredients
- 2 cups (250g) all-purpose flour
- ¾ cup (75g) unsweetened cocoa powder
- 1 teaspoon baking soda
- ½ teaspoon baking powder
- ½ teaspoon salt
- 1 cup (2 sticks or 226g) unsalted butter, softened
- 1 cup (200g) granulated sugar
- ½ cup (100g) packed light brown sugar
- 2 large eggs
- 2 teaspoons vanilla extract
- ½ cup (120ml) milk
- 2 cups (480ml) heavy cream
- 1 cup (240ml) whole milk
- ¾ cup (150g) granulated sugar
- 1 vanilla bean, split lengthwise and seeds scraped (or 2 teaspoons vanilla extract)
- Pinch of salt
- 6 large egg yolks
Instructions
- Combine Dry Ingredients: In a medium bowl, whisk together the flour, cocoa powder, baking soda, baking powder, and salt. Make sure everything is evenly distributed. This ensures a consistent flavor and texture in your cookies.
- Cream Butter and Sugars: In a large bowl (or the bowl of a stand mixer), cream together the softened butter, granulated sugar, and brown sugar until light and fluffy. This usually takes about 3-5 minutes. Scrape down the sides of the bowl as needed to ensure everything is evenly incorporated. The creaming process is crucial for creating a tender cookie.
- Add Eggs and Vanilla: Beat in the eggs one at a time, then stir in the vanilla extract. Make sure each egg is fully incorporated before adding the next. This prevents the batter from curdling.
- Alternate Wet and Dry Ingredients: Gradually add the dry ingredients to the wet ingredients, alternating with the milk, beginning and ending with the dry ingredients. Mix until just combined. Be careful not to overmix, as this can result in tough cookies. Overmixing develops the gluten in the flour, leading to a less tender texture.
- Chill the Dough: Cover the dough and chill in the refrigerator for at least 2 hours, or preferably overnight. Chilling the dough allows the gluten to relax, which results in a more tender cookie. It also prevents the cookies from spreading too much during baking.
- Preheat Oven and Prepare Baking Sheets: Preheat oven to 350°F (175°C). Line baking sheets with parchment paper or silicone baking mats. Parchment paper prevents the cookies from sticking and makes cleanup easier.
- Scoop and Bake: Scoop rounded tablespoons of dough onto the prepared baking sheets, leaving about 2 inches between each cookie. For uniform cookies, use a cookie scoop.
- Bake: Bake for 10-12 minutes, or until the edges are set and the centers are slightly soft. The cookies will continue to bake slightly as they cool on the baking sheet.
- Cool: Let the cookies cool on the baking sheets for a few minutes before transferring them to a wire rack to cool completely. This prevents the cookies from breaking.
- Prepare the Cream Mixture: In a medium saucepan, combine the heavy cream, whole milk, sugar, vanilla bean (if using), and salt. If using vanilla extract, add it later.
- Heat the Cream Mixture: Heat the mixture over medium heat, stirring occasionally, until the sugar is dissolved and the mixture is steaming but not boiling. Remove from heat.
- Temper the Egg Yolks: In a separate bowl, whisk the egg yolks until light and pale. Slowly drizzle a small amount of the hot cream mixture into the egg yolks, whisking constantly to temper them. This prevents the eggs from scrambling when added to the hot cream.
- Combine and Cook: Pour the tempered egg yolk mixture back into the saucepan with the remaining cream mixture. Cook over low heat, stirring constantly with a wooden spoon, until the mixture thickens enough to coat the back of the spoon. This usually takes about 5-10 minutes. The mixture should reach a temperature of 170-175°F (77-79°C). Be careful not to overheat the mixture, as this can cause the eggs to curdle.
- Strain and Cool: Strain the mixture through a fine-mesh sieve into a clean bowl to remove any cooked egg particles or vanilla bean solids. If using a vanilla bean, remove it before straining. If using vanilla extract, stir it in now.
- Chill: Cover the bowl with plastic wrap, pressing it directly onto the surface of the custard to prevent a skin from forming. Chill in the refrigerator for at least 4 hours, or preferably overnight. This allows the flavors to meld and the custard to fully chill.
- Churn: Pour the chilled custard into an ice cream maker and churn according to the manufacturer’s instructions. The churning process incorporates air into the mixture, creating a smooth and creamy texture.
- Harden: Transfer the churned ice cream to an airtight container and freeze for at least 2 hours to harden. This allows the ice cream to firm up and become scoopable.
- Soften Ice Cream Slightly: Let the ice cream sit at room temperature for a few minutes to soften slightly. This will make it easier to spread.
- Assemble Sandwiches: Place a scoop of ice cream on the flat side of one cookie. Top with another cookie, flat side down. Gently press the cookies together to distribute the ice cream evenly.
- Smooth Edges (Optional): Use a knife or spatula to smooth the edges of the ice cream, if desired.
- Freeze: Wrap each ice cream sandwich individually in plastic wrap and freeze for at least 30 minutes to firm up. This will prevent the ice cream from melting too quickly when you eat them.
- Serve: Enjoy your homemade ice cream sandwiches! They are best enjoyed immediately after removing them from the freezer.
Notes
- For best results, use high-quality cocoa powder and vanilla extract.
- Don’t overmix the cookie dough, as this can result in tough cookies.
- Chilling the cookie dough is essential for preventing the cookies from spreading too much during baking.
- Be careful not to overheat the ice cream custard, as this can cause the eggs to curdle.
- If you don’t have an ice cream maker, you can still make ice cream by pouring the chilled custard into a freezer-safe container and stirring it every 30 minutes for the first 2-3 hours.


Leave a Comment