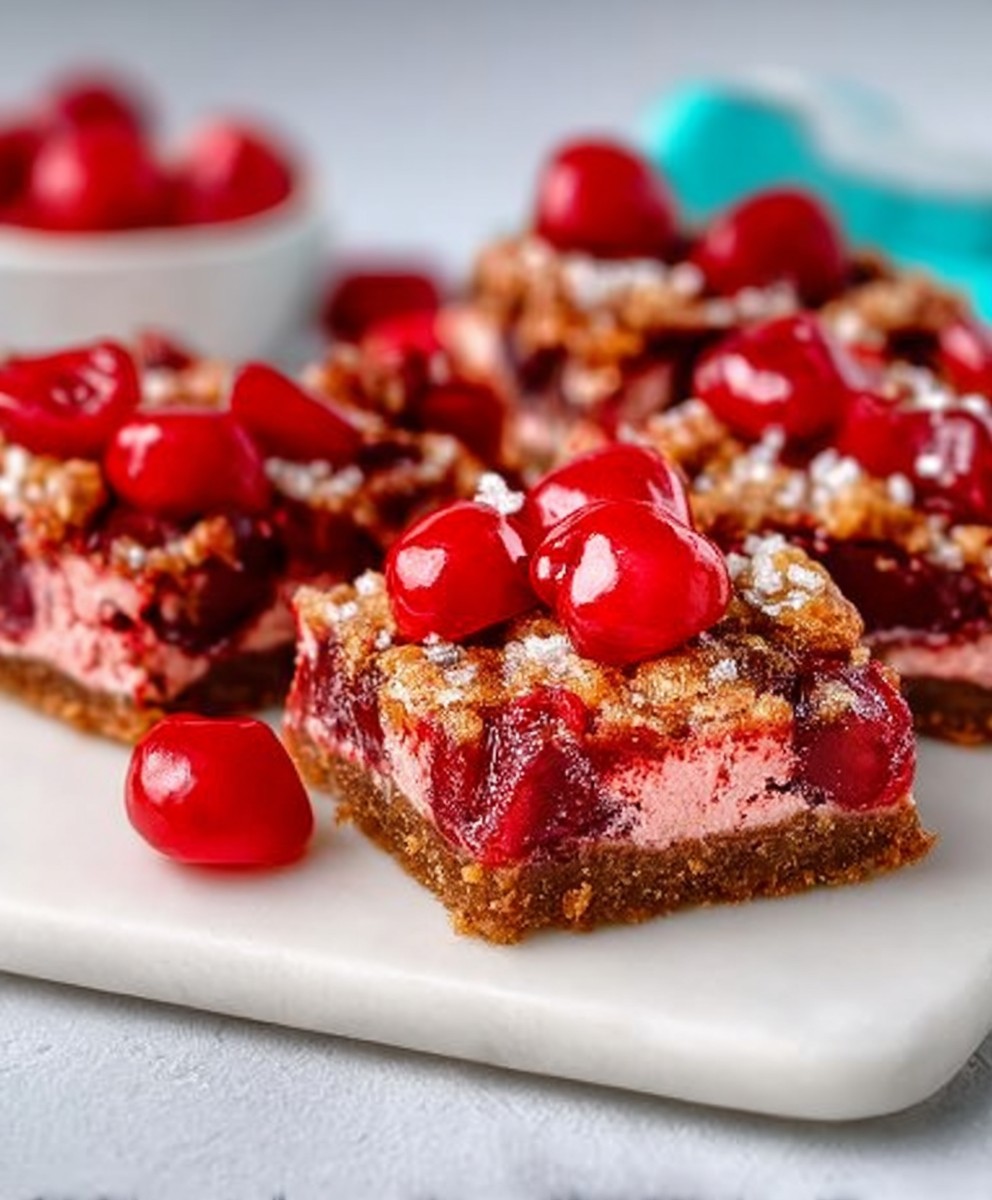
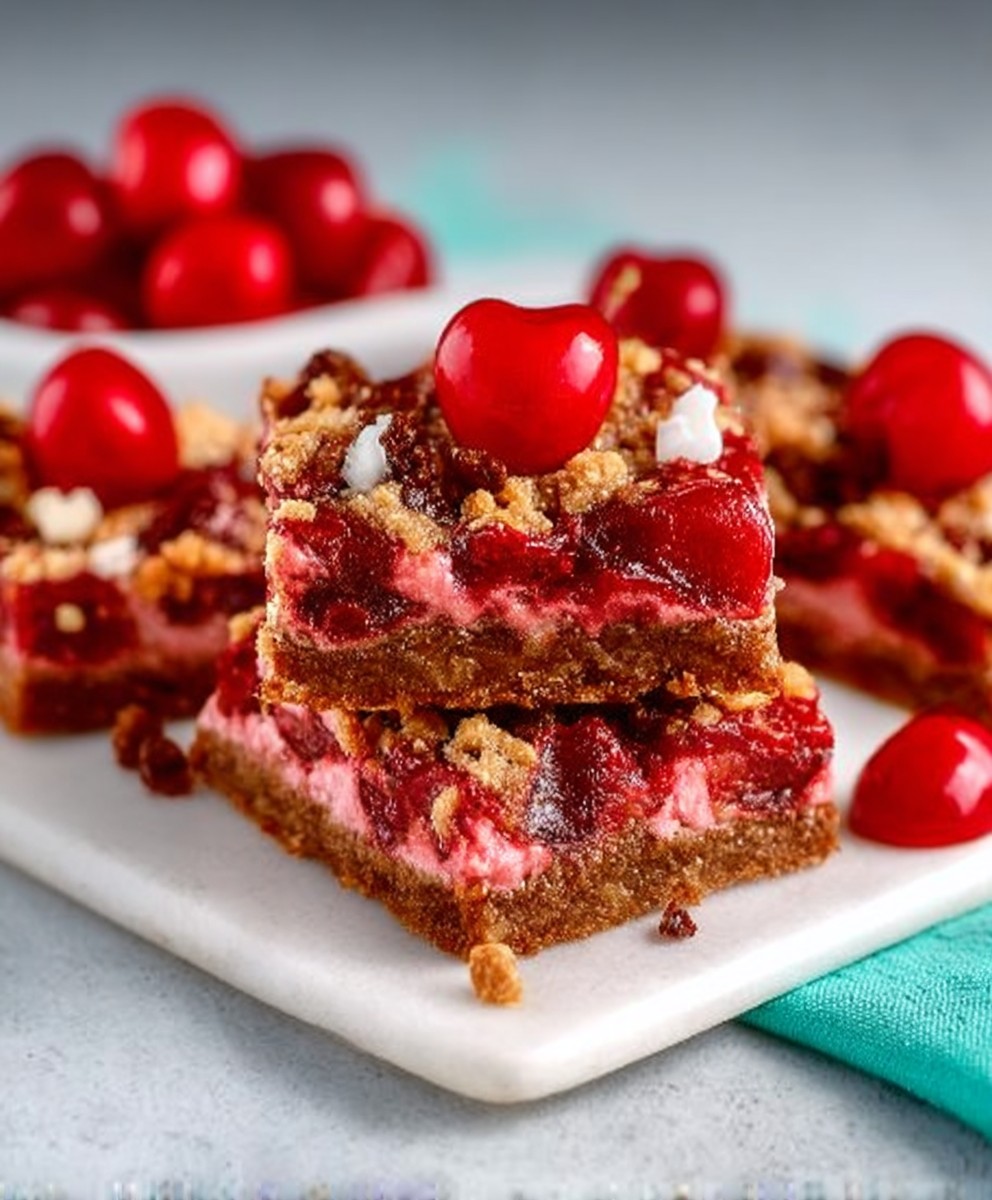
Maraschino cherry bars: Prepare to be transported back to simpler times with a dessert that’s as delightful as it is nostalgic! These aren’t just any bars; they’re a slice of sunshine, bursting with the sweet, unmistakable flavor of maraschino cherries. I remember my grandmother making these every Christmas, and the vibrant pink hue always made them the star of the dessert table.
While the exact origins of maraschino cherry bars are a bit hazy, they gained popularity in the mid-20th century, coinciding with the widespread availability of commercially produced maraschino cherries. These bright red gems, originally made from marasca cherries preserved in maraschino liqueur, became a symbol of fun and indulgence. The modern version, often made with a sugar syrup and almond extract, retains that playful spirit, and that’s exactly what we’re capturing in this recipe.
What makes these bars so irresistible? It’s the perfect combination of textures: a buttery, slightly crumbly base, studded with chewy, sweet cherries, and often topped with a simple glaze that adds just the right amount of extra sweetness. They’re incredibly easy to make, requiring minimal ingredients and effort, making them perfect for potlucks, bake sales, or simply a sweet treat to brighten your day. Plus, who can resist that vibrant pink color? Let’s get baking!
Ingredients:
- 1 cup (2 sticks) unsalted butter, softened
- 1 ½ cups granulated sugar
- 3 large eggs
- 1 teaspoon almond extract
- ½ teaspoon vanilla extract
- 3 cups all-purpose flour
- 1 teaspoon baking powder
- ½ teaspoon salt
- 1 (10 ounce) jar maraschino cherries, drained and chopped (reserve 2 tablespoons of juice)
- ½ cup chopped walnuts or pecans (optional)
- Powdered sugar, for dusting (optional)
Preparing the Cherry Mixture:
Before we even think about the batter, let’s get our cherries ready. This is a crucial step because the cherries are the star of the show! We want them to be evenly distributed throughout the bars, and chopping them up helps achieve that.
- Drain the Cherries: Carefully drain the entire jar of maraschino cherries. Make sure to reserve about 2 tablespoons of the cherry juice we’ll need that later to add a little extra cherry flavor to the batter. Don’t discard the rest of the juice; you can use it for Shirley Temples or other fun drinks!
- Chop the Cherries: Now, chop the drained cherries into smaller pieces. I like to quarter them, but you can chop them even finer if you prefer. The smaller the pieces, the more evenly they’ll disperse in the batter.
- Optional: Add Nuts: If you’re using nuts, chop them finely as well. Walnuts or pecans work beautifully with the cherry flavor. You can toast them lightly in a dry pan for a few minutes to enhance their flavor, but this is entirely optional.
Making the Batter:
Now for the fun part creating the batter! This is where the magic happens, and we transform simple ingredients into a delicious base for our cherry bars. It’s important to follow the steps carefully to ensure a light and tender texture.
- Cream the Butter and Sugar: In a large bowl (or the bowl of your stand mixer), cream together the softened butter and granulated sugar until light and fluffy. This usually takes about 3-5 minutes. The mixture should be pale and airy. This step is crucial for incorporating air into the batter, which will result in a lighter and more tender bar. Don’t rush this step!
- Add the Eggs: Beat in the eggs one at a time, making sure each egg is fully incorporated before adding the next. This prevents the batter from curdling. If the batter does look slightly curdled, don’t worry too much; it will come together when you add the dry ingredients.
- Incorporate the Extracts: Stir in the almond extract and vanilla extract. The almond extract really complements the cherry flavor, so don’t skip it! The vanilla extract adds a touch of warmth and complexity.
- Combine Dry Ingredients: In a separate bowl, whisk together the all-purpose flour, baking powder, and salt. Whisking ensures that the baking powder and salt are evenly distributed throughout the flour, which is important for proper leavening and flavor.
- Gradually Add Dry Ingredients to Wet Ingredients: Gradually add the dry ingredients to the wet ingredients, mixing on low speed until just combined. Be careful not to overmix! Overmixing can develop the gluten in the flour, resulting in tough bars. Mix until you no longer see streaks of flour.
- Add Cherry Juice: Stir in the reserved 2 tablespoons of maraschino cherry juice. This will add a little extra cherry flavor and moisture to the batter.
- Fold in Cherries and Nuts: Gently fold in the chopped maraschino cherries and nuts (if using). Be careful not to overmix, as this can cause the cherries to bleed their color into the batter. You want the cherries and nuts to be evenly distributed throughout the batter.
Baking the Bars:
Almost there! Now it’s time to bake our cherry bars to golden perfection. Proper baking is key to achieving the right texture and ensuring that the bars are cooked through.
- Preheat Oven and Prepare Pan: Preheat your oven to 350°F (175°C). Grease and flour a 9×13 inch baking pan. You can also line the pan with parchment paper, leaving an overhang on the sides, for easy removal. This is my preferred method, as it ensures that the bars won’t stick to the pan.
- Pour Batter into Pan: Pour the batter into the prepared baking pan and spread it evenly. Use a spatula or the back of a spoon to smooth the surface.
- Bake: Bake for 30-35 minutes, or until a wooden skewer inserted into the center comes out clean or with just a few moist crumbs attached. The edges of the bars should be lightly golden brown.
- Cool Completely: Let the bars cool completely in the pan before cutting into squares. This is important because the bars will continue to set as they cool. If you try to cut them while they’re still warm, they may crumble.
Cutting and Serving:
The final step! Once the bars are completely cool, it’s time to cut them into squares and enjoy. You can dust them with powdered sugar for an extra touch of sweetness and visual appeal.
- Cut into Squares: Once the bars are completely cool, cut them into squares. The size of the squares is up to you! I usually cut them into about 2-inch squares. If you lined the pan with parchment paper, you can simply lift the bars out of the pan using the overhang and then cut them on a cutting board.
- Dust with Powdered Sugar (Optional): If desired, dust the bars with powdered sugar. This adds a touch of sweetness and makes them look even more appealing. You can use a sifter or a fine-mesh sieve to evenly distribute the powdered sugar.
- Serve and Enjoy: Serve the cherry bars and enjoy! They’re delicious on their own, but you can also serve them with a scoop of vanilla ice cream or a dollop of whipped cream. They’re perfect for parties, potlucks, or just a sweet treat any time of day.
Tips for Success:
- Use Softened Butter: Make sure your butter is properly softened before creaming it with the sugar. This will ensure that the mixture is light and fluffy.
- Don’t Overmix: Be careful not to overmix the batter, as this can result in tough bars. Mix until just combined.
- Cool Completely: Let the bars cool completely in the pan before cutting into squares. This will prevent them from crumbling.
- Storage: Store the cherry bars in an airtight container at room temperature for up to 3 days.
- Variations: Feel free to experiment with different variations of this recipe. You can add different types of nuts, such as macadamia nuts or pistachios. You can also add chocolate chips or dried cranberries.
Troubleshooting:
- Bars are too dry: Make sure you’re not overbaking the bars. Also, ensure that you’re using the correct amount of butter and eggs.
- Bars are too crumbly: This could be due to overmixing the batter or not using enough butter.
- Bars are too dense: This could be due to overmixing the batter or not using enough baking powder.
I hope you enjoy making these delicious maraschino cherry bars! They’re a classic treat that’s sure to please everyone. Happy baking!
Conclusion:
And there you have it! These Maraschino Cherry Bars are truly a must-try for anyone who loves a sweet treat with a delightful burst of cherry flavor. From the buttery, melt-in-your-mouth crust to the chewy, cherry-studded filling, every bite is an explosion of deliciousness. I know I’ve already made them three times this month!
But why are these bars so special? It’s more than just the taste. They’re incredibly easy to make, requiring minimal ingredients and effort. Perfect for a last-minute dessert craving or a bake sale contribution that’s guaranteed to be a hit. Plus, the vibrant red color makes them visually appealing, adding a touch of festive cheer to any occasion. They’re a guaranteed crowd-pleaser, and I’m confident they’ll become a staple in your baking repertoire.
Beyond their inherent deliciousness, these bars are incredibly versatile. Serve them warm with a scoop of vanilla ice cream for an extra indulgent dessert. Or, let them cool completely and cut them into smaller squares for a delightful addition to a cookie platter. For a more sophisticated touch, drizzle them with melted white chocolate and sprinkle with chopped pistachios.
Looking for variations? You can easily adapt this recipe to suit your preferences. Try adding a handful of chopped walnuts or pecans to the filling for a nutty crunch. Or, substitute almond extract for the vanilla extract for a slightly different flavor profile. If you’re feeling adventurous, consider adding a layer of cream cheese frosting on top for an extra decadent treat. You could even experiment with different types of cherries, although I personally think the bright, sweet flavor of Maraschino cherries is what makes these bars so irresistible.
Another fun idea is to make mini versions of these bars using a muffin tin. They’re perfect for parties or for portion control (although, let’s be honest, it’s hard to stop at just one!). You could also crumble them over yogurt or ice cream for a quick and easy dessert topping. The possibilities are endless!
I truly believe that everyone should experience the joy of these Maraschino Cherry Bars. They’re a simple yet satisfying treat that’s perfect for any occasion. So, what are you waiting for? Gather your ingredients, preheat your oven, and get ready to bake up a batch of these delightful bars.
I’m so excited for you to try this recipe! Once you’ve made them, I’d love to hear about your experience. Did you make any variations? What did your family and friends think? Share your photos and comments below! Let’s spread the love for these amazing bars and inspire others to give them a try. Happy baking! I am sure you will love this recipe as much as I do. Don’t forget to rate the recipe once you’ve tried it! Your feedback helps others discover this delicious treat.
Maraschino Cherry Bars: A Delicious and Easy Dessert Recipe
Soft, chewy bars packed with sweet cherries and a hint of almond, perfect for a nostalgic treat.
Ingredients
- 1 cup (2 sticks) unsalted butter, softened
- 1 ½ cups granulated sugar
- 3 large eggs
- 1 teaspoon almond extract
- ½ teaspoon vanilla extract
- 3 cups all-purpose flour
- 1 teaspoon baking powder
- ½ teaspoon salt
- 1 (10 ounce) jar maraschino cherries, drained and chopped (reserve 2 tablespoons of juice)
- ½ cup chopped walnuts or pecans (optional)
- Powdered sugar, for dusting (optional)
Instructions
- Prepare Cherries: Drain maraschino cherries, reserving 2 tablespoons of juice. Chop the cherries into smaller pieces. If using nuts, chop them finely.
- Cream Butter and Sugar: In a large bowl, cream together the softened butter and granulated sugar until light and fluffy (3-5 minutes).
- Add Eggs: Beat in the eggs one at a time, ensuring each egg is fully incorporated before adding the next.
- Incorporate Extracts: Stir in the almond extract and vanilla extract.
- Combine Dry Ingredients: In a separate bowl, whisk together the all-purpose flour, baking powder, and salt.
- Gradually Add Dry Ingredients to Wet Ingredients: Gradually add the dry ingredients to the wet ingredients, mixing on low speed until just combined. Be careful not to overmix.
- Add Cherry Juice: Stir in the reserved 2 tablespoons of maraschino cherry juice.
- Fold in Cherries and Nuts: Gently fold in the chopped maraschino cherries and nuts (if using). Be careful not to overmix.
- Preheat Oven and Prepare Pan: Preheat your oven to 350°F (175°C). Grease and flour a 9×13 inch baking pan.
- Pour Batter into Pan: Pour the batter into the prepared baking pan and spread it evenly.
- Bake: Bake for 30-35 minutes, or until a wooden skewer inserted into the center comes out clean or with just a few moist crumbs attached.
- Cool Completely: Let the bars cool completely in the pan before cutting into squares.
- Cut into Squares: Once the bars are completely cool, cut them into squares.
- Dust with Powdered Sugar (Optional): If desired, dust the bars with powdered sugar.
- Serve and Enjoy: Serve the cherry bars and enjoy!
Notes
- Use softened butter for best results.
- Don’t overmix the batter to avoid tough bars.
- Cool the bars completely before cutting to prevent crumbling.
- Store in an airtight container at room temperature for up to 3 days.
- Variations: Add different nuts, chocolate chips, or dried cranberries.
- Troubleshooting:
- Dry bars: Avoid overbaking and ensure correct ingredient amounts.
- Crumbly bars: Avoid overmixing and use enough butter.
- Dense bars: Avoid overmixing and use enough baking powder.

Leave a Comment