
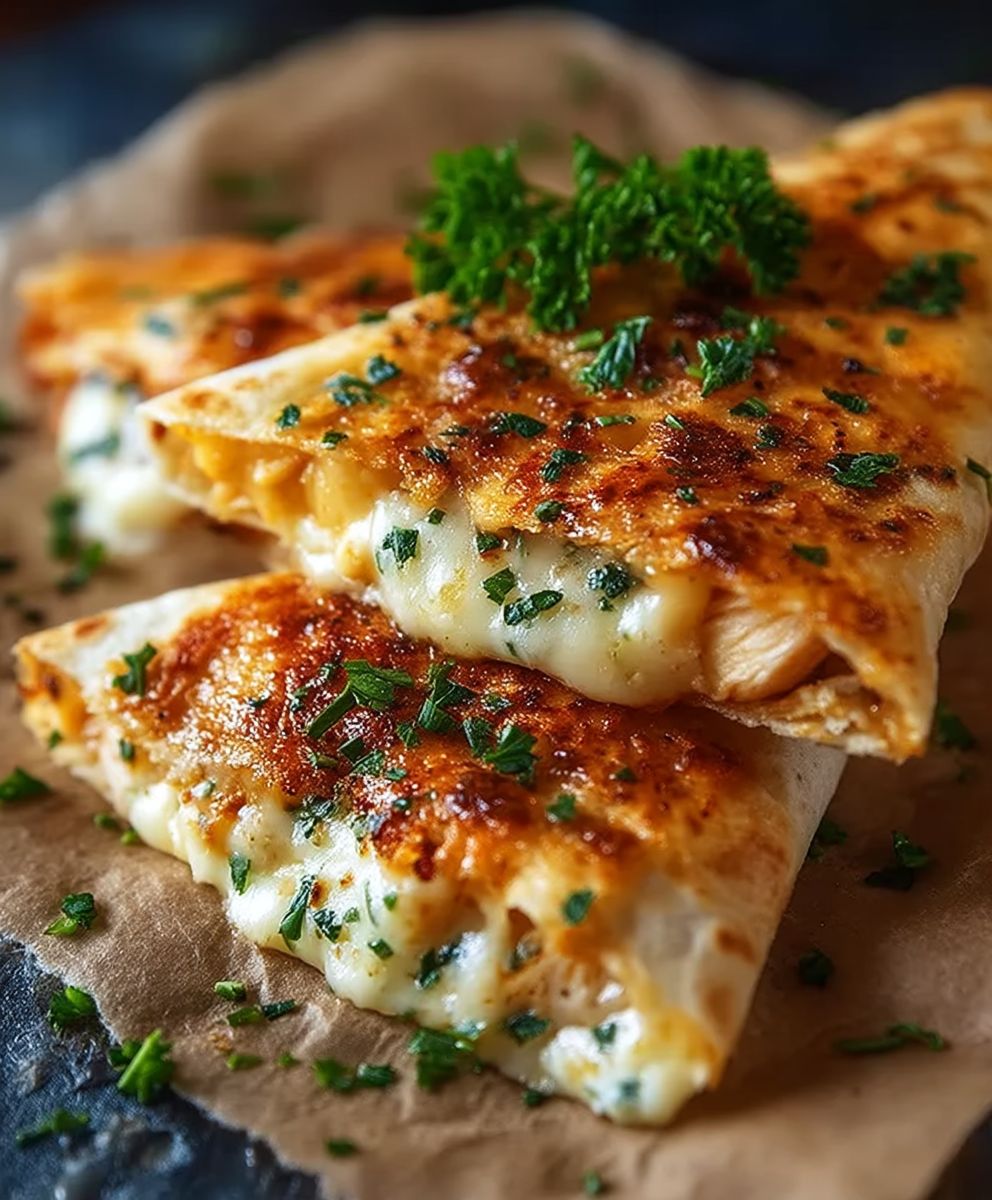
Cheesy Garlic Chicken Wraps: Prepare to be amazed! Imagine sinking your teeth into a warm, toasted wrap bursting with juicy, garlic-infused chicken and rivers of melted cheese. This isn’t just lunch; it’s an experience. I’m so excited to share this recipe with you, because it’s one of my absolute go-to meals for busy weeknights or casual weekend gatherings.
While the exact origins of chicken wraps are somewhat modern, the concept of wrapping savory fillings in flatbreads dates back centuries across various cultures. Think of the Middle Eastern shawarma or the Mexican burrito delicious proof that wrapping food is a timeless and universally loved culinary technique. This particular iteration, Cheesy Garlic Chicken Wraps, takes that concept and elevates it with the irresistible combination of garlic and cheese, two ingredients that have been winning hearts (and stomachs) for generations.
What makes these wraps so incredibly popular? It’s the perfect trifecta of flavor, texture, and convenience. The garlic-infused chicken is savory and aromatic, the melted cheese adds a creamy richness, and the toasted wrap provides a satisfying crunch. Plus, they’re incredibly easy to customize! Add your favorite veggies, a drizzle of hot sauce, or a dollop of sour cream to make them your own. But most importantly, they are quick to prepare, making them ideal for those evenings when you need a delicious and satisfying meal on the table in under 30 minutes. Get ready to discover your new favorite weeknight dinner!

Ingredients:
- For the Chicken:
- 2 large boneless, skinless chicken breasts (about 1.5 lbs total)
- 1 tablespoon olive oil
- 1 teaspoon garlic powder
- 1 teaspoon onion powder
- 1/2 teaspoon smoked paprika
- 1/4 teaspoon dried oregano
- 1/4 teaspoon dried thyme
- Salt and freshly ground black pepper to taste
- For the Garlic Sauce:
- 1/2 cup mayonnaise
- 1/4 cup sour cream
- 3 cloves garlic, minced
- 2 tablespoons grated Parmesan cheese
- 1 tablespoon lemon juice
- 1 tablespoon chopped fresh parsley
- 1/4 teaspoon salt
- 1/8 teaspoon black pepper
- For the Wraps:
- 4 large flour tortillas (10-12 inch diameter)
- 1 cup shredded mozzarella cheese
- 1/2 cup shredded cheddar cheese
- 1/4 cup chopped red onion
- 1/4 cup chopped fresh cilantro (optional)
Preparing the Chicken:
- Pound the Chicken: Place each chicken breast between two sheets of plastic wrap. Use a meat mallet or rolling pin to pound the chicken to an even thickness of about 1/2 inch. This ensures even cooking and tenderizes the chicken.
- Season the Chicken: In a small bowl, combine the garlic powder, onion powder, smoked paprika, oregano, thyme, salt, and pepper. Generously rub this spice mixture all over both sides of the chicken breasts. Make sure every part of the chicken is covered for maximum flavor!
- Cook the Chicken: Heat the olive oil in a large skillet over medium-high heat. Once the oil is shimmering, carefully place the seasoned chicken breasts in the skillet. Cook for about 5-7 minutes per side, or until the chicken is cooked through and the internal temperature reaches 165°F (74°C). Use a meat thermometer to ensure accuracy. Don’t overcrowd the pan; cook in batches if necessary.
- Rest and Shred the Chicken: Once the chicken is cooked, remove it from the skillet and place it on a cutting board. Let it rest for about 5-10 minutes before shredding it with two forks. Resting allows the juices to redistribute, resulting in more tender and flavorful chicken.
Making the Garlic Sauce:
- Combine the Ingredients: In a medium bowl, whisk together the mayonnaise, sour cream, minced garlic, Parmesan cheese, lemon juice, parsley, salt, and pepper. Mix until everything is well combined and the sauce is smooth and creamy.
- Adjust to Taste: Taste the sauce and adjust the seasonings as needed. You might want to add a little more lemon juice for extra tanginess, or a pinch more salt and pepper to enhance the flavor.
- Refrigerate (Optional): For the best flavor, cover the garlic sauce and refrigerate it for at least 30 minutes to allow the flavors to meld together. This step is optional, but it definitely makes a difference!
Assembling the Cheesy Garlic Chicken Wraps:
- Warm the Tortillas (Optional): If desired, warm the tortillas in a dry skillet over medium heat for about 15-20 seconds per side, or until they are pliable. You can also warm them in the microwave for a few seconds. This makes them easier to roll without tearing.
- Spread the Garlic Sauce: Lay one tortilla flat on a clean surface. Spread a generous amount of the garlic sauce evenly over the tortilla, leaving a small border around the edges.
- Add the Chicken: Sprinkle about 1/2 cup of the shredded chicken evenly over the garlic sauce.
- Add the Cheese: Sprinkle about 1/4 cup of mozzarella cheese and 1/8 cup of cheddar cheese over the chicken. Don’t be shy with the cheese!
- Add the Toppings: Sprinkle a tablespoon of chopped red onion and a tablespoon of chopped cilantro (if using) over the cheese.
- Roll the Wrap: Fold in the sides of the tortilla, then tightly roll it up from the bottom. Make sure to tuck in the filling as you roll to keep everything secure.
- Repeat: Repeat steps 2-6 with the remaining tortillas and ingredients.
Cooking the Wraps (Optional):
- Heat a Skillet: Heat a large skillet over medium heat. You can add a little butter or olive oil to the skillet if desired, but it’s not necessary.
- Cook the Wraps: Place the wraps in the skillet, seam-side down. Cook for about 2-3 minutes per side, or until the tortillas are golden brown and crispy, and the cheese is melted and gooey.
- Serve Immediately: Remove the wraps from the skillet and let them cool slightly before slicing in half and serving immediately.
Tips and Variations:
- Spice it Up: Add a pinch of red pepper flakes to the garlic sauce or sprinkle some diced jalapeños over the chicken for a spicy kick.
- Add Veggies: Feel free to add other vegetables to the wraps, such as sliced bell peppers, sautéed mushrooms, or spinach.
- Use Different Cheese: Experiment with different types of cheese, such as Monterey Jack, pepper jack, or provolone.
- Make it a Salad: Instead of wrapping the ingredients in a tortilla, you can serve them over a bed of lettuce for a delicious and healthy salad.
- Grill the Chicken: For a smoky flavor, grill the chicken breasts instead of cooking them in a skillet.
- Make it Ahead: You can prepare the chicken and garlic sauce ahead of time and store them in the refrigerator until you’re ready to assemble the wraps.
- Air Fryer Option: Preheat your air fryer to 400°F (200°C). Place the assembled wraps in the air fryer basket, seam-side down. Cook for 5-7 minutes, or until the tortillas are golden brown and crispy.
- Serving Suggestions: Serve these cheesy garlic chicken wraps with a side of salsa, guacamole, sour cream, or your favorite dipping sauce. They’re also great with a side salad or some crispy french fries.
- Leftovers: Store any leftover wraps in an airtight container in the refrigerator for up to 3 days. Reheat them in a skillet, microwave, or air fryer.
Enjoy your delicious Cheesy Garlic Chicken Wraps!
Conclusion:
This Cheesy Garlic Chicken Wraps recipe is more than just a quick lunch; it’s a flavor explosion waiting to happen, and trust me, you absolutely need to try it! The combination of juicy, garlicky chicken, melted cheese, and your favorite wrap fillings creates a symphony of textures and tastes that will leave you craving more. Its the perfect solution for busy weeknights, impromptu picnics, or even a satisfying snack.
But what truly makes these wraps a must-try is their incredible versatility. Feel free to experiment with different cheeses a sharp cheddar for a bolder flavor, a creamy provolone for extra meltiness, or even a spicy pepper jack to kick things up a notch. You can also customize the fillings to your heart’s content. Add some crisp lettuce and juicy tomatoes for a refreshing crunch, or throw in some sautéed bell peppers and onions for added sweetness and depth. For a spicier version, consider adding a drizzle of sriracha mayo or a sprinkle of red pepper flakes.
Looking for serving suggestions? These wraps are fantastic on their own, but they also pair perfectly with a side of crispy sweet potato fries, a light and refreshing salad, or even a bowl of creamy tomato soup. For a more substantial meal, consider serving them with a side of quinoa or couscous. And don’t forget the dipping sauce! A simple ranch dressing, a tangy honey mustard, or even a creamy avocado dip would be the perfect complement to these flavorful wraps.
Beyond the basic recipe, the possibilities are truly endless. If you’re looking for a vegetarian option, simply substitute the chicken with grilled halloumi cheese or seasoned tofu. You could also try using different types of wraps, such as whole wheat tortillas for added fiber or spinach wraps for a boost of nutrients. Get creative and have fun experimenting with different flavor combinations!
I truly believe that this Cheesy Garlic Chicken Wraps recipe will become a staple in your kitchen. It’s quick, easy, customizable, and incredibly delicious. It’s the kind of recipe that you can whip up in minutes, using ingredients that you probably already have on hand. And the best part? It’s guaranteed to please even the pickiest of eaters.
So, what are you waiting for? Grab your ingredients, fire up your skillet, and get ready to create some culinary magic. I’m confident that you’ll love these wraps as much as I do. And when you do, I’d love to hear about your experience! Share your photos, your variations, and your thoughts in the comments below. Let’s create a community of wrap enthusiasts and inspire each other with our delicious creations. Happy wrapping! I can’t wait to see what you come up with. Don’t forget to tag me in your social media posts so I can see your amazing creations! Let me know what you think of this Cheesy Garlic Chicken Wraps recipe!
Cheesy Garlic Chicken Wraps: The Ultimate Recipe Guide
Delicious and easy cheesy garlic chicken wraps filled with tender shredded chicken, creamy garlic sauce, melted cheese, and your favorite toppings. Perfect for a quick lunch or dinner!
Ingredients
- 2 large boneless, skinless chicken breasts (about 1.5 lbs total)
- 1 tablespoon olive oil
- 1 teaspoon garlic powder
- 1 teaspoon onion powder
- 1/2 teaspoon smoked paprika
- 1/4 teaspoon dried oregano
- 1/4 teaspoon dried thyme
- Salt and freshly ground black pepper to taste
- 1/2 cup mayonnaise
- 1/4 cup sour cream
- 3 cloves garlic, minced
- 2 tablespoons grated Parmesan cheese
- 1 tablespoon lemon juice
- 1 tablespoon chopped fresh parsley
- 1/4 teaspoon salt
- 1/8 teaspoon black pepper
- 4 large flour tortillas (10-12 inch diameter)
- 1 cup shredded mozzarella cheese
- 1/2 cup shredded cheddar cheese
- 1/4 cup chopped red onion
- 1/4 cup chopped fresh cilantro (optional)
Instructions
- Prepare the Chicken: Place each chicken breast between two sheets of plastic wrap. Use a meat mallet or rolling pin to pound the chicken to an even thickness of about 1/2 inch.
- In a small bowl, combine the garlic powder, onion powder, smoked paprika, oregano, thyme, salt, and pepper. Generously rub this spice mixture all over both sides of the chicken breasts.
- Heat the olive oil in a large skillet over medium-high heat. Once the oil is shimmering, carefully place the seasoned chicken breasts in the skillet. Cook for about 5-7 minutes per side, or until the chicken is cooked through and the internal temperature reaches 165°F (74°C).
- Remove the chicken from the skillet and place it on a cutting board. Let it rest for about 5-10 minutes before shredding it with two forks.
- Make the Garlic Sauce: In a medium bowl, whisk together the mayonnaise, sour cream, minced garlic, Parmesan cheese, lemon juice, parsley, salt, and pepper. Mix until everything is well combined and the sauce is smooth and creamy.
- Taste the sauce and adjust the seasonings as needed. Refrigerate for at least 30 minutes to allow the flavors to meld together.
- Assemble the Wraps: Warm the tortillas in a dry skillet over medium heat for about 15-20 seconds per side, or until they are pliable.
- Lay one tortilla flat on a clean surface. Spread a generous amount of the garlic sauce evenly over the tortilla, leaving a small border around the edges.
- Sprinkle about 1/2 cup of the shredded chicken evenly over the garlic sauce.
- Sprinkle about 1/4 cup of mozzarella cheese and 1/8 cup of cheddar cheese over the chicken.
- Sprinkle a tablespoon of chopped red onion and a tablespoon of chopped cilantro (if using) over the cheese.
- Fold in the sides of the tortilla, then tightly roll it up from the bottom.
- Repeat steps 7-12 with the remaining tortillas and ingredients.
- Cook the Wraps (Optional): Heat a large skillet over medium heat.
- Place the wraps in the skillet, seam-side down. Cook for about 2-3 minutes per side, or until the tortillas are golden brown and crispy, and the cheese is melted and gooey.
- Remove the wraps from the skillet and let them cool slightly before slicing in half and serving immediately.
Notes
- Spice it Up: Add a pinch of red pepper flakes to the garlic sauce or sprinkle some diced jalapeños over the chicken for a spicy kick.
- Add Veggies: Feel free to add other vegetables to the wraps, such as sliced bell peppers, sautéed mushrooms, or spinach.
- Use Different Cheese: Experiment with different types of cheese, such as Monterey Jack, pepper jack, or provolone.
- Make it a Salad: Instead of wrapping the ingredients in a tortilla, you can serve them over a bed of lettuce for a delicious and healthy salad.
- Grill the Chicken: For a smoky flavor, grill the chicken breasts instead of cooking them in a skillet.
- Make it Ahead: You can prepare the chicken and garlic sauce ahead of time and store them in the refrigerator until you’re ready to assemble the wraps.
- Air Fryer Option: Preheat your air fryer to 400°F (200°C). Place the assembled wraps in the air fryer basket, seam-side down. Cook for 5-7 minutes, or until the tortillas are golden brown and crispy.
- Serving Suggestions: Serve these cheesy garlic chicken wraps with a side of salsa, guacamole, sour cream, or your favorite dipping sauce. They’re also great with a side salad or some crispy french fries.
- Leftovers: Store any leftover wraps in an airtight container in the refrigerator for up to 3 days. Reheat them in a skillet, microwave, or air fryer.

Leave a Comment