
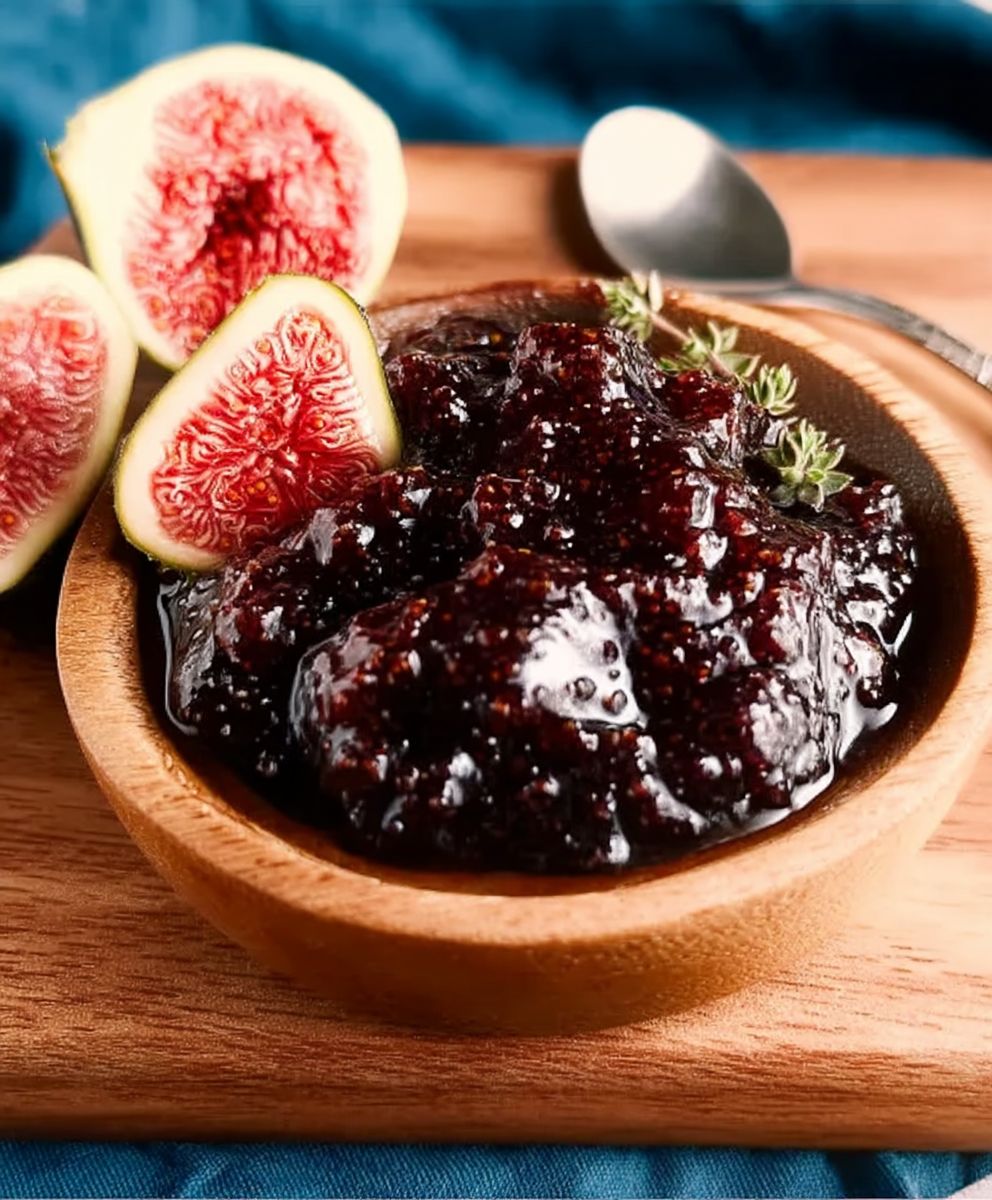
Perfect Fig Jam, a jewel-toned preserve bursting with the sun-drenched sweetness of ripe figs, is more than just a spread; it’s a taste of summer captured in a jar. Have you ever imagined transforming ordinary toast into a gourmet experience with just a single spoonful? Or perhaps elevating a cheese board from simple to sophisticated in seconds? That’s the magic of homemade fig jam, and I’m here to show you how to create the perfect fig jam every single time.
Figs themselves boast a rich history, revered since ancient times. They were a staple in the diets of the Romans and Greeks, often associated with prosperity and abundance. Preserving them as jam is a tradition that stretches back centuries, a way to savor their unique flavor long after the fig season has ended.
People adore fig jam for its complex flavor profile a delightful blend of sweetness, earthiness, and a hint of honey. The tiny seeds provide a pleasing textural contrast, adding a subtle crunch to the smooth, luscious jam. Beyond its incredible taste, fig jam is incredibly versatile. It pairs beautifully with cheeses like goat cheese, brie, and parmesan, making it a star on any charcuterie board. It’s also fantastic spread on scones, biscuits, or even used as a glaze for roasted meats. And let’s not forget the sheer satisfaction of knowing you’ve created something delicious and homemade from scratch!

Ingredients:
- 2 pounds fresh figs, stems removed and quartered
- 4 cups granulated sugar
- 1/2 cup water
- 1/4 cup lemon juice, freshly squeezed
- 1 teaspoon lemon zest, finely grated
- 1/4 teaspoon ground cinnamon (optional, but highly recommended!)
- Pinch of sea salt
- 1 tablespoon pectin (optional, for a thicker set)
Preparing the Figs:
Okay, let’s get started! First things first, we need to prep our beautiful figs. This is a crucial step, as it sets the stage for the entire jam-making process. Trust me, taking the time to do this right will pay off in the end with a jam that’s bursting with flavor and has the perfect texture.
- Wash the Figs: Gently wash the figs under cool running water. Be careful not to bruise them. We just want to remove any dirt or debris that might be clinging to the skin.
- Remove the Stems: Using a small paring knife or your fingers, carefully remove the stems from each fig. The stems can be a bit tough and bitter, so we definitely want to get rid of them.
- Quarter the Figs: Now, quarter each fig. This will help them break down more easily during the cooking process and release their natural sugars. If your figs are particularly large, you might even want to cut them into smaller pieces.
- Combine Figs, Sugar, and Water: In a large, heavy-bottomed pot (stainless steel or enamel-coated cast iron is ideal), combine the quartered figs, granulated sugar, and water. Make sure the pot is large enough to accommodate the mixture as it simmers and bubbles, preventing any messy spills.
- Macerate (Optional but Recommended): At this point, you can let the fig mixture sit for about 30 minutes to an hour. This process, called maceration, allows the sugar to draw out the natural juices from the figs, resulting in a more flavorful and intensely figgy jam. It’s not absolutely necessary, but I highly recommend it if you have the time.
Cooking the Jam:
Alright, now for the fun part cooking the jam! This is where the magic happens, and we transform those humble figs into a jar of deliciousness. Patience is key here, as we want to cook the jam slowly and steadily to achieve the perfect consistency and flavor.
- Bring to a Boil: Place the pot over medium-high heat and bring the fig mixture to a rolling boil, stirring constantly to prevent the sugar from sticking to the bottom of the pot and burning. A rolling boil means that the mixture continues to bubble vigorously even when you stir it.
- Add Lemon Juice and Zest: Once the mixture is boiling, add the lemon juice and lemon zest. The lemon juice not only adds a bright, tangy flavor that complements the sweetness of the figs but also helps to activate the pectin (both natural and added, if using) and ensure a proper set. The lemon zest adds an extra layer of citrusy aroma and flavor.
- Add Cinnamon and Salt: If you’re using cinnamon (and I highly recommend it!), add it now, along with a pinch of sea salt. The cinnamon adds a warm, comforting spice that pairs beautifully with the figs, while the salt enhances the overall flavor profile and balances the sweetness.
- Continue to Boil and Stir: Reduce the heat to medium and continue to boil the jam, stirring frequently, until it reaches the setting point. This can take anywhere from 20 to 45 minutes, depending on the heat, the size of your pot, and the moisture content of your figs.
- Test for Setting Point: This is the most important part! There are a few ways to test for the setting point:
- The Cold Plate Test: Place a small plate in the freezer before you start cooking the jam. To test, spoon a small amount of jam onto the cold plate and return it to the freezer for about a minute. Then, push the jam with your finger. If it wrinkles and forms a skin, it’s ready. If it’s still runny, continue cooking.
- The Candy Thermometer Test: Use a candy thermometer to monitor the temperature of the jam. It should reach 220°F (104°C) for a proper set.
- The Spoon Test: Dip a cold metal spoon into the jam and lift it out. If the jam drips off the spoon in thick sheets rather than thin, watery drips, it’s likely ready.
- Add Pectin (Optional): If you’re using pectin, stir it in during the last few minutes of cooking. Pectin helps to thicken the jam and ensures a more consistent set. Follow the instructions on your pectin package for the correct amount to use.
- Remove from Heat: Once the jam has reached the setting point, remove it from the heat.
- Skim off any Foam: Use a spoon to skim off any foam that has formed on the surface of the jam. This will help to create a clearer, more visually appealing final product.
Canning the Jam (Optional):
If you want to preserve your fig jam for longer storage, you can can it using the water bath canning method. This process involves sterilizing jars, filling them with hot jam, and then processing them in boiling water to create a vacuum seal. This will prevent spoilage and allow you to enjoy your homemade jam for months to come.
- Sterilize Jars and Lids: Wash your canning jars and lids in hot, soapy water. Rinse them thoroughly and then sterilize them by boiling them in a large pot of water for 10 minutes. Keep the jars hot until you’re ready to fill them. You can also sterilize them in the dishwasher on the sanitize cycle.
- Heat Lids: Place the canning lids in a small saucepan and cover them with water. Bring the water to a simmer and keep the lids hot until you’re ready to use them. Do not boil the lids, as this can damage the sealing compound.
- Fill Jars: Ladle the hot jam into the sterilized jars, leaving 1/4 inch of headspace (the space between the top of the jam and the rim of the jar).
- Remove Air Bubbles: Use a non-metallic spatula or bubble remover to gently press down on the jam and release any trapped air bubbles.
- Wipe Rims: Wipe the rims of the jars with a clean, damp cloth to remove any spills or drips. This will ensure a proper seal.
- Place Lids and Rings: Place a lid on each jar and screw on a canning ring until it is fingertip tight (not too tight, not too loose).
- Process in Water Bath: Place the filled jars in a boiling water bath canner. Make sure the jars are completely covered with water (at least 1 inch above the tops of the jars). Bring the water to a rolling boil and process the jars for 10 minutes for half-pint or pint jars. Adjust processing time for altitude.
- Cool Jars: Turn off the heat and let the jars sit in the hot water for 5 minutes before removing them. Carefully remove the jars from the canner and place them on a towel-lined surface to cool completely.
- Check for Seal: As the jars cool, you should hear a popping sound as the lids seal. After the jars have cooled completely (about 12-24 hours), check the seals by pressing down on the center of each lid. If the lid doesn’t flex or pop back up, it’s properly sealed. If the lid flexes, the jar is not sealed and should be refrigerated and used within a few weeks.
- Label and Store: Label the jars with the date and contents and store them in a cool, dark place. Properly canned jam will last for at least a year.
No-Canning Option:
If you’re not interested in canning, that’s perfectly fine! You can still enjoy your homemade fig jam. Simply let the jam cool slightly and then transfer it to clean jars or containers. Store it in the refrigerator, where it will keep for several weeks. Just be sure to use a clean spoon each time you scoop out some jam to prevent contamination.
Serving Suggestions:
Now that you’ve made your delicious fig jam, it’s time to enjoy it! Here are a few of my favorite ways to serve it:
- On Toast or Biscuits: This is the classic way to enjoy jam, and it’s always a winner. Spread a generous spoonful of fig jam on warm toast, biscuits, or scones for a simple
Conclusion:
This Perfect Fig Jam isn’t just another jam recipe; it’s a gateway to experiencing the rich, sweet, and utterly captivating flavor of figs in a whole new light. From its simple preparation to its incredible versatility, this recipe is a must-try for anyone who appreciates homemade goodness. I truly believe that once you taste this jam, you’ll never want to buy store-bought again!
Think of it: the deep, amber color, the tiny seeds that add a delightful textural contrast, and that concentrated fig flavor that bursts onto your palate. It’s a symphony of sensations, and it all starts with a few simple ingredients and a little bit of patience.
But the best part? The possibilities are endless! While this jam is absolutely divine spread on a warm, crusty piece of bread or a freshly baked scone, don’t stop there. Imagine swirling a spoonful into your morning yogurt or oatmeal for a touch of sweetness and complexity. Picture it gracing a cheese board alongside creamy brie or tangy goat cheese, creating a perfect balance of flavors. Or, get adventurous and use it as a glaze for roasted chicken or pork, adding a unique and unexpected twist to your savory dishes.
For variations, consider adding a splash of balsamic vinegar during the last few minutes of cooking for a more sophisticated, tangy flavor. A pinch of cinnamon or a star anise can also add warmth and depth. If you like a little heat, a tiny sliver of chili pepper can provide a subtle kick that complements the sweetness of the figs beautifully. You could even incorporate a handful of chopped walnuts or pecans for added texture and nutty flavor. Don’t be afraid to experiment and make it your own!
This Perfect Fig Jam is also a fantastic homemade gift. Imagine the delight on your friends’ and family’s faces when you present them with a jar of this deliciousness, lovingly made by you. It’s a thoughtful and personal gift that shows you care.
I know that making jam can seem intimidating, but trust me, this recipe is incredibly straightforward. I’ve broken it down into easy-to-follow steps, and I’m confident that even beginner cooks can achieve amazing results. The most important thing is to use high-quality figs and to be patient during the cooking process. Let the jam simmer gently until it reaches the perfect consistency, and you’ll be rewarded with a truly exceptional product.
So, what are you waiting for? Gather your ingredients, put on some music, and get ready to embark on a jam-making adventure! I promise you won’t regret it. And once you’ve made your own batch of this incredible Perfect Fig Jam, I’d love to hear about your experience. Share your photos, your variations, and your serving suggestions in the comments below. Let’s create a community of fig jam enthusiasts and inspire each other with our culinary creations! I can’t wait to see what you come up with. Happy jamming!
Perfect Fig Jam: The Ultimate Guide to Homemade Goodness
Delicious homemade fig jam, bursting with fresh fig flavor and a hint of lemon and cinnamon. Perfect on toast, biscuits, or as a cheese board accompaniment.
Ingredients
- 2 pounds fresh figs, stems removed and quartered
- 4 cups granulated sugar
- 1/2 cup water
- 1/4 cup lemon juice, freshly squeezed
- 1 teaspoon lemon zest, finely grated
- 1/4 teaspoon ground cinnamon (optional, but highly recommended!)
- Pinch of sea salt
- 1 tablespoon pectin (optional, for a thicker set)
Instructions
- Prepare the Figs: Gently wash figs, remove stems, and quarter. Combine figs, sugar, and water in a large, heavy-bottomed pot. Macerate for 30 minutes to an hour (optional).
- Cook the Jam: Bring the fig mixture to a rolling boil over medium-high heat, stirring constantly. Add lemon juice, lemon zest, cinnamon (if using), and salt.
- Reduce heat to medium and continue to boil, stirring frequently, until the jam reaches the setting point (20-45 minutes).
- Test for Setting Point: Use the cold plate test, candy thermometer (220°F/104°C), or spoon test.
- If using pectin, stir it in during the last few minutes of cooking.
- Remove from heat and skim off any foam.
- Canning (Optional): Sterilize jars and lids. Ladle hot jam into sterilized jars, leaving 1/4 inch headspace. Remove air bubbles, wipe rims, and place lids and rings on jars. Process in a boiling water bath for 10 minutes (adjust for altitude). Cool jars completely and check for seal.
- No-Canning Option: Let the jam cool slightly and transfer it to clean jars or containers. Store it in the refrigerator.
- Serving Suggestions: Enjoy on toast, biscuits, scones, or as a cheese board accompaniment.
Notes
- Macerating the figs with sugar and water before cooking enhances the flavor.
- The cinnamon is optional but adds a warm, comforting spice.
- Testing for the setting point is crucial for achieving the desired jam consistency.
- If you are new to canning, be sure to follow safe canning practices to prevent spoilage.
- If not canning, store the jam in the refrigerator and use within a few weeks.

Leave a Comment