
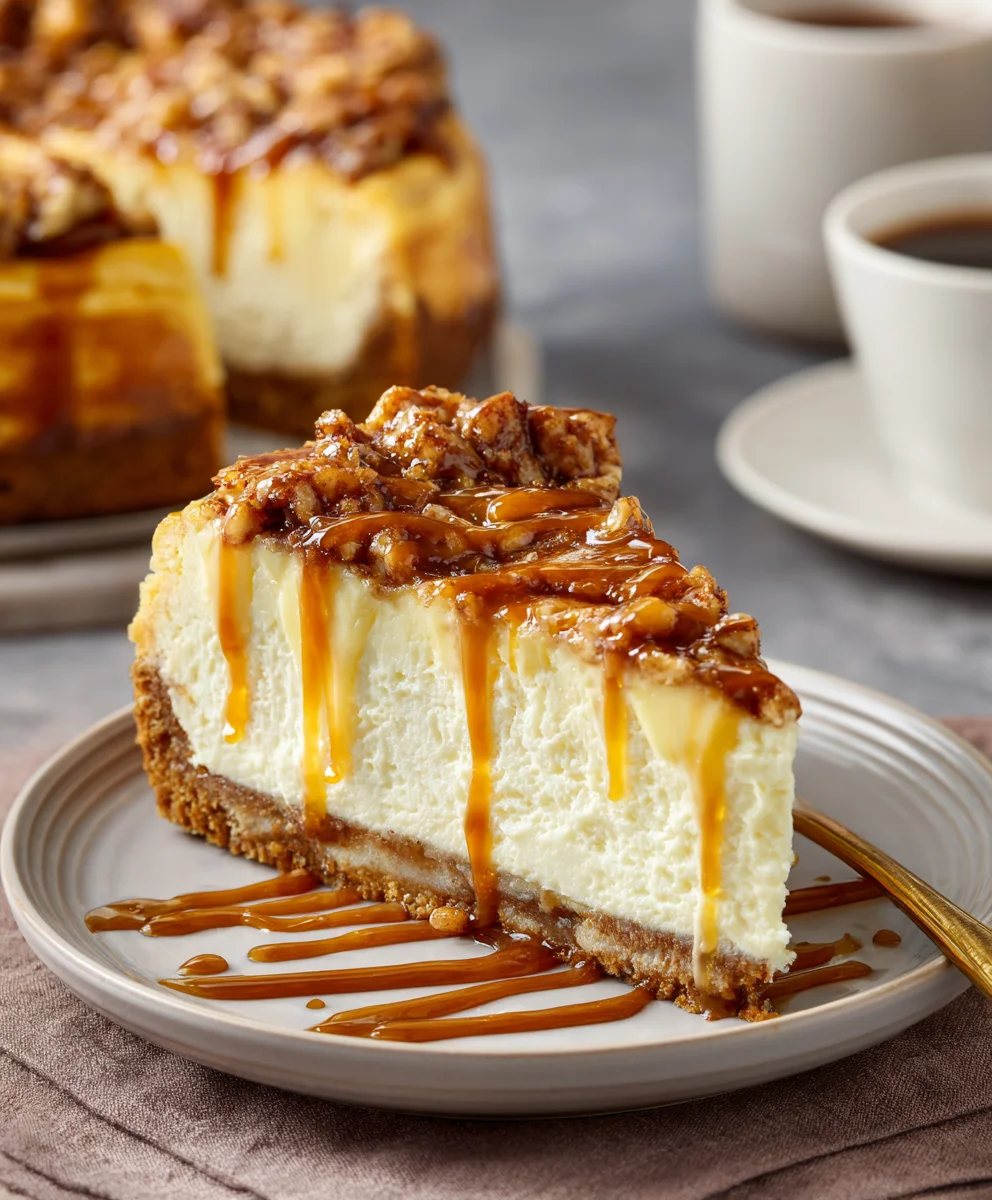
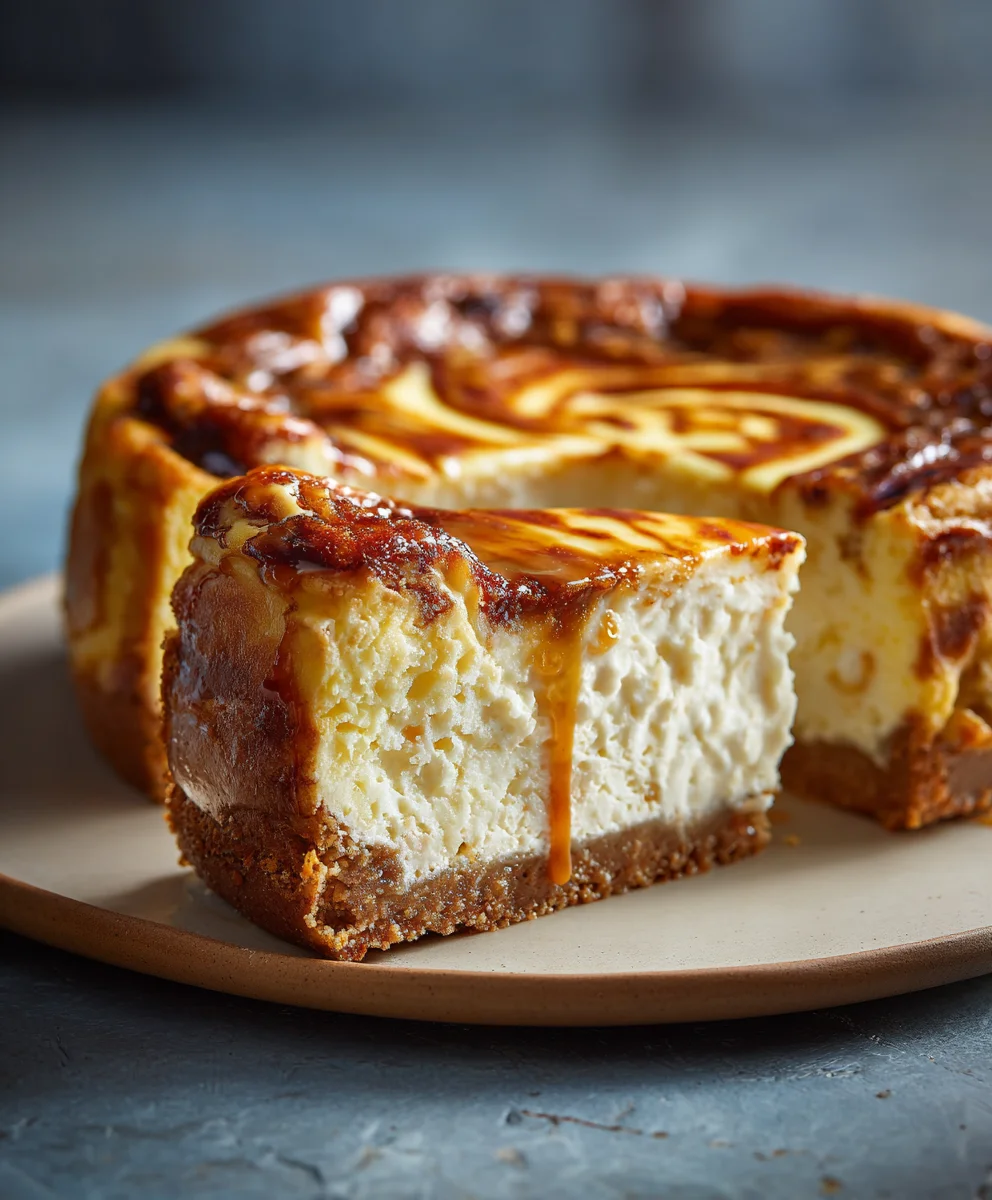
Honey Bun Cheesecake – that name alone conjures images of a dessert that blurs the lines between breakfast indulgence and sophisticated sweet treat, doesn’t it? I’m absolutely thrilled to share with you a recipe that promises to elevate your dessert game and ignite a spark of nostalgic delight in every single bite. Imagine the comforting, cinnamon-kissed swirls of your favorite honey bun, perfectly fused with the velvety richness of a classic cheesecake. This isn’t just a dessert; it’s a culinary journey that celebrates the humble honey bun, transforming it into something truly extraordinary and elegant enough for any special occasion.
While the honey bun itself holds a special place in American comfort food culture, particularly as a grab-and-go delight, this particular Honey Bun Cheesecake takes that familiar flavor profile and wraps it in an utterly luxurious package. People adore this dish because it delivers an unexpected harmony of textures and flavors: the tender, spiced crumb of the crust, the smooth, tangy cream cheese filling, and the unmistakable sticky-sweet honey glaze that makes a honey bun so irresistible. It’s the perfect combination for anyone seeking a dessert that is both familiar and excitingly new, offering a unique blend of warmth, spice, and creamy indulgence that will undoubtedly become a new favorite in your recipe collection.

Ingredients:
-
For the Honey Bun Crust:
- 2 cups (approximately 250g) all-purpose flour
- 1/2 cup (100g) granulated sugar
- 1 teaspoon ground cinnamon
- 1/2 teaspoon ground nutmeg
- 1/4 teaspoon salt
- 1 cup (226g) unsalted butter, very cold and cut into small cubes
- 4-6 tablespoons ice water
-
For the Creamy Cheesecake Filling:
- 4 (8-ounce) packages full-fat cream cheese, softened to room temperature
- 1 1/2 cups (300g) granulated sugar
- 1/4 cup (50g) packed light brown sugar
- 1/4 cup (60ml) sour cream, room temperature
- 2 tablespoons all-purpose flour
- 1 tablespoon pure vanilla extract
- 1/2 teaspoon ground cinnamon
- 1/4 teaspoon ground nutmeg
- Pinch of salt
- 4 large eggs, room temperature
- 1 large egg yolk, room temperature
-
For the Signature Honey Glaze:
- 1/2 cup (113g) unsalted butter
- 1/4 cup (60ml) honey, high quality for best flavor
- 1/4 cup (60ml) heavy cream
- 1 teaspoon vanilla extract
- 2 cups (240g) powdered sugar, sifted
- 1/2 teaspoon ground cinnamon
- Pinch of salt
-
Optional Garnish:
- Toasted chopped pecans or walnuts
- Extra cinnamon for dusting
- Fresh berries (strawberries or raspberries)
Equipment You’ll Need:
- 9-inch springform pan
- Large mixing bowls
- Electric stand mixer with paddle attachment, or a hand mixer
- Food processor (optional, for the crust)
- Measuring cups and spoons
- Rubber spatula
- Aluminum foil (heavy-duty)
- Large roasting pan or baking dish (for water bath)
- Wire cooling rack
- Small saucepan
- Whisk
- Sifter (for powdered sugar)
Preparing the Honey Bun Crust:
Creating the perfect foundation for your Honey Bun Cheesecake starts with a tender, flavorful crust that echoes the deliciousness of a classic honey bun. This isn’t just any crust; it’s designed to complement the rich filling beautifully.
- Preheat your oven to 375°F (190°C). Lightly grease a 9-inch springform pan.
- In a large mixing bowl, whisk together the all-purpose flour, granulated sugar, ground cinnamon, ground nutmeg, and salt. Make sure these dry ingredients are thoroughly combined. This aromatic blend is key to the “honey bun” flavor profile in the crust.
- Add the very cold, cubed unsalted butter to the dry ingredients. You can do this in a food processor by pulsing until the mixture resembles coarse crumbs with some pea-sized pieces remaining, or by hand using a pastry blender or your fingertips. If using your hands, work quickly to avoid melting the butter. The goal is to incorporate the butter without overworking the dough, which would make the crust tough.
- Gradually add the ice water, one tablespoon at a time, mixing gently after each addition, until the dough just comes together. Be careful not to add too much water; you want the dough to be moist enough to hold together but not sticky. The cold water helps keep the butter solid, ensuring a flaky crust.
- Press the dough evenly into the bottom and about 1 1/2 inches up the sides of the prepared springform pan. Use the bottom of a flat glass or your fingers to create a compact, even layer. It’s important to press firmly to prevent crumbling once baked.
- Bake the crust for 12-15 minutes, or until it’s lightly golden brown and fragrant. This pre-baking (or blind baking) step is crucial to prevent a soggy crust and ensures it holds up to the moist cheesecake filling.
- Once baked, remove the crust from the oven and let it cool completely on a wire rack while you prepare the cheesecake filling. Reduce the oven temperature to 325°F (160°C) for the cheesecake.
Crafting the Velvety Cheesecake Filling:
This is where the magic happens for your Honey Bun Cheesecake! Achieving that signature creamy, smooth texture requires careful attention to detail and room temperature ingredients. Patience is a virtue here, leading to an incomparably smooth and luscious dessert.
- Ensure all your cream cheese, sour cream, and eggs are at room temperature. This is arguably the most important tip for a lump-free, silky smooth cheesecake filling. Cold ingredients don’t emulsify well, leading to a lumpy texture.
- In the bowl of an electric stand mixer fitted with the paddle attachment (or using a large bowl with a hand mixer), beat the softened cream cheese on medium-low speed for about 2-3 minutes, until it’s completely smooth and creamy with no lumps. Scrape down the sides of the bowl frequently.
- Gradually add the granulated sugar and light brown sugar to the cream cheese, continuing to beat on medium-low speed. Mix for another 2-3 minutes, until the sugars are fully incorporated and the mixture is light and fluffy. The brown sugar adds a subtle depth of flavor reminiscent of the honey bun’s caramelized notes.
- Stir in the room temperature sour cream, all-purpose flour, pure vanilla extract, ground cinnamon, ground nutmeg, and a pinch of salt. Mix on low speed just until combined. The flour acts as a stabilizer, helping to prevent cracks, while the sour cream adds a delightful tang and moisture.
- Add the large eggs and the additional egg yolk one at a time, mixing on very low speed just until each egg is incorporated. It’s crucial not to overmix at this stage once the eggs are added. Overmixing can incorporate too much air into the batter, which can cause the cheesecake to puff up and then crack as it cools. Scrape down the bowl after each egg addition.
- Prepare a water bath for baking. Wrap the bottom and sides of your cooled springform pan tightly with several layers of heavy-duty aluminum foil. Ensure there are no gaps for water to seep in. This water bath provides a moist, even baking environment, preventing cracks and ensuring a creamy texture for your Honey Bun Cheesecake.
- Pour the smooth cheesecake batter into the cooled, foil-wrapped crust. Gently tap the pan on the counter a few times to release any trapped air bubbles.
- Carefully place the foil-wrapped springform pan into a large roasting pan or baking dish. Fill the roasting pan with about 1 inch of hot water, making sure the water comes at least halfway up the sides of the springform pan, but not so high that it can spill into the cheesecake.
- Carefully transfer the roasting pan with the cheesecake to the preheated 325°F (160°C) oven.
- Bake for 60-80 minutes, or until the edges are set and lightly golden, but the center still has a slight jiggle (about 2-3 inches in diameter). This slight jiggle is your indicator that it’s perfectly cooked; it will continue to set as it cools.
- Once baked, turn off the oven, prop the oven door open slightly, and leave the cheesecake in the water bath inside the oven for 1 hour. This slow cooling process is vital for preventing cracks, allowing your magnificent Honey Bun Cheesecake to set gracefully and retain its creamy interior.
- After 1 hour, carefully remove the cheesecake from the oven and the water bath. Remove the foil. Let it cool completely on a wire rack at room temperature for another 2-3 hours.
- Once at room temperature, cover the cheesecake with plastic wrap and refrigerate for at least 8 hours, or preferably overnight. Chilling is essential for the cheesecake to fully set and for the flavors to meld beautifully. Do not rush this step; it’s critical for the structural integrity and taste of your Honey Bun Cheesecake.
Whipping Up the Signature Honey Glaze:
The honey glaze is the crowning glory of your Honey Bun Cheesecake, providing that unmistakable sticky, sweet, and spiced flavor that truly defines a honey bun. This glaze ties all the elements together into a cohesive, delicious experience.
- In a small saucepan, combine the unsalted butter, honey, and heavy cream. Heat over medium-low heat, stirring occasionally, until the butter is melted and the mixture is smooth and warm. Do not let it boil vigorously; a gentle simmer is fine.
- Remove the saucepan from the heat. Stir in the vanilla extract, ground cinnamon, and a pinch of salt.
- In a separate bowl, sift the powdered sugar to remove any lumps. This step is important for a smooth glaze.
- Gradually whisk the sifted powdered sugar into the warm butter-honey mixture until it’s completely smooth and free of lumps. The consistency should be pourable but thick enough to coat the back of a spoon. If it’s too thick, add a tiny bit more heavy cream (1/2 teaspoon at a time). If it’s too thin, sift in a little more powdered sugar.
- Keep the glaze warm, or reheat gently if it cools too much, for easy pouring and spreading over the chilled cheesecake.
Assembling and Finishing Your Honey Bun Cheesecake:
The final steps bring together all your hard work, transforming individual components into the stunning and delectable Honey Bun Cheesecake you’ve been dreaming of. This is where the visual appeal truly comes to life.
- Once the cheesecake is thoroughly chilled (at least 8 hours or overnight), carefully run a thin knife around the edge of the springform pan before releasing and removing the sides. This helps prevent the cheesecake from sticking and tearing.
- Transfer the chilled cheesecake to a serving platter.
- Pour the warm honey glaze evenly over the top of the cheesecake. Start in the center and allow it to slowly spread towards the edges, creating an irresistible, glossy finish. If you desire a slightly drippy edge, guide some of the glaze over the sides with a spoon.
- If using, sprinkle the toasted chopped pecans or walnuts over the top of the glaze while it’s still wet, ensuring they adhere. A light dusting of extra cinnamon can also enhance the “honey bun” aesthetic.
- Allow the glaze to set slightly at room temperature for about 15-30 minutes, or return the cheesecake to the refrigerator for a quicker set if desired.
- Slice with a sharp knife, wiping the blade clean between each cut for the cleanest slices. Serve your magnificent Honey Bun Cheesecake chilled.
Chef’s Notes & Tips for the Perfect Honey Bun Cheesecake:
Achieving a show-stopping Honey Bun Cheesecake is all about understanding the nuances of baking. Here are some extra pointers to ensure your success and elevate your creation:
-
Room Temperature Ingredients are Non-Negotiable:
This cannot be stressed enough for cheesecake. Cold cream cheese or eggs will lead to a lumpy batter and an inferior texture. Plan ahead and take them out of the fridge at least 1-2 hours before you start mixing. They should be pliable and soft to the touch.
-
Avoid Overmixing the Batter:
Especially once you add the eggs. Overmixing introduces too much air, which causes the cheesecake to rise rapidly in the oven and then fall dramatically, often resulting in unsightly cracks. Mix just until combined for a dense, creamy texture.
-
The Importance of the Water Bath:
The water bath creates a humid environment in your oven, ensuring gentle, even baking. This prevents the edges from baking faster and drying out before the center is cooked, which is a primary cause of cracking. It’s essential for that velvety smooth texture. Make sure your foil wrap around the springform pan is completely watertight!
-
Don’t Rush the Cooling Process:
The gradual cooling in the oven, followed by room temperature cooling, and then refrigeration, is as important as the baking itself. Sudden temperature changes are a cheesecake’s worst enemy and will almost guarantee cracks. This slow cooling allows the cheesecake to set uniformly and prevents the internal structure from collapsing.
-
Checking for Doneness:
A properly baked cheesecake will have set edges (about 1-2 inches from the pan) but a slight wobble in the very center. It shouldn’t be liquid, but a gentle jiggle indicates it’s done. It will continue to cook slightly from residual heat as it cools.
-
Preventing Cracks:
Beyond proper cooling and avoiding overmixing, sometimes cracks still happen. Don’t fret! The honey glaze will beautifully mask any imperfections, making them part of the rustic charm of your Honey Bun Cheesecake.
-
Storage:
This Honey Bun Cheesecake stores beautifully. Cover any leftovers tightly with plastic wrap and refrigerate for up to 5-7 days. It can also be frozen for longer storage; wrap individual slices or the whole cheesecake (after the glaze has set) tightly in plastic wrap and then foil. Thaw in the refrigerator overnight before serving.
-
Experiment with Spices:
While cinnamon and nutmeg are traditional for a honey bun, you could add a tiny pinch of cardamom or allspice to the crust or filling for an even more complex spice profile.
-
Serving Suggestion:
A warm slice of this Honey Bun Cheesecake is divine on its own, but a scoop of vanilla bean ice cream or a dollop of fresh whipped cream would also be an incredible accompaniment.
-
High-Quality Honey:
Since “honey bun” is in the name, using a good quality honey for your glaze will really make a difference. Different types of honey have distinct flavor notes that can subtly enhance the overall taste.
Conclusion:
And there you have it, my friends! We’ve journeyed through the delightful process of creating what I truly believe is one of the most uniquely satisfying desserts you’ll ever encounter. This isn’t just another cheesecake recipe; it’s an experience, a symphony of textures and flavors that will undoubtedly earn you rave reviews from anyone lucky enough to try a slice. If you’ve been searching for that perfect dessert that combines the nostalgic comfort of a classic breakfast pastry with the elegant creaminess of a gourmet cheesecake, your quest ends here. I can personally attest that the moment you take that first bite, with its soft, cinnamony crust giving way to a rich, velvety filling, all topped with that iconic glaze, you’ll understand exactly why this recipe has become such a beloved staple in my own kitchen.
I genuinely encourage you to make this wonderful dessert. It truly is a must-try for so many reasons. For starters, it’s an incredible conversation starter. Imagine serving this at your next gathering – the intrigued looks, the initial hesitation, and then the pure delight as people discover just how perfectly the distinct flavors meld together. It’s also surprisingly manageable to create, despite its impressive appearance. Don’t be intimidated by the layers; each step is straightforward, leading you to a dessert that looks like it came straight from a high-end bakery. This Honey Bun Cheesecake isn’t just a dessert; it’s a statement piece, a culinary adventure that promises to elevate any meal or occasion. It offers that perfect balance of sweetness without being cloying, and the gentle spice notes from the cinnamon truly make it an all-season treat, equally at home on a summer picnic table as it is on a festive holiday spread.
When it comes to serving, this magnificent creation truly shines on its own. A simple dusting of powdered sugar or a fresh berry garnish is all it needs to look absolutely stunning. However, if you’re looking to elevate the experience even further, I have a few suggestions for you. Imagine a warm slice alongside a scoop of vanilla bean ice cream, allowing the cold creaminess to perfectly contrast with the rich cheesecake. For coffee lovers, a strong espresso or a creamy latte makes for an ideal companion, cutting through the sweetness and enhancing the dessert’s complex flavors. During the cooler months, consider pairing it with a hot cup of spiced apple cider or a robust black tea. The versatility of this Honey Bun Cheesecake allows it to adapt beautifully to almost any pairing, making it perfect for any time of year.
But the fun doesn’t stop there! This recipe is also wonderfully adaptable, allowing you to put your own unique spin on it. Feel free to experiment with the spices in the crust; a pinch of nutmeg or a dash of cardamom could add an interesting twist. If you’re a fan of nuts, a sprinkle of toasted pecans or walnuts over the glaze before it sets would provide a delightful crunch and an extra layer of flavor. For a truly decadent experience, you could even drizzle a little caramel sauce over each slice just before serving. Or, if you prefer a less intense sweetness, a citrus zest in the filling – perhaps orange or lemon – could offer a bright counterpoint. The possibilities are truly endless, so don’t hesitate to get creative and make this recipe truly yours. Remember, cooking is an art, and this recipe provides a fantastic canvas for your culinary imagination.
So, what are you waiting for? I wholeheartedly encourage you to roll up your sleeves, gather your ingredients, and embark on the delicious journey of creating this incredible dessert. I promise you, the smiles and satisfied sighs from your family and friends will be all the reward you need. Once you’ve made it, I would absolutely love to hear about your experience! Did you stick to the original, or did you try one of my variations? Perhaps you invented a new one? Please, don’t keep your culinary triumphs to yourself! Come back and share your photos, your tips, and your honest feedback in the comments section below. Your insights not only make this community richer but also inspire others to try their hand at this truly special recipe. Let’s spread the joy of this Honey Bun Cheesecake far and wide!
FAQs: People Also Ask
What is a Honey Bun Cheesecake?
A Honey Bun Cheesecake is a delightful dessert fusion that combines the classic, sweet, and cinnamon-swirled flavors of a honey bun pastry with the rich, creamy texture of a traditional cheesecake. It typically features a crust made from crushed honey buns or a similar cinnamon-sugar mixture, a velvety cheesecake filling, and is often topped with a sweet glaze reminiscent of a honey bun’s icing.
Is Honey Bun Cheesecake difficult to make?
Not at all! While it might look impressive, the process is quite straightforward. If you’ve made a basic cheesecake before, you’ll find this recipe very approachable. The key steps involve preparing the crust, mixing the filling, baking slowly in a water bath to prevent cracks, and then applying the glaze. Each step is manageable, even for novice bakers.
Can I make Honey Bun Cheesecake ahead of time?
Absolutely! Cheesecake is an excellent make-ahead dessert. In fact, it often tastes even better the next day after the flavors have had a chance to fully meld in the refrigerator. You can prepare the entire cheesecake, including the glaze, up to 2-3 days in advance. Just be sure to store it properly covered in the refrigerator.
What are some variations for this cheesecake?
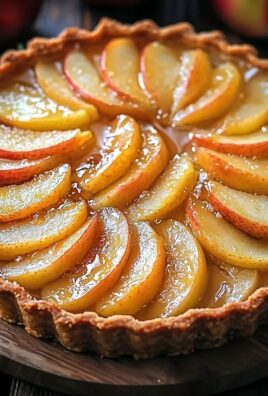
There are many ways to customize your Honey Bun Cheesecake! You could add a layer of cooked apples or peaches to the bottom of the crust for a fruity twist. For extra texture, sprinkle toasted pecans or walnuts over the glaze. Some enjoy a touch of bourbon or rum in the glaze or the filling for a deeper flavor profile. You can also play with the spices in the crust or filling, adding a pinch of nutmeg or allspice.
How do I prevent my cheesecake from cracking?
The most effective way to prevent cracks is to bake your cheesecake in a water bath (bain-marie). This creates a moist, even heat environment. Additionally, avoid overbaking (the center should still be slightly jiggly when done), and allow the cheesecake to cool slowly in the oven with the door ajar before transferring it to the counter and then to the refrigerator. Sudden temperature changes are often the culprit for cracks.
Best Honey Bun Cheesecake: Sweet Cinnamon Swirl Delight
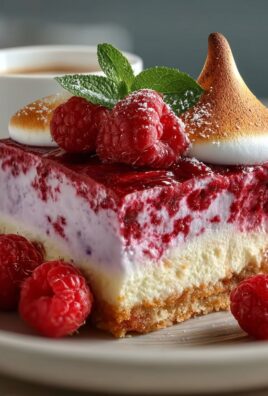
Imagine the comforting, cinnamon-kissed swirls of your favorite honey bun, perfectly fused with the velvety richness of a classic cheesecake. This Honey Bun Cheesecake takes a familiar flavor profile and wraps it in an utterly luxurious package, offering a unique blend of warmth, spice, and creamy indulgence.
Ingredients
-
Crust: 2 cups (250g) all-purpose flour, 1/2 cup (100g) granulated sugar, 1 teaspoon ground cinnamon, 1/2 teaspoon ground nutmeg, 1/4 teaspoon salt, 1 cup (226g) cold unsalted butter (cubed), 4-6 tablespoons ice water.
-
Filling: 4 (8-ounce) packages softened full-fat cream cheese, 1 1/2 cups (300g) granulated sugar, 1/4 cup (50g) packed light brown sugar, 1/4 cup (60ml) room temperature sour cream, 2 tablespoons all-purpose flour, 1 tablespoon pure vanilla extract, 1/2 teaspoon ground cinnamon, 1/4 teaspoon ground nutmeg, Pinch of salt, 4 large room temperature eggs, 1 large room temperature egg yolk.
-
Glaze: 1/2 cup (113g) unsalted butter, 1/4 cup (60ml) honey (high quality), 1/4 cup (60ml) heavy cream, 1 teaspoon vanilla extract, 2 cups (240g) sifted powdered sugar, 1/2 teaspoon ground cinnamon, Pinch of salt.
-
Optional Garnish: Toasted chopped pecans or walnuts, Extra cinnamon for dusting, Fresh berries (strawberries or raspberries).
Instructions
-
Step 1
Prepare Crust: Preheat oven to 375°F (190°C). Grease a 9-inch springform pan. Whisk flour, sugar, cinnamon, nutmeg, and salt. Cut in cold butter until coarse crumbs. Add ice water gradually until dough forms. Press dough into the bottom and 1.5 inches up the sides of the pan. Bake 12-15 minutes until golden. Cool completely. Reduce oven to 325°F (160°C). -
Step 2
Prepare Filling: Ensure all filling ingredients are at room temperature. Beat softened cream cheese until smooth (2-3 min). Gradually add granulated and brown sugar; beat until light and fluffy (2-3 min). Mix in sour cream, flour, vanilla, cinnamon, nutmeg, and salt on low speed until just combined. Add eggs and egg yolk one at a time, mixing on very low speed until just incorporated. Do not overmix. -
Step 3
Bake Cheesecake (Water Bath): Wrap the cooled springform pan tightly with several layers of heavy-duty foil. Pour filling into the crust. Place foil-wrapped pan into a large roasting pan. Add 1 inch of hot water to the roasting pan. Bake at 325°F (160°C) for 60-80 minutes, until edges are set and center jiggles slightly. -
Step 4
Cool Cheesecake: Turn off oven, prop door open, and leave cheesecake in water bath for 1 hour. Remove from oven/water bath, remove foil. Cool completely on a wire rack at room temperature (2-3 hours). Cover and refrigerate for at least 8 hours or overnight. -
Step 5
Prepare Glaze: In a small saucepan, combine butter, honey, and heavy cream. Heat over medium-low heat until butter melts and mixture is smooth/warm. Remove from heat. Stir in vanilla, cinnamon, and salt. Whisk in sifted powdered sugar gradually until smooth and pourable. Keep warm. -
Step 6
Assemble & Serve: Once cheesecake is thoroughly chilled, run a thin knife around the edge of the pan before releasing. Transfer to a serving platter. Pour warm glaze evenly over the top. If desired, sprinkle with toasted nuts or extra cinnamon. Allow glaze to set (15-30 min) or briefly chill. Slice and serve chilled.
Important Information
Nutrition Facts (Per Serving)
It is important to consider this information as approximate and not to use it as definitive health advice.
Allergy Information
Please check ingredients for potential allergens and consult a health professional if in doubt.
Leave a Comment