
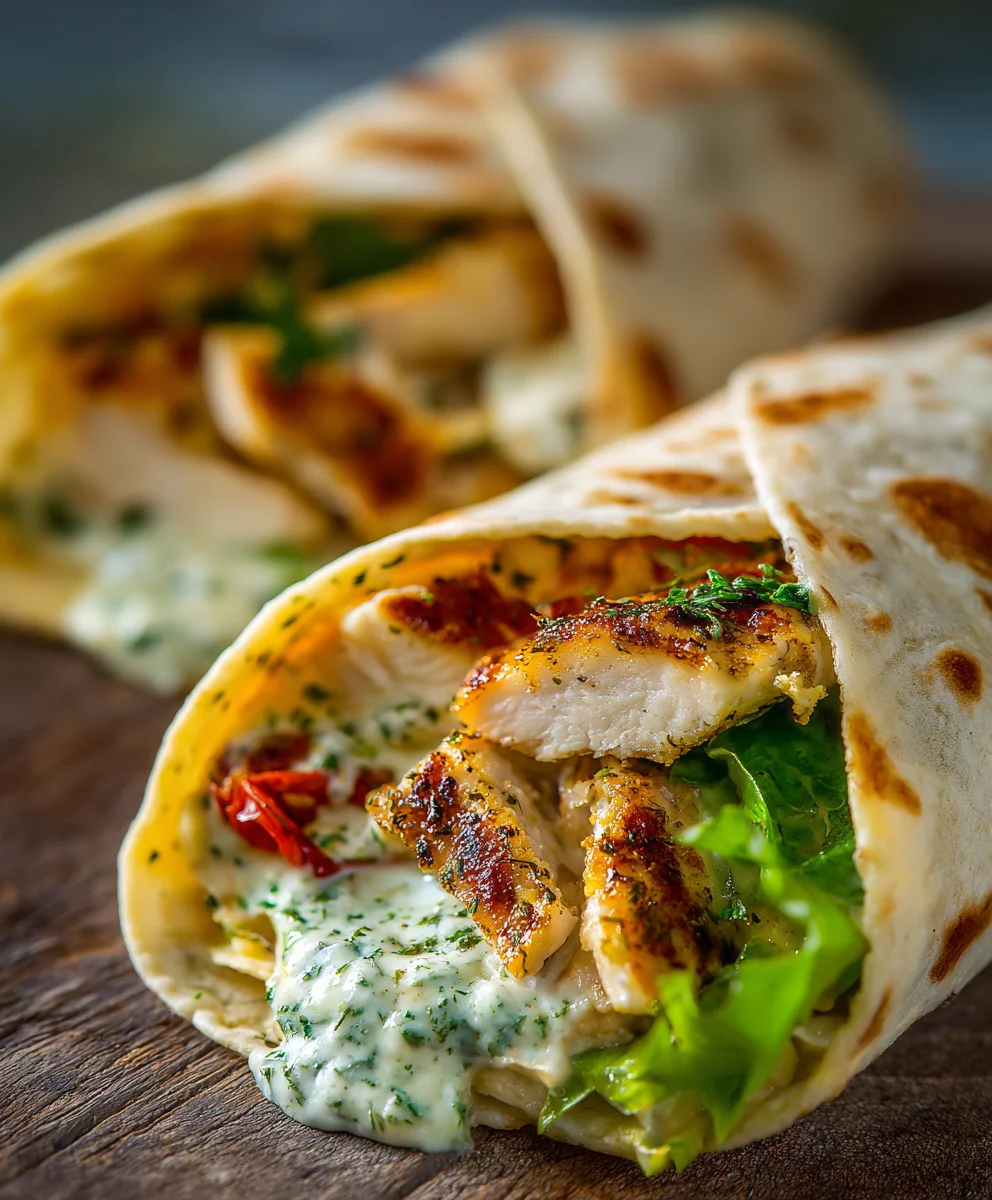
Cheesy Garlic Chicken Wraps are more than just a simple meal; they are a culinary revelation, a harmonious blend of flavors and textures that promises to transform your weeknight dinner routine into an exciting culinary adventure. I have always believed that the best dishes are those that bring comfort and joy, and this recipe certainly delivers on both fronts.
A Modern Classic: Why These Wraps Capture Hearts
While this particular dish might not boast centuries of history, it beautifully embodies the spirit of modern comfort food, drawing inspiration from global street food and the universal appeal of savory, hand-held delights. It’s a testament to how simple, beloved ingredients can come together to create something truly extraordinary. I’ve found that people absolutely adore this dish for its irresistible combination of succulent, garlicky chicken, generously melted cheese, and fresh, crisp additions, all perfectly nestled within a soft tortilla. The convenience factor is undeniable – quick to prepare, incredibly easy to eat on the go, and immensely satisfying. The rich, savory taste, coupled with the delightful textures, makes every single bite a pure pleasure. These Cheesy Garlic Chicken Wraps are designed to offer maximum flavor with minimal fuss, making them an instant staple in any busy kitchen.

Ingredients:
- For the Chicken:
- 1.5 lbs boneless, skinless chicken breasts or thighs (I often prefer thighs for extra juiciness!)
- 2 tablespoons olive oil
- 1 teaspoon garlic powder
- 1 teaspoon onion powder
- ½ teaspoon smoked paprika
- ½ teaspoon dried oregano
- ¼ teaspoon cayenne pepper (optional, for a little kick!)
- Salt and freshly ground black pepper to taste
- For the Creamy Cheesy Garlic Sauce:
- 4 tablespoons unsalted butter
- 6-8 cloves garlic, minced (and yes, I mean a generous amount – this is cheesy garlic chicken, after all!)
- 3 tablespoons all-purpose flour
- 2 cups whole milk, warmed (or a mix of milk and half-and-half for extra richness)
- ½ cup chicken broth
- 4 ounces cream cheese, softened and cut into cubes
- 1.5 cups shredded cheese blend (I love a mix of Monterey Jack, sharp cheddar, and a touch of mozzarella for the ultimate melt)
- ½ teaspoon salt, or to taste
- ¼ teaspoon white pepper, or to taste (white pepper provides a milder flavor without visible flecks)
- 2 tablespoons fresh parsley, chopped, for garnish and flavor (optional, but highly recommended!)
- For the Wraps and Fillings:
- 8 large flour tortillas (burrito size, about 10-12 inches)
- 2 cups shredded lettuce (Romaine or iceberg works wonderfully for a crisp bite)
- 1 large tomato, diced
- ½ red onion, thinly sliced (you can quickly pickle it for a few minutes in vinegar and a pinch of sugar if you like less sharp onion flavor)
- Optional: Sliced black olives, jalapeño slices, or corn for extra variety
- Equipment: Large skillet, whisk, cutting board, sharp knife.
Prepping the Chicken for Your Cheesy Garlic Chicken Wraps
- Prepare the Chicken: First things first, let’s get that chicken ready. Pat your boneless, skinless chicken breasts or thighs completely dry with paper towels. This crucial step helps them brown beautifully and absorb all those amazing flavors. Once dry, place them on a clean cutting board. Depending on your preference for the Cheesy Garlic Chicken Wraps, you can either slice them into thin cutlets (about ½-inch thick) for quicker cooking and easier shredding later, or leave them whole if you prefer to dice them into cubes after cooking. I usually go for the cutlet method as it ensures maximum surface area for seasoning and a really tender result.
- Season the Chicken: In a small bowl, whisk together the olive oil, garlic powder, onion powder, smoked paprika, dried oregano, and cayenne pepper (if you’re using it). This blend is fantastic for creating a flavorful base that complements our rich sauce perfectly. Generously season both sides of your chicken pieces with salt and freshly ground black pepper. Then, brush or rub the seasoned oil mixture all over the chicken, ensuring every piece is well coated. You can let the chicken marinate for at least 15-20 minutes at room temperature, or even better, cover it and refrigerate for up to an hour to allow those flavors to really sink in. This step is key to making truly delicious Cheesy Garlic Chicken Wraps.
- Cook the Chicken: Heat a large skillet over medium-high heat. Once hot, add the seasoned chicken in a single layer, being careful not to overcrowd the pan. If necessary, cook the chicken in batches. Cook for about 4-6 minutes per side, depending on the thickness, until it’s golden brown, cooked through, and reaches an internal temperature of 165°F (74°C). The beautiful sear we’re aiming for here doesn’t just look good; it locks in moisture and develops a wonderful depth of flavor that will shine in your Cheesy Garlic Chicken Wraps.
- Rest and Shred/Dice: Once cooked, transfer the chicken to a clean plate or cutting board and let it rest for at least 5-10 minutes. Don’t skip this resting step! It allows the juices to redistribute, resulting in much more tender and flavorful chicken. After resting, you can either shred the chicken using two forks (my personal favorite method for wraps as it creates a lovely texture) or dice it into bite-sized cubes. Set the prepared chicken aside.
Crafting the Creamy Cheesy Garlic Sauce
- Sauté the Garlic: In the same skillet (no need to clean it, those chicken bits add extra flavor!), melt the 4 tablespoons of unsalted butter over medium heat. Once the butter is melted and slightly foaming, add your generous amount of minced garlic. Sauté the garlic for about 1-2 minutes until it becomes fragrant and lightly golden. Be careful not to burn the garlic, as burnt garlic can taste bitter and will impact the overall deliciousness of your Cheesy Garlic Chicken Wraps. We’re aiming for aromatic, not acrid!
- Make the Roux: Sprinkle the 3 tablespoons of all-purpose flour over the sautéed garlic and butter. Whisk constantly for 1-2 minutes to create a smooth paste, known as a roux. This flour and butter mixture is the foundation for thickening our sauce, ensuring it’s beautifully creamy and not watery. Cooking the flour slightly also helps to cook out any raw flour taste, which is essential for a velvety smooth sauce.
- Whisk in Liquids: Gradually, while continuously whisking, pour in the warm whole milk (or milk and half-and-half mixture) and the chicken broth. It’s important to add the liquids slowly and keep whisking to prevent lumps from forming. The warmth of the milk also helps to achieve a smoother consistency faster. Increase the heat slightly to medium-high and bring the mixture to a gentle simmer, whisking frequently. As it simmers, the sauce will begin to thicken.
-
Incorporate the Cheeses: Once the sauce has thickened to your desired consistency (it should be able to coat the back of a spoon), reduce the heat to low. Add the softened cream cheese cubes and stir until they are completely melted and smoothly incorporated into the sauce. Then, gradually add your shredded cheese blend, a handful at a time, stirring constantly until each addition is fully melted and smooth before adding more.
The Secret to Perfectly Melted Cheese
Adding cheese slowly over low heat prevents it from clumping or becoming oily. This step is where the magic happens, transforming a simple béchamel into an incredibly rich and decadent cheesy garlic sauce that is the heart and soul of these Cheesy Garlic Chicken Wraps.
- Season the Sauce: Season the creamy cheesy garlic sauce with ½ teaspoon of salt and ¼ teaspoon of white pepper, or adjust to your personal taste. Taste and adjust as needed. You want it to be flavorful but not overly salty, as the cheese itself contributes some salinity. If you like, stir in the fresh chopped parsley now for an extra pop of color and herbaceous flavor. Keep the sauce warm over very low heat, stirring occasionally, while you prepare the remaining components. If it gets too thick, you can thin it out with a splash of warm milk or broth. This sauce is so good, you might just want to eat it with a spoon!
Gathering Your Fresh Fillings and Components
- Prepare the Vegetables: While your chicken is resting and your incredible cheesy garlic sauce is simmering, it’s the perfect time to get your fresh fillings ready. Wash and thoroughly dry your lettuce, then shred it into thin strips. Dice your tomato into small, uniform pieces. For the red onion, thinly slice it into delicate rings or half-moons. If you prefer a milder onion flavor, you can place the sliced red onion in a small bowl with a splash of white vinegar and a pinch of sugar for about 10 minutes, then drain. This quick pickling takes away some of the raw bite and adds a lovely tang to your Cheesy Garlic Chicken Wraps.
- Arrange Your Station: Set up an assembly line with all your prepared ingredients: the shredded chicken, the warm creamy cheesy garlic sauce, the shredded lettuce, diced tomatoes, sliced red onion, and your large flour tortillas. Having everything within arm’s reach makes the assembly process smooth and enjoyable, especially when you’re making several Cheesy Garlic Chicken Wraps!
Assembling Your Irresistible Cheesy Garlic Chicken Wraps
- Warm the Tortillas: For best results and to prevent tearing, lightly warm your flour tortillas. You can do this in a dry skillet over medium heat for about 15-20 seconds per side until they are soft and pliable, or stack them and microwave for 15-30 seconds. Warm tortillas are much easier to roll and less likely to crack, ensuring your Cheesy Garlic Chicken Wraps hold together perfectly.
- Layer the Sauce: Lay a warmed tortilla flat on your clean work surface. Spoon a generous amount of the creamy cheesy garlic sauce onto the center of the tortilla. Spread it out, leaving about a 1-inch border around the edges. Be generous here! This sauce is what makes these Cheesy Garlic Chicken Wraps truly special and provides that incredible garlicky, cheesy flavor in every bite.
- Add the Chicken: Next, spoon a portion of your delicious shredded (or diced) chicken over the sauce. Try to distribute it evenly across the sauced area. The combination of the tender chicken and the rich sauce is already a winner!
- Pile on the Veggies: Now it’s time for the fresh components! Add a layer of shredded lettuce, followed by some diced tomatoes and a few slices of red onion. If you’re using any optional fillings like black olives or jalapeños, add them now too. The freshness of the vegetables provides a wonderful textural contrast and cuts through the richness of the chicken and sauce, balancing the Cheesy Garlic Chicken Wraps beautifully.
-
Fold and Roll the Wrap: This is the tricky part, but with warm tortillas, it’s a breeze!
- First, fold in the two opposite sides of the tortilla (the left and right sides, towards the center) by about 1-2 inches. This creates a secure “pocket” to hold all your fillings.
- Then, starting from the bottom edge (the edge closest to you), tightly fold the tortilla up and over the filling.
- Continue to roll the tortilla upwards, tucking it in firmly as you go, creating a snug and compact wrap. You want it to be tight enough to hold together but not so tight that it tears.
- Once rolled, you should have a neatly contained Cheesy Garlic Chicken Wrap. Repeat this process with the remaining tortillas and fillings.
The Final Touch: Warming and Perfecting Your Wraps
- Prepare for Warming (Optional, but Recommended!): While your Cheesy Garlic Chicken Wraps are utterly delicious as is, taking a few extra minutes to warm them in a skillet or oven elevates them to another level. This step melts the cheese inside even further, slightly crisps the tortilla, and warms all the components together, enhancing the overall flavor and texture experience.
- Skillet Method (My Favorite!): Heat a clean, dry skillet (the same one you used before, or a grill pan for those lovely grill marks) over medium heat. Place one or two assembled Cheesy Garlic Chicken Wraps seam-side down in the hot skillet. Cook for 2-3 minutes per side, or until the tortilla is golden brown and slightly crispy, and the cheese inside is gooey and melted. Press down gently with a spatula to help them cook evenly and flatten slightly. This method gives you a fantastic exterior texture and a wonderfully warm interior.
- Oven Method (Good for Batches): Preheat your oven to 375°F (190°C). Place the assembled Cheesy Garlic Chicken Wraps on a baking sheet, seam-side down. Bake for 8-12 minutes, or until the tortillas are lightly toasted and the filling is thoroughly heated through and the cheese is beautifully melted. This is a great option if you’re making a larger batch for a crowd or meal prep.
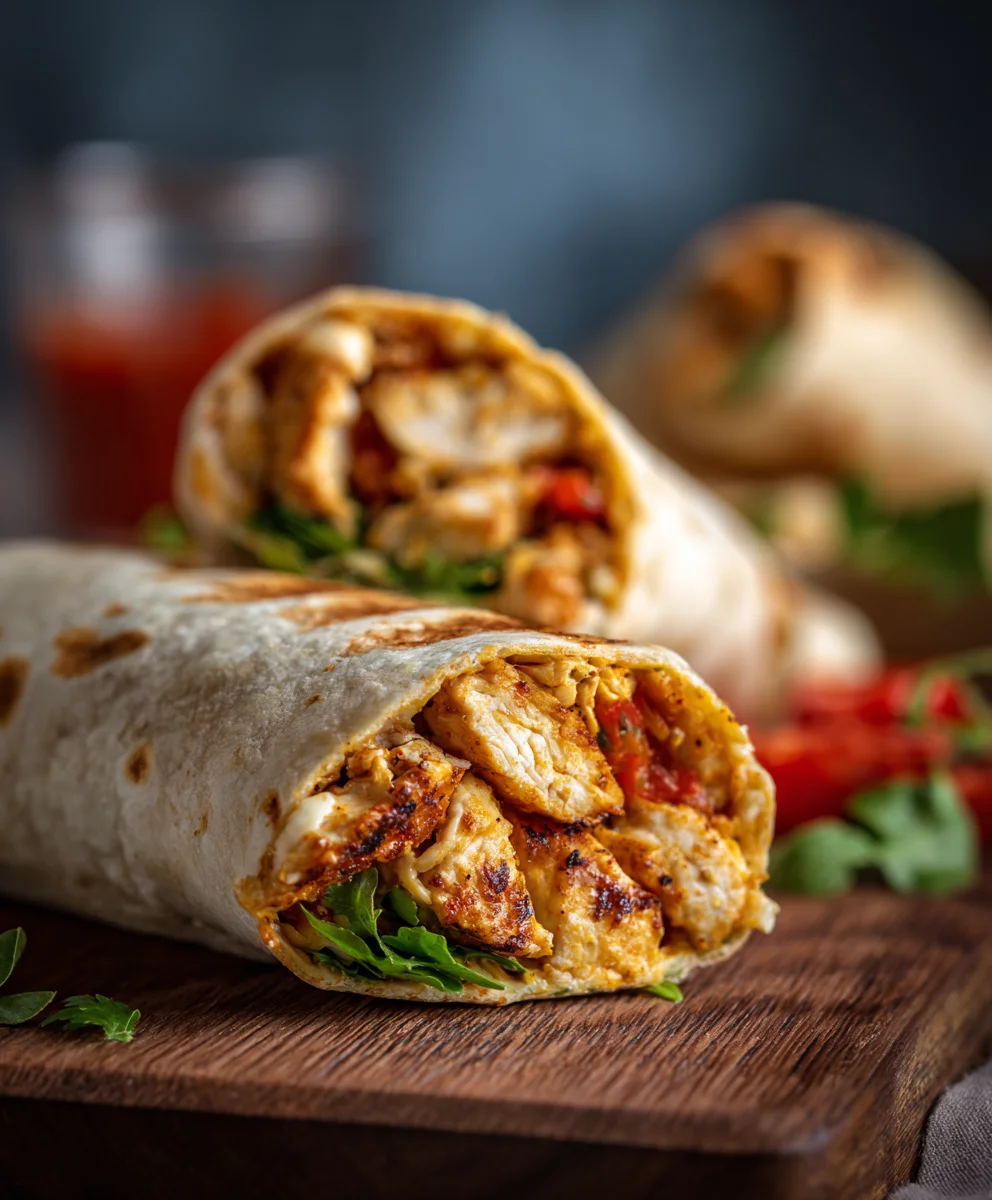
- Serve Immediately: Carefully remove the warmed Cheesy Garlic Chicken Wraps from the skillet or oven. You can slice them in half diagonally for easier handling and a lovely presentation, or serve them whole. Serve them immediately while they are warm and the cheese is at its peak gooeyness. These Cheesy Garlic Chicken Wraps are a complete meal on their own, but they also pair wonderfully with a simple green salad or some extra fresh salsa. Enjoy every delicious, garlicky, cheesy bite! This recipe is a true crowd-pleaser and I’m confident you’ll find yourself making these irresistible Cheesy Garlic Chicken Wraps again and again.
<h2>Conclusion:</h2>
<p>Well, my friends, we’ve reached the exciting culmination of our culinary journey! I truly hope you’re feeling inspired and ready to dive into your kitchen to create these absolutely fantastic <strong>Cheesy Garlic Chicken Wraps</strong>. What makes this recipe an undeniable must-try, you ask? It’s the perfect storm of convenience, flavor, and sheer satisfaction. Imagine tender, juicy chicken, infused with aromatic garlic, generously coated in a decadent layer of melted cheese, all snuggled in a warm tortilla. It’s comfort food elevated, yet incredibly simple to prepare, making it ideal for busy weeknights, a quick lunch, or even a casual gathering with friends. The alchemy of savory chicken, the pungent kick of garlic, and the rich, gooey embrace of cheese creates a symphony of flavors that will have everyone asking for seconds. I’ve found that it effortlessly transcends age groups; from picky eaters to adventurous palates, these wraps tend to disappear remarkably fast. It’s not just a meal; it’s an experience, a little moment of joy you can easily whip up for yourself and your loved ones.</p>
<h4>Serving Suggestions to Elevate Your Meal</h4>
<p>While these wraps are undeniably a star on their own, pairing them with the right accompaniments can truly complete the dining experience. For a refreshing balance, I highly recommend serving them alongside a crisp, vibrant green salad tossed with a light vinaigrette. The freshness cuts through the richness beautifully. If you’re looking for something a bit heartier, a simple tomato soup or a creamy roasted red pepper soup makes for a fantastic pairing, especially on a cooler evening. Don’t forget about the dips! A dollop of cool sour cream, a fiery salsa, or even a fresh guacamole can add an extra layer of flavor and texture that really enhances each bite. For those who love a bit of crunch, a side of perfectly seasoned sweet potato fries or a handful of tortilla chips with a zesty lime crema would be an excellent addition. Think about the overall experience you want to create: whether it’s a light, refreshing meal or a substantial, comforting feast, these wraps are wonderfully adaptable.</p>
<h4>Creative Variations to Spark Your Culinary Imagination</h4>
<p>One of the greatest joys of cooking, for me, is the freedom to experiment and personalize a recipe, and these wraps are a fantastic canvas for your creativity! Don’t feel limited to chicken; try substituting lean ground turkey, thinly sliced beef, or even a plant-based protein like seasoned black beans or crumbled tofu for a vegetarian twist. When it comes to vegetables, the sky’s the limit! Sautéed bell peppers, sweet onions, spinach, corn, or even a touch of finely diced jalapeño for a spicy kick would be incredible additions. If you’re a fan of different cheeses, feel free to experiment with Monterey Jack, pepper jack for a little heat, or a sharp cheddar for a more intense flavor. You could also transform the wraps into a baked casserole by layering the ingredients in a dish, topping with extra cheese, and baking until bubbly and golden. For a lighter, low-carb option, consider using large lettuce leaves instead of tortillas for a satisfying crunch. Another idea: turn them into quesadillas! Simply cook the wraps until golden and crispy on both sides, ensuring the cheese is perfectly melted. You can even switch up the seasonings – a dash of smoked paprika, a pinch of cumin, or a touch of oregano can completely change the flavor profile. These variations ensure that your <strong>Cheesy Garlic Chicken Wraps</strong> can be a regular, yet never boring, feature in your meal rotation.</p>
<p>So, what are you waiting for? I wholeheartedly encourage you to roll up your sleeves, gather your ingredients, and give this recipe a try this week. I promise you won’t be disappointed. There’s an incredible sense of accomplishment that comes from creating something delicious with your own hands, and I truly believe this recipe delivers on that promise. Once you’ve made these wonderful wraps, I would absolutely love to hear about your experience! Did you stick to the original recipe, or did you put your own creative spin on it? What were your favorite serving suggestions? Please feel free to share your thoughts, your successes, and even your photos in the comments section below. Your feedback and creativity inspire me and others in our cooking community. Happy cooking, and I can’t wait to hear all about your amazing <strong>Cheesy Garlic Chicken Wraps</strong>!</p>
Cheesy Garlic Beef Wraps
A quick and easy weeknight dinner featuring succulent, garlicky beef, melted cheese, and fresh additions, all perfectly nestled within a soft tortilla.
Ingredients
-
2 cups cooked beef, shredded
-
1/2 cup garlic aioli
-
1 cup cheddar cheese, shredded
-
4 large tortillas
-
Salt to taste
-
Pepper to taste
Instructions
-
Step 1
Lightly warm tortillas in a dry skillet or microwave for 15-30 seconds until soft and pliable. -
Step 2
Lay each warmed tortilla flat. Spread garlic aioli on the center, leaving a 1-inch border. Top with shredded beef and shredded cheddar cheese. Season with salt and pepper to taste. -
Step 3
Fold in the two opposite sides of the tortilla (about 1-2 inches). Starting from the bottom edge, tightly roll the tortilla upwards to create a snug wrap. -
Step 4
For best results, place assembled wraps seam-side down in a dry skillet over medium heat. Cook 2-3 minutes per side until golden and cheese is melted. Serve immediately.
Important Information
Nutrition Facts (Per Serving)
It is important to consider this information as approximate and not to use it as definitive health advice.
Allergy Information
Please check ingredients for potential allergens and consult a health professional if in doubt.
Leave a Comment