
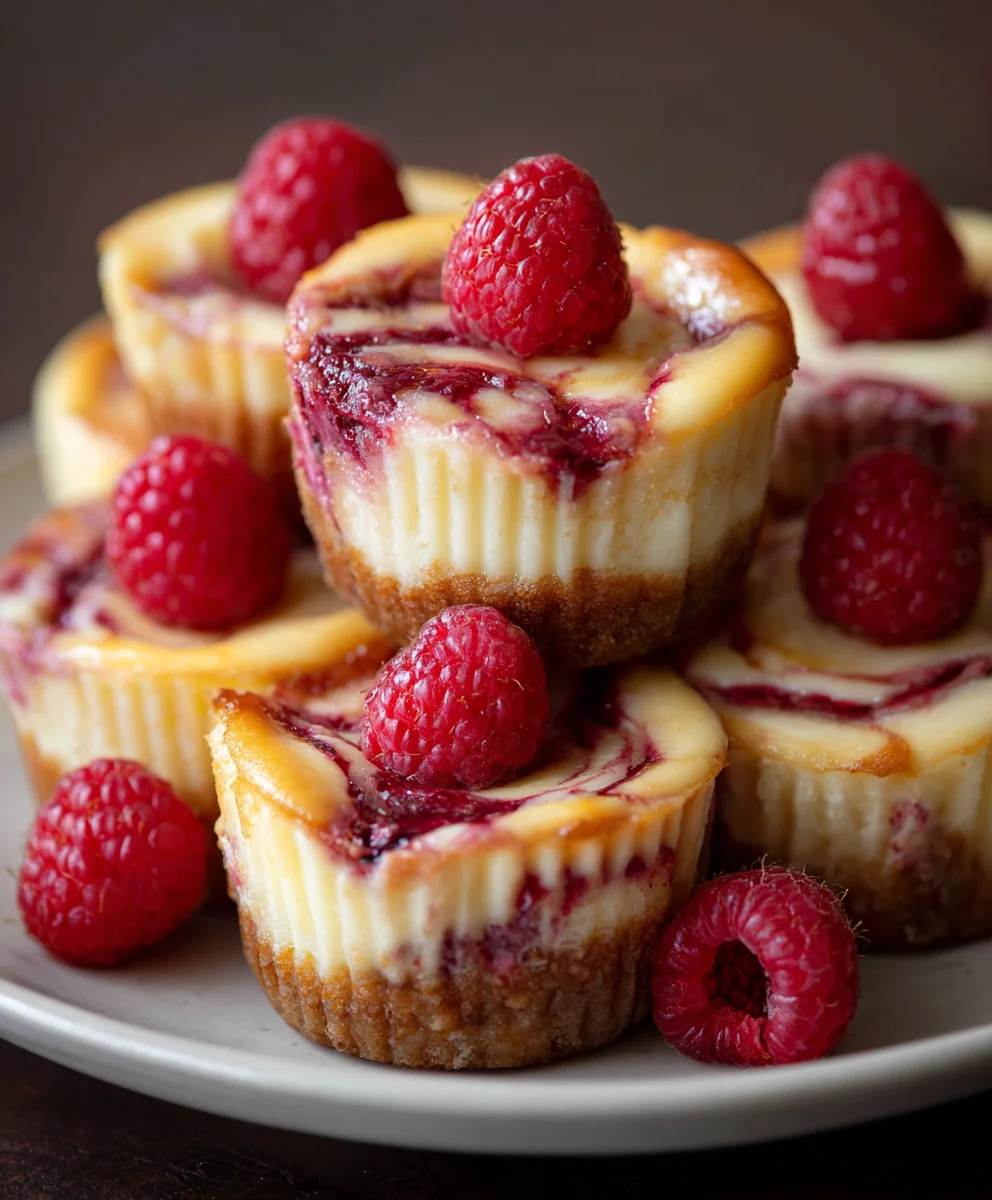
Homemade Raspberry Swirl Cheesecake Bites are not just a dessert; they are a delightful invitation to indulge in pure, creamy bliss, perfectly portioned for any occasion. I’m absolutely thrilled to share this recipe with you, as I believe these miniature marvels strike the ideal balance between elegance and irresistible flavor. While cheesecake itself boasts a rich history, evolving from ancient Greek delicacies to the iconic New York-style dessert we adore today, my take elevates this classic into a convenient, handheld delight. The addition of a vibrant raspberry swirl doesn’t just add a stunning visual appeal; it infuses each bite with a burst of tangy fruitiness that perfectly complements the rich, velvety cheesecake base.
People utterly adore this dish for so many reasons. The smooth, luxurious texture of the cheesecake, nestled atop a buttery graham cracker crust, provides a foundation of comfort. Then, the vibrant, slightly tart raspberry swirl cuts through the richness, creating a harmonious symphony of flavors that is truly addictive. They are incredibly convenient for entertaining, making them a fantastic alternative to a traditional large cheesecake, as guests can easily grab one without the fuss of slicing. Preparing these Homemade Raspberry Swirl Cheesecake Bites from scratch also brings an immense sense of satisfaction, knowing you’re crafting something truly special and memorable for your loved ones.

Ingredients:
-
For the Golden Graham Cracker Crust:
- 1 ½ cups (approximately 180g) finely crushed graham cracker crumbs – I usually go for about 12-14 full graham cracker sheets, blitzed in my food processor until they’re like fine sand. This forms the perfect sturdy base for our homemade raspberry swirl cheesecake bites.
- ¼ cup (50g) granulated sugar – Just enough to add a touch of sweetness to the crust, complementing the buttery goodness.
- 6 tablespoons (85g) unsalted butter, melted – The glue that holds our beautiful crust together, imparting a rich flavor. Make sure it’s fully melted but not scorching hot when you mix it in.
-
For the Velvety Cream Cheese Filling:
- 24 ounces (three 8-ounce packages, 680g total) full-fat cream cheese, softened to room temperature – This is non-negotiable for a smooth, lump-free cheesecake. Take it out of the fridge at least an hour or two before you plan to start.
- 1 cup (200g) granulated sugar – The primary sweetener that balances the tang of the cream cheese, ensuring a perfectly sweet bite.
- 3 large eggs, at room temperature – Eggs are crucial for structure and richness. Room temperature eggs emulsify better with the cream cheese mixture, leading to a silkier texture.
- ½ cup (120g) sour cream, at room temperature – Adds a wonderful creamy tang and helps create that signature smooth, dense texture. Don’t skip this for truly amazing homemade raspberry swirl cheesecake bites.
- 1 teaspoon pure vanilla extract – A classic flavor enhancer that deepens the overall taste profile. I always reach for the good stuff here!
- 1 teaspoon fresh lemon zest (from about 1 medium lemon) – This brightens the flavor of the cheesecake significantly, cutting through the richness and harmonizing beautifully with the raspberry swirl.
-
For the Luscious Raspberry Swirl:
- 12 ounces (about 2 cups) fresh or frozen raspberries – If using frozen, there’s no need to thaw them first; they’ll cook down just fine.
- ¼ cup (50g) granulated sugar – To sweeten the tart raspberries and create a lovely coulis.
- 1 tablespoon fresh lemon juice – Enhances the natural raspberry flavor and adds a touch of brightness to the swirl.
- 1 tablespoon cornstarch mixed with 2 tablespoons cold water (cornstarch slurry) – This is our secret weapon for thickening the raspberry mixture into a perfect, swirlable consistency without being too runny.
-
Optional Garnish:
- Fresh raspberries
- Fresh mint leaves
Preparing the Golden Graham Cracker Crust for Your Homemade Raspberry Swirl Cheesecake Bites
My journey to creating the perfect “Homemade Raspberry Swirl Cheesecake Bites” always begins with the crust. It’s the foundation, and a good foundation makes all the difference! First things first, I preheat my oven to 325°F (160°C). Then, I line a 24-cup mini muffin tin with paper liners. While not strictly necessary for removal if you have a non-stick tin and grease it well, I find the liners make these little treats incredibly easy to serve and handle, plus they look adorable.
- Combine the Dry Ingredients: In a medium-sized bowl, I combine the finely crushed graham cracker crumbs with the granulated sugar. I give it a good stir with a fork or a whisk to make sure the sugar is evenly distributed among the crumbs. You want those crumbs to be really fine, almost like sand, so they pack down nicely.
- Add the Melted Butter: Now, I pour the melted unsalted butter over the crumb mixture. Using a fork, I mix everything together until all the crumbs are moistened and resemble wet sand. It should hold together when you pinch a small amount between your fingers. If it seems too dry, you can add another teaspoon or two of melted butter, but usually, 6 tablespoons is just perfect.
- Press into Muffin Tins: Next, I evenly divide the mixture among the 24 mini muffin cups. I use about a tablespoon of crumb mixture for each cup. This is a crucial step for a sturdy crust: I firmly press the crumbs down into the bottom of each liner using the back of a small spoon, a tamper, or even my clean thumb. You want to make sure they are compact and level. A well-compacted crust won’t crumble when you bite into your finished cheesecake bite.
- Pre-bake the Crust: I pop the muffin tin into the preheated oven and bake the crusts for 5-7 minutes. This short bake time helps to set the crust, making it crispier and preventing it from becoming soggy once the cheesecake filling is added. Once baked, I remove the tin from the oven and let the crusts cool completely on a wire rack while I prepare the rest of the components. Cooling is important; we don’t want to add cold filling to a hot crust!
Crafting the Silky Smooth Cheesecake Filling for Homemade Raspberry Swirl Cheesecake Bites
Achieving that signature smooth, velvety texture in a cheesecake is all about technique, especially when making something as delicate as “Homemade Raspberry Swirl Cheesecake Bites.” This stage requires patience and attention to detail. Remember, all your cold ingredients—cream cheese, eggs, and sour cream—must be at room temperature. This is paramount for preventing lumps and ensuring a beautifully emulsified, crack-free cheesecake.
- Cream the Cream Cheese and Sugar: In the bowl of a stand mixer fitted with the paddle attachment (or using a large bowl and a hand mixer), I place the softened cream cheese. I start beating it on low speed for about 1 minute until it’s smooth and creamy. Then, I gradually add the granulated sugar, continuing to beat on low to medium-low speed for another 2-3 minutes. I make sure to scrape down the sides and bottom of the bowl frequently with a rubber spatula. We want the mixture to be light and fluffy, with no sugar granules visible. Avoid over-beating at this stage, as incorporating too much air can lead to cracks later.
- Incorporate the Eggs: This is where patience truly pays off. I add the eggs one at a time, beating on very low speed just until each egg is incorporated. After adding an egg, I mix for only about 20-30 seconds, then scrape down the bowl thoroughly before adding the next. The goal here is to combine, not to whip. Adding them one by one ensures proper emulsification and minimizes the amount of air introduced into the batter, which is key to preventing those dreaded cracks in our finished “Homemade Raspberry Swirl Cheesecake Bites.”
- Add Sour Cream, Vanilla, and Lemon Zest: Finally, I add the room temperature sour cream, pure vanilla extract, and fresh lemon zest to the mixture. I beat on the lowest speed possible, or even just fold it in gently with my spatula, until everything is just combined and no streaks remain. Again, avoid overmixing. The batter should be smooth, thick, and consistent. I give the bowl one last thorough scrape to ensure everything is perfectly blended.
Creating the Vibrant Raspberry Swirl for Homemade Raspberry Swirl Cheesecake Bites
The raspberry swirl is not just for visual appeal; it introduces a delightful tartness and fruity brightness that perfectly complements the rich creaminess of the cheesecake. This component is what makes these truly “Homemade Raspberry Swirl Cheesecake Bites.”
- Cook the Raspberries: In a small saucepan, I combine the fresh or frozen raspberries, granulated sugar, and fresh lemon juice. I cook this mixture over medium heat, stirring occasionally, until the raspberries break down and the sugar dissolves, which usually takes about 5-7 minutes. As they cook, the mixture will become quite jammy and fragrant.
- Mash and Strain: Once the raspberries are soft and have released their juices, I remove the saucepan from the heat. I use a fork or a potato masher to mash the raspberries thoroughly. For a perfectly smooth coulis, I then press the mixture through a fine-mesh sieve set over a clean bowl, using the back of a spoon to extract as much liquid and pulp as possible, leaving behind the seeds and any remaining solids. This step is essential for that luxurious, seed-free swirl.
- Thicken the Coulis: I return the strained raspberry purée back to the clean saucepan. I bring it to a gentle simmer over low heat. Then, I give my cornstarch slurry (1 tablespoon cornstarch mixed with 2 tablespoons cold water) a quick stir and slowly whisk it into the simmering raspberry purée. I continue to cook and whisk for another 1-2 minutes, until the mixture thickens to a consistency similar to thin jam or warm honey. It should coat the back of a spoon.
- Cool the Raspberry Coulis: Once thickened, I remove the saucepan from the heat and transfer the raspberry coulis to a small bowl. It’s absolutely critical to let the coulis cool completely to room temperature, or even slightly chilled, before attempting to swirl it into the cheesecake batter. If it’s warm, it will melt into the cheesecake batter rather than creating distinct swirls. I usually prepare this first and let it cool while I make the cheesecake filling, or even pop it in the fridge for a quick chill.
Assembling Your Raspberry Swirl Cheesecake Bites
Now comes the fun part – assembling our “Homemade Raspberry Swirl Cheesecake Bites” and giving them their signature artistic flair! This is where the magic truly starts to happen.
- Fill the Crusts: With your pre-baked and cooled graham cracker crusts waiting patiently in their muffin liners, it’s time to add the luscious cheesecake filling. I carefully spoon or pour the cream cheese filling over each crust, filling each cup about ¾ full. I try to ensure the amount is consistent in each cup so they bake evenly.
- Add the Raspberry Coulis: Now for the beautiful swirl! I take my completely cooled raspberry coulis. Using a small spoon, I drop about ½ teaspoon to 1 full teaspoon of raspberry coulis on top of the cheesecake batter in each cup. I try to place it right in the center or in a few small dots on the surface. Don’t add too much, or it will overwhelm the cheesecake flavor and become more of a layer than a swirl.
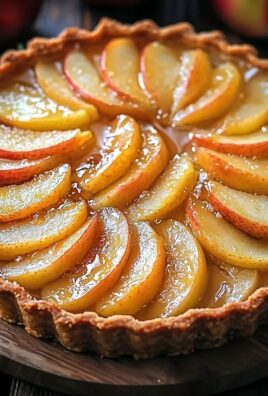
- Create the Swirl: This is where you become the artist! I take a toothpick, a small skewer, or even the tip of a small knife, and gently swirl the raspberry coulis into the cheesecake batter. I like to make a few gentle figure-eights or circles to create a pretty marbled effect. The key is to be gentle and not overmix, otherwise, the colors will blend too much, and you’ll lose that distinct raspberry swirl. You want to see beautiful streaks of pink and red against the creamy white cheesecake.
Baking and Cooling Your Perfect Raspberry Swirl Cheesecake Bites
Baking cheesecake, even in bite-sized form, requires a gentle touch to prevent cracks and achieve that perfect creamy texture. Getting this right is essential for truly successful “Homemade Raspberry Swirl Cheesecake Bites.”
- Prepare for Baking: I carefully transfer the muffin tin with the assembled cheesecake bites to the preheated 325°F (160°C) oven. For mini cheesecakes, I generally don’t use a full water bath, but I do ensure the oven temperature is stable and not too high.
- Bake Until Set: I bake the cheesecake bites for approximately 18-22 minutes. Baking time can vary depending on your oven, so I keep a close eye on them. You’ll know they’re done when the edges appear set and lightly golden, but the centers still have a slight jiggle to them when you gently shake the pan. They will continue to set as they cool. Overbaking is a common culprit for dry cheesecake and cracks, so resist the urge to leave them in for too long.
- Initial Cooling in the Oven: Once baked, I turn off the oven but leave the muffin tin inside with the oven door propped open slightly (using a wooden spoon or oven mitt). I let the cheesecake bites cool in the cooling oven for about 15-20 minutes. This gradual cooling process is crucial for preventing drastic temperature changes that can lead to cracks on the surface of your beautiful “Homemade Raspberry Swirl Cheesecake Bites.”
- Cooling at Room Temperature: After the oven cool-down, I remove the muffin tin from the oven and place it on a wire rack to cool completely to room temperature. This usually takes another 30-60 minutes.
- Chilling for Perfection: Once at room temperature, I transfer the muffin tin to the refrigerator. This is arguably the most important cooling step! I let the cheesecake bites chill for at least 4 hours, but preferably overnight. Chilling allows the cheesecake to firm up properly, develop its full flavor, and achieve that dense, rich texture we all love. Rushing this step will result in a soft, potentially messy cheesecake.
Finishing Touches and Serving Your Homemade Raspberry Swirl Cheesecake Bites
After all that meticulous work, it’s time for the grand reveal and the delicious reward! Properly serving your “Homemade Raspberry Swirl Cheesecake Bites” ensures they look as good as they taste.
- Removing from the Muffin Tin: Once thoroughly chilled, I gently lift each cheesecake bite out of its muffin cup by pulling on the edges of the paper liner. If you opted not to use liners, you might need to run a thin knife around the edge of each cheesecake before carefully prying it out. They should be firm enough to handle without much trouble.
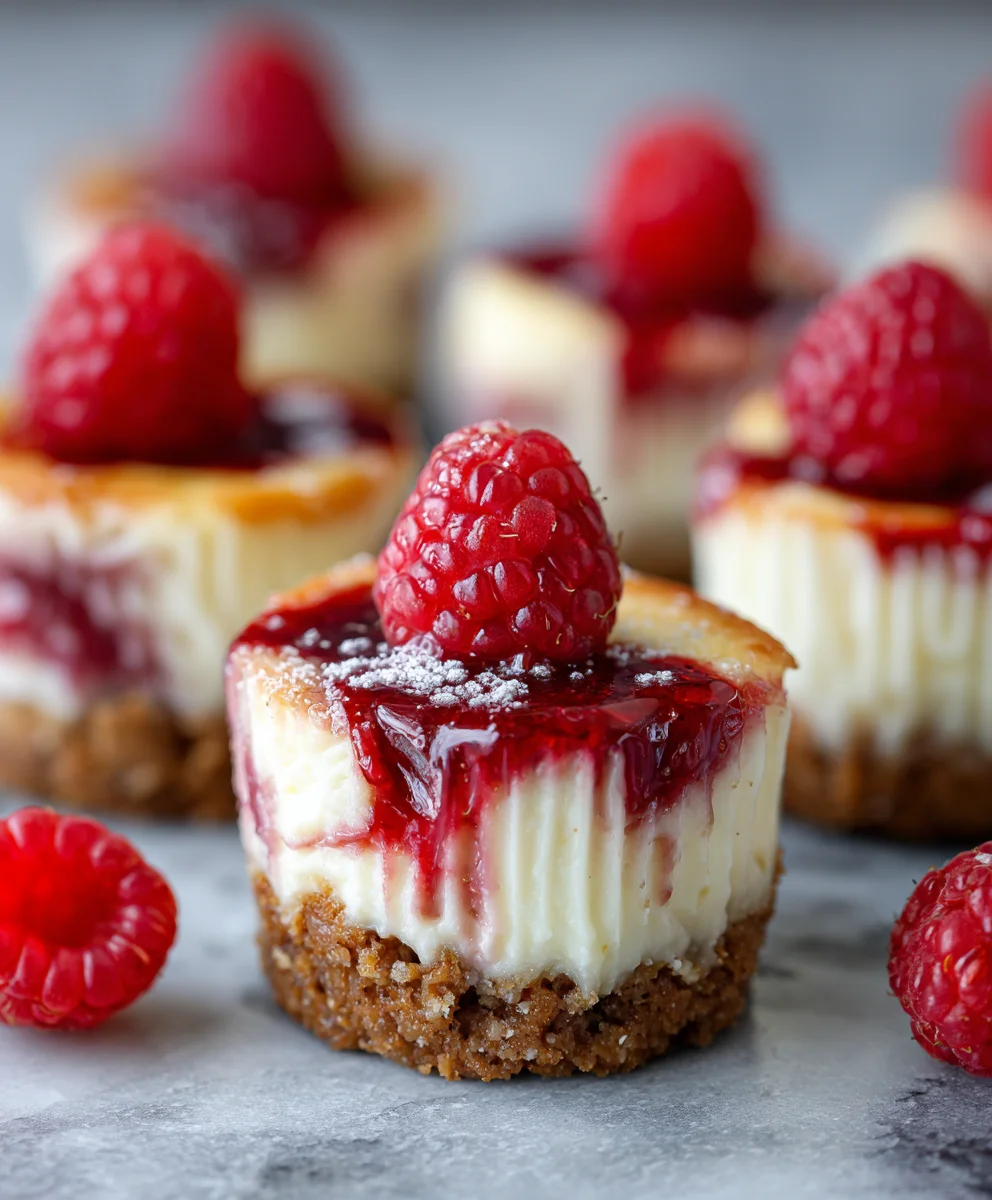
- Garnish (Optional but Recommended!): For an extra touch of elegance and fresh flavor, I like to garnish each “Homemade Raspberry Swirl Cheesecake Bite” just before serving. A fresh raspberry placed on top of the swirl, perhaps alongside a tiny fresh mint leaf, adds a lovely pop of color and freshness that truly elevates their presentation. This makes them look incredibly inviting and professional.
- Serving: These little gems are best served cold, straight from the refrigerator. Their bite-sized nature makes them perfect for parties, dessert platters, or just as a delightful treat after dinner.
- Storage: Any leftover “Homemade Raspberry Swirl Cheesecake Bites” should be stored in an airtight container in the refrigerator for up to 3-4 days. They maintain their freshness and texture wonderfully when properly stored, making them excellent for enjoying over several days.
<h2>Conclusion:</h2>
<p>Well, my friends, we’ve reached the sweet finale of our journey, and I genuinely hope you’re as excited as I am about the prospect of sinking your teeth into these delectable treats. If you’ve been searching for that perfect dessert that manages to be both incredibly indulgent and refreshingly light, look no further. This recipe isn’t just about baking; it’s about crafting an experience, a moment of pure bliss that can be shared or savored in quiet solitude. <strong>The beauty of these cheesecake bites lies in their harmonious balance of flavors and textures.</strong> Imagine: a buttery, slightly crisp graham cracker crust providing the perfect foundation, followed by a velvety smooth, rich cream cheese filling that’s just the right amount of tangy and sweet. And then, the star of the show – a vibrant, tart raspberry swirl that cuts through the richness, adding a burst of fruity freshness and a stunning visual appeal that makes each bite a work of art. It’s this intricate dance of creamy, fruity, and crunchy that truly elevates these <strong>Homemade Raspberry Swirl Cheesecake Bites</strong> from a simple dessert to an unforgettable culinary highlight. They’re impressive enough for a special occasion, yet delightfully straightforward to prepare, making them an accessible luxury for any home baker.</p>
<p>They embody everything wonderful about homemade desserts: the care, the freshness, and that undeniable personal touch you just can’t get from a store-bought treat. Each individual bite is a perfectly portioned piece of heaven, preventing the usual struggle of cutting and serving a full cheesecake, and ensuring everyone gets a flawless slice of deliciousness. <strong>I honestly believe this recipe is a must-try because it delivers on every front:</strong> incredible taste, elegant presentation, and a surprisingly satisfying baking process. It’s the kind of recipe that will earn you rave reviews and requests for more, time and time again. The fresh raspberries are key here, bringing an authentic and bright flavor that artificial essences simply cannot replicate, creating a dessert that feels wholesome yet incredibly decadent all at once. The preparation, while requiring a few steps, is incredibly rewarding, culminating in a dessert that looks like it came from a high-end patisserie, all thanks to your own two hands.</p>
<h4>Serving Suggestions to Elevate Your Bites</h4>
<p>These delightful cheesecake bites are incredibly versatile and can be presented in numerous ways to suit any occasion. For an elegant dinner party, arrange them artfully on a large platter, perhaps garnished with a few fresh mint leaves or a scattering of extra raspberries for a pop of color. They make a fantastic individual dessert, meaning no fuss with slicing a large cake – your guests can simply pick up their perfect portion. Consider serving them chilled with a delicate dusting of powdered sugar, which adds a touch of sophistication and a hint of extra sweetness. For a more casual affair, like a summer barbecue or a potluck, they transport beautifully and are always a crowd-pleaser. Pair them with a strong cup of freshly brewed coffee for an afternoon pick-me-up, or alongside a glass of chilled dessert wine for a sophisticated after-dinner treat. They’re also perfect for a bridal shower or baby shower spread, their vibrant swirl adding a festive touch. Don’t underestimate their potential as a thoughtful homemade gift – package a few in a decorative box, and you have a personalized present that will surely be appreciated.</p>
<h4>Exciting Variations to Explore</h4>
<p>While the raspberry swirl is absolutely divine, don’t hesitate to get creative with variations once you’ve mastered the basic recipe. You could easily swap the raspberry puree for a blueberry swirl, a tangy lemon curd swirl, or even a rich cherry compote for a different fruity twist. Imagine a mango swirl for a tropical vibe or a passion fruit variation for an exotic flair! Another fantastic idea is to drizzle a little melted dark chocolate over the finished bites before they set completely, adding an extra layer of decadence. For a truly indulgent experience, you could even mix a handful of mini chocolate chips into the cream cheese filling. If you want to play with the crust, consider using crushed Oreo cookies for a chocolatey base, or ginger snaps for a spicy, warming undertone. For those with dietary considerations, a gluten-free graham cracker crust works beautifully, ensuring everyone can enjoy these treats. You could also experiment with adding a touch of almond extract to the filling for a slightly different aroma, or even a tiny pinch of cardamom for an unexpected spice note. Fresh whipped cream, a few toasted nuts, or even a sprinkle of edible glitter can also be wonderful final touches to truly make these bites your own.</p>
<p>So, what are you waiting for? I truly hope you’re feeling inspired to roll up your sleeves and dive into making these incredible <strong>Homemade Raspberry Swirl Cheesecake Bites</strong>. Don’t be intimidated; the process is incredibly rewarding, and the end result is pure confectionery magic. There’s a special kind of satisfaction that comes from creating something so beautiful and delicious from scratch, especially when you share it with loved ones. <strong>I absolutely encourage you to try this recipe, make it your own, and then, please, share your experience with me!</strong> I can’t wait to hear about your baking adventures, see your gorgeous creations, and learn about any delightful variations you come up with. Did you try a different fruit swirl? Did you add a special topping? Your feedback and photos are always a huge source of joy and inspiration for me. So, go forth, bake, enjoy, and let the sweet aroma of baking fill your kitchen and your heart! You won’t regret taking the leap into this incredibly rewarding recipe.</p>
Easy Raspberry Swirl Cheesecake Bites: Sweet & Creamy
Homemade Raspberry Swirl Cheesecake Bites are a delightful invitation to indulge in pure, creamy bliss, perfectly portioned for any occasion. These miniature marvels strike the ideal balance between elegance and irresistible flavor. A vibrant raspberry swirl adds stunning visual appeal and infuses each bite with a burst of tangy fruitiness that perfectly complements the rich, velvety cheesecake base.
Ingredients
-
1 ½ cups finely crushed graham cracker crumbs
-
3 tablespoons granulated sugar
-
6 tablespoons unsalted butter, melted
-
24 ounces full-fat cream cheese, softened to room temperature
-
½ cup granulated sugar
-
3 large eggs, at room temperature
-
½ cup sour cream, at room temperature
-
1 teaspoon pure vanilla extract
-
1 teaspoon fresh lemon zest (from about 1 medium lemon)
-
12 ounces fresh or frozen raspberries
-
¼ cup granulated sugar
-
1 tablespoon fresh lemon juice
-
1 tablespoon cornstarch
-
2 tablespoons cold water
-
Fresh raspberries (for garnish, optional)
-
Fresh mint leaves (for garnish, optional)
Instructions
-
Step 1
In a small saucepan, combine 12 oz raspberries, ¼ cup granulated sugar, and 1 tablespoon fresh lemon juice. Cook over medium heat for 5-7 minutes until soft. Mash and strain through a fine-mesh sieve to remove seeds. Return purée to saucepan. Bring to a gentle simmer, then whisk in cornstarch slurry (1 tablespoon cornstarch mixed with 2 tablespoons cold water). Cook 1-2 minutes until thickened. Transfer coulis to a bowl and cool completely to room temperature. -
Step 2
Preheat oven to 325°F (160°C). Line a 24-cup mini muffin tin with paper liners. In a medium bowl, combine 1 ½ cups graham cracker crumbs, 3 tablespoons granulated sugar, and 6 tablespoons melted butter. Mix until moistened. Press 1 tablespoon of mixture firmly into the bottom of each lined muffin cup. Bake crusts for 5-7 minutes until set. Cool completely on a wire rack. -
Step 3
In a stand mixer, beat 24 oz softened cream cheese on low speed until smooth. Gradually add ½ cup granulated sugar; beat for 2-3 minutes, scraping down the bowl frequently. Add 3 large eggs, one at a time, beating on very low speed just until incorporated after each. Scrape down the bowl. Gently mix in ½ cup sour cream, 1 teaspoon pure vanilla extract, and 1 teaspoon fresh lemon zest until just combined. Do not overmix. -
Step 4
Spoon cream cheese filling over the cooled crusts, filling each cup about ¾ full. Drop ½ to 1 teaspoon of the completely cooled raspberry coulis on top of the cheesecake batter in each cup. Gently swirl the coulis into the batter using a toothpick or small knife to create a marbled effect. -
Step 5
Bake in the preheated oven for 18-22 minutes, until the edges appear set but the centers still have a slight jiggle. Turn off the oven, prop the door open slightly, and let the cheesecake bites cool in the oven for 15-20 minutes. Remove from oven and cool completely on a wire rack (30-60 minutes). Transfer the muffin tin to the refrigerator and chill for at least 4 hours, or preferably overnight. -
Step 6
Once thoroughly chilled, gently remove each cheesecake bite from its muffin cup. Garnish with fresh raspberries and fresh mint leaves, if desired, just before serving. Serve cold. Store any leftover bites in an airtight container in the refrigerator for up to 3-4 days.
Important Information
Nutrition Facts (Per Serving)
It is important to consider this information as approximate and not to use it as definitive health advice.
Allergy Information
Please check ingredients for potential allergens and consult a health professional if in doubt.
Leave a Comment