
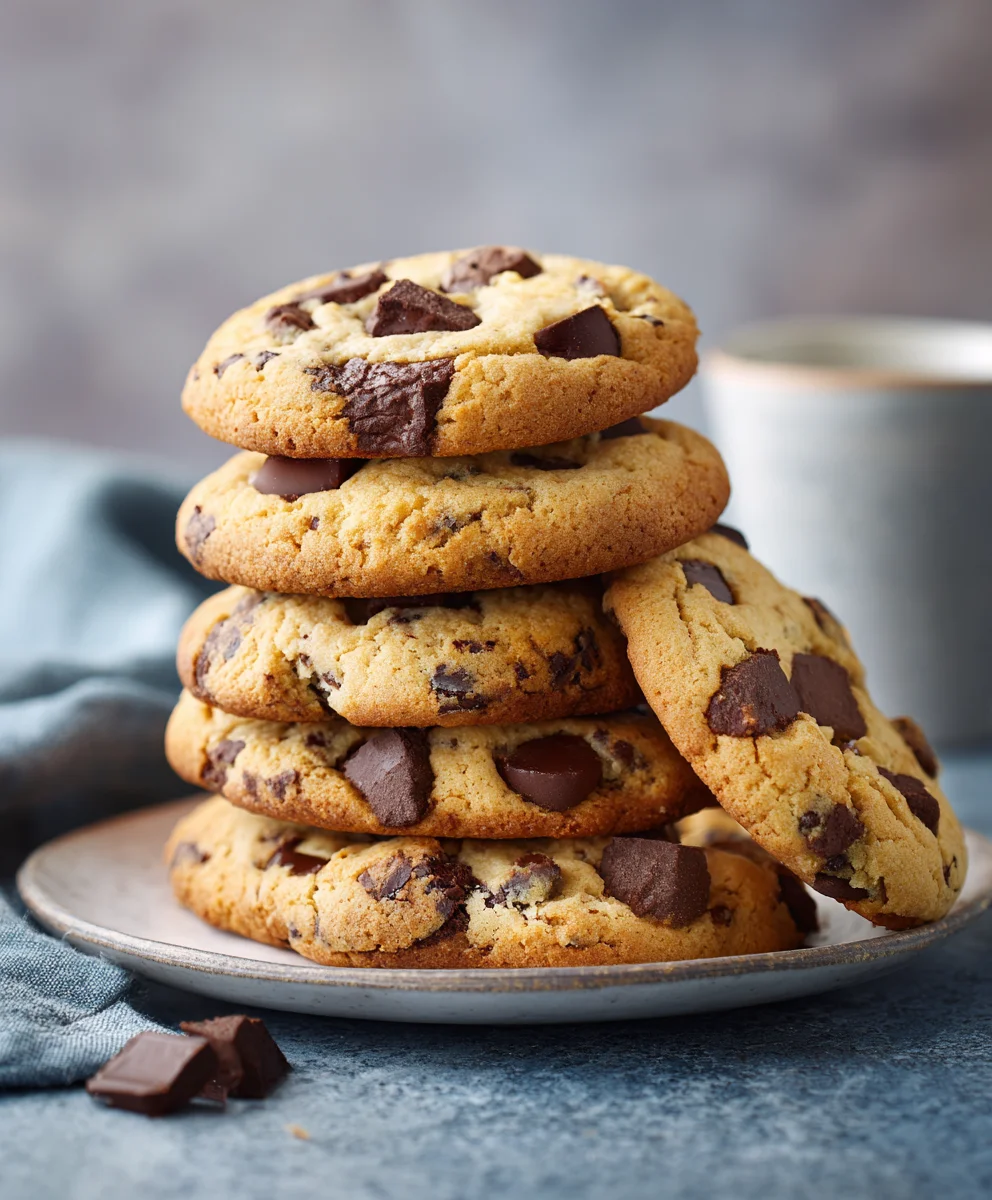
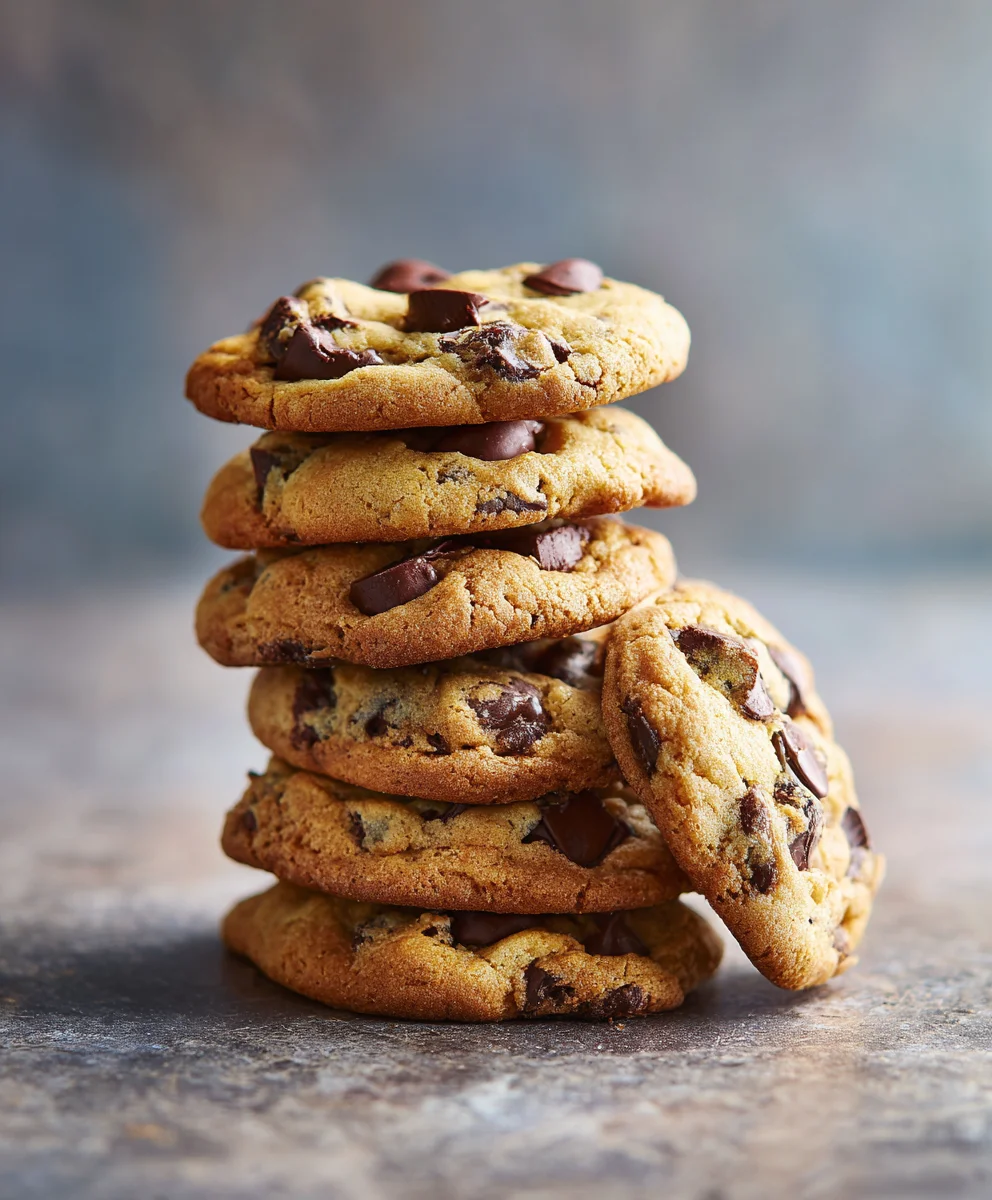
Chocolate Chip Cookies are, for me, more than just a dessert; they are a timeless emblem of comfort, nostalgia, and pure, unadulterated joy. I find there’s an undeniable magic that happens when that first batch emerges from the oven, filling my home with the intoxicating aroma of warm butter, brown sugar, and melting chocolate. Who can resist the allure of a perfectly baked cookie, with its golden-brown edges giving way to a soft, chewy center studded with gooey chocolate chips?
This beloved treat traces its origins back to the 1930s, famously created by Ruth Graves Wakefield at the Toll House Inn in Whitman, Massachusetts. What started as a happy accident quickly became an American icon, captivating palates across generations. People adore these classic Chocolate Chip Cookies not just for their rich, sweet flavor and delightful textural contrast – the satisfying crunch yielding to a melt-in-your-mouth interior – but also for the simple pleasure they bring. They are the perfect accompaniment to a cold glass of milk, a comforting pick-me-up, or a delightful shareable treat, easily made from scratch.
Get ready to bake a batch that will bring smiles to everyone!

Ingredients:
- 1 cup (2 sticks or 226g) Unsalted Butter: Softened to room temperature. This is crucial for creaming properly and achieving the right cookie texture.
- ¾ cup (150g) Granulated Sugar: For sweetness and a bit of crispness on the edges.
- 1 ½ cups (300g) Packed Light Brown Sugar: The secret weapon for chewiness and depth of flavor in our chocolate chip cookies. Make sure it’s firmly packed into the measuring cup!
- 2 Large Eggs: Also at room temperature. These bind everything together and add richness.
- 2 teaspoons Pure Vanilla Extract: Don’t skimp on this! It enhances all the other flavors and is essential for classic chocolate chip cookies.
- 2 ¼ cups (270g) All-Purpose Flour: Measured correctly (spooned and leveled) to avoid dense cookies.
- 1 teaspoon Baking Soda: Our leavening agent, helping the cookies spread and rise slightly.
- 1 teaspoon Salt: Balances the sweetness and truly brings out the chocolate flavor. A crucial, often overlooked ingredient for chocolate chip cookies.
- 2 cups (340g) Semi-Sweet Chocolate Chips: Or chunks, your preference! High-quality chocolate makes a significant difference. I love a mix of semi-sweet and milk chocolate for added complexity.
- Optional: Flaky Sea Salt: For sprinkling on top before baking. This adds a gourmet touch and a lovely contrast to the sweetness.
Equipment You’ll Need:
- Large mixing bowl
- Electric mixer (stand mixer with paddle attachment or handheld mixer)
- Rubber spatula
- Dry measuring cups and spoons
- Liquid measuring cup
- Baking sheets (2-3, light-colored preferred)
- Parchment paper or silicone baking mats
- Wire cooling rack
- Cookie scoop (1.5 to 2 tablespoons capacity is ideal)
Phase 1: Preparing Your Workspace and Preheating
- Clear Your Space: Before diving into the delicious world of making chocolate chip cookies, I always start by clearing my kitchen counter. A clean, organized workspace makes the entire process so much more enjoyable and efficient. Gather all your ingredients and equipment – having everything within arm’s reach prevents last-minute scrambling.
- Preheat Your Oven: This is a step I can’t stress enough. Turn your oven to 375°F (190°C). It takes time for an oven to reach and stabilize at the correct temperature, so doing this first ensures your cookies go into a perfectly hot environment, promoting even baking and that desired crispy edge with a chewy center. Don’t rely solely on the oven light; often, the preheat cycle indicates it’s ready before it’s truly at the target temperature. Give it an extra 10-15 minutes after it signals readiness, just to be sure.
- Prepare Your Baking Sheets: Line two to three large baking sheets with parchment paper or silicone baking mats. This prevents sticking, promotes even browning, and makes cleanup a breeze. I find that parchment paper gives a slightly crispier bottom to my chocolate chip cookies, which I absolutely adore! Avoid greasing the pans directly, as this can sometimes cause the cookies to spread too much.
- Bring Ingredients to Room Temperature: Make sure your butter and eggs are at room temperature. This isn’t just a suggestion; it’s a critical step for perfect chocolate chip cookies. Softened butter creams beautifully with the sugars, creating a light, airy base that traps air, leading to a tender cookie. Cold eggs don’t emulsify as well and can result in a lumpy batter. If you forgot to take them out, a quick trick for butter is to cut it into smaller pieces; for eggs, place them in a bowl of warm (not hot!) water for 5-10 minutes.
Phase 2: Crafting the Dough – The Heart of Your Chocolate Chip Cookies
-
Cream the Butter and Sugars: In your large mixing bowl, combine the softened unsalted butter, granulated sugar, and packed light brown sugar. Using your electric mixer (stand mixer with the paddle attachment is ideal, or a good handheld mixer), beat these ingredients together on medium speed. You’re aiming for a mixture that is light, fluffy, and significantly paler in color, almost like whipped butter. This creaming process incorporates air into the butter and sugar, which is fundamental for creating light and tender chocolate chip cookies. Scrape down the sides of the bowl frequently with your rubber spatula to ensure everything is evenly incorporated. This step usually takes 3-5 minutes, so be patient – it’s worth every second! You’ll notice the sugars dissolving slightly into the butter, creating a cohesive, delightful base.
Why Proper Creaming is Key:
This initial step sets the stage for the entire batch of chocolate chip cookies. The air pockets created here expand during baking, contributing to that wonderful chewy texture and slight rise. If you don’t cream enough, your cookies might be dense and flat. If you over-cream, you risk over-aerating, which can sometimes lead to cookies spreading too much.
-
Incorporate the Eggs and Vanilla: Once your butter and sugar mixture is beautifully light and fluffy, it’s time to add the room-temperature eggs. Add them one at a time, beating well after each addition until fully incorporated. Each egg should disappear into the mixture before you add the next. This ensures proper emulsification. After the eggs, stir in the pure vanilla extract. Beat for another minute or so until the mixture is smooth and cohesive. The vanilla is absolutely essential for classic chocolate chip cookies; it truly elevates the flavor profile and adds that signature comforting aroma.
The Importance of Room Temperature Eggs:
Adding cold eggs to a creamy butter mixture can cause the butter to seize up and become lumpy. Room temperature eggs, however, integrate seamlessly, creating a smooth, homogenous batter that’s perfect for our chocolate chip cookies.
- Whisk Together Dry Ingredients: In a separate medium-sized bowl, whisk together the all-purpose flour, baking soda, and salt. This step might seem minor, but it’s crucial for ensuring that the leavening agents and salt are evenly distributed throughout the flour. If you skip this, you might end up with pockets of baking soda (yuck!) or unevenly seasoned cookies. A good whisk for about 30 seconds is all it takes to combine everything thoroughly.
-
Gradually Add Dry to Wet Ingredients: Now for the gentle art of combining. With your mixer on low speed, gradually add the dry ingredient mixture to the wet mixture. Do this in two or three additions, mixing only until just combined. Stop mixing as soon as you see no more streaks of dry flour. Overmixing at this stage develops the gluten in the flour too much, which can lead to tough, dense, and less tender chocolate chip cookies. We want tender, melt-in-your-mouth cookies, so be gentle! Use your rubber spatula to give the dough a final fold to ensure everything is perfectly integrated without overworking it.
Understanding Overmixing:
Gluten is a protein found in flour that provides structure. When flour and liquid are mixed, gluten strands begin to form. The more you mix, the stronger these strands become. For chewy breads, this is great! But for tender chocolate chip cookies, we want minimal gluten development. Hence, mix until just combined.
-
Fold in the Chocolate Chips: Finally, the stars of the show! Add your semi-sweet chocolate chips (and any other chocolate variations you’re using). Using your rubber spatula, gently fold them into the dough until they are evenly distributed. Be careful not to crush them – we want beautiful, intact chocolate morsels throughout our chocolate chip cookies. This final gentle fold ensures that every bite is loaded with that irresistible chocolate goodness.
Choosing Your Chocolate:
While semi-sweet chocolate chips are classic, feel free to experiment! Dark chocolate chunks offer a more intense flavor, milk chocolate chips provide extra sweetness, and white chocolate chips can add a creamy contrast. A mix of two or three types often yields the most interesting and delicious results for homemade chocolate chip cookies.
- Optional: Chill the Dough: For truly exceptional chocolate chip cookies, I highly recommend chilling the dough for at least 30 minutes, or even overnight. While not strictly necessary for this recipe to work, chilling the dough allows the flavors to meld and deepen, and it helps prevent the cookies from spreading too much in the oven. The butter solidifies, making the cookies thicker and chewier. If you have the time, this step transforms good cookies into absolutely phenomenal cookies! Cover the bowl with plastic wrap and refrigerate.
Phase 3: The Art of Scooping and Baking Perfect Chocolate Chip Cookies
-
Scoop Your Cookies: Once your dough is ready (chilled or not), use a cookie scoop (about 1.5 to 2 tablespoons capacity) to portion out uniform balls of dough. This ensures that all your chocolate chip cookies bake evenly and finish at the same time. Place the scooped dough balls onto your prepared baking sheets, leaving about 2 inches of space between each one to allow for spreading. I usually fit 10-12 cookies per standard baking sheet.
The Magic of a Cookie Scoop:
A cookie scoop is truly an indispensable tool for baking. Not only does it make portioning quick and mess-free, but the consistent size is key to uniform baking. Unevenly sized cookies mean some will be overbaked while others are still raw in the middle.
- Optional: Add Extra Chocolate and Sea Salt: For that bakery-style look and an extra burst of flavor, I like to press a few extra chocolate chips onto the top of each cookie dough ball before baking. If you’re using flaky sea salt, now is the time to sprinkle a tiny pinch on top of each cookie. This small touch makes your homemade chocolate chip cookies look incredibly appealing and adds a wonderful sweet and salty contrast that is utterly addictive.
-
Bake Your Chocolate Chip Cookies: Place one baking sheet at a time into your preheated 375°F (190°C) oven. Bake for 10-12 minutes. The exact baking time will vary depending on your oven and how large you scooped your cookies. You’re looking for edges that are set and golden brown, while the centers still look slightly soft and puffy.
Understanding Oven Hot Spots:
Most ovens have hot spots. To ensure even baking, I often rotate my baking sheet halfway through the baking time (after about 5-6 minutes). If baking two sheets at once, swap their positions (top to bottom, and front to back) for consistent results across all your chocolate chip cookies.
- Check for Doneness: The key to chewy chocolate chip cookies is to underbake them slightly. When you pull them out, they might seem a bit too soft in the middle. Don’t worry, they will continue to set up as they cool. If you wait until they are fully golden and firm in the oven, they will be overbaked and dry. Trust the process! The edges should be a lovely golden brown, and the very center still looks a bit pale and soft.
Phase 4: Cooling and Enjoying Your Homemade Chocolate Chip Cookies
- Cool on the Baking Sheet: This step is super important! Once out of the oven, let your freshly baked chocolate chip cookies cool on the hot baking sheet for about 5 minutes. During this time, they will continue to cook slightly from the residual heat, firm up, and become easier to transfer without breaking. If you try to move them too soon, they’ll likely fall apart. This resting period is critical for achieving that perfect texture.
- Transfer to a Wire Rack: After the initial cooling period on the baking sheet, carefully transfer the cookies to a wire cooling rack to cool completely. Air circulation around the cookies prevents them from getting soggy on the bottom and helps them achieve that ideal chewy-on-the-inside, slightly-crispy-on-the-outside texture. Resist the urge to stack them while warm, as this can make them stick together and lose their shape.
- Enjoy Your Masterpiece: Once cooled (or still slightly warm, which is my personal favorite way to eat them!), these homemade chocolate chip cookies are ready to be devoured. Pair them with a cold glass of milk, a scoop of vanilla ice cream, or a warm cup of coffee. There’s nothing quite like the comforting taste and aroma of a freshly baked chocolate chip cookie.
Tips for Ultimate Chocolate Chip Cookie Perfection:
- Don’t Skimp on Quality Ingredients: Using good quality butter, pure vanilla extract, and high-quality chocolate chips truly makes a noticeable difference in the flavor of your chocolate chip cookies. Since there are relatively few ingredients, each one shines through.
- Measure Flour Correctly: The most common mistake in baking is incorrectly measuring flour. Spoon your flour into the measuring cup and then level it off with the back of a knife. Scooping directly from the bag compacts the flour, adding too much and resulting in dry, dense chocolate chip cookies. A kitchen scale is even better for accuracy!
- Resting the Dough: As mentioned, chilling the dough for a minimum of 30 minutes, or even up to 24-48 hours, allows the flavors to deepen and the ingredients to fully hydrate. This results in thicker, chewier, and more flavorful chocolate chip cookies with a beautiful depth that can’t be achieved otherwise. It also helps prevent excessive spreading.
- Room Temperature Matters: I can’t emphasize enough the importance of room temperature butter and eggs. It’s fundamental for creating a smooth emulsion and an airy, tender crumb in your chocolate chip cookies.
- Oven Thermometer: Ovens can be notoriously inaccurate. An inexpensive oven thermometer can be a game-changer, ensuring your oven is truly at the temperature you set, which is vital for consistent baking results with your chocolate chip cookies.
- Don’t Overbake: When it comes to chocolate chip cookies, it’s always better to underbake slightly. They will continue to cook on the hot baking sheet as they cool, leading to that perfect balance of crispy edges and a soft, chewy center. Overbaked cookies are dry and crumbly.
- Storage: Store your cooled chocolate chip cookies in an airtight container at room temperature for up to 3-4 days. For longer storage, you can freeze baked cookies (once completely cooled) in a freezer-safe bag for up to 2-3 months. Thaw at room temperature or warm slightly in the microwave for a “freshly baked” experience. You can also freeze portions of unbaked dough and bake them directly from frozen (adding a few extra minutes to the baking time).
-
Troubleshooting Flat Cookies: If your chocolate chip cookies are consistently flat, several factors could be at play:
- Butter was too soft or even melted.
- Not enough flour (incorrect measurement).
- Oven temperature too low (cookies spread before they set).
- Over-creaming the butter and sugar, incorporating too much air.
- Lack of chilling time for the dough.
- Too much leavening agent (baking soda).
-
Troubleshooting Hard/Dry Cookies:
- Overbaking is the most common culprit.
- Too much flour.
- Dough was overmixed.
Variations to Elevate Your Chocolate Chip Cookies:
While the classic chocolate chip cookie is a masterpiece on its own, here are a few ideas to customize your next batch:
- Nutty Goodness: Fold in ½ to 1 cup of chopped walnuts, pecans, or macadamia nuts with the chocolate chips for added crunch and flavor. Toasting the nuts lightly before adding them can enhance their aroma and taste.
- Double Chocolate Delight: Use half semi-sweet and half milk chocolate chips, or even throw in some white chocolate chips for a triple chocolate treat. You could also swap out some of the all-purpose flour for cocoa powder (adjusting liquids if necessary) to create a darker, richer chocolate dough base.
- Spice It Up: A pinch of cinnamon, nutmeg, or even a tiny amount of cayenne pepper (for a hint of warmth) can add an unexpected depth to your chocolate chip cookies.
- Brown Butter: For an incredible depth of nutty, caramel-like flavor, brown your butter before creaming it with the sugars. Melt the butter in a saucepan over medium heat until it turns amber and smells nutty. Let it cool slightly before using, ensuring you scrape all the flavorful browned bits into your dough. Just be sure to bring it back to a slightly softened, but not fully liquid, consistency before creaming with sugars. This adds a sophisticated twist to your standard chocolate chip cookies.
- Different Extracts: While vanilla is classic, a tiny dash of almond extract or peppermint extract (especially around the holidays) can create entirely new flavor profiles for your chocolate chip cookies.
- Oatmeal Chocolate Chip Cookies: Replace ½ cup of the all-purpose flour with old-fashioned rolled oats for a chewier, heartier cookie. This adds a lovely texture and a slightly nutty flavor that complements the chocolate beautifully.
- Candy Add-ins: Get creative with M&M’s, chopped candy bars, or even pretzels for a sweet and salty crunch. The possibilities for customizing your chocolate chip cookies are truly endless!
Conclusion:
So, there you have it! We’ve journeyed through the simple yet profound process of creating what I truly believe are the best batch of Chocolate Chip Cookies you’ll ever bake. This isn’t just another cookie recipe; it’s a carefully crafted method designed to deliver consistent, mouth-watering results every single time. What makes these cookies an absolute must-try, you ask? It’s that perfect harmony of textures and flavors. We’re talking about edges that are beautifully crisp and caramelized, giving way to a center that’s wonderfully soft, chewy, and tender – almost melting in your mouth. Each bite is bursting with rich, gooey chocolate and that unmistakable, comforting aroma of freshly baked goodness. They strike that delicate balance between sweet and salty, ensuring they’re never cloyingly sweet, but always deeply satisfying. This recipe takes the guesswork out of baking, empowering even novice bakers to achieve bakery-quality cookies right in their own kitchen. It’s about creating a moment of pure culinary joy, an edible hug that brings warmth and happiness with every single piece. Trust me when I say, once you’ve tried this recipe, you’ll understand why it’s destined to become your new go-to for Chocolate Chip Cookies.
Now, while these cookies are absolutely phenomenal enjoyed straight from the cooling rack, still slightly warm with the chocolate chips delightfully molten, don’t stop there! The serving possibilities are as endless as your imagination. For a classic comfort experience, pair them with a tall glass of cold milk, or a steaming mug of coffee or tea for an afternoon pick-me-up. For a more decadent dessert, transform them into irresistible ice cream sandwiches by pressing a scoop of your favorite vanilla bean or salted caramel ice cream between two cookies. You could also crumble a few over a bowl of plain Greek yogurt with some fresh berries for a quick, delightful breakfast or a lighter dessert. Feeling adventurous? Try making a cookie sundae by adding a warm cookie to a bowl, topping it with a scoop of ice cream, a drizzle of chocolate sauce, and a dollop of whipped cream. As for variations, this recipe is a fantastic canvas for your creativity. Consider adding a sprinkle of flaky sea salt on top of the dough before baking to enhance the chocolate’s depth and add a pleasant textural contrast. You could also mix in toasted chopped pecans or walnuts for an extra layer of crunch and nutty flavor. Experiment with different types of chocolate chips – milk, dark, or even white chocolate – or a combination of them for a complex chocolate profile. A dash of espresso powder can intensify the chocolate flavor without making the cookies taste like coffee, or a pinch of cinnamon or nutmeg can add a subtle, warm spice note perfect for cooler evenings. The beauty of this recipe lies in its adaptability, allowing you to tailor it to your exact preferences or whatever ingredients you have on hand.
I am genuinely so excited for you to try this recipe. It’s more than just a set of instructions; it’s an invitation to create something truly special, to fill your home with the intoxicating scent of baking, and to bring smiles to the faces of everyone who gets to enjoy these cookies. Don’t be shy – dive in, preheat your oven, and let the magic happen! I promise, the effort is minimal compared to the immense reward of biting into a perfectly baked, homemade cookie. Once you’ve pulled that golden-brown batch from the oven, and perhaps enjoyed a warm one (or two!), I would absolutely love to hear about your experience. Did you add any fun variations? How did your family and friends react? Did they disappear faster than you expected? Please, please, come back and share your stories, your photos, and your triumphs in the comments section below. Your feedback and creative twists inspire me and the entire community of home bakers. Happy baking, my friends – I can’t wait to hear how your incredible Chocolate Chip Cookies turn out!
Best Ever Chocolate Chip Cookies: Easy, Chewy & Perfect!
A timeless emblem of comfort, nostalgia, and pure joy, these chocolate chip cookies feature golden-brown edges, a soft, chewy center, and gooey chocolate chips. Easily made from scratch, they are perfect with milk or as a comforting treat.
Ingredients
-
1 cup (226g) Unsalted Butter, softened
-
¾ cup (150g) Granulated Sugar
-
1 ½ cups (300g) Packed Light Brown Sugar
-
2 Large Eggs, room temperature
-
2 teaspoons Pure Vanilla Extract
-
2 ¼ cups (270g) All-Purpose Flour
-
1 teaspoon Baking Soda
-
1 teaspoon Salt
-
2 cups (340g) Semi-Sweet Chocolate Chips
-
Optional: Flaky Sea Salt, for sprinkling
Instructions
-
Step 1
Preheat oven to 375°F (190°C). Line baking sheets with parchment paper or silicone mats. Ensure butter and eggs are at room temperature. -
Step 2
In a large mixing bowl, cream softened unsalted butter, granulated sugar, and packed light brown sugar with an electric mixer until light and fluffy (3-5 minutes), scraping down the sides as needed. -
Step 3
Beat in eggs one at a time until fully incorporated, then stir in the pure vanilla extract. -
Step 4
In a separate medium bowl, whisk together all-purpose flour, baking soda, and salt. Gradually add the dry mixture to the wet mixture on low speed, mixing only until just combined. Do not overmix. -
Step 5
Gently fold in the semi-sweet chocolate chips using a rubber spatula until evenly distributed. Optionally, chill the dough for at least 30 minutes, or overnight, for best results. -
Step 6
Scoop uniform balls of dough (1.5 to 2 tablespoons capacity) onto the prepared baking sheets, leaving about 2 inches of space between each. Optionally, press a few extra chocolate chips and sprinkle flaky sea salt on top of each dough ball. -
Step 7
Bake one baking sheet at a time in the preheated 375°F (190°C) oven for 10-12 minutes. Cookies are done when the edges are set and golden brown, and the centers still look slightly soft and puffy. Rotate the baking sheet halfway through for even baking. -
Step 8
Remove from oven and let the cookies cool on the hot baking sheet for about 5 minutes. Then, carefully transfer them to a wire cooling rack to cool completely. Enjoy your homemade chocolate chip cookies!
Important Information
Nutrition Facts (Per Serving)
It is important to consider this information as approximate and not to use it as definitive health advice.
Allergy Information
Please check ingredients for potential allergens and consult a health professional if in doubt.

Leave a Comment