
Game Day Cheesy Pizza Sliders are, without a doubt, the ultimate crowd-pleasing snack that will make you the MVP of any gathering! Imagine biting into a warm, soft roll, generously loaded with rich tomato sauce, savory pepperoni, and an abundance of perfectly melted, gooey mozzarella cheese. It’s the quintessential comfort food experience, packed into a convenient, shareable bite that promises to satisfy every craving.
While sliders originated as a humble mini-burger, the concept has beautifully evolved, transforming beloved dishes into exciting, shareable finger foods perfect for communal celebrations. This ingenious adaptation, combining the universally adored flavors of pizza with the irresistible ease of sliders, has become a cornerstone of American entertaining, particularly for those thrilling game day events where delicious, fuss-free food is key.
Why Everyone Loves These Pizza Sliders
People adore this dish not just for its incredible taste – that perfect symphony of tangy sauce, creamy cheese, and your chosen toppings – but also for its delightful texture and sheer convenience. The soft, slightly toasted rolls provide the ideal vehicle for the bubbling, pull-apart cheese and the savory fillings, creating a truly satisfying mouthfeel. Plus, their effortless assembly makes them an ideal choice for hosts who want to spend more time enjoying the company and less time in the kitchen. I promise, these Game Day Cheesy Pizza Sliders are destined to become a staple in your recipe repertoire!

Ingredients:
- Hawaiian Sweet Rolls: One 24-pack (often labeled as King’s Hawaiian sweet rolls). These are the absolute foundation for our incredible Game Day Cheesy Pizza Sliders, providing that perfect balance of sweetness and softness that holds up beautifully to all our delicious fillings.
- Marinara Sauce: 1 ½ cups of your favorite high-quality marinara or pizza sauce. Whether you prefer a robust, garlicky sauce or something a little sweeter, make sure it’s a brand you love, as it’s key to the authentic pizza flavor of these sliders.
- Pepperoni Slices: 6-8 ounces, preferably pre-sliced mini pepperonis for easy layering, or regular-sized ones that you can overlap. You want enough to generously cover two full layers for maximum flavor in every bite of our Game Day Cheesy Pizza Sliders.
- Shredded Mozzarella Cheese: 2 ½ cups. Opt for a good quality low-moisture, part-skim mozzarella for the best melt and stretch. This is the classic pizza cheese and essential for that gooey factor we all adore.
- Provolone Cheese Slices: 8-10 slices, thinly sliced. Provolone adds a fantastic creamy texture and a slightly sharper, more complex flavor profile that beautifully complements the mozzarella, taking our Game Day Cheesy Pizza Sliders to the next level.
- Unsalted Butter: ½ cup (1 stick), melted. This will be the base for our irresistible garlic herb topping that gets brushed over the rolls, adding a golden-brown finish and incredible aroma.
- Garlic Powder: 1 ½ teaspoons. Don’t skimp on this! It’s what gives our melted butter mixture that quintessential garlic bread appeal, permeating every nook and cranny of the sweet rolls.
- Dried Oregano: 1 teaspoon. A classic Italian herb that instantly transports you to a pizza parlor. It’s a non-negotiable for that authentic pizza aroma and taste.
- Red Pepper Flakes: ½ teaspoon (optional, but highly recommended if you enjoy a little zing!). This adds a subtle warmth and a gentle kick that balances the richness of the cheese and pepperoni in your Game Day Cheesy Pizza Sliders. Adjust to your heat preference!
- Fresh Parsley: 2 tablespoons, finely chopped. Used as a vibrant garnish, it adds a touch of fresh herbaceousness and a beautiful pop of color that makes your sliders look as good as they taste.
- Grated Parmesan Cheese: 2 tablespoons. A final flourish of savory, salty goodness to sprinkle over the top before serving, enhancing the overall cheesy deliciousness.
Equipment You’ll Need:
- 9×13 Inch Baking Dish: Essential for snugly fitting all 24 sliders and ensuring even baking. A ceramic or glass dish works wonderfully for maintaining consistent heat.
- Sharp Serrated Knife: The best tool for slicing the entire slab of sweet rolls horizontally without squishing them. Precision is key for easy assembly of your Game Day Cheesy Pizza Sliders.
- Small Microwave-Safe Bowl or Small Saucepan: For melting the butter for our heavenly garlic topping.
- Pastry Brush: To evenly distribute that glorious garlic butter mixture over the tops of your sliders, ensuring every inch is coated for maximum flavor and golden crust.
- Aluminum Foil: For covering the baking dish during the initial baking phase, which helps the cheese melt perfectly without the tops browning too quickly.
- Cutting Board: For any quick chopping or prep work, like finely dicing your fresh parsley.
- Measuring Cups and Spoons: For accurate and consistent ingredient amounts, ensuring your Game Day Cheesy Pizza Sliders turn out perfectly every time.
Prepping Your Game Day Cheesy Pizza Sliders:
-
Preheat and Prepare Your Dish:
First things first, let’s get that oven ready! Preheat your oven to a welcoming 350°F (175°C). While it’s warming up, take out your trusty 9×13 inch baking dish. I like to lightly grease mine with a little non-stick cooking spray, just to be extra sure nothing sticks, although with the butter topping and the rolls themselves, it’s often not strictly necessary. It’s more of a personal insurance policy to make cleanup a breeze, leaving you more time to enjoy your fantastic Game Day Cheesy Pizza Sliders. -
The Essential Roll Slice:
This step is critical for a smooth assembly! Carefully remove the entire block of 24 Hawaiian sweet rolls from their packaging. Place the whole slab on a clean cutting board. Now, using a sharp serrated knife, slice the entire block of rolls horizontally right through the middle, creating a top half and a bottom half, almost like a giant burger bun. Take your time with this; you want a clean, even cut so that your top and bottom layers align perfectly later on. This method is far superior to trying to slice each roll individually, trust me! It keeps the structure intact, which is vital for our Game Day Cheesy Pizza Sliders. -
Setting the Foundation:
Gently lift the bottom half of the sliced rolls and place them into your prepared 9×13 inch baking dish. They should fit snugly, creating a seamless base. Press them down ever so slightly to ensure they are evenly spread across the bottom of the dish. This creates a sturdy and delicious base for all the cheesy, saucy goodness we’re about to pile on for our Game Day Cheesy Pizza Sliders.
Assembling the Game Day Cheesy Pizza Sliders:
-
Layer on the Marinara Magic:
Now for the heart of the pizza flavor! Spoon about 1 cup of your marinara sauce evenly over the bottom layer of the sweet rolls. Use the back of the spoon to spread it all the way to the edges. You don’t want to drown the rolls, but you want a good, consistent layer of sauce on every single slider. This ensures every bite of our Game Day Cheesy Pizza Sliders is infused with that classic tomato goodness. -
First Layer of Cheesy Delight:
Sprinkle half of your shredded mozzarella cheese (about 1 ¼ cups) evenly over the marinara sauce. Then, arrange all of your provolone cheese slices directly on top of the mozzarella. The provolone slices are fantastic here because they melt into a beautifully smooth, creamy layer that adds another dimension of flavor. This double cheese layer is what makes these Game Day Cheesy Pizza Sliders so incredibly satisfying. -
Pepperoni Perfection:
Next up, it’s pepperoni time! Arrange half of your pepperoni slices (about 3-4 ounces) in a single layer over the provolone cheese. Try to get them as evenly distributed as possible, so each slider gets a good share of that savory, slightly spicy pepperoni kick. If you’re using mini pepperonis, this is super easy; if using regular, just overlap them slightly. -
Second Round of Sauce and Cheese:
Drizzle the remaining ½ cup of marinara sauce over the pepperoni layer. This second layer of sauce helps to moisten the top half of the rolls and ensures a robust pizza flavor throughout the entire slider. Immediately follow this with the remaining shredded mozzarella cheese (the other 1 ¼ cups), scattering it generously over the sauce and pepperoni. We want these Game Day Cheesy Pizza Sliders to be absolutely loaded with cheese! -
Crown Your Creation:
Carefully place the top half of the sweet rolls back over all the glorious fillings. Gently press down on the entire block of rolls to help compact the layers slightly and ensure everything is snug. At this point, your baking dish should look like a giant, unbaked pizza sandwich, ready for its final delicious transformation into the ultimate Game Day Cheesy Pizza Sliders.
Baking Your Game Day Cheesy Pizza Sliders to Perfection:
-
Crafting the Glorious Garlic Butter Topping:
In your small microwave-safe bowl or saucepan, melt your ½ cup of unsalted butter. Once melted and smooth, stir in the garlic powder, dried oregano, and red pepper flakes (if you’re using them). Give it a good whisk to make sure all those fantastic flavors are well combined. The aroma alone at this stage is enough to get your taste buds tingling, anticipating the incredible flavor this will bring to our Game Day Cheesy Pizza Sliders. -
Brushing on the Flavor:
Generously brush this aromatic garlic butter mixture all over the tops of the sweet rolls. Use your pastry brush to ensure every single square inch is coated. Don’t be shy! This butter mixture is what will give the tops of your rolls a beautiful golden-brown crust and an extra layer of savory, garlicky flavor that makes these sliders truly irresistible. Make sure to get it into the crevices between the individual rolls too, for maximum saturation and deliciousness. -
The Initial Bake (Covered):
Cover your baking dish tightly with aluminum foil. This is a crucial step! Baking covered allows the cheese to melt slowly and evenly, creating that wonderfully gooey, pull-apart texture we crave, without the tops of the rolls browning too quickly or becoming crispy before the inside is perfectly melty. Place the covered dish into your preheated 350°F (175°C) oven and bake for 15 minutes. This initial bake ensures everything gets hot and bubbly inside. -
The Final Bake (Uncovered):
After 15 minutes, carefully remove the foil from the baking dish. Now it’s time to get that beautiful golden-brown crust! Return the uncovered dish to the oven and continue baking for another 8-12 minutes, or until the tops of the rolls are a lovely golden brown and the cheese is fully melted, bubbling, and perhaps even slightly caramelized around the edges. Keep a close eye on them during this stage, as oven temperatures can vary. The goal here is a perfectly toasted top that complements the gooey interior of our Game Day Cheesy Pizza Sliders.
The Flavorful Finishing Touches:
-
Resting for Perfection:
Once your Game Day Cheesy Pizza Sliders emerge from the oven, looking absolutely glorious and smelling divine, resist the urge to dive in immediately! Transfer the baking dish to a wire rack and let them rest for 5-10 minutes. This short resting period allows the cheese to set slightly, preventing it from all oozing out when you cut them, and also makes them easier to handle. It’s a small act of patience that pays off big time in the enjoyment of your sliders. -
The Final Garnish:
While they’re resting, sprinkle the finely chopped fresh parsley evenly over the top of the sliders. The vibrant green not only adds a beautiful visual contrast but also a fresh, herbaceous note that brightens up the rich flavors. Then, for an extra layer of savory goodness, sprinkle the grated Parmesan cheese over the top as well. This final flourish adds a subtle saltiness and umami that truly completes our Game Day Cheesy Pizza Sliders. -
Serve and Enjoy!:
Using your serrated knife, cut along the lines of the individual rolls to separate the 24 sliders. You can either serve them as individual sliders, or for a more dramatic presentation, serve them in clusters of 3 or 4, allowing your guests to pull them apart themselves. These are best served warm, straight out of the oven. They are absolutely perfect for game day, parties, or just a fun family dinner. Prepare for rave reviews and empty trays because these Game Day Cheesy Pizza Sliders are always a massive hit!
Tips for the Ultimate Game Day Cheesy Pizza Sliders:
-
Customizing Your Toppings:
While pepperoni is a classic, don’t be afraid to experiment with other pizza toppings! Consider adding finely diced cooked ham, crumbled cooked sausage, or even a handful of finely chopped bell peppers or mushrooms for a vegetarian twist. Just make sure any vegetable additions are pre-cooked and well-drained to avoid making the sliders soggy. The beauty of these Game Day Cheesy Pizza Sliders is their versatility, allowing you to tailor them to your personal preferences or the dietary needs of your guests. Ensure any additional ingredients are not too bulky, as we want them to fit neatly between the slider buns. For a spicier kick, you could even add some finely chopped jalapeños or a dash of hot sauce to your marinara layer. -
Make-Ahead Magic:
If you’re planning a party and want to get a head start, you can assemble these Game Day Cheesy Pizza Sliders up to 24 hours in advance. Simply follow all the steps up to brushing on the garlic butter, then cover the baking dish tightly with plastic wrap and refrigerate. When you’re ready to bake, pull them out of the fridge about 30 minutes before baking to allow them to come closer to room temperature. You might need to add an extra 5-10 minutes to the baking time if they are still very cold. This make-ahead option is a lifesaver for busy hosts, ensuring you have delicious, warm sliders ready to go when your guests arrive. -
Dipping Sauce Suggestions:
While these Game Day Cheesy Pizza Sliders are absolutely fantastic on their own, offering a side of dipping sauces can elevate the experience even further. A small bowl of extra marinara sauce, warmed slightly, is always a welcome addition. For those who enjoy a little ranch, a creamy ranch dressing provides a cool counterpoint to the rich flavors. A garlic aioli or even a simple balsamic glaze could also offer an interesting flavor dynamic. Having options allows your guests to customize their culinary adventure. -
Storage and Reheating:
Leftover Game Day Cheesy Pizza Sliders (if there are any!) can be stored in an airtight container in the refrigerator for up to 3 days. To reheat, you can pop them back into a preheated oven at 300°F (150°C) for about 10-15 minutes, or until heated through and the cheese is melty again. Covering them loosely with foil during reheating can help prevent the tops from drying out. A quick zap in the microwave is also an option, but the oven method yields a much better texture, especially for the rolls. -
Cheese Blend Variations:
While mozzarella and provolone are my go-to for these Game Day Cheesy Pizza Sliders, feel free to experiment with other cheese blends. A little shredded cheddar cheese can add a sharper note, or some Monterey Jack for an even gooier, milder melt. A touch of smoked Gouda or fontina could also introduce an interesting depth of flavor. The key is to use cheeses that melt well, ensuring that satisfying pull. Don’t be afraid to mix and match to find your perfect cheesy combination!
Conclusion:
So, we’ve reached the delicious culmination of our culinary journey, and I genuinely hope you’re feeling inspired and hungry! We’ve navigated the incredibly simple, yet profoundly satisfying, steps to create a dish that I truly believe is a game-changer for any occasion. From the moment those slider buns are brushed with their aromatic garlic butter to the instant they emerge from the oven, golden brown and bubbling with molten cheese, you’ll understand why this recipe holds such a special place in my heart. It’s not just a snack; it’s an experience, a little bite of happiness that brings smiles to every face.
I’ve always advocated for recipes that deliver maximum flavor with minimal fuss, and this one absolutely epitomizes that philosophy. Imagine: a dish that takes mere minutes to assemble, fills your kitchen with the most intoxicating aroma, and then disappears from the serving platter in record time. That’s the magic we’re talking about here. The gooey, melted cheese, the savory pepperoni (or your chosen toppings!), all nestled within soft, perfectly toasted buns – it’s a symphony of textures and tastes that echoes the comforting familiarity of a classic pizza, but in a much more sociable, easy-to-handle format. There’s no need for plates and forks; these are designed for grab-and-go enjoyment, making them absolutely ideal for mingling at parties or during those intense moments watching a big match. The slight crispness of the toasted edges contrasting with the tender interior is truly divine, and every single bite is packed with that quintessential pizza flavor we all adore.
These aren’t just appetizers; they are little pockets of pure joy, designed to be devoured with gusto.
Now, while these delightful creations are utterly perfect in their own right, glistening with cheese and ready to be devoured, I’m a big believer in personalizing your culinary adventures. So, let’s talk about taking them to the next level! For an added layer of indulgence, I heartily recommend serving them alongside a warm, rich bowl of your favorite marinara sauce for dipping. There’s something undeniably classic and comforting about that combination. Alternatively, a cool, creamy ranch dip offers a wonderful tangy contrast, while a vibrant pesto or even a homemade garlic-herb butter sauce could introduce a sophisticated twist. Don’t underestimate the power of a simple dip to elevate the entire experience from great to truly unforgettable.
And if you’re looking to transform these appetizers into a more substantial meal, fear not, for the possibilities are endless! Imagine pairing them with a crisp, refreshing side salad, perhaps with a light balsamic vinaigrette, to cut through the richness. Or, for the ultimate comfort food feast, a generous serving of crispy curly fries, a bowl of tangy coleslaw, or even some baked chicken wings would create an impressive spread that’s sure to satisfy even the hungriest crowd. These sliders are incredibly versatile, fitting seamlessly into almost any menu. But the real fun begins when you start experimenting with the sliders themselves! This recipe is a blank canvas for your creativity. Instead of pepperoni, consider crumbled Italian sausage, crispy bacon bits, or even shredded BBQ chicken. For a vegetarian option, sautéed mushrooms, caramelized onions, roasted red peppers, or fresh spinach with a sprinkle of feta cheese would be absolutely divine. Feel free to swap out the mozzarella for provolone, a sharp cheddar, or a smoky gouda to explore different flavor profiles. You could even use a BBQ sauce or a creamy Alfredo sauce as your base instead of tomato pizza sauce for a truly unique twist! And remember, the type of slider bun can also make a huge difference – Hawaiian rolls add a touch of sweetness, while savory garlic bread rolls would intensify the Italian flavors.
This is your kitchen, your rules; let your culinary imagination run wild!
So, seriously, what are you waiting for? I promise you, these Game Day Cheesy Pizza Sliders are not just a recipe; they are a ticket to becoming the hero of your next gathering. They are the ultimate embodiment of easy, delicious comfort food, designed specifically to bring joy, warmth, and incredibly satisfying flavors to everyone who tries them. I’ve poured my heart into perfecting this recipe because I truly believe it’s one you’ll return to again and again, finding new ways to love it each time. The ease of preparation combined with the universal appeal of pizza makes them an undeniable winner, every single time.
I am genuinely excited for you to try this recipe in your own kitchen. There’s a profound satisfaction that comes from creating something so universally loved from scratch and witnessing the happy reactions of your friends and family. Once you’ve whipped up a batch, please, please, please come back and share your experience! Did you stick to the classic pepperoni, or did you venture into bold new topping combinations? What dips did you pair them with? And most importantly, how quickly did they disappear from the plate? Your stories, your photos, and any brilliant variations you discover not only inspire me but also provide wonderful ideas for our growing community of home cooks. Let’s share the love, share the food, and create some delicious memories together! Trust me, once these enter your recipe rotation, they’ll become an instant favorite. They are undeniable proof that impressive, utterly delicious food doesn’t have to be complicated or time-consuming. Happy cooking, my friends, and prepare to enjoy some seriously amazing sliders!
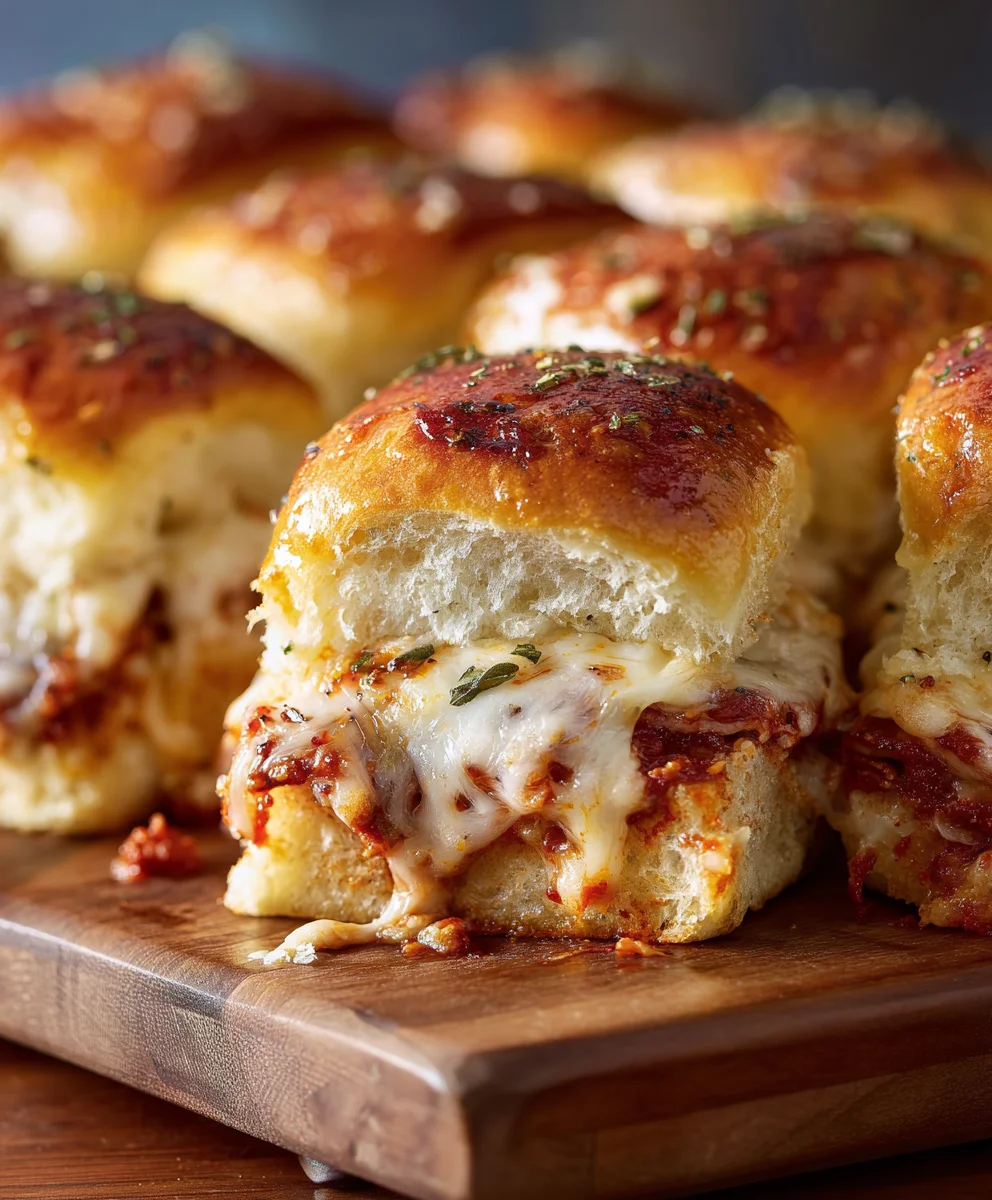
Game Day Cheesy Pizza Sliders
These Cheesy Pizza Sliders started as a quick solution for movie night but turned into our family’s most beloved recipe. That moment when those soft Hawaiian rolls filled with layers of cheese and pepperoni hit the oven creates pure magic in our kitchen. Now the aroma of garlic butter and melting mozzarella brings everyone running even my teenager who usually needs three calls for dinner.
Ingredients
-
1 (24-pack) Hawaiian Sweet Rolls
-
1 ½ cups Marinara Sauce
-
6-8 oz Beef Pepperoni Slices
-
2 ½ cups Shredded Mozzarella Cheese
-
8-10 slices Provolone Cheese
-
½ cup (1 stick) Unsalted Butter, melted
-
1 ½ tsp Garlic Powder
-
1 tsp Dried Oregano
-
½ tsp Red Pepper Flakes (optional)
-
2 tbsp Fresh Parsley, chopped
-
2 tbsp Grated Parmesan Cheese
Instructions
-
Step 1
Preheat oven to 350°F (175°C). Lightly grease a 9×13 inch baking dish. -
Step 2
Slice the entire block of 24 Hawaiian sweet rolls horizontally. Place the bottom half in the prepared dish. -
Step 3
Layer on 1 cup marinara sauce, 1 ¼ cups shredded mozzarella, all provolone slices, and half of the beef pepperoni slices. -
Step 4
Drizzle remaining ½ cup marinara sauce, then top with remaining 1 ¼ cups shredded mozzarella. -
Step 5
Place the top half of the rolls over the fillings and gently press down. -
Step 6
Melt ½ cup unsalted butter; stir in 1 ½ tsp garlic powder, 1 tsp dried oregano, and ½ tsp red pepper flakes (if using). Brush generously over the tops of the rolls. -
Step 7
Cover the dish tightly with aluminum foil. Bake for 15 minutes in the preheated oven. -
Step 8
Remove foil and bake uncovered for another 8-12 minutes, or until the tops are golden brown and the cheese is bubbling. -
Step 9
Rest for 5-10 minutes. Garnish with 2 tbsp chopped fresh parsley and 2 tbsp grated Parmesan cheese. -
Step 10
Cut along the lines of the rolls to separate into individual sliders. Serve warm.
Important Information
Nutrition Facts (Per Serving)
It is important to consider this information as approximate and not to use it as definitive health advice.
Allergy Information
Please check ingredients for potential allergens and consult a health professional if in doubt.

Leave a Comment