
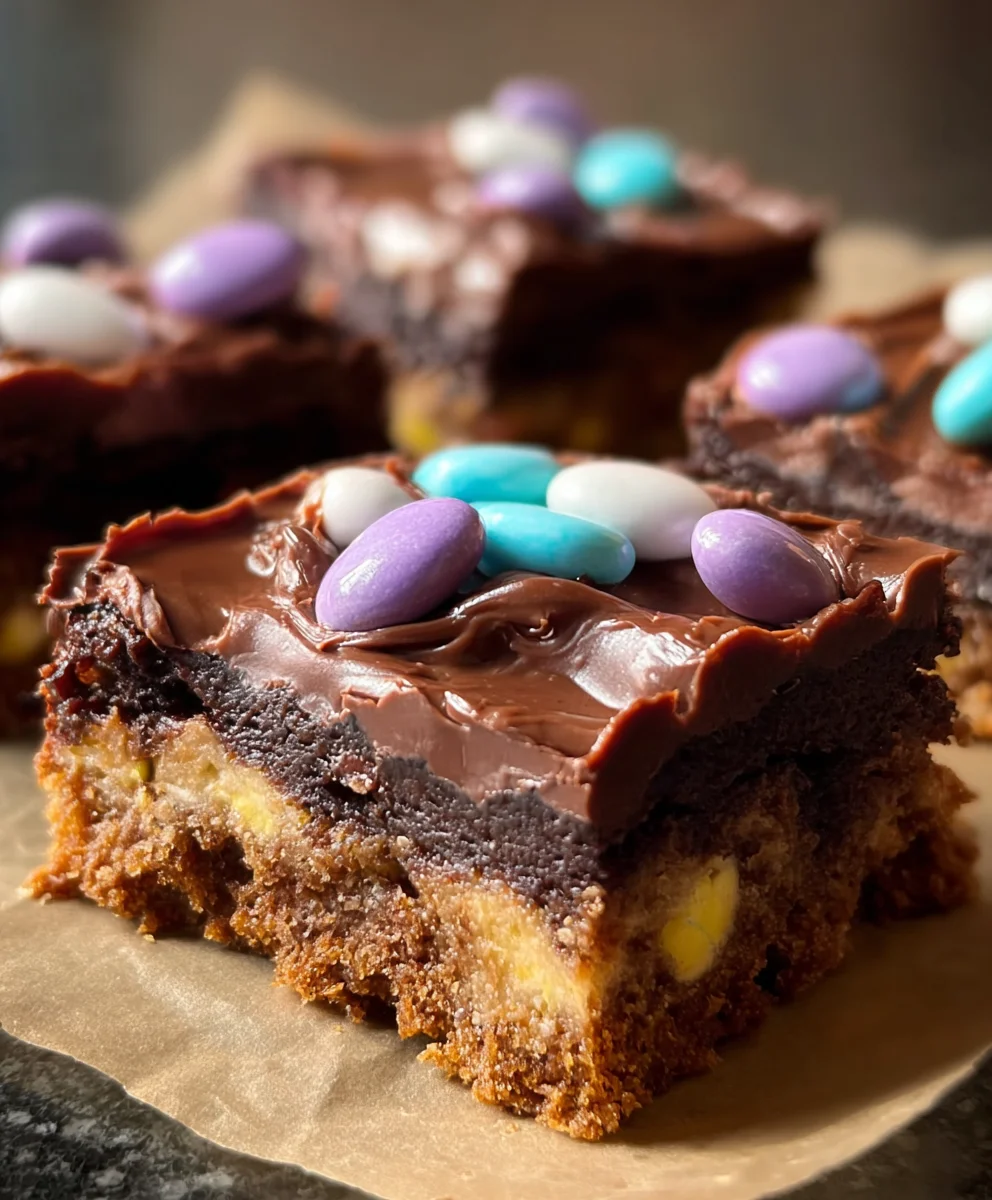
Peep Bars are more than just a seasonal treat; they’re a vibrant explosion of joy, particularly as spring blossoms around us! Have you ever wondered how to transform those iconic, fluffy marshmallow chicks and bunnies into something even more extraordinary, perhaps a dessert that captures their whimsical spirit in every delightful bite? I am absolutely thrilled to share a recipe that does precisely that, creating an irresistible confection that brightens any day and embodies the fun of the holidays they often represent.
While the marshmallow Peep itself boasts a long and sugary history, becoming an undisputed symbol of Easter baskets and spring celebrations, the innovation of turning them into these delightful bars is a more recent, brilliant culinary stroke. It’s a wonderful way to utilize surplus Peeps after the festivities, ensuring none of those colorful confections go to waste. People absolutely adore this dish for its incredible simplicity, its undeniable playful appeal, and its comforting sweetness. The combination of chewy, melt-in-your-mouth marshmallow, often paired with a crispy, buttery cereal base, creates a textural symphony that is simply addictive.
Why We Love Peep Bars So Much
There’s a unique satisfaction in witnessing the transformation of individual Peeps into a cohesive, gooey, and utterly delicious bar. The vibrant colors beautifully melt and swirl together, creating a visually stunning masterpiece that’s as pleasing to the eye as it is to the palate. They offer a nostalgic sweetness that appeals to both children and adults, making them a fantastic addition to any spring gathering or a simple, joyful afternoon snack. Get ready to fall head over heels for these easy-to-make, utterly charming Peep Bars!

Ingredients:
- For the Salty-Sweet Pretzel & Oat Crust:
- 1 cup (2 sticks or 226g) unsalted butter, softened to room temperature
- ½ cup (100g) granulated sugar
- ¾ cup (160g) light brown sugar, packed
- 2 large eggs, at room temperature
- 1 teaspoon pure vanilla extract
- 1¾ cups (210g) all-purpose flour
- 1 teaspoon baking soda
- ½ teaspoon salt
- 1½ cups (135g) old-fashioned rolled oats
- 1 cup (approx. 100g) finely crushed pretzels (about 3 cups whole pretzels before crushing)
- For the Decadent Chocolate-Peanut Butter Fudge Layer:
- 1½ cups (approx. 250g) semi-sweet chocolate chips (good quality for best melt)
- 1 cup (250g) creamy peanut butter (I recommend a good stir if using natural)
- ½ cup (1 stick or 113g) unsalted butter
- 2 cups (240g) powdered sugar, sifted
- ¼ cup (60ml) whole milk or heavy cream
- 1 teaspoon pure vanilla extract
- For the Signature Melted Peep Topping:
- Approximately 20-24 Peeps marshmallows, assorted colors (about 4-5 packages, depending on size)
- 2 tablespoons unsalted butter
- A tiny pinch of salt (really helps balance the sweetness!)
- Optional: 1-2 tablespoons rainbow sprinkles or festive nonpareils for garnish
Phase 1: Preparing the Salty-Sweet Pretzel & Oat Crust
- Preheat and Prepare Your Pan: First things first, let’s get our oven ready. Preheat your oven to a comfortable 350°F (175°C). Then, grab a 9×13 inch baking pan. This is the perfect size for these delicious Peep Bars. To make removal a breeze, line the pan with parchment paper, leaving an overhang on the sides. This parchment “sling” will be your best friend when it’s time to lift the cooled bars out. A little spray with non-stick cooking spray on the parchment won’t hurt either, just for extra insurance!
- Cream the Wet Ingredients: In a large mixing bowl, either with an electric mixer or a stand mixer fitted with the paddle attachment, cream together the softened unsalted butter, granulated sugar, and light brown sugar. You’ll want to beat these together on medium speed for about 2-3 minutes until the mixture is light, fluffy, and looks noticeably pale. This step incorporates air, which contributes to a tender crust. Don’t rush this!
- Incorporate Eggs and Vanilla: Now, add the two large eggs, one at a time, beating well after each addition until fully incorporated. Scrape down the sides of the bowl with a rubber spatula to ensure everything is mixing evenly. Finally, stir in the pure vanilla extract. That lovely aroma of vanilla is already making our kitchen smell amazing, setting the stage for these incredible Peep Bars.
- Combine Dry Ingredients: In a separate medium bowl, whisk together the all-purpose flour, baking soda, and salt. Whisking ensures these ingredients are evenly distributed, which is crucial for a consistent texture in your crust. This dry mixture will be added to our wet ingredients in the next step.
- Gently Mix Dry into Wet: Gradually add the dry ingredient mixture to the wet ingredients in the large mixing bowl. Mix on low speed until just combined. Be careful not to overmix here; overmixing can lead to a tough crust. We want our Peep Bars to have a tender, crumbly base.
- Fold in Oats and Pretzels: Remove the bowl from the mixer and, using your rubber spatula, fold in the old-fashioned rolled oats and the finely crushed pretzels. The pretzels add that wonderful salty crunch that beautifully complements the sweetness of the other layers. Make sure they are well distributed throughout the dough. The pretzel crumbs should be fine, not large chunks, so they integrate smoothly.
- Press into Pan and Bake: Press the entire dough mixture evenly into the bottom of your prepared 9×13 inch baking pan. You can use the back of a spoon or your clean hands to get it into an even layer. Pop it into your preheated oven and bake for 20-25 minutes, or until the edges are lightly golden brown and a toothpick inserted into the center comes out clean.
- Cool the Crust: Once baked, remove the pan from the oven and place it on a wire rack to cool completely. This is a critical step for our Peep Bars. We need the crust to be fully cooled and set before we add the next layer, otherwise, things could get messy! It might take about 45 minutes to an hour. You can even place it in the refrigerator for 20-30 minutes to speed up the cooling process if you’re eager to get to the Peeps!
Phase 2: Crafting the Silky Chocolate-Peanut Butter Fudge Layer
- Melt Chocolate, Peanut Butter, and Butter: While your crust is cooling, let’s get started on the truly decadent middle layer. In a large, microwave-safe bowl, combine the semi-sweet chocolate chips, creamy peanut butter, and ½ cup (1 stick) unsalted butter. Microwave on high in 30-second intervals, stirring well after each interval, until the mixture is completely melted and smooth. This usually takes about 1.5 to 2.5 minutes, depending on your microwave’s power. Alternatively, you can melt these ingredients together in a double boiler over simmering water, stirring until smooth.
- Whip in Powdered Sugar and Liquid: Once melted and smooth, remove from the heat (if using a double boiler) or microwave. Add the sifted powdered sugar, whole milk or heavy cream, and the remaining 1 teaspoon of pure vanilla extract. Stir vigorously with a sturdy spoon or a whisk until the mixture is incredibly smooth, glossy, and lump-free. It will transform into a rich, thick, and wonderfully fudgy consistency. This is the heart of our Peep Bars’ richness!
- Spread Over Cooled Crust: Once your crust is completely cool, pour this luxurious chocolate-peanut butter fudge mixture over the top. Use an offset spatula or the back of a spoon to spread it evenly from edge to edge. Work relatively quickly here, as the fudge will start to set as it cools. Aim for a perfectly smooth, uniform layer.
- Chill the Fudge Layer: Place the pan back into the refrigerator to chill for at least 30-45 minutes. We need this layer to firm up nicely before we add the star attraction – our Peeps! This chilling will make sure the fudge is solid enough to support the warm, melted Peeps without blending or shifting.
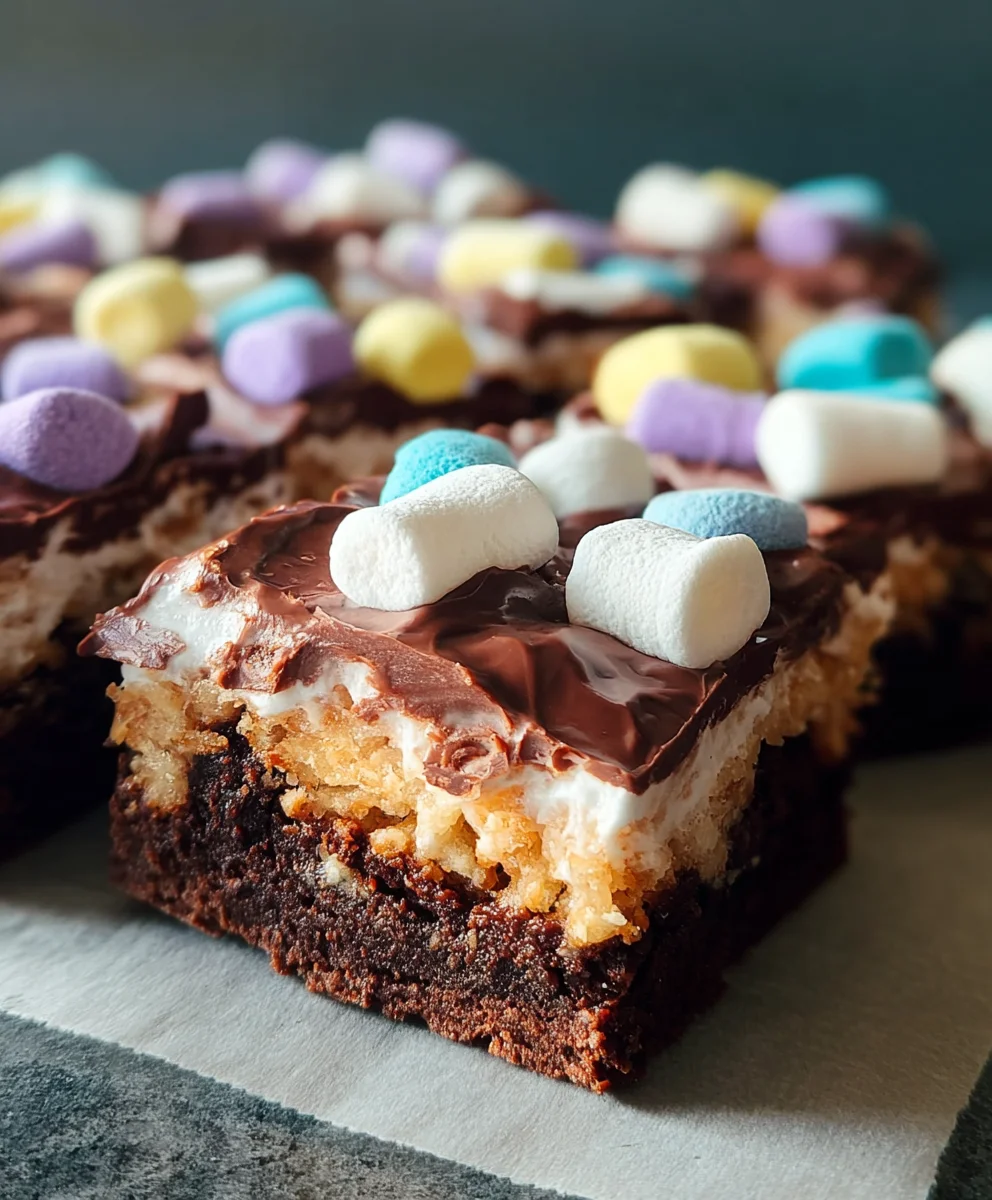
Phase 3: The Peep Topping – A Melted Marshmallow Cloud
- Prepare the Peeps: Now for the fun part! This is where our Peep Bars truly earn their name. Arrange your assorted Peeps marshmallows over the chilled chocolate-peanut butter fudge layer. You can arrange them in a colorful pattern, or simply place them close together to cover the entire surface. They will expand as they melt, so don’t worry too much about leaving tiny gaps. Aim for a single, even layer of Peeps. The more vibrant the colors, the more festive your Peep Bars will look!
- Melt Additional Butter: In a small microwave-safe bowl, melt 2 tablespoons of unsalted butter.
- Brush Peeps with Butter: Gently brush the tops of the Peeps with the melted butter. This helps them achieve that beautiful golden, slightly toasted finish and prevents them from drying out too much under the broiler. A tiny pinch of salt mixed into the butter before brushing can also enhance the flavor by balancing the sweetness.
- Broil for Golden Perfection: Place the pan with the Peeps under your oven’s broiler. Here’s where you need to pay very close attention! Keep the oven door slightly ajar and do not walk away. Broil for just 1-3 minutes, or until the Peeps are puffed up, beautifully golden brown on top, and slightly toasted. They can go from perfect to burnt in a matter of seconds. Every broiler is different, so vigilance is key. You’re looking for that perfectly gooey, slightly crispy top layer.
- Remove and Allow to Cool Slightly: Once the Peeps are beautifully toasted, carefully remove the pan from the oven. The marshmallow layer will be incredibly hot and gooey.
- Optional Sprinkles: If you’re adding sprinkles, now is the time! While the melted Peeps are still warm and sticky, generously sprinkle your rainbow sprinkles or festive nonpareils over the top. They’ll adhere perfectly to the gooey marshmallow and add an extra pop of color and festivity to your Peep Bars.
Phase 4: Chilling and Serving Your Divine Peep Bars
- Cool and Chill Thoroughly: Allow the Peep Bars to cool at room temperature for about 15-20 minutes, just so the initial heat dissipates. Then, transfer the pan back to the refrigerator to chill for at least 2-3 hours, or preferably until completely firm. This extended chilling period is crucial for the bars to set properly, making them much easier to cut into clean, beautiful squares. If you try to cut them too soon, the layers might separate or become squashed. Patience truly pays off here!
- Lift and Cut: Once thoroughly chilled and firm, use the parchment paper overhang to carefully lift the entire slab of Peep Bars out of the baking pan and place it onto a sturdy cutting board. This parchment sling makes everything so much easier!
- Slice into Bars: Using a sharp, large knife, cut the slab into individual bars. For the cleanest cuts, I recommend running your knife under hot water and wiping it dry between each cut. This helps prevent the sticky marshmallow and fudge from adhering too much to the blade. You can cut them into 2-inch squares, 1×3-inch rectangles, or any size that suits your fancy. You should get about 18-24 bars, depending on how large you make them.
- Serve and Store: These Peep Bars are best served chilled or at a slightly cool room temperature. They are absolutely delightful! Store any leftover bars in an airtight container at room temperature for up to 3 days, or in the refrigerator for up to a week. If stored in the fridge, let them sit out for 10-15 minutes before serving to allow the layers to soften slightly for the best texture. Enjoy these festive, sweet, and perfectly unique treats! They are sure to be a hit with anyone who loves the combination of salty-sweet, chocolate, and marshmallow.
Conclusion:
So, there you have it, my friends! We’ve journeyed through the delightful world of creating what I genuinely believe are some of the most charmingly irresistible treats you could ever whip up in your kitchen. If you’ve been searching for that perfect confection that brings a smile to everyone’s face, sparks joy with its vibrant colors, and satisfies even the most intense sweet tooth, then this recipe is, without a doubt, your golden ticket. I truly can’t emphasize enough how much of a game-changer these particular Peep Bars have been in my own baking repertoire. They aren’t just another dessert; they’re an experience, a moment of pure, unadulterated sugary bliss that transports you back to the simplest, happiest days of childhood. The combination of the gooey marshmallow, the satisfying crunch, and that unmistakable candy sweetness makes them utterly unforgettable. It’s a recipe that perfectly balances ease of preparation with an impressive final presentation, making you look like a seasoned pastry chef even if you’re just starting your baking adventure.
Why are these Peep Bars a must-try? Beyond their undeniable visual appeal, which is undeniably captivating with those iconic marshmallow chicks perched atop, it’s the textural interplay that truly sets them apart. Imagine biting into a crisp, buttery base that gives way to a soft, chewy marshmallow layer, all beautifully complemented by a rich, velvety chocolate topping. It’s a symphony of textures and flavors that dances on your palate, offering a moment of pure, sweet indulgence. They are incredibly versatile, fitting perfectly into any occasion from casual family gatherings to more festive celebrations. Planning a spring brunch? These bars will be the star of the show. Need a quick, impressive treat for a potluck? Look no further. Hosting an Easter basket decorating party? These are the ideal sweet snack to fuel the creativity! Their simplicity also means they’re a fantastic project for baking with kids, allowing little hands to help arrange the Peeps and sprinkle on the toppings, creating cherished memories right alongside delicious treats.
Serving Suggestions & Creative Variations:
Once your glorious batch of Peep Bars is complete and has had ample time to set, the serving possibilities are as endless as your imagination. I love to serve them cut into neat squares, perhaps alongside a scoop of vanilla bean ice cream for an extra decadent dessert, or a dollop of fresh whipped cream. For a truly elevated experience, a drizzle of warm caramel or a sprinkle of flaky sea salt on top just before serving can add an incredible depth of flavor, contrasting beautifully with the sweetness. They also make a fantastic addition to any dessert platter, standing out with their vibrant hues amidst more traditional baked goods. Personally, my favorite way to enjoy them is with a strong cup of coffee or a tall glass of cold milk, providing that perfect balance to the sugary delight.
But let’s talk about variations – this is where the real fun begins! Don’t be afraid to experiment and make this recipe truly your own. Instead of milk chocolate, try using dark chocolate for a more sophisticated, less sweet profile, or even white chocolate for a creamier, milder flavor. You could swirl in some peanut butter or a dollop of Nutella into the melted chocolate topping for an extra layer of richness. For a playful twist, swap out regular sprinkles for themed ones – maybe pastel nonpareils for spring, or bright, bold colors for a summer party. Consider adding a handful of chopped nuts like pecans or walnuts to the base for added crunch and flavor. You could even incorporate different varieties of Peeps – the bunnies, or even the flavored ones like fruit punch or blue raspberry – to create an even more colorful and diverse assortment. Imagine making individual mini Peep Bars by baking them in a muffin tin with paper liners for perfect portion control and an adorable presentation! Another idea is to press a layer of graham cracker crumbs mixed with butter as the base for a s’mores-inspired twist. The possibilities are truly limitless, and each variation offers a chance to explore new flavor combinations and textures.
Your Turn to Create and Share!
Now, it’s your turn to experience the magic! I wholeheartedly encourage you to roll up your sleeves, gather your ingredients, and dive into making these incredible treats. Trust me, the joy you’ll feel while making them, and the even greater joy you’ll witness on the faces of those who taste them, is truly priceless. These Peep Bars are more than just a recipe; they’re an invitation to create, to share, and to savor simple pleasures. Once you’ve baked your batch, please don’t keep your culinary triumph to yourself! I would absolutely love to hear all about your experience. Did you try any fun variations? What was your favorite part of the process? Did they bring back any nostalgic memories for you or your loved ones? Share your stories, your photos, and your modifications. I can’t wait to see your colorful creations and hear about the smiles they bring into your home. Happy baking!
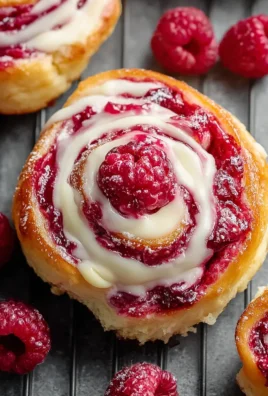
Peep Bars
Easy, chewy, and colorful Easter dessert bars featuring a salty-sweet pretzel and oat crust, a decadent chocolate-peanut butter fudge layer, and a signature melted Peep marshmallow topping. A vibrant explosion of joy for any occasion!
Ingredients
-
1 cup (226g) unsalted butter, softened
-
½ cup (100g) granulated sugar
-
¾ cup (160g) light brown sugar, packed
-
2 large eggs, room temp
-
1 tsp pure vanilla extract
-
1¾ cups (210g) all-purpose flour
-
1 tsp baking soda
-
½ tsp salt
-
1½ cups (135g) old-fashioned rolled oats
-
1 cup (100g) finely crushed pretzels
-
1½ cups (250g) semi-sweet chocolate chips
-
1 cup (250g) creamy peanut butter
-
½ cup (113g) unsalted butter
-
2 cups (240g) powdered sugar, sifted
-
¼ cup (60ml) whole milk or heavy cream
-
1 tsp pure vanilla extract
-
20-24 Peeps marshmallows, assorted colors
-
2 tbsp unsalted butter
-
Pinch of salt
-
Optional: 1-2 tbsp rainbow sprinkles or nonpareils for garnish
Instructions
-
Step 1
Preheat oven to 350°F (175°C). Line a 9×13 inch pan with parchment, leaving an overhang, and spray lightly. Cream 1 cup butter, granulated sugar, and brown sugar until light and fluffy (2-3 min). Beat in eggs one at a time, then stir in 1 tsp vanilla. In a separate bowl, whisk together flour, baking soda, and ½ tsp salt. Gradually add dry ingredients to wet, mixing on low until just combined. Fold in oats and crushed pretzels. Press dough evenly into the prepared pan. Bake 20-25 minutes until golden brown. Cool completely on a wire rack (45-60 min), or refrigerate 20-30 min. -
Step 2
In a large microwave-safe bowl, combine chocolate chips, peanut butter, and ½ cup butter. Microwave in 30-second intervals, stirring, until completely melted and smooth (1.5-2.5 min). Stir in sifted powdered sugar, milk/cream, and 1 tsp vanilla extract until smooth and glossy. Spread the fudge mixture evenly over the cooled crust. Chill in the refrigerator for at least 30-45 minutes to firm up. -
Step 3
Arrange 20-24 assorted Peeps marshmallows in a single layer over the chilled fudge layer. In a small bowl, melt 2 tbsp unsalted butter (optional: add a pinch of salt). Gently brush the tops of the Peeps with melted butter. Place the pan under your oven’s broiler for 1-3 minutes until puffed, golden brown, and slightly toasted. Watch carefully as they can burn quickly. Remove from oven and allow to cool slightly. Optional: While warm and sticky, generously sprinkle rainbow sprinkles or nonpareils over the top. -
Step 4
Allow the bars to cool at room temperature for 15-20 minutes, then transfer to the refrigerator to chill for at least 2-3 hours (preferably until completely firm). Use the parchment overhang to lift the slab onto a cutting board. Slice into 18-24 individual bars using a sharp knife (running under hot water and wiping dry between cuts for cleanest results). Serve chilled or at cool room temperature. Store leftovers in an airtight container at room temperature for up to 3 days, or in the refrigerator for up to a week. If refrigerated, let sit 10-15 min before serving.
Important Information
Nutrition Facts (Per Serving)
It is important to consider this information as approximate and not to use it as definitive health advice.
Allergy Information
Please check ingredients for potential allergens and consult a health professional if in doubt.
Leave a Comment