
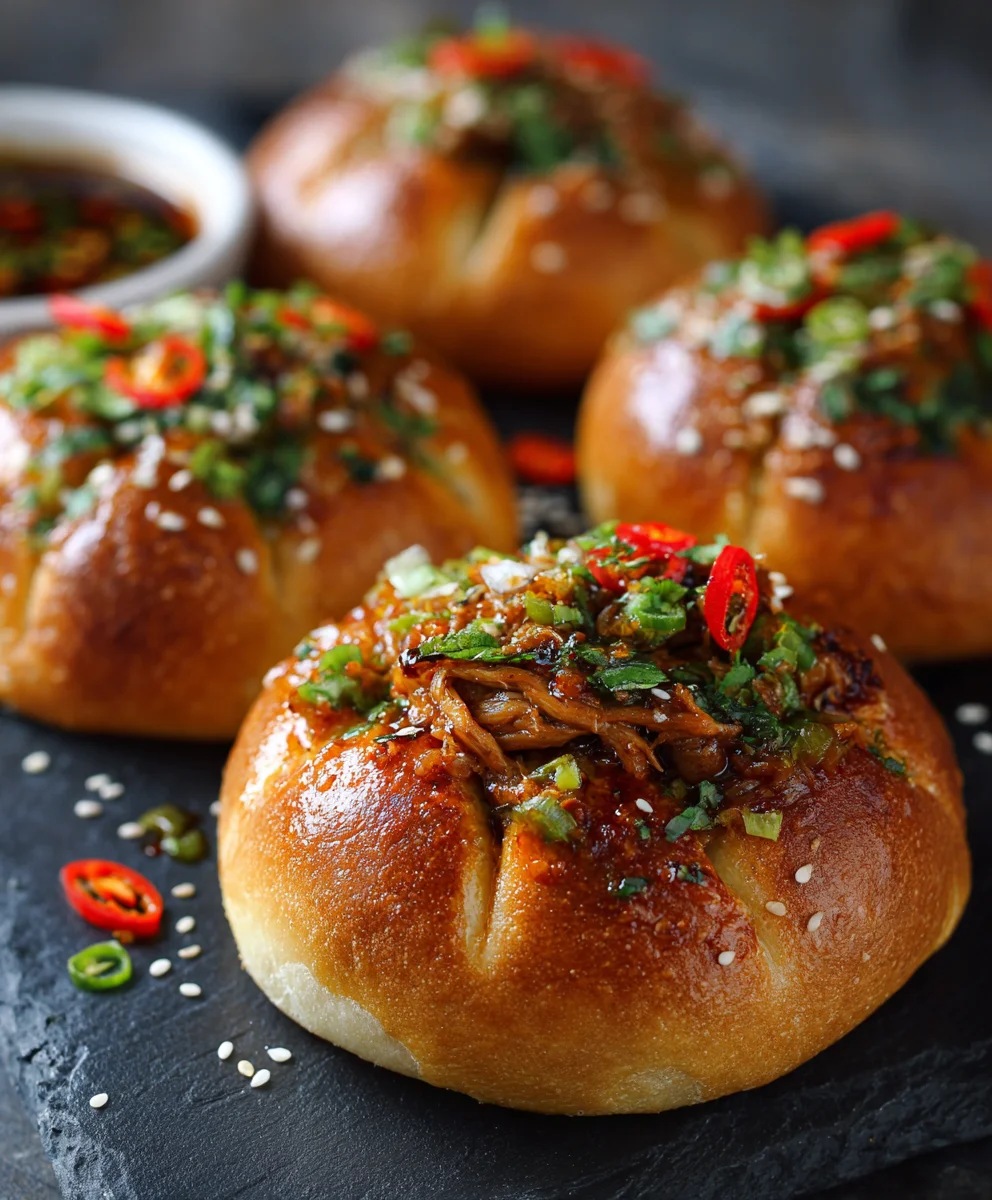
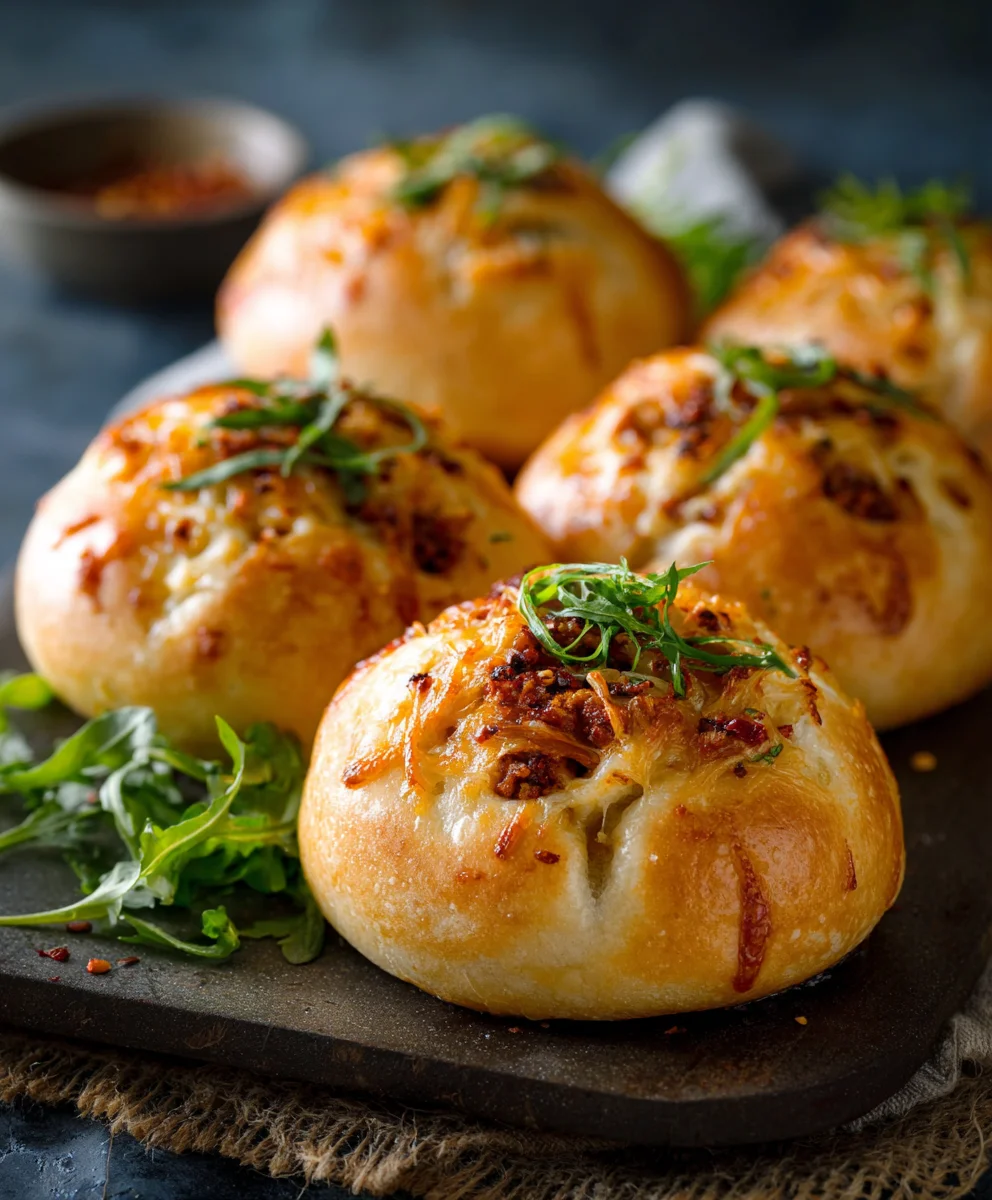
Cheesy Dynamite Chicken Buns are not just a recipe; they are an invitation to a truly sensational culinary experience. Imagine sinking your teeth into a warm, pillowy bun, perfectly golden, to uncover a rich, spicy chicken filling that’s sumptuously blanketed in gooey, melted cheese. It’s an explosion of flavor and texture that I personally find utterly irresistible and know you will too.
This dish is a modern classic in the making, drawing inspiration from the global love affair with spicy chicken and comforting baked goods.
While Cheesy Dynamite Chicken Buns might not trace back to ancient dynasties, their brilliance lies in their ability to combine universally beloved elements: the comforting embrace of freshly baked bread, the thrilling kick of “dynamite” spiced chicken – reminiscent of popular Korean heat – and the undeniable allure of savory, stretchy cheese. I’ve observed that people simply adore this dish because it perfectly balances heat with creaminess, offering a satisfying warmth that’s both adventurous and deeply comforting. They are an ideal choice for a lively gathering, a convenient and delicious snack, or a unique twist on your family dinner. Get ready to discover your new favorite comfort food, packed with a delightful punch.

Ingredients:
- For the Soft Brioche-Style Dough:
- 3 ½ cups (420g) all-purpose flour, plus more for dusting – I sometimes use bread flour for an extra chewy bun, it’s up to your preference!
- ¼ cup (50g) granulated sugar – This helps activate the yeast and gives our buns a lovely sweetness.
- 1 teaspoon (6g) salt – Essential for flavor balance in the dough.
- 1 packet (7g or 2 ¼ teaspoons) instant dry yeast – Make sure it’s fresh!
- ¾ cup (180ml) warm whole milk (around 105-115°F / 40-46°C) – The warmth is crucial for yeast activation.
- 1 large egg, at room temperature – Adds richness and helps with structure.
- ½ cup (113g) unsalted butter, softened to room temperature and cut into small pieces – For that irresistible tender crumb.
- For the Irresistible Cheesy Dynamite Chicken Filling:
- 2 cups (approx. 300g) cooked chicken, shredded – Rotisserie chicken works wonderfully here for a quick shortcut!
- 8 ounces (226g) cream cheese, softened – The base for our creamy dynamite sauce.
- ¼ cup (60ml) mayonnaise – Adds an extra layer of richness and tang.
- 2-3 tablespoons sriracha, or to taste – This is where the “dynamite” comes in! Adjust for your spice preference.
- 1 tablespoon sweet chili sauce – Balances the heat with a touch of sweetness.
- ¼ cup finely diced red onion – Adds a little zing and texture.
- ¼ cup finely diced red bell pepper – For color and a subtle sweetness.
- 2 cloves garlic, minced – Essential aromatic goodness.
- 2 green onions (scallions), thinly sliced – Freshness and a mild onion flavor.
- 1 cup (113g) shredded cheddar cheese – Melty, sharp goodness.
- ½ cup (56g) shredded mozzarella cheese – For that ultimate cheese pull!
- ½ teaspoon salt, or to taste – Always season to perfection.
- ¼ teaspoon black pepper, freshly ground – A little kick.
- For the Egg Wash & Topping:
- 1 large egg
- 1 tablespoon water or milk
- 2 tablespoons sesame seeds (white or black), for sprinkling
- 1 tablespoon chopped fresh green onions, for garnish (optional, but lovely!)
Let’s Get Started: Preparing the Dough for Our Cheesy Dynamite Chicken Buns
Making yeasted dough can seem a little intimidating at first, but trust me, it’s incredibly rewarding! This particular dough is a joy to work with, resulting in wonderfully soft and pillowy buns that are the perfect vessel for our flavorful filling.
-
Activate the Yeast: In a large mixing bowl (or the bowl of a stand mixer fitted with the dough hook attachment), combine the warm milk, granulated sugar, and instant dry yeast. Give it a gentle stir to combine. We’re looking for a temperature range of 105-115°F (40-46°C); if it’s too hot, it will kill the yeast, and if it’s too cold, it won’t activate properly. Let this mixture sit for 5-10 minutes. You should see a foamy layer appear on the surface; this is a clear sign your yeast is alive and ready to work its magic. If you don’t see any foam, your yeast might be old, or your milk wasn’t the right temperature, and it’s best to start again with fresh yeast and properly warmed milk. This step is crucial for the rise of your Cheesy Dynamite Chicken Buns!
-
Combine Dry and Wet Ingredients: To the activated yeast mixture, add the large egg. In a separate bowl, whisk together the all-purpose flour and salt. Gradually add the flour mixture to the wet ingredients, mixing on low speed (or with a wooden spoon) until a shaggy, cohesive dough forms. It might look a little messy at this stage, but that’s perfectly normal.
-
Knead the Dough: If using a stand mixer, increase the speed to medium-low and knead for about 5-7 minutes. If kneading by hand, turn the dough out onto a lightly floured surface and knead vigorously for 8-10 minutes. The goal here is to develop the gluten. You’ll know it’s ready when the dough becomes smooth, elastic, and less sticky, passing the windowpane test – where you can gently stretch a small piece of dough thin enough to see light through it without tearing.
-
Incorporate the Butter: Now for the really fun part! Reduce the mixer speed to low and add the softened unsalted butter, one piece at a time. Make sure each piece is fully incorporated before adding the next. This process might take a few minutes, and the dough might look like it’s breaking apart, but don’t worry, it will come back together. Once all the butter is in, continue kneading for another 5-8 minutes until the dough is once again smooth, soft, pliable, and incredibly elastic. This butter is what gives our Cheesy Dynamite Chicken Buns their luxurious, tender texture.
-
First Rise (Bulk Fermentation): Lightly grease a large bowl with a little oil. Transfer the dough to the bowl, turning it once to coat the entire surface with oil. This prevents it from drying out. Cover the bowl tightly with plastic wrap or a clean kitchen towel. Place it in a warm, draft-free place to rise for 1 to 1 ½ hours, or until it has doubled in size. A slightly warm oven (turned off, with just the pilot light on if you have one, or after being preheated and then turned off completely) can be a great proofing spot, especially on a cold day. Patience in this step leads to incredibly fluffy Cheesy Dynamite Chicken Buns!
Crafting the Dynamite Chicken Filling: The Heart of Our Buns
While our dough is leisurely rising, let’s get to work on the star of the show: the incredibly flavorful, cheesy, and spicy dynamite chicken filling. This filling is not just delicious; it’s designed to hold up well inside the bun and deliver a punch of flavor with every bite of your Cheesy Dynamite Chicken Buns.
-
Prepare Your Chicken: If you haven’t already, shred your cooked chicken into small, manageable pieces. I find using a stand mixer with the paddle attachment on low speed for a minute or two makes quick work of this, but two forks work just as well! Make sure there are no large chunks, as we want the filling to be evenly distributed and easy to scoop.
-
Sauté the Aromatics: In a small skillet, heat a teaspoon of oil over medium heat. Add the finely diced red onion and red bell pepper. Sauté for about 3-5 minutes until they begin to soften and become fragrant. Then, add the minced garlic and cook for another minute until aromatic, being careful not to burn it. This quick sauté enhances their sweetness and removes any harsh raw edge, adding a layer of depth to our filling. Let these cool slightly.
-
Create the Creamy Base: In a large mixing bowl, combine the softened cream cheese, mayonnaise, sriracha, and sweet chili sauce. Use a spatula or spoon to mix these together until they are well combined and smooth. The sriracha is adjustable here; if you like things extra spicy, add a little more! If you prefer a milder flavor, start with less and taste as you go. This creamy base is what makes our Cheesy Dynamite Chicken Buns truly “dynamite.”
-
Combine All Filling Ingredients: Add the shredded chicken, the cooled sautéed red onion, red bell pepper, and garlic, sliced green onions, shredded cheddar cheese, and shredded mozzarella cheese to the cream cheese mixture. Season with ½ teaspoon of salt and ¼ teaspoon of black pepper.
-
Mix Thoroughly and Taste: Gently fold all the ingredients together until everything is evenly distributed. Make sure to scrape the bottom and sides of the bowl to ensure no pockets of unmixed ingredients remain. Now for the best part – taste it! Adjust the seasoning as needed. Do you want more spice? Add a bit more sriracha. Need more tang? A tiny squeeze of lime juice can work wonders. Is it missing something? A pinch more salt usually does the trick. Don’t be shy here; adjusting the flavor now means perfectly seasoned Cheesy Dynamite Chicken Buns later.
-
Chill the Filling: Once you’re happy with the flavor, cover the bowl with plastic wrap and refrigerate the filling for at least 30 minutes. Chilling the filling helps it firm up slightly, making it much easier to scoop and encapsulate within the dough without it oozing out. This is a small but mighty tip that makes a big difference in the assembly process.
Assembling Our Cheesy Dynamite Chicken Buns: The Art of Shaping
Now that our dough is beautifully risen and our filling is chilled and ready, it’s time to bring everything together. This is perhaps my favorite part of the whole process – watching the Cheesy Dynamite Chicken Buns come to life!
-
Prepare Your Work Surface and Baking Sheets: Lightly dust your clean work surface with flour. Line two large baking sheets with parchment paper; this will prevent sticking and make for easy cleanup. Having everything ready before you start shaping will make the process much smoother.
-
Punch Down the Dough: Gently punch down the risen dough to release the air. Turn it out onto your lightly floured surface. Resist the urge to aggressively knead it again; we just want to deflate it gently.
-
Divide the Dough: Using a bench scraper or a sharp knife, divide the dough into 12 equal portions. For precision and consistency, I highly recommend using a kitchen scale to weigh the total dough and then divide by 12 to get equally sized pieces (usually around 65-70g each). This ensures all your Cheesy Dynamite Chicken Buns bake evenly. Round each portion into a smooth ball. Cover the dough balls with a clean kitchen towel or plastic wrap to prevent them from drying out while you work.
-
Flatten and Shape Each Dough Ball: Take one dough ball and, on your lightly floured surface, gently flatten it into a disc about 4-5 inches (10-12 cm) in diameter. Try to make the center slightly thicker and the edges a bit thinner; this will make sealing easier and ensure a good dough-to-filling ratio. I find gently pressing with my fingertips, then lightly rolling with a small rolling pin, works best.
-
Fill the Dough: Spoon a generous amount (about 2-3 tablespoons) of the chilled Cheesy Dynamite Chicken filling into the center of the flattened dough disc. Don’t overfill, or it will be difficult to seal, but don’t be shy either; we want these buns to be packed with flavor!
-
Seal the Buns: Now for the delicate part! Gather the edges of the dough around the filling, bringing them up and over the filling to meet in the center. Pinch the seams tightly together to seal the bun completely. It’s like gathering the edges of a little dumpling. Make absolutely sure there are no gaps, or your delicious filling might escape during baking. Once sealed, gently roll the bun between your palms to smooth out the seams and create a nice, round shape. This firm seal is critical for perfect Cheesy Dynamite Chicken Buns!
-
Arrange for Second Rise: Place the sealed buns, seam-side down, onto your prepared baking sheets, leaving about 2 inches of space between each bun to allow for expansion during their second rise and baking. Depending on the size of your baking sheets, you might fit 6-8 buns per sheet.
-
Second Rise (Proofing): Loosely cover the baking sheets with plastic wrap or a clean kitchen towel. Return them to a warm, draft-free place for their second rise, which typically takes about 30-45 minutes, or until the buns look noticeably puffy and slightly larger. Be careful not to let them over-proof, which can lead to a slightly crumbly texture. They should be light and airy, but not fragile. This final rise is key to the tender texture of your baked Cheesy Dynamite Chicken Buns.
The Baking Journey for Our Cheesy Dynamite Chicken Buns
We’re almost there! The anticipation builds as our beautiful Cheesy Dynamite Chicken Buns get ready for their transformation in the oven. The smell that will soon fill your kitchen is utterly divine, I promise!
-
Preheat Your Oven: About 15-20 minutes before the second rise is complete, preheat your oven to 375°F (190°C). This allows the oven to come to a consistent temperature, which is important for even baking. If your oven has a convection setting, you might use it, but adjust the temperature down by 25°F (about 15°C) and keep a close eye on the baking time.
-
Prepare the Egg Wash: In a small bowl, whisk together the large egg and 1 tablespoon of water (or milk) until well combined. This egg wash will give our Cheesy Dynamite Chicken Buns that beautiful golden-brown crust and a lovely sheen.
-
Brush and Top: Gently brush the tops of the proofed buns with the egg wash. Be careful not to deflate them! Then, generously sprinkle with sesame seeds. If you like, you can also sprinkle a little chopped green onion on top for extra visual appeal and a fresh hint of flavor. The sesame seeds add a delightful nutty crunch and a classic bakery look.
-
Bake to Golden Perfection: Place the baking sheets in the preheated oven. Bake for 18-25 minutes, rotating the baking sheets halfway through the baking time to ensure even browning. The exact baking time will depend on your oven and the size of your buns. Look for a beautiful golden-brown color on top and bottom. If you have an instant-read thermometer, the internal temperature of the dough should register around 200°F (93°C) when fully cooked. Oh, the aroma of these baking Cheesy Dynamite Chicken Buns is simply heavenly!
-
Cool Slightly: Once baked, carefully remove the Cheesy Dynamite Chicken Buns from the oven and transfer them to a wire rack to cool for at least 10-15 minutes before serving. This allows the internal filling to set a bit and prevents you from burning your mouth on the molten cheese inside. Trust me, the wait is worth it for perfectly cooled and incredibly flavorful Cheesy Dynamite Chicken Buns!
Serving Suggestions and Storage Tips for Your Cheesy Dynamite Chicken Buns
Congratulations, you’ve made incredible Cheesy Dynamite Chicken Buns! Now comes the best part – enjoying your hard work. Here are some ideas for serving and keeping them fresh.
-
Serve Warm: These buns are absolutely at their best when served warm, straight out of the oven or reheated slightly. The warm, soft dough combined with the gooey, cheesy, spicy chicken filling is an experience you won’t forget. They make a fantastic snack, appetizer, or even a light meal paired with a simple side.
-
Pairing Suggestions:
- Light Salad: A crisp green salad with a simple vinaigrette provides a refreshing contrast to the richness of the buns.
- Soup: A clear broth soup or a creamy tomato soup would complement these savory buns beautifully.
- Dipping Sauce: While they are bursting with flavor on their own, a side of extra sweet chili sauce, sriracha mayonnaise, or even a cooling ranch dip can elevate the experience for those who love to dip!
- Beverages: A cold glass of iced tea, lemonade, or even a light beer can be a perfect accompaniment to cut through the richness and spice.
-
Storage: If you happen to have any leftover Cheesy Dynamite Chicken Buns (a rare occurrence in my house!), they can be stored in an airtight container at room temperature for up to 2 days. For longer storage, you can keep them in the refrigerator for up to 4 days.
-
Reheating: To reheat, I recommend placing them in a preheated oven or toaster oven at 300°F (150°C) for about 8-12 minutes, or until warmed through and the cheese is melty again. This method helps to crisp up the exterior of the dough slightly and prevents it from becoming soggy, which can sometimes happen in a microwave. If you do use a microwave, heat them in 30-second intervals until warm, but be aware the texture might be a little softer. Reheating these buns properly ensures you get to enjoy that wonderful soft bread and gooey filling every time.
-
Freezing (Unbaked Buns): You can actually freeze the shaped but unbaked Cheesy Dynamite Chicken Buns! After the first rise, shape the buns and place them on a parchment-lined baking sheet. Freeze until solid (about 2-3 hours), then transfer the frozen buns to a freezer-safe bag or container. They can be stored for up to 1 month. When you’re ready to bake, place the frozen buns on a baking sheet, cover loosely, and let them thaw and rise at room temperature for 3-5 hours (or overnight in the fridge, then an hour at room temperature), until puffy. Then proceed with the egg wash, topping, and baking steps as usual. This is an excellent make-ahead option for fresh Cheesy Dynamite Chicken Buns anytime!
-
Freezing (Baked Buns): Baked and cooled Cheesy Dynamite Chicken Buns can also be frozen. Wrap each bun individually in plastic wrap, then place them in a freezer-safe bag. They will keep for up to 1 month. To reheat, thaw overnight in the refrigerator, then warm in a preheated oven as described above. Enjoying your own homemade Cheesy Dynamite Chicken Buns has never been easier!
Conclusion:
And so, we arrive at the culmination of our culinary journey. I genuinely hope you’re as excited as I am about what we’ve just discussed, because these aren’t just any ordinary buns; they are a revelation, a flavor explosion that truly lives up to its name. If you’ve been searching for that one dish to truly impress, to add a spark to your weeknight meals, or to become the undisputed star of your next gathering, then look no further. This recipe for Cheesy Dynamite Chicken Buns is, without a doubt, a must-try. I believe you’ll find that the combination of the tender, seasoned chicken, the creamy, molten cheese, and that delightful kick of spice all encased within a soft, pillowy bun creates an unparalleled symphony of textures and tastes. It’s an experience that tantalizes every single taste bud, leaving you craving just one more.
What makes them so incredibly special? It’s that perfect balance. The heat isn’t overpowering; it’s a warm, inviting glow that complements the rich savory chicken, while the generous helping of cheese melts into a glorious, gooey blanket, providing a comforting contrast. Each bite offers a satisfying chewiness from the bun, a succulence from the chicken, and that irresistible stretch of cheese. They are versatile, serving equally well as a hearty snack, a standout appetizer, or even a fun, light meal when paired with a fresh side. Preparing these is more than just cooking; it’s an act of creating joy, and I promise, the reward of seeing the smiles on everyone’s faces (including your own!) when they take that first bite is utterly priceless. These buns aren’t just food; they’re an occasion, a reason to celebrate the simple, incredible pleasure of good eating.
Creative Serving Suggestions to Elevate Your Experience
While these magnificent buns are absolutely perfect just as they are, fresh out of the oven, I love exploring ways to make them even more of an occasion. For a truly delightful experience, consider serving them alongside a cooling dipping sauce. A creamy ranch, a tangy blue cheese dressing, or even a simple sour cream and chive dip can beautifully complement the dynamite kick, offering a refreshing counterpoint. Imagine them gracing your snack table during a game night, nestled amongst other appetizers, where they are sure to be the first to disappear. For a lighter meal, pair them with a crisp, refreshing coleslaw or a vibrant green salad tossed in a light vinaigrette. The freshness of the salad cuts through the richness of the buns, creating a perfectly balanced plate. And for beverage pairings, a cold craft beer, a sparkling lemonade, or even a chilled rosé would be absolutely delightful.
Exciting Variations to Make Them Your Own
One of the beautiful aspects of this recipe is its adaptability. Don’t be afraid to put your own spin on it! If you’re a true heat seeker, consider adding a pinch more cayenne pepper, a dash of your favorite hot sauce directly into the chicken mixture, or even finely diced jalapeños for an extra crunch and fiery punch. On the other hand, if you prefer a milder profile, feel free to reduce the chili flakes or omit them entirely – the other flavors are robust enough to shine on their own. Experiment with different cheeses too! A blend of Monterey Jack and sharp cheddar would be fantastic, or for an even creamier interior, try provolone. You could also introduce other ingredients into the filling: finely diced bell peppers for added sweetness and crunch, a handful of corn kernels for a touch of sweetness, or even some black beans for a heartier, more Tex-Mex inspired bun. For a different texture, you could try baking these as a pull-apart bread in a Bundt pan, which makes for a spectacular centerpiece and an easy sharing experience. The possibilities are truly endless, and I encourage you to get creative in your kitchen!
So, what are you waiting for? This is your invitation to step into the kitchen, embrace the joy of cooking, and create something truly spectacular. I am absolutely confident that once you take that first bite of these Cheesy Dynamite Chicken Buns, you’ll understand why I’m so enthusiastic about them. I implore you to give this recipe a try. Make it for your family, your friends, or just for yourself as a well-deserved treat. And please, don’t keep your triumphs to yourself! I would absolutely love to hear about your experience. Share your pictures, your modifications, and your reactions. Did you add more cheese? Did you find a new favorite dipping sauce? Did they disappear in minutes? Let me know in the comments below! Your insights and culinary adventures inspire me, and I can’t wait to see your incredible creations. Happy baking, and get ready for a truly dynamic dining experience!
Recipe
A delicious recipe
Ingredients
Instructions
Important Information
Nutrition Facts (Per Serving)
It is important to consider this information as approximate and not to use it as definitive health advice.
Allergy Information
Please check ingredients for potential allergens and consult a health professional if in doubt.


Leave a Comment