
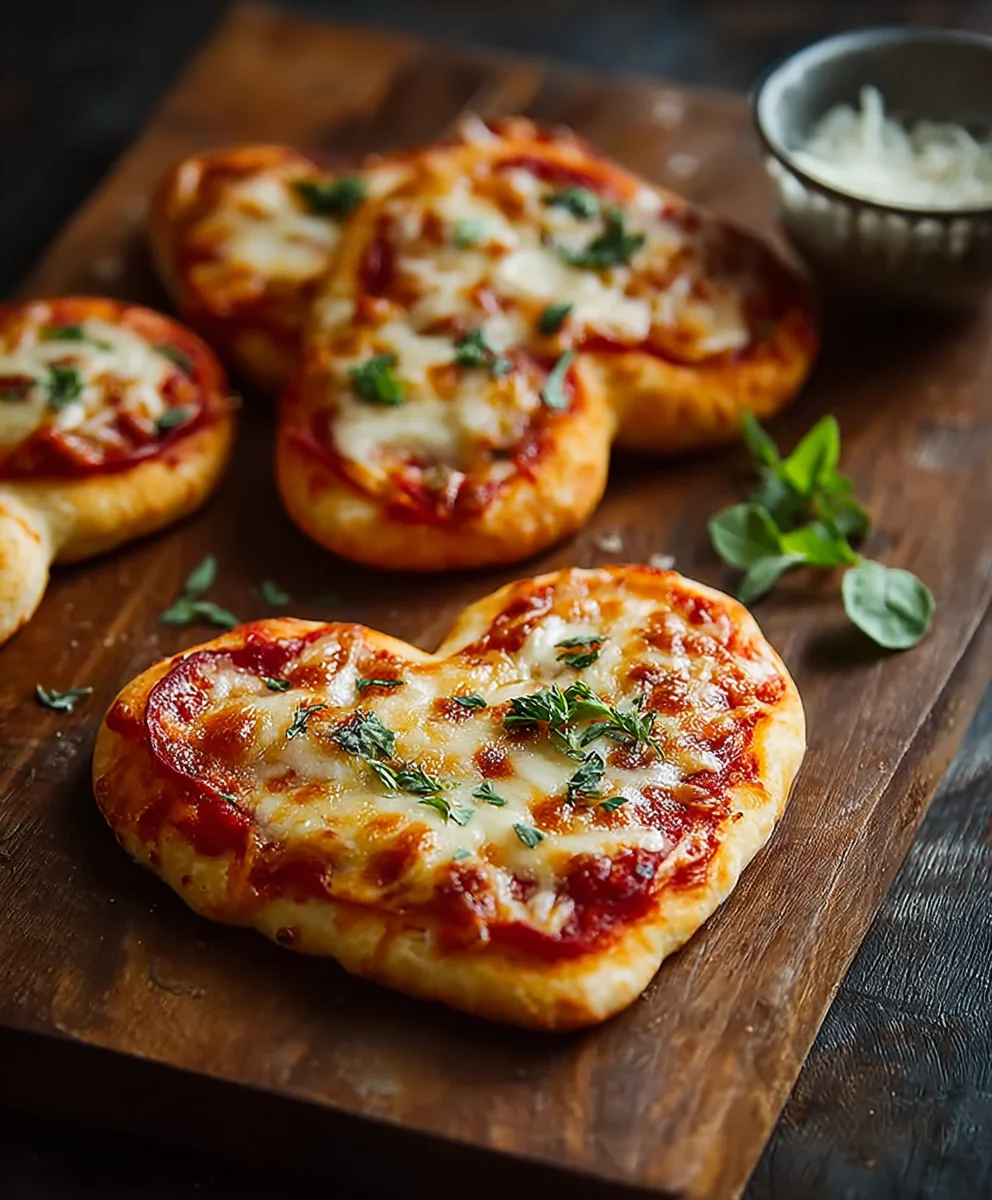
Mini Heart Pizzas hold a special place in my heart, and I’m absolutely delighted to share with you how to create these charming little delights. There’s something undeniably magical about transforming a classic, beloved dish into a shape that symbolizes affection and joy. While pizza itself boasts a rich history dating back centuries, the delightful concept of Mini Heart Pizzas is a more contemporary celebration, emerging as a popular and utterly adorable way to express love and care, particularly around special occasions like Valentine’s Day, anniversaries, or simply to brighten an ordinary family dinner.
Why We Adore These Whimsical Bites
What truly makes this recipe a crowd-pleaser? Beyond their incredibly cute appearance, these individual pizzas offer the ultimate in convenience and customization. Each bite delivers the perfect balance of crispy crust, tangy sauce, and gooey, melted cheese, exactly how you like it. They are fantastic for hands-on cooking with children, making them feel like little chefs, and are equally perfect for adult gatherings where everyone can personalize their own culinary masterpiece. I find that the individual portions are not just practical but add an element of fun and personalization that a standard pizza often can’t match, ensuring every guest gets exactly what they desire, all wrapped up in a heartwarming shape.

Ingredients:
-
For the Homemade Pizza Dough:
- 2 ¼ teaspoons (1 standard packet) active dry yeast
- 1 teaspoon granulated sugar (to activate the yeast)
- 1 cup (240ml) warm water (around 105-115°F / 40-46°C)
- 2 ½ cups (300g) all-purpose flour, plus extra for dusting
- 1 teaspoon fine sea salt
- 2 tablespoons olive oil, plus extra for the bowl
-
For My Quick Homemade Pizza Sauce:
- 1 tablespoon olive oil
- 2 cloves garlic, minced
- 1 (15-ounce / 425g) can crushed tomatoes
- ½ teaspoon dried oregano
- ¼ teaspoon dried basil
- Pinch red pepper flakes (optional, for a little kick)
- ½ teaspoon granulated sugar (to balance acidity)
- Salt and freshly ground black pepper to taste
-
For the Toppings and Cheese (My Favorites!):
- 1 cup (113g) shredded mozzarella cheese (low-moisture, part-skim works best)
- ½ cup (50g) shredded provolone cheese (for extra flavor)
- ¼ cup (25g) grated Parmesan cheese (for a salty finish)
- ¼ cup mini pepperoni slices
- ½ small red bell pepper, finely diced
- ¼ small red onion, very thinly sliced
- 2 tablespoons fresh basil leaves, torn or thinly sliced (for garnish)
- Olive oil for brushing the crust (optional, but highly recommended)
Gathering My Tools and Ingredients
- Before I even think about mixing, I always take a moment to gather all my ingredients and necessary tools. This is what we call “mise en place” in the culinary world, and it makes the entire process so much smoother and more enjoyable. For my delightful Mini Heart Pizzas, I make sure I have my measuring cups and spoons, mixing bowls (one large for dough, one medium for sauce), a whisk, a wooden spoon or spatula, a sturdy surface for kneading, a rolling pin, a heart-shaped cookie cutter (about 3-4 inches wide is perfect for these mini pizzas), baking sheets, parchment paper, and a sharp knife for chopping. Having everything ready means I can move seamlessly from one step to the next, reducing stress and increasing my chances of success!
Crafting the Perfect Pizza Dough for My Mini Heart Pizzas
Making homemade pizza dough might sound intimidating, but I promise you, it’s incredibly rewarding and yields the most flavorful, chewy crust for our Mini Heart Pizzas. Trust me, once you try this recipe, you’ll never go back to store-bought dough!
- Activating the Yeast: In a large mixing bowl, I start by combining my warm water (it should feel like a warm bath, not too hot, not too cold – between 105-115°F or 40-46°C is ideal for yeast activation) with the granulated sugar and active dry yeast. I give it a gentle stir and then let it sit undisturbed for about 5-10 minutes. What I’m looking for is a bubbly, foamy layer on top, which tells me the yeast is alive and ready to work its magic. If it doesn’t foam, your water might have been too hot or too cold, or your yeast might be old, and it’s best to start over.
- Mixing the Dry Ingredients: While my yeast is blooming, in a separate medium bowl, I whisk together the all-purpose flour and fine sea salt. This ensures the salt is evenly distributed throughout the flour, preventing salty pockets in the dough later.
- Combining Wet and Dry: Once my yeast mixture is beautifully foamy, I pour it into the large bowl with the flour and salt mixture. I then add the 2 tablespoons of olive oil. Using a wooden spoon or a sturdy spatula, I stir everything together until a shaggy, somewhat sticky dough forms. At this point, it won’t look pretty, but that’s perfectly normal!
- Kneading for Perfection: Now comes the fun part – kneading! I turn the dough out onto a lightly floured surface. I usually start with about ¼ cup of flour for dusting, but I’ll add more as needed if the dough is too sticky. I knead the dough for about 8-10 minutes. This process develops the gluten in the flour, which is what gives our pizza crust its wonderful chewiness and elasticity. I know it’s ready when the dough transforms from a shaggy mess into a smooth, elastic, and springy ball. It should feel less sticky and more manageable. A good test is the “windowpane test”: tear off a small piece of dough and gently stretch it. If you can stretch it thin enough to see light through it without tearing, your gluten is well developed!
- First Rise: The Magic Begins: I lightly grease a clean large bowl with a little olive oil, then place my beautifully kneaded dough ball into it, turning it once to coat all sides with oil. This prevents it from drying out. I cover the bowl tightly with plastic wrap or a clean kitchen towel and place it in a warm, draft-free spot. My favorite spot is usually inside a slightly warmed-up (but turned off!) oven. I let it rise for 1 to 1 ½ hours, or until it has doubled in size. This first rise is crucial for flavor development and a light, airy texture for our Mini Heart Pizzas.
- Punching Down and Second Rise (Optional, but Recommended): Once doubled, I gently punch down the dough to release the air. I then knead it for about a minute on a lightly floured surface. For an even more tender and flavorful crust, I like to put it back in the oiled bowl, cover it, and let it rise for another 30-45 minutes. This second rise really improves the texture and makes the dough even easier to work with. If I’m short on time, I sometimes skip this second rise, but for the best Mini Heart Pizzas, I truly recommend it!
Whipping Up My Quick and Zesty Pizza Sauce
While the dough is doing its thing, I whip up a batch of my super simple, yet incredibly flavorful pizza sauce. It comes together in minutes and really elevates the taste of these Mini Heart Pizzas!
- Sautéing Aromatics: In a medium saucepan, I heat 1 tablespoon of olive oil over medium heat. Once shimmering, I add my minced garlic and sauté it for about 30 seconds to 1 minute, until it’s fragrant but not browned. Be careful not to burn the garlic, as it can turn bitter very quickly!
- Simmering the Tomatoes: I then pour in the can of crushed tomatoes. Crushed tomatoes give a lovely texture that adheres well to the small surface area of our Mini Heart Pizzas. I stir in the dried oregano, dried basil, and a pinch of red pepper flakes (if I’m feeling a little adventurous and want a tiny bit of heat). I also add the granulated sugar at this stage; it helps to balance the acidity of the tomatoes and brings out their natural sweetness.
- Seasoning to Taste: I bring the sauce to a gentle simmer, then reduce the heat to low, cover, and let it cook for at least 15-20 minutes, stirring occasionally. This simmering time allows the flavors to meld beautifully. After simmering, I taste the sauce and adjust the seasoning with salt and freshly ground black pepper as needed. Sometimes, I might add another tiny pinch of sugar if the tomatoes are particularly tart. I want this sauce to sing with flavor, ready to be the delicious base for our Mini Heart Pizzas!
Prepping My Delicious Toppings and Cheeses
Prepping the toppings is all about making sure everything is ready to go when it’s time to assemble our Mini Heart Pizzas. Uniformity in chopping really helps with even cooking and presentation.
- Chopping Vegetables: I take my red bell pepper and finely dice it. For the red onion, I slice it as thinly as possible. Since these are mini pizzas, I want the vegetable pieces to be small enough that they don’t overpower a single bite or slide off the crust.
- Slicing Meats: If my pepperoni isn’t already mini-sized, I might even quarter larger slices so they fit perfectly on our small heart shapes. The goal is to have proportionate toppings that enhance, rather than overwhelm, the “Mini Heart Pizzas” experience.
- Shredding Cheese: I find that shredding my own mozzarella and provolone from blocks results in better melt and flavor compared to pre-shredded varieties, which often contain anti-caking agents. I also grate my Parmesan cheese fresh. I combine all three cheeses in a bowl; this mix gives a wonderful depth of flavor and that classic stretchy, bubbly pizza top.
Assembling My Adorable Mini Heart Pizzas
This is where our Mini Heart Pizzas truly come to life! It’s such a fun and creative step, especially if you have little helpers in the kitchen.
- Preparing the Workspace: I preheat my oven to 450°F (230°C) with a rack in the middle position. This high heat is key for a crispy crust. I also line two large baking sheets with parchment paper to prevent sticking and make cleanup a breeze.
- Shaping the Dough Hearts: I lightly flour my clean work surface and turn out my risen pizza dough. Using a rolling pin, I gently roll the dough out to about ¼-inch thickness. I try to keep it as even as possible for uniform cooking. Then, using my heart-shaped cookie cutter (I love a 3-4 inch one for these), I cut out as many heart shapes as possible. I carefully transfer these dough hearts to my prepared baking sheets, leaving a little space between each one. Any dough scraps can be gently re-rolled once or twice to create a few more hearts, though the subsequent ones might be a little less tender.
- Applying the Sauce: With a small spoon or the back of a measuring spoon, I spread a thin layer of my delicious homemade pizza sauce over each dough heart, leaving about a ¼-inch border around the edges. This border will become our lovely golden crust. I am careful not to over-sauce, as too much can make the Mini Heart Pizzas soggy.
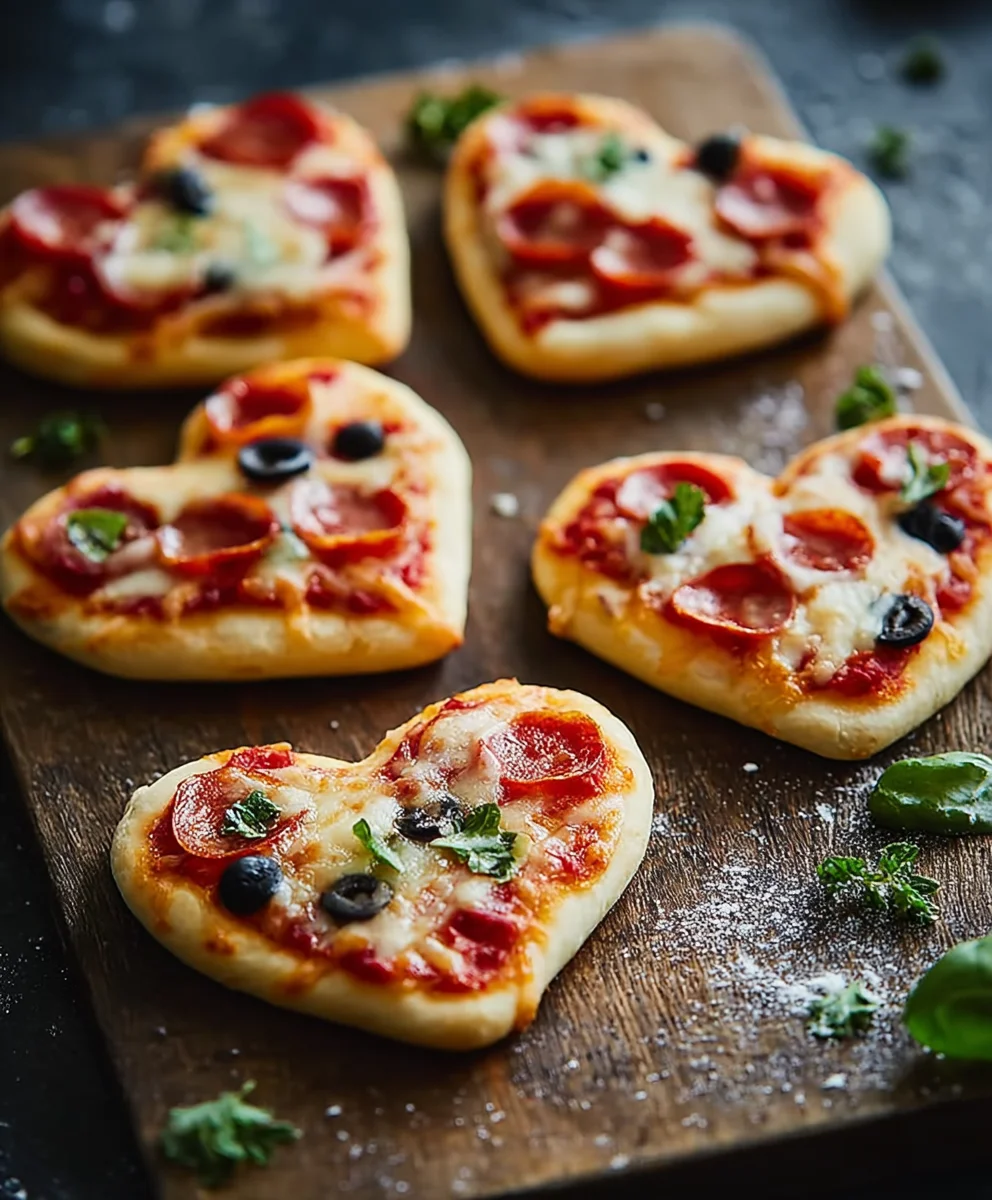
- Layering Cheese and Toppings: Next, I sprinkle a generous amount of my mixed cheeses over the sauce on each heart. Then, I arrange my chosen toppings – the mini pepperoni, finely diced red bell pepper, and thin red onion slices – artfully on top of the cheese. Since these are “Mini Heart Pizzas,” I make sure the toppings are placed thoughtfully so each little heart looks appealing.
- Optional Crust Brush: For an extra golden and slightly crispier crust, I sometimes lightly brush the exposed dough edges with a tiny bit of olive oil. It adds a lovely finish!
Baking My Mini Heart Pizzas to Golden Perfection
The moment of truth! Baking these Mini Heart Pizzas is quick, and the aroma that fills your kitchen is absolutely divine.
- Baking Time and Temperature: I carefully transfer the baking sheets to my preheated oven. I bake them for 10-15 minutes. The exact time will depend on your oven and how crispy you like your crust. What I’m looking for is a bubbly, melted cheese topping, a golden-brown crust, and slightly charred edges on some of the toppings. If I’m baking two sheets at once, I often rotate them halfway through baking to ensure even cooking, switching their positions from top to bottom and front to back.
- Achieving That Golden Crust: Keep an eye on them! The high heat means they cook quickly. I want the bottoms of the crusts to be nicely browned and firm. Sometimes, if I want a little more browning on the cheese, I’ll switch the oven to broiler for the last minute or two, but I stand right there and watch it like a hawk because it can go from perfect to burnt in seconds!
Serving and Enjoying My Homemade Mini Heart Pizzas
The best part – enjoying the fruits of your labor! These Mini Heart Pizzas are perfect for parties, snacks, or just a fun family meal.
- Cooling Slightly: Once baked to perfection, I carefully remove the baking sheets from the oven. It’s tempting to dive right in, but I let the Mini Heart Pizzas cool on the baking sheets for about 2-3 minutes before transferring them to a wire rack. This brief cooling period allows the cheese to set slightly and the crust to firm up, making them easier to handle without everything sliding off.
- Garnishing: Just before serving, I love to sprinkle my fresh basil leaves over the warm Mini Heart Pizzas. The heat from the pizzas helps release the aromatic oils of the basil, adding a burst of freshness and color. Sometimes, I’ll even drizzle a tiny bit of extra virgin olive oil over them for a luxurious touch.
- Serving Suggestions: These Mini Heart Pizzas are fantastic served warm, fresh from the oven. They make an excellent appetizer for gatherings, a fun lunch for kids (and adults!), or a delightful snack. I like to serve them with a side of extra marinara for dipping, or perhaps a simple green salad to round out the meal.
- Storage Tips: If, by some miracle, you have any leftover Mini Heart Pizzas, they can be stored in an airtight container in the refrigerator for up to 2-3 days. To reheat, I usually pop them back into a preheated oven at 350°F (175°C) for about 5-7 minutes, or until the cheese is bubbly again and the crust is crisp. The microwave works in a pinch, but the crust won’t be as crispy.
There you have it! My complete guide to making incredibly delicious and adorable Mini Heart Pizzas from scratch. I truly hope you enjoy making and eating these as much as I do!
Conclusion:
Well, my friends, we’ve reached the delicious conclusion of our culinary journey, and I genuinely hope you’re feeling as excited as I am about the prospect of creating these delightful treats. If there’s one recipe I could implore you to try, it would undoubtedly be this one. Why, you ask? Because these aren’t just any pizzas; they are an experience wrapped in a charming, bite-sized package. They represent the perfect fusion of simplicity, fun, and undeniable deliciousness, making them an absolute must-try for home cooks of all skill levels. Whether you’re a seasoned chef or a kitchen novice, I promise you, success is virtually guaranteed, and the smiles that follow will be your greatest reward.
From the moment you cut out those adorable shapes to the first bubbly, cheesy bite, every step of making these will fill your kitchen with joy. They’re incredibly versatile, offering endless possibilities for customization to suit every palate and dietary preference. Imagine the delight on your family’s faces, or the impressed murmurs of guests at your next gathering, when they discover these charming creations. They truly transform a simple meal into something special, proving that a little creativity can go a long way in making food memorable. The sheer joy of crafting something so visually appealing, yet so utterly satisfying, is a feeling I wish for everyone to experience.
Now, let’s talk about enjoying your creations! These Mini Heart Pizzas are incredibly adaptable to various dining scenarios. For a fantastic appetizer spread, I love serving them alongside a vibrant marinara dipping sauce, a creamy ranch, or even a zesty garlic aioli. They vanish quickly, so consider making an extra batch! If you’re looking for a delightful main course, pair them with a fresh, crisp garden salad dressed with a light vinaigrette, or a comforting bowl of homemade tomato basil soup. They also make an incredible addition to any party platter, game-night snack lineup, or even a fun, unconventional brunch item where guests can customize their own toppings before baking. Think about setting up a “pizza bar” with various toppings; it’s always a massive hit and adds an interactive element to your meal.
And speaking of customization, this is where the real fun begins! Don’t be afraid to unleash your inner culinary artist. Experiment with different cheese blends: smoked gouda, sharp cheddar, or even a sprinkle of crumbled feta or goat cheese can elevate the flavor profile. For sauces, beyond the classic marinara, consider a bright pesto, a tangy BBQ sauce, or a rich white garlic cream sauce. The topping possibilities are genuinely endless! Go traditional with pepperoni, sausage, and mushrooms, or get gourmet with caramelized onions, thinly sliced prosciutto (added after baking for crispness), sun-dried tomatoes, Kalamata olives, or even a sprinkle of fresh arugula or basil post-oven. For my vegetarian and vegan friends, load them up with an array of colorful vegetables like bell peppers, zucchini, spinach, and plant-based cheeses and proteins. A dash of red pepper flakes can add a lovely kick for those who enjoy a bit of heat. Remember, the beauty of these mini pizzas lies in their flexibility; each one can be a tiny canvas for your favorite flavors.
I genuinely hope you’re feeling inspired to roll up your sleeves and give this recipe a try very soon. It’s more than just cooking; it’s about creating joy, fostering connections, and making delicious memories in your kitchen. So, gather your ingredients, turn on some music, and prepare for a delightful culinary adventure. I absolutely cannot wait to hear about your experiences! Did you try a unique topping combination? Were they a hit at your party? Please, share your stories, photos, and any brilliant variations you come up with in the comments below or on social media. Your feedback and creativity truly inspire me and our wonderful community of home cooks. Happy baking, and enjoy every single bite!
Recipe
A delicious recipe
Ingredients
Instructions
Important Information
Nutrition Facts (Per Serving)
It is important to consider this information as approximate and not to use it as definitive health advice.
Allergy Information
Please check ingredients for potential allergens and consult a health professional if in doubt.


Leave a Comment