
Milky Way Fudge – imagine sinking your teeth into a confection that perfectly marries the velvety smoothness of classic fudge with the iconic, irresistible flavors of your favorite candy bar. I’m thrilled to share this recipe with you, as it truly is a revelation for any sweet tooth. While traditional fudge has graced American tables for over a century, offering a comforting slice of homemade goodness, this particular iteration elevates the experience by incorporating the beloved Milky Way bar. It’s a fantastic blend of old-school charm and modern candy bar nostalgia, creating a unique treat that resonates with all ages.
What makes this particular fudge so universally adored? It’s the sublime combination of textures and tastes. Each square of Milky Way Fudge offers a rich, deep chocolate base, swirled with pockets of luscious caramel and hints of soft, chewy nougat – a symphony of flavors that truly melts in your mouth. Beyond its incredible taste, I find immense satisfaction in its relative ease of preparation, making it an ideal choice for busy bakers looking to impress. Whether you’re preparing a holiday gift, a party treat, or simply indulging in a cozy evening snack, this delightful recipe promises to deliver pure, unadulterated joy. I often find myself making extra batches because it disappears so quickly!

Ingredients:
- 1 (14-ounce) can sweetened condensed milk (I always recommend a good quality, full-fat version for the creamiest results!)
- 1 ½ cups granulated sugar
- ½ cup (1 stick) unsalted butter, cut into small pieces
- ¼ cup unsweetened cocoa powder (Dutch-processed works wonderfully for a richer, darker chocolate flavor, but natural cocoa is also fine!)
- ¼ teaspoon salt (just a pinch, but it really helps to bring out all those lovely flavors)
- 2 teaspoons pure vanilla extract (the good stuff, trust me, it makes a difference!)
- 1 (12-ounce) package semi-sweet chocolate chips (or your favorite milk chocolate chips for an even sweeter treat)
- 10 standard-sized Milky Way candy bars (about 1.84 ounces each), unwrapped and roughly chopped – these are the stars of our Milky Way Fudge!
Prepping Our Ingredients and Pan
- Prepare Your Pan for Success: First things first, we need to get our pan ready. I always reach for an 8×8-inch baking pan, which is just the right size to give us beautifully thick pieces of Milky Way Fudge. To make sure our fudge comes out easily and cleanly, we’re going to line the pan. Take a piece of parchment paper or aluminum foil and line the entire pan, leaving an overhang on two opposite sides. This creates little “handles” that will be super helpful later when it’s time to lift the set fudge out of the pan. Once the paper or foil is in place, give it a good spray with non-stick cooking spray, or a generous greasing with butter. Don’t skip this step – it’s crucial for that satisfying, seamless removal! A perfectly prepped pan is the foundation for perfect fudge.
- Chop Those Milky Way Bars: Now for the fun part – getting our star ingredient ready! Unwrap all 10 of your standard-sized Milky Way candy bars. I like to roughly chop them into smaller pieces, aiming for about ½ to ¾-inch chunks. Don’t worry about being too precise here; they’re going to melt beautifully into our fudge base. The goal is just to make them manageable for melting and to ensure they distribute well throughout the fudge. Smaller pieces will melt more quickly and evenly, contributing that signature nougat and caramel goodness throughout every bite of our finished Milky Way Fudge. Set these aside in a bowl, ready to be introduced later in the process.
- Measure Everything Out: Before we even think about turning on the heat, I always recommend measuring out all your ingredients. This is what we call “mise en place” in the cooking world – everything in its place! Have your sweetened condensed milk, granulated sugar, butter pieces, cocoa powder, salt, vanilla extract, chocolate chips, and chopped Milky Way bars all measured and ready to go. This makes the cooking process so much smoother and prevents any last-minute scrambling while your mixture is bubbling on the stove. With everything prepped, we can focus entirely on the cooking process and achieving that perfect fudge consistency for our glorious Milky Way Fudge.
Crafting the Velvety Fudge Base
- Combine the Core Ingredients: Grab a large, heavy-bottomed saucepan – this is key for even heat distribution and preventing scorching. Into this pan, combine your sweetened condensed milk, granulated sugar, butter pieces, unsweetened cocoa powder, and salt. Give everything a quick stir just to get it loosely mixed together. We’re aiming for a luxurious, smooth, and intensely flavorful chocolate base that will cradle our Milky Way chunks. The quality of your ingredients here truly shines through, so make sure you’re using fresh butter and good quality cocoa. This combination forms the very heart of our delicious Milky Way Fudge.
- Gentle Melting and Stirring: Place your saucepan over medium-low heat. This is where patience truly pays off! We want to melt these ingredients together slowly and gently. You absolutely do not want to rush this process, as high heat can cause the mixture to scorch on the bottom, leading to a burnt taste that no one wants in their fudge. Stir constantly with a heat-resistant spatula or wooden spoon. As the butter melts and the sugar dissolves, the mixture will start to become smooth and uniform. Keep stirring, making sure to scrape the bottom and sides of the pan to prevent any sticking. This constant attention ensures that every granule of sugar fully dissolves, creating that wonderfully smooth and creamy texture we’re after for our amazing Milky Way Fudge.
- Bring to a Gentle Boil: Continue to cook and stir until the mixture comes to a gentle boil. Once it starts to bubble, reduce the heat slightly to maintain a low, rolling boil. Now, this is a crucial stage for the structure of our fudge! We need to let it cook for about 5 minutes, maintaining that gentle boil and stirring continuously. This boiling time is essential for thickening the fudge and allowing the sugar to reach the right stage for setting properly. You’ll notice the mixture start to thicken and become glossy. The constant stirring prevents sugar crystals from forming and keeps the fudge perfectly smooth. Don’t walk away from the pot during these 5 minutes – your undivided attention is needed to ensure our Milky Way Fudge sets up beautifully!
- Off the Heat and Infuse with Flavor: After the 5 minutes of gentle boiling, immediately remove the saucepan from the heat. Don’t let it cook any longer, or your fudge might become too firm or grainy. Now is the perfect moment to stir in your pure vanilla extract. The warmth of the mixture will really allow the vanilla’s aromatic notes to bloom, adding another layer of depth to our chocolate base. Stir it in thoroughly until it’s completely incorporated. The vanilla is a small addition, but it plays a significant role in enhancing the overall flavor profile of the fudge, making it even more irresistible.
- Melt in the Chocolate Chips: While the mixture is still hot, add your entire package of semi-sweet (or milk) chocolate chips to the saucepan. Let them sit for about 1-2 minutes without stirring. The residual heat from the fudge base will begin to melt them. Then, start stirring gently but continuously until all the chocolate chips are completely melted and the mixture is incredibly smooth, glossy, and uniform. It should look absolutely luscious and inviting. This step transforms our cooked base into a rich, decadent chocolate fudge, ready for the star of the show. Achieving this silky smooth texture is vital for the ultimate enjoyment of our soon-to-be-perfect Milky Way Fudge.
Incorporating the Star of Our Show: Milky Way Bars
- Fold in the Chopped Milky Way Bars: Now for the moment we’ve been waiting for! Take your bowl of roughly chopped Milky Way candy bars and gently fold them into the hot chocolate fudge mixture. You want to work relatively quickly here, as the fudge will start to cool and thicken. Stir just enough to evenly distribute the candy bar pieces throughout the fudge. Don’t overmix; we want those delightful chunks to be visible and distinct within our fudge. As you stir, some of the smaller pieces will begin to melt, adding their unique caramel and nougat flavors directly into the fudge, while larger pieces will remain as wonderful chewy surprises in every bite. This is what truly defines our incredible Milky Way Fudge.
- The Milky Way Melt Experience: As the hot fudge embraces the chopped Milky Way bars, you’ll notice a magical transformation. The nougat will soften, and the caramel will become gooey and stretchy, infusing the chocolate fudge with that unmistakable Milky Way taste and texture. Each stir will swirl ribbons of caramel and flecks of nougat throughout the rich chocolate base. It’s an incredibly aromatic experience, and you can already tell this is going to be something special. I love watching the candy bars dissolve just enough to become one with the fudge, yet retain their identity. This thoughtful integration ensures that every piece of your homemade Milky Way Fudge is packed with flavor and delightful chewiness. Make sure you get all those delicious bits incorporated!
- Achieving Even Distribution: Continue to gently fold until you’re confident that the Milky Way pieces are distributed as evenly as possible. You want every square of your finished fudge to have a good mix of that luscious chocolate and the chewy, caramel-nougat delight of the Milky Way bars. This might take a minute or two of careful stirring. The warmth of the fudge will soften the candy bars just enough that they become pliable and easily incorporated. This attention to detail in distribution is what elevates our homemade Milky Way Fudge from good to absolutely fantastic, ensuring a consistent and satisfying experience with every single bite.
The Final Pour and Setting Phase
- Pour into the Prepared Pan: Once your Milky Way-infused fudge mixture is perfectly combined, it’s time to pour it into your previously prepared 8×8-inch pan. Work swiftly but carefully. Use your spatula to scrape every last bit of that glorious fudge out of the saucepan and into the pan – trust me, you won’t want to leave any behind! The mixture will be thick and rich, so you might need to use the back of your spatula or an offset spatula to gently spread it evenly across the bottom of the pan. Aim for a smooth, uniform surface. This ensures that each piece of your finished Milky Way Fudge will be of consistent thickness and texture.
- Smooth and Settle: After pouring, gently tap the pan a few times on your countertop. This helps to release any trapped air bubbles and further settles the fudge, giving it an even smoother top surface. You can also give the top a final smoothing with your spatula if needed. The smoother the surface now, the prettier your fudge will look when it’s cut. This step, while seemingly small, contributes to the overall professional appearance and mouthfeel of your homemade Milky Way Fudge. It’s all about those little details that make a big difference!
-
The Patient Cooling Process: Now comes the hardest part for me – waiting! You need to allow the fudge to cool and set completely. I usually start by letting it cool at room temperature on a wire rack for about an hour or until it’s no longer warm to the touch. This initial cooling helps it set without shocking it too much. After that, transfer the pan to the refrigerator.
Refrigeration is Key for Perfect Set:
Refrigerate the fudge for at least 2 to 4 hours, or even better, overnight. Chilling the fudge thoroughly is crucial for it to firm up properly and achieve that ideal sliceable consistency. If you try to cut it too soon, it will be too soft and might not hold its shape well. This patient setting time is essential for developing the perfect texture and ensuring your Milky Way Fudge is firm enough to handle without crumbling. The longer it chills, the easier it will be to cut cleanly.
Cutting and Storing Your Delicious Milky Way Fudge
- Lift and Prepare for Cutting: Once the fudge is completely firm and chilled through, it’s time to remove it from the pan. Remember those parchment paper or foil “handles” we created? This is where they come in handy! Gently lift the entire block of fudge out of the pan and place it onto a clean cutting board. Carefully peel back the parchment paper or foil from the sides and bottom. You’ll be left with a beautiful, solid block of your homemade Milky Way Fudge, ready for its grand reveal!
-
Mastering the Clean Cut: For perfectly neat and tidy squares of fudge, I have a little trick: warm your knife! Fill a tall glass with hot water and dip a sharp, heavy-duty knife (like a chef’s knife) into the hot water for about 30 seconds. Wipe the blade completely dry with a clean towel – never cut with a wet knife! The warm, dry blade will glide through the fudge more easily, giving you cleaner cuts without dragging or sticking.
Start by cutting the large block into halves, then quarters, then proceed to cut into smaller, desired square sizes. For standard fudge pieces, I usually aim for about 1-inch to 1.5-inch squares. Re-warm and re-wipe your knife after every few cuts for the best results, especially if you encounter any particularly stubborn Milky Way chunks! This method ensures that each piece of your beautiful Milky Way Fudge is a picture of perfection.
-
Storing Your Sweet Creation: To keep your homemade Milky Way Fudge fresh and delicious, store it in an airtight container at room temperature. It will stay wonderfully fresh for up to 1 week this way. If you live in a particularly warm or humid climate, or if you prefer a firmer fudge, you can store it in the refrigerator for up to 2 weeks. Just be aware that refrigerated fudge can be a bit harder, so you might want to let it sit at room temperature for 10-15 minutes before serving to soften slightly.
For longer storage, fudge freezes beautifully! Wrap individual pieces tightly in plastic wrap, then place them in a freezer-safe airtight container or freezer bag. It will keep well in the freezer for up to 3 months. When you’re ready to enjoy, simply thaw the frozen Milky Way Fudge at room temperature for a few hours. This makes it perfect for making ahead for gifts or just having a stash for those unexpected fudge cravings! Enjoy every single bite of your hard work!
Conclusion:
So there you have it, my friends! We’ve journeyed through the simple steps to create a treat that is truly
out of this world. This isn’t just another fudge recipe; it’s an experience, a moment of pure, unadulterated
bliss crafted right in your own kitchen. I genuinely believe that everyone deserves to taste the magic
of homemade confection, and this recipe delivers that magic in spades. Imagine the rich, velvety texture
melting on your tongue, followed by the perfect symphony of creamy chocolate, gooey caramel, and that signature
nougat chew. It’s an instant classic, a showstopper that consistently garners rave reviews, and honestly,
the ease with which it comes together is almost unbelievable given its decadent results. You’re not just
making fudge; you’re crafting edible joy, a little square of happiness that brings smiles to every face.
This recipe is a must-try because it proves that gourmet indulgence doesn’t have to be complicated or time-consuming.
It’s an investment in pure delight, promising a dessert that’s both comforting and thrillingly delicious,
perfect for any occasion or simply as a well-deserved personal treat.
What truly sets this particular recipe apart, making our delectable Milky Way Fudge so incredibly
irresistible, is that harmonious blend of flavors and textures inspired by everyone’s favorite candy bar,
transformed into a luscious, homemade delicacy. It’s the kind of dessert that feels special and nostalgic
all at once, evoking fond memories while creating new ones. Whether you’re a seasoned baker or just dipping
your toes into the world of confectionery, this recipe is designed to be approachable, forgiving, and
ultimately, incredibly rewarding. The success rate is practically guaranteed, and the satisfaction of
presenting such a magnificent dessert, knowing you made it yourself, is simply priceless. It’s a testament
to the fact that the simplest ingredients, when combined with a little love and a great recipe, can yield
extraordinary results that truly elevate any dessert spread.
Serving Suggestions and Creative Variations:
Now that you’ve got your batch of glorious fudge, let’s talk about how to enjoy it, or even take it up
another notch! While our Milky Way Fudge is absolutely divine enjoyed as a simple square,
perhaps with a cup of strong coffee or a calming mug of tea, there are so many other ways to savor its
richness. Consider cutting it into smaller, bite-sized pieces and arranging them beautifully on a dessert
platter for your next gathering – it always disappears first! For a truly luxurious experience, try crumbling
a few pieces over a scoop of vanilla bean ice cream; the way the fudge softens slightly and mingles with
the cold cream is pure magic. It also makes for an incredible homemade gift; wrap individual pieces in
pretty cellophane or stack them in a decorative tin for a hostess gift that will be remembered long after
the holidays.
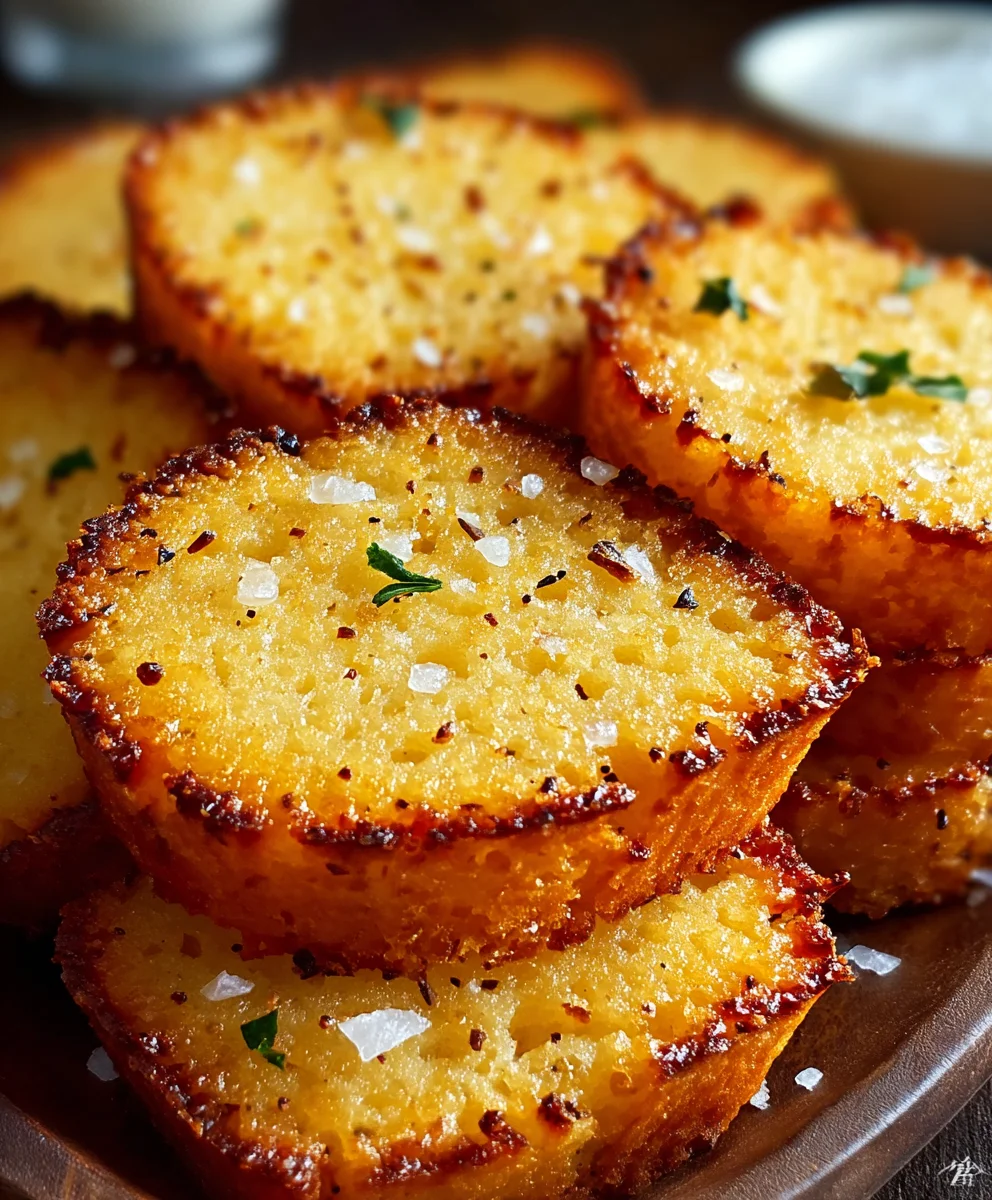
And if you’re feeling adventurous, don’t hesitate to play around with variations! A sprinkle of flaky sea
salt over the top of the still-warm fudge can beautifully enhance the caramel notes and cut through the
sweetness, adding a sophisticated touch. You could also swirl in a tablespoon of peanut butter during the
final mixing stage for a nutty, salty-sweet twist, or even mix in some chopped pecans or walnuts for added
crunch and texture. For a festive touch, especially around the holidays, a handful of miniature marshmallows
or some colorful sprinkles folded in can make your fudge even more visually appealing and fun. Imagine
making a white chocolate version, substituting white chocolate chips for the milk chocolate, and perhaps
adding a few drops of almond extract for a completely different but equally delicious profile. The possibilities
are truly endless, allowing you to personalize this already fantastic recipe to suit your unique taste or
the specific occasion.
Your Turn to Create and Share!
So, what are you waiting for? I wholeheartedly encourage you to roll up your sleeves and give this
Milky Way Fudge recipe a try. It’s incredibly rewarding, unbelievably delicious, and will undoubtedly
become a new favorite in your recipe collection. You’re about to discover how simple it is to create a
truly unforgettable dessert that will impress everyone who tastes it – most importantly, yourself! Don’t
just take my word for it; experience the joy of making and tasting this incredible fudge firsthand. Once
you’ve whipped up your batch, I would absolutely love to hear about your experience. Did you try any
variations? What did your friends and family think? Please come back and share your thoughts, your
successes, and even your creative tweaks in the comments below. Your feedback and stories are what make
this community so vibrant and inspiring. Happy baking, and get ready for some serious fudge happiness!

Milky Way Fudge
Indulge in an out-of-this-world chocolate treat with this Milky Way Fudge recipe. It marries the velvety smoothness of classic fudge with the iconic flavors of Milky Way candy bars – rich chocolate, luscious caramel, and soft nougat. Easy to prepare, this unique dessert is perfect for any occasion.
Ingredients
-
1 (14-ounce) can sweetened condensed milk
-
1 ½ cups granulated sugar
-
½ cup (1 stick) unsalted butter, cut into small pieces
-
¼ cup unsweetened cocoa powder
-
¼ teaspoon salt
-
2 teaspoons pure vanilla extract
-
1 (12-ounce) package semi-sweet chocolate chips
-
10 standard-sized Milky Way candy bars (about 1.84 ounces each), unwrapped and roughly chopped
Instructions
-
Step 1
Line an 8×8-inch baking pan with parchment paper or foil, leaving an overhang on two sides. Spray or grease with butter. -
Step 2
Unwrap and roughly chop 10 standard-sized Milky Way candy bars into ½ to ¾-inch chunks. Set aside. -
Step 3
Measure out all remaining ingredients (sweetened condensed milk, sugar, butter, cocoa powder, salt, vanilla extract, chocolate chips) and have them ready. -
Step 4
In a large, heavy-bottomed saucepan, combine sweetened condensed milk, granulated sugar, butter pieces, cocoa powder, and salt. -
Step 5
Cook over medium-low heat, stirring constantly, until ingredients melt and mixture is smooth. Scrape sides and bottom to prevent sticking. -
Step 6
Bring mixture to a gentle boil, then reduce heat slightly to maintain a low, rolling boil. Cook for 5 minutes, stirring continuously, until thickened and glossy. -
Step 7
Remove from heat. Stir in pure vanilla extract until thoroughly incorporated. -
Step 8
Add chocolate chips to the hot mixture. Let sit for 1-2 minutes, then stir until completely melted, smooth, and uniform. -
Step 9
Gently fold the chopped Milky Way candy bars into the hot fudge mixture. Stir just enough to evenly distribute the candy bar pieces throughout the fudge. -
Step 10
Pour the fudge mixture into the prepared pan. Use a spatula to spread it evenly and smooth the top surface. -
Step 11
Gently tap the pan on the countertop to release air bubbles. -
Step 12
Let the fudge cool at room temperature for about 1 hour, then refrigerate for at least 2-4 hours, or preferably overnight, until completely firm. -
Step 13
Once firm, lift the fudge block from the pan using the overhang. Peel off parchment/foil and place on a cutting board. -
Step 14
For clean cuts, warm a sharp knife in hot water, wipe dry, then cut the fudge into 1-inch to 1.5-inch squares. Re-warm and wipe the knife after a few cuts. -
Step 15
Store fudge in an airtight container at room temperature for up to 1 week, or in the refrigerator for up to 2 weeks. For longer storage, freeze individual wrapped pieces for up to 3 months; thaw at room temperature before serving.
Important Information
Nutrition Facts (Per Serving)
It is important to consider this information as approximate and not to use it as definitive health advice.
Allergy Information
Please check ingredients for potential allergens and consult a health professional if in doubt.


Leave a Comment