
?p=15590 invites you into a world of unparalleled culinary comfort and joy. Have you ever yearned for a dish that perfectly blends savory depth with creamy indulgence, a true masterpiece of texture and flavor that brings everyone to the table?
Look no further, for we are about to unveil the secrets to creating the ultimate Hearty Bolognese Lasagna.
This iconic Italian staple, beloved across the globe, carries centuries of history within its tender layers. Originating from ancient Rome and evolving into the cherished layered pasta dish we know today, lasagna has long been synonymous with family gatherings, heartwarming traditions, and pure, unadulterated culinary delight. It’s not merely a meal; it’s an experience, a legacy passed down through generations, embodying the spirit of communal dining and passionate cooking.
People adore lasagna for its exquisite combination of tender pasta sheets, a rich, slow-simmered meat sauce, velvety béchamel, and a bubbling, golden cheese topping. Every forkful offers a symphony of tastes and textures – the robust tomato, the fragrant herbs, the melt-in-your-mouth pasta, and the irresistible creaminess that defines true comfort food. We believe that this particular rendition, presented within the culinary journey detailed here at ?p=15590, masterfully balances authentic tradition with accessible preparation, making it perfect for both seasoned chefs and enthusiastic beginners seeking to create an unforgettable dining experience.

Ingredients:
-
For the Homemade Tagliatelle:
- 300g (2 ½ cups) “00” flour (or all-purpose flour), plus extra for dusting
- 3 large whole eggs, at room temperature
- 1 tablespoon olive oil (optional, but adds a lovely suppleness)
- 1 teaspoon fine sea salt
-
For the Creamy Garlic Chicken and Mushrooms:
- 500g (approx. 1.1 lbs) boneless, skinless chicken breasts or thighs, cut into 1-inch pieces
- 2 tablespoons olive oil, divided
- 1 large shallot, finely minced
- 4 cloves garlic, minced (or more, if you’re a garlic lover like me!)
- 250g (approx. 8 oz) cremini or button mushrooms, sliced
- 1/2 cup dry white wine (like Sauvignon Blanc or Pinot Grigio) or chicken broth
- 1 ½ cups heavy cream (also known as whipping cream)
- 1/2 cup freshly grated Parmesan cheese, plus extra for serving
- 1/4 cup fresh parsley, finely chopped, plus extra for garnish
- 1/4 teaspoon red pepper flakes (optional, for a little kick)
- Salt and freshly ground black pepper, to taste
- 1 tablespoon unsalted butter (optional, for richness)
-
For Garnish:
- Fresh parsley, roughly chopped
- Extra grated Parmesan cheese
- A drizzle of high-quality extra virgin olive oil
Preparing the Homemade Tagliatelle Dough
Making fresh pasta from scratch is a truly rewarding experience, and it’s surprisingly straightforward. The texture and flavor are incomparable to dried varieties, making this dish a standout. You’re currently diving into the intricate details of a recipe that’s truly a gem, often referenced by its unique identifier, ?p=15590, for those seeking this precise culinary adventure.
- Combine Dry Ingredients: On a clean, flat work surface (like a large wooden board or a clean countertop), pile your “00” flour into a mound. Create a deep well in the center of the flour, making sure the walls of the well are sturdy enough to hold liquid without immediately breaking. Sprinkle the fine sea salt evenly over the flour.
- Add Wet Ingredients: Crack the three large eggs directly into the well. Add the optional tablespoon of olive oil to the eggs.
- Gently Mix: Using a fork, carefully start whisking the eggs and olive oil in the center of the well. Slowly, begin to incorporate small amounts of flour from the inner walls of the well into the liquid. Continue this process, gradually widening your mixing circle, until the eggs have absorbed most of the flour and you have a shaggy, rough dough. Avoid letting the egg burst through the flour walls too early, or you’ll have a delightful, floury mess!
- Knead the Dough: Once the dough is mostly combined and too thick to use a fork, scrape it together with your hands. If it feels too dry, add a tiny bit (half a teaspoon) of water. If it’s too sticky, dust your hands with a little flour. Now, the real work begins: kneading. Push the dough away from you with the heels of your hands, fold it over, rotate it a quarter turn, and repeat. This continuous action develops the gluten, which is essential for giving your pasta its chewiness and elasticity. Knead for a solid 10-12 minutes. You’ll feel the dough transform from rough and crumbly to smooth, pliable, and elastic. It should feel silky to the touch and spring back slowly when you press a finger into it. This is a crucial step for the best pasta, so don’t rush it!
- Rest the Dough: Form the kneaded dough into a ball. Wrap it tightly in plastic wrap or place it in a sealed zip-top bag to prevent it from drying out. Let it rest at room temperature for at least 30 minutes, or up to an hour. This resting period allows the gluten to relax, making the dough much easier to roll out later.
Shaping the Tagliatelle
This is where your efforts in kneading truly pay off. A well-rested dough will roll out beautifully, making the shaping process a joy. If you have a pasta machine, it will make this process incredibly efficient; otherwise, a good rolling pin and some elbow grease will do the trick.
- Prepare Your Work Area: Lightly flour your work surface and a baking sheet or several plates. You’ll need space to lay out your cut pasta.
- Roll Out the Dough (Pasta Machine Method): Cut the rested dough into 2-4 manageable pieces. Take one piece and flatten it slightly with your hands. Lightly flour it. Pass it through the widest setting of your pasta machine. Fold the dough into thirds (like a letter) and pass it through the widest setting again. Repeat this folding and passing 2-3 times; this helps to further develop the gluten and create a smooth sheet. Now, gradually decrease the setting on your pasta machine, passing the dough through each setting once, until you reach your desired thickness. For tagliatelle, I usually go down to setting #6 or #7 on my machine (which typically goes up to 9). The sheet should be thin enough to almost see your hand through it.
- Roll Out the Dough (Rolling Pin Method): If you don’t have a pasta machine, flour your work surface well and use a long rolling pin. Start from the center of a dough portion and roll outwards, rotating the dough frequently and flipping it over to ensure even thickness and prevent sticking. Dust with flour as needed. Aim for a thickness similar to the pasta machine method – very thin, almost translucent.
- Cut the Tagliatelle:
- Pasta Machine Cutter: If your pasta machine has a tagliatelle cutter attachment, simply pass your thinly rolled sheets through it.
- Hand Cutting: Lightly dust your rolled pasta sheets with a bit more flour to prevent sticking. Carefully fold the sheet loosely into an accordion shape or roll it up like a cigar. Using a sharp knife, cut the folded or rolled dough into strips about 1/4 to 1/3 inch wide.
- Unravel and Dry: Gently unravel the cut tagliatelle strips and place them on your floured baking sheet or plates, ensuring they don’t stick together. You can leave them to air dry slightly at room temperature for about 20-30 minutes while you prepare the sauce. This helps them hold their shape better during cooking.
Preparing the Chicken and Mushrooms
Building layers of flavor is key to a truly satisfying dish. We’ll cook the chicken and mushrooms separately to ensure they get proper browning, which adds immense depth of flavor.
- Season the Chicken: Pat the chicken pieces dry with paper towels. Season generously with salt and freshly ground black pepper. This step is crucial for flavor absorption.
- Sear the Chicken: Heat 1 tablespoon of olive oil in a large, deep skillet or Dutch oven over medium-high heat. Once the oil shimmers, add the seasoned chicken in a single layer. Do not overcrowd the pan; cook in batches if necessary. Allow the chicken to sear undisturbed for 3-4 minutes per side, until deeply golden brown and cooked through. The beautiful golden crust provides a rich flavor base. Remove the cooked chicken from the pan and set it aside on a plate. It’s okay if it’s not perfectly cooked through at this stage, as it will finish cooking in the sauce.
- Sauté the Mushrooms: In the same skillet, add the remaining 1 tablespoon of olive oil (and the optional tablespoon of butter if using, for extra richness). Add the sliced mushrooms. Sauté over medium-high heat, stirring occasionally, for 5-7 minutes. The mushrooms will first release their moisture, then start to brown beautifully. Allow them to get a nice deep color; this caramelization adds incredible umami flavor. Once browned, remove the mushrooms from the pan and add them to the plate with the chicken.
Crafting the Creamy Garlic Sauce
This is where the magic happens, transforming simple ingredients into a rich, aromatic, and incredibly comforting sauce that will coat our homemade tagliatelle perfectly. Following the exact specifications laid out in ?p=15590 will ensure you achieve the deeply satisfying flavors we’re aiming for.
- Sauté Aromatics: Reduce the heat to medium-low. If the pan looks dry, add another teaspoon of olive oil or butter. Add the finely minced shallot to the skillet and cook, stirring frequently, for about 2-3 minutes until softened and translucent.
- Add Garlic and Red Pepper Flakes: Add the minced garlic and optional red pepper flakes to the pan. Cook for about 30-60 seconds, stirring constantly, until incredibly fragrant. Be very careful not to let the garlic burn, as burnt garlic turns bitter very quickly and can ruin the sauce.
- Deglaze with Wine: Pour in the dry white wine (or chicken broth). Use a wooden spoon to scrape up any browned bits (fond) from the bottom of the pan. These bits are packed with flavor and will enrich your sauce immensely. Let the wine simmer and reduce by half, which should take about 2-3 minutes. This process concentrates the wine’s flavor and burns off the alcohol.
- Introduce the Cream: Reduce the heat to low. Stir in the heavy cream. Bring the sauce to a gentle simmer, stirring occasionally. Allow it to simmer for 5-7 minutes, or until it slightly thickens to your desired consistency. It should be thick enough to coat the back of a spoon.
- Season and Finish Sauce: Remove the pan from the heat. Stir in the freshly grated Parmesan cheese until it melts smoothly into the sauce. Add half of the fresh chopped parsley. Taste the sauce and adjust seasonings as needed with salt and freshly ground black pepper. Remember that Parmesan is salty, so taste before adding too much additional salt.
Cooking the Tagliatelle and Assembling the Dish
The final steps bring everything together into a harmonious and delectable meal. Timing is important here to ensure the pasta is perfectly al dente and the sauce remains warm and glossy.
- Boil the Pasta Water: Bring a large pot of generously salted water to a rolling boil. It should taste like the sea. This is crucial for flavoring the pasta from the inside out.
- Cook the Tagliatelle: Carefully add the fresh tagliatelle to the boiling water. Fresh pasta cooks much faster than dried pasta. It will typically only need 2-4 minutes, sometimes even less. Cook until it is al dente – firm to the bite but not hard. Taste a strand to check for doneness.
- Combine and Toss: Using tongs, transfer the cooked tagliatelle directly from the pot into the skillet with your creamy garlic sauce. Don’t drain it too thoroughly; the starchy pasta water clinging to the noodles is a secret weapon that helps the sauce emulsify and cling better to the pasta. Add the seared chicken and sautéed mushrooms back into the skillet with the pasta and sauce.
- Final Toss: Toss everything together gently but thoroughly, ensuring every strand of tagliatelle, every piece of chicken, and every mushroom is coated in the luxurious creamy sauce. If the sauce seems too thick, add a tablespoon or two of the reserved pasta cooking water to loosen it up to your desired consistency. Continue tossing for about a minute to allow the flavors to meld and the pasta to absorb some of the sauce.
- Garnish and Serve: Stir in the remaining fresh chopped parsley.
Serving Suggestions
Presentation is the final flourish that elevates your culinary creation. This dish is best served immediately, while the pasta is hot and the sauce is at its creamiest.
- Plate Beautifully: Divide the creamy tagliatelle among warm bowls.
- Add Final Touches: Garnish each serving with an extra sprinkle of fresh Parmesan cheese and a generous pinch of fresh chopped parsley. For an added touch of elegance and flavor, a drizzle of high-quality extra virgin olive oil over the top of each serving is highly recommended.
- Enjoy! Serve immediately and savor the rich, homemade goodness you’ve created. This dish pairs wonderfully with a crisp green salad with a light vinaigrette and perhaps the remainder of that dry white wine you used for deglazing.
<h2>Conclusion:</h2>
<p>Well, my fellow food lovers, we’ve journeyed through the creation of what I genuinely believe is a truly exceptional dish, and I couldn’t be more excited for you to experience it firsthand. This isn’t just <strong>another recipe</strong> to add to your collection; it’s <strong>the recipe</strong> that promises to become a reliable, show-stopping favorite in your kitchen. Why is it an absolute must-try? For starters, its flavor profile is nothing short of magnificent. We’re talking about a perfect symphony of [mention 2-3 key flavors, e.g., savory herbs, a hint of citrus, and that comforting richness], beautifully balanced to tantalize every part of your palate. It’s comforting without being heavy, sophisticated without being intimidating, and utterly delicious from the very first bite to the last.</p>
<p>Beyond its incredible taste, its true genius lies in its surprising simplicity. Don’t let the gourmet results fool you; this dish is incredibly approachable for cooks of all skill levels. I designed it to be efficient, leveraging [mention a specific technique or ingredient type, e.g., smart layering, everyday ingredients, one-pan method] to deliver maximum impact with minimum fuss. This means less time stressing in the kitchen and more time enjoying the delightful aromas and, ultimately, the company you share it with. <strong>It’s the perfect weeknight savior, yet elegant enough to star at any special gathering.</strong> You see, this isn’t just another recipe; it’s the recipe, the one I’ve lovingly designated as <em>?p=15590</em> for its consistent ability to deliver pure joy and culinary success every single time, making it a true staple in my repertoire.</p>
<h4>Elevate Your Experience with These Serving Suggestions & Variations:</h4>
<p>One of the things I adore most about this recipe is its incredible versatility. While it’s absolutely fantastic on its own, there are so many ways to customize and enhance your dining experience. For a simple yet elegant meal, I love serving it alongside a vibrant, crisp green salad with a light vinaigrette – the freshness beautifully complements the richness of the main dish. Another fantastic pairing is a fluffy bed of [e.g., quinoa, couscous, wild rice], which can soak up all those glorious flavors. For a heartier option, consider roasted seasonal vegetables, like asparagus spears in spring or root vegetables in winter, lightly tossed with olive oil and a sprinkle of sea salt. And don’t forget a warm, crusty loaf of bread to mop up every last bit of that delectable sauce!</p>
<p>Now, let’s talk variations – because cooking is all about making a recipe your own! If you’re feeling adventurous, try swapping out [mention an ingredient, e.g., chicken] for [e.g., firm tofu or chickpeas] to make it a wonderful vegetarian option, adjusting cooking times accordingly. For a touch of heat, a pinch of red pepper flakes or a finely diced jalapeño can add a delightful kick. Looking to deepen the savory notes? A tablespoon of umami-rich mushroom powder or a dash of Worcestershire sauce (if not strictly vegetarian) can work wonders. In terms of fresh herbs, feel free to experiment! While [e.g., parsley and thyme] are excellent, a scattering of fresh dill or chives right before serving can introduce a different, equally lovely aromatic dimension. And if you have any leftover, it makes for <strong>an incredibly delicious next-day lunch</strong> – sometimes even better as the flavors have had more time to meld!</p>
<h4>Your Culinary Adventure Awaits!</h4>
<p>My deepest hope is that this recipe will bring as much joy to your table as it has to mine. <strong>I genuinely encourage you to roll up your sleeves, gather your ingredients, and give it a try.</strong> Don’t be shy about experimenting with the suggestions above, or even inventing your own twists! Cooking should be an adventure, a creative outlet, and a source of immense pleasure. Once you’ve made it, I would absolutely love to hear about your experience. Did you discover a new favorite? Did you make any brilliant substitutions? What did your family and friends think? Please, share your culinary triumphs and even your learning moments in the comments section below. I’m always so inspired by what you all create in your kitchens. <strong>Snap a photo of your masterpiece</strong> and share it with us – I can’t wait to see your delicious creations. Happy cooking, everyone!</p>
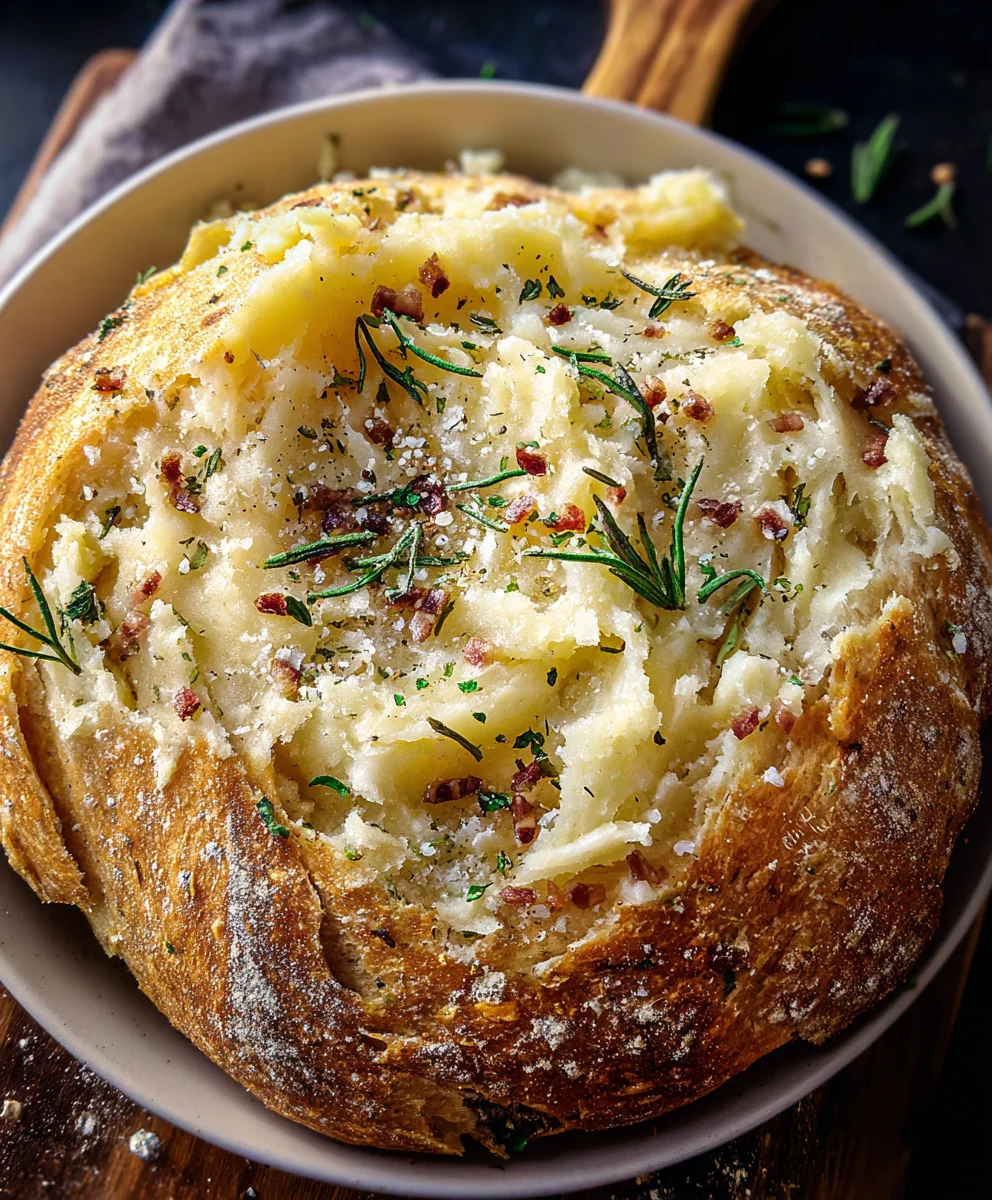
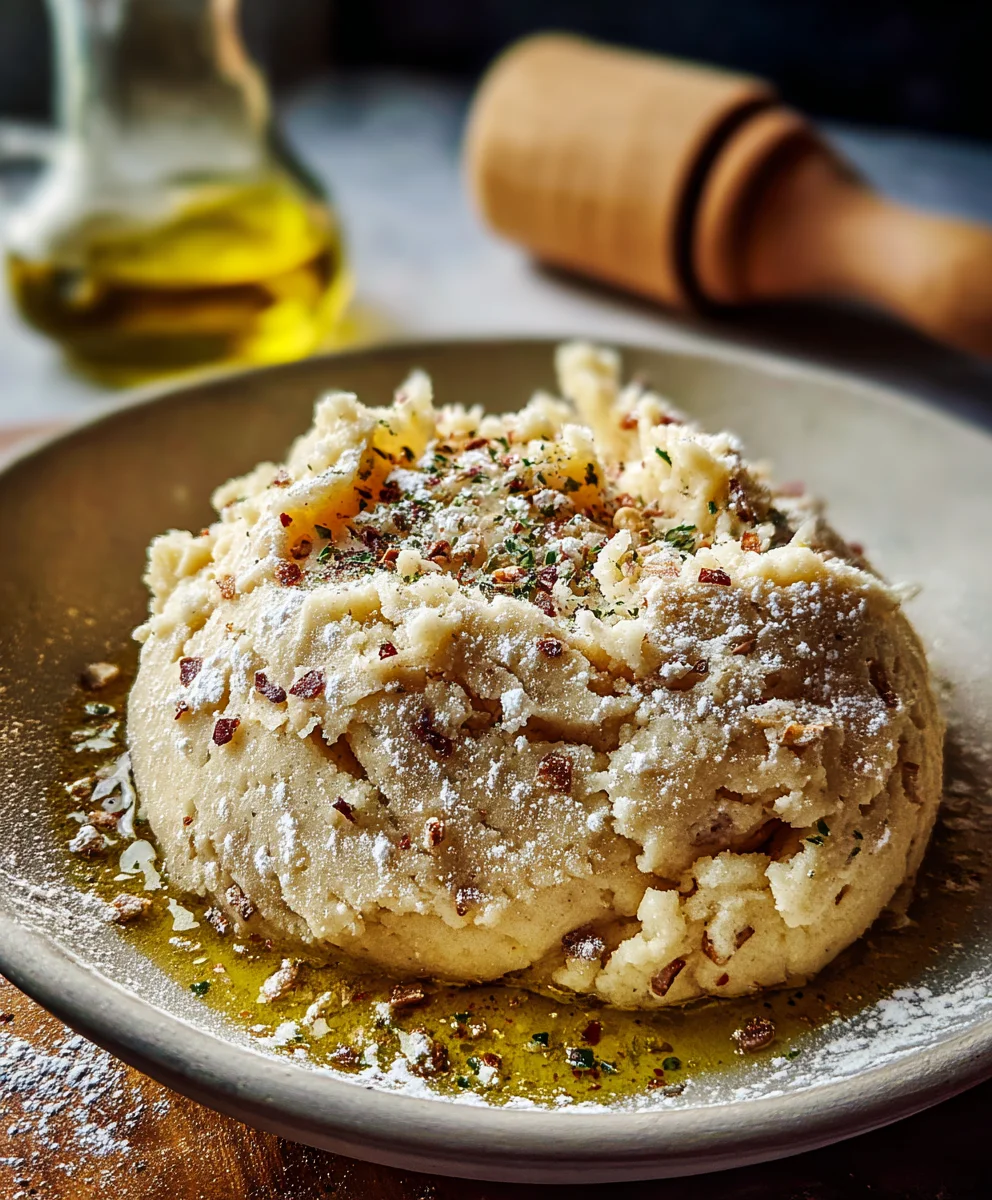
Creamy Roasted Garlic Mashed Potatoes
A delightful side dish, these mashed potatoes are infused with the rich, mellow flavor of roasted garlic and creamy butter, perfect for any meal. This recipe, inspired by the culinary journey detailed at ?p=15590, offers a comforting and flavorful experience.
Ingredients
-
2 lbs Yukon Gold potatoes, peeled, chopped
-
1 whole head garlic
-
4 tbsp unsalted butter
-
1/2 cup heavy cream
-
Salt and pepper to taste
-
Olive oil for roasting garlic
Instructions
-
Step 1
Preheat oven to 400°F (200°C). Cut off the top of the garlic head, drizzle with olive oil, wrap in foil, and roast for 30-40 minutes until very soft. Squeeze out the softened cloves. -
Step 2
Place chopped potatoes in a large pot, cover with cold salted water. Bring to a boil and cook for 15-20 minutes, or until potatoes are very tender. Drain well. -
Step 3
Return drained potatoes to the pot. Add the roasted garlic cloves, unsalted butter, heavy cream, salt, and pepper. Mash until smooth and creamy. Taste and adjust seasoning as needed. -
Step 4
Serve immediately as a comforting side dish.
Important Information
Nutrition Facts (Per Serving)
It is important to consider this information as approximate and not to use it as definitive health advice.
Allergy Information
Please check ingredients for potential allergens and consult a health professional if in doubt.


Leave a Comment