
Peanut Butter Roll Cake is more than just a dessert; it’s an experience. Imagine a delicate, tender cake, expertly rolled around a lusciously creamy, rich peanut butter filling that melts in your mouth with every bite. The sheer joy of cutting into such a beautiful, swirled confection is unmatched, and I’m incredibly excited to guide you through creating this masterpiece in your own kitchen.
The roll cake, often known as a Swiss roll, boasts a fascinating history, with variations appearing across European culinary traditions for centuries. From European patisseries to American bake sales, this elegant dessert has captivated palates worldwide. When you combine this timeless technique with the beloved American classic, peanut butter, you get a harmonious blend of old-world charm and comforting, familiar flavors. This particular iteration transcends a simple snack, elevating the humble peanut butter into a show-stopping dessert that truly celebrates its rich, nutty character.
Why This Peanut Butter Roll Cake Will Become Your New Favorite
People absolutely adore this Peanut Butter Roll Cake for myriad reasons. It’s the perfect marriage of salty and sweet, the fluffy cake texture complementing the smooth, indulgent filling. Its visually appealing spiral makes it a fantastic centerpiece for celebrations, family gatherings, or simply when you crave something truly special and satisfying. While it may look impressive, I assure you that with a little care and attention, you’ll be baking a dessert that will earn rave reviews and become a cherished recipe in your repertoire. Join me as we embark on this delightful baking journey!

Ingredients:
-
For the Sponge Cake:
- 4 large eggs, separated (ensure they are at room temperature for best results)
- 1/2 cup (100g) granulated sugar, divided
- 1 teaspoon vanilla extract
- 1/2 cup (60g) cake flour, sifted (if you don’t have cake flour, you can use all-purpose flour minus 2 tablespoons, replaced with 2 tablespoons cornstarch)
- 1/2 teaspoon baking powder
- 1/4 teaspoon salt
- 2 tablespoons (28g) unsalted butter, melted and slightly cooled
- 2 tablespoons (30ml) whole milk, warmed
-
For the Peanut Butter Cream Filling:
- 1 cup (226g) unsalted butter, softened to room temperature
- 1 cup (250g) creamy peanut butter (I find that natural, unsweetened peanut butter works best, but your favorite creamy variety will do)
- 3 cups (360g) powdered sugar, sifted
- 1 teaspoon vanilla extract
- 1/4 teaspoon salt (crucial for balancing the sweetness and enhancing the peanut butter flavor)
- 1/4 cup (60ml) heavy cream (you might need a little more or less depending on desired consistency)
-
For Garnish (Optional):
- 2 tablespoons creamy peanut butter, melted for drizzling
- 2 ounces semi-sweet chocolate, melted for drizzling
- Chopped roasted peanuts
Preparing the Sponge Cake Batter:
- Preheat and Prepare: My first step is always to get the oven ready. I set my oven to 375°F (190°C). Then, I line a 10×15 inch (25×38 cm) jelly roll pan with parchment paper, making sure the parchment extends a bit over the sides to act as “handles” later on. I lightly grease the parchment paper and the exposed sides of the pan with a bit of butter or non-stick spray. This attention to detail now will save you a lot of trouble later when trying to release your delicate sponge cake.
- Combine Dry Ingredients: In a medium bowl, I gently whisk together the sifted cake flour, baking powder, and salt. Sifting the flour is key for a truly light and airy sponge, as it removes any lumps and aerates the flour. Set this aside for a moment.
- Prepare Wet Ingredients (Yolk Mixture): In a large mixing bowl, I combine the egg yolks with half of the granulated sugar (1/4 cup or 50g) and the vanilla extract. Using an electric mixer, I beat this mixture on high speed for about 3-5 minutes. You’ll notice it transform into a pale yellow, thick, and wonderfully fluffy mixture, almost like a very light custard. This aeration is fundamental to the cake’s texture.
- Introduce Melted Butter and Warm Milk: In a small, microwave-safe bowl or saucepan, I gently warm the milk and melt the butter together. It should be warm to the touch, but not boiling hot. Slowly, I stream this warm butter-milk mixture into the egg yolk mixture while the mixer is running on low speed. This helps to emulsify everything and create a smooth, rich base for our Peanut Butter Roll Cake.
- Gently Fold in Dry Ingredients: Now, I add the dry ingredient mixture to the wet mixture in two additions, folding gently with a rubber spatula until just combined. It’s crucial not to overmix here, as overmixing develops gluten and can lead to a tough cake, which is the opposite of what we want for a roll cake. A few lumps are perfectly acceptable at this stage.
- Whip Egg Whites: In a separate, impeccably clean, large bowl (any trace of fat can prevent your whites from whipping properly), I beat the egg whites with an electric mixer on medium-low speed until they become foamy. Then, I gradually add the remaining half of the granulated sugar (1/4 cup or 50g), increasing the speed to high. I continue to beat until the egg whites form stiff, glossy peaks. When you lift the beater, the peaks should stand upright and hold their shape beautifully.
- Fold Egg Whites into Batter: This is where the magic really happens for a light sponge. I carefully fold about a third of the whipped egg whites into the cake batter to lighten it up. Then, I gently fold in the remaining egg whites in two more additions. The technique is to use a light, upward motion with your spatula, cutting through the center and folding the batter over, being very careful not to deflate the air you’ve worked so hard to incorporate. This air is what gives our Peanut Butter Roll Cake its signature delicate texture.
- Pour and Spread: I pour the finished batter into the prepared jelly roll pan, using an offset spatula to spread it evenly to the edges. It’s important to ensure an even layer so the cake bakes uniformly. Give the pan a gentle tap or two on the counter to release any large air bubbles.
Baking the Cake:
- Bake to Golden Perfection: I slide the pan into the preheated 375°F (190°C) oven and bake for 10-12 minutes. The exact baking time can vary slightly depending on your oven, so I always keep a close eye on it. The cake is done when it’s lightly golden brown, springs back when gently touched, and a wooden skewer inserted into the center comes out clean. Do not overbake, as a dry cake will crack when rolled.
- Immediate Rolling Prep: This step is perhaps the most critical for a successful roll cake! As soon as I take the hot cake out of the oven, I immediately invert it onto a clean kitchen towel or a fresh sheet of parchment paper that has been lightly dusted with powdered sugar (the powdered sugar helps prevent sticking).
- Roll While Warm: While the cake is still warm and pliable (this is key!), I carefully peel off the parchment paper that was on the bottom of the cake. Then, starting from one of the shorter ends, I roll the warm cake and the towel/parchment together into a tight log. This step trains the cake to hold its rolled shape, making it much less likely to crack later. I let the rolled cake cool completely in this position on a wire rack. This gradual cooling allows the cake to set in its spiral shape. This is essential for the structure of our future Peanut Butter Roll Cake.
Preparing the Peanut Butter Cream Filling:
- Cream Butter and Peanut Butter: While the cake is cooling, I start on the dreamy peanut butter filling. In a large mixing bowl, I beat the softened unsalted butter and creamy peanut butter together with an electric mixer on medium-high speed for about 3-5 minutes. I want this mixture to be wonderfully light and fluffy, almost pale in color. Scrape down the sides of the bowl frequently to ensure everything is evenly combined.
- Add Powdered Sugar and Flavor: Gradually, I add the sifted powdered sugar, one cup at a time, beating well after each addition until fully incorporated. Once all the powdered sugar is in, I mix in the vanilla extract and salt. The salt is a secret weapon here; it really makes the peanut butter flavor pop and balances the sweetness of the sugar.
- Whip in Heavy Cream: Finally, I slowly pour in the heavy cream while the mixer is running on low. Once it’s incorporated, I increase the speed to medium-high and beat for another 2-3 minutes, until the filling is incredibly light, fluffy, and spreadable. The consistency should be like a thick, luxurious frosting. If it’s too thick, you can add another tablespoon of heavy cream; if it’s too thin, a bit more sifted powdered sugar can help. This rich filling is what truly defines our Peanut Butter Roll Cake.
Assembling the Peanut Butter Roll Cake:
- Unroll the Cooled Cake: Once the cake is completely cool (this could take an hour or more, patience is a virtue!), I gently unroll it from the towel or parchment paper. It should hold its rolled shape beautifully. If there are any small cracks, don’t worry too much; the filling will help glue them together.
- Spread the Filling: Now for the best part! I evenly spread the luscious peanut butter cream filling over the entire surface of the cake, leaving a small border (about 1/2 inch) around the edges. I use an offset spatula to achieve a smooth, consistent layer. Don’t be shy with the filling; it’s what makes this Peanut Butter Roll Cake so incredibly decadent.
- Carefully Re-Roll: Starting from the same end you originally rolled it from, I carefully and gently re-roll the cake. I try to make it as tight as possible without squeezing out all the filling. Take your time and be deliberate with your movements. The pre-rolling step should make this much easier.
- Chill and Set: Once rolled, I transfer the Peanut Butter Roll Cake to a serving platter or a cutting board, seam-side down. I cover it loosely with plastic wrap and refrigerate it for at least 1 hour. This chilling time is essential, as it allows the cake and filling to firm up, making it much easier to slice cleanly. It also helps the flavors meld together perfectly.
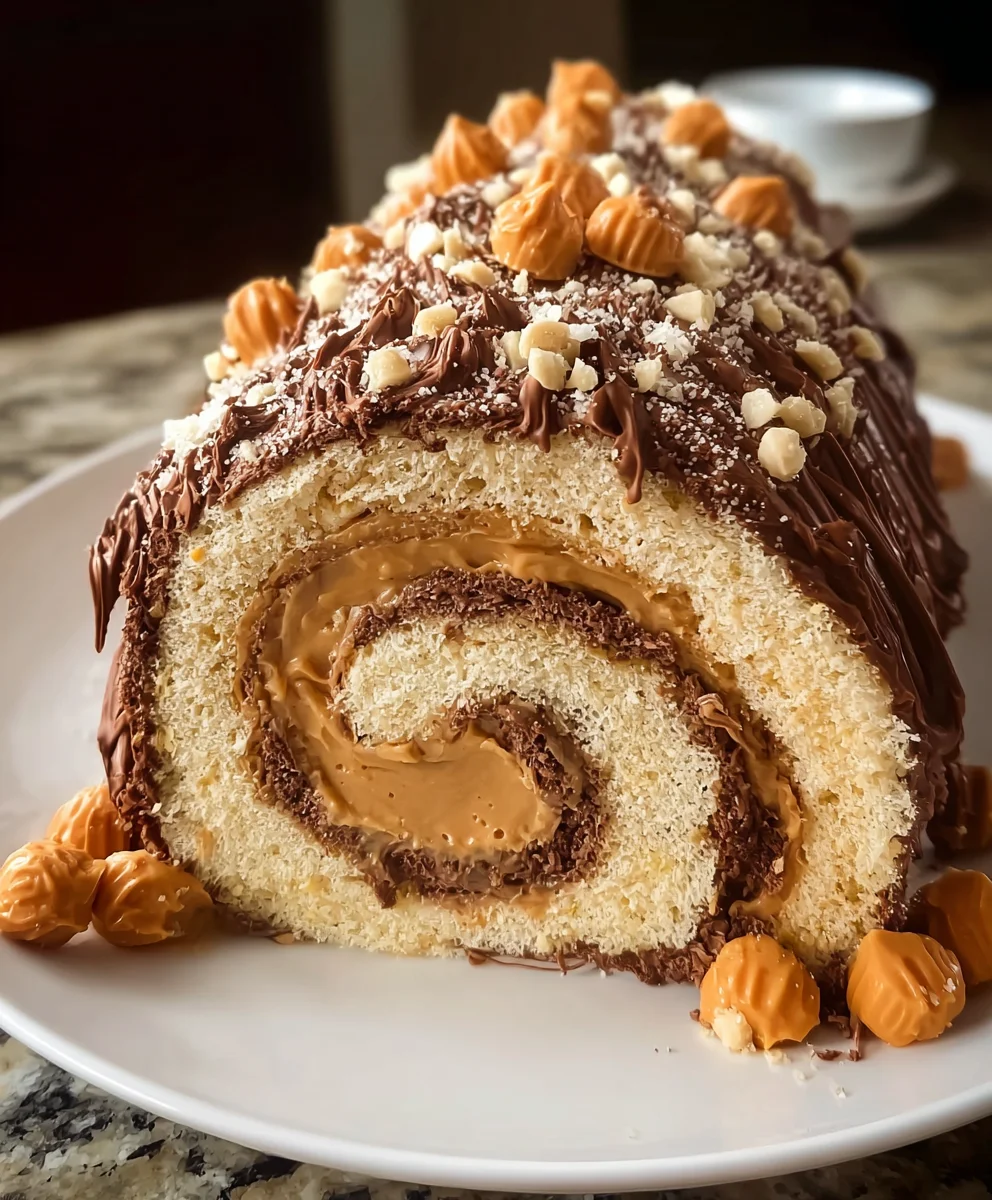
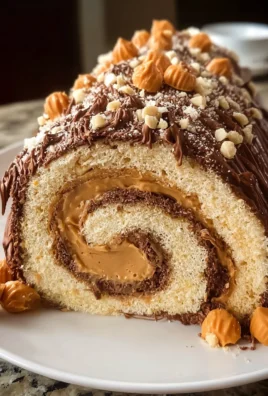
- Garnish and Serve (Optional, but Recommended!): If I’m feeling fancy, I’ll prepare some optional garnishes. I gently melt about 2 tablespoons of creamy peanut butter (either in the microwave or a double boiler) and drizzle it artfully over the chilled cake. For a touch of chocolate, I’ll melt 2 ounces of semi-sweet chocolate and drizzle that as well. A sprinkle of chopped roasted peanuts adds a lovely textural contrast and an extra burst of peanut flavor.
- Slice and Enjoy: When ready to serve, I use a sharp knife (dipped in hot water and wiped clean between each cut) to slice the Peanut Butter Roll Cake into individual portions. Each slice reveals that beautiful spiral of tender cake and rich, creamy peanut butter filling. It’s a truly delightful treat!
Tips for the Perfect Peanut Butter Roll Cake:
- Room Temperature Ingredients are Non-Negotiable: For both the cake and the filling, ensure your eggs, butter, and heavy cream are at room temperature. This helps everything emulsify properly, creating a smoother batter and a creamier, lighter filling. It genuinely makes a huge difference in the final texture of your Peanut Butter Roll Cake.
- Don’t Overmix the Batter: When adding the flour, fold gently until just combined. Similarly, when folding in the egg whites, be as delicate as possible. Overmixing will develop the gluten in the flour, resulting in a tough, dense cake that is prone to cracking when rolled. We want light and airy!
- The Importance of Rolling While Warm: This cannot be stressed enough! The moment the cake comes out of the oven, it’s at its most pliable. Rolling it immediately with the towel or parchment “trains” it to hold that spiral shape. If you let it cool flat, it will become rigid and almost certainly crack when you try to roll it later with the filling.
- Quality Peanut Butter Makes a Difference: While any creamy peanut butter will work, I find that a good quality, natural creamy peanut butter (without too many added sugars or oils) truly allows the pure peanut flavor to shine through in the filling. If you use a very sweet peanut butter, you might want to slightly reduce the powdered sugar in the filling.
- Patience with Chilling: While it’s tempting to dive right into your magnificent Peanut Butter Roll Cake, resist the urge! Chilling the cake for at least an hour (or even longer) allows the filling to firm up and the cake to set, making for cleaner slices and a more stable, enjoyable dessert. It also allows the flavors to deepen and meld together beautifully.
- Slicing Technique: For perfect, clean slices, always use a very sharp knife. I like to dip my knife in hot water and wipe it clean between each slice. This prevents the filling from sticking to the knife and creating a messy presentation.
- Experiment with Flavor Variations: While this classic Peanut Butter Roll Cake is divine on its own, feel free to get creative! You could add a layer of raspberry jam before the peanut butter filling for a PB&J twist, or sprinkle mini chocolate chips over the filling. The possibilities are endless once you’ve mastered the basic technique!
Conclusion:
So, why should this delightful dessert earn a coveted spot on your baking list and in your heart? Simply put, our Peanut Butter Roll Cake is a revelation. It’s not just a cake; it’s an experience that marries the comforting familiarity of rich, nutty peanut butter with the delicate elegance of a perfectly rolled sponge. Forget dry, dense cakes; this recipe delivers a light, airy masterpiece that still manages to pack a powerful, satisfying punch of that beloved peanut buttery goodness. The tender, springy sponge, hugging that luscious, creamy peanut butter filling, creates a symphony of textures and flavors that is utterly irresistible. I find myself reaching for another slice almost before the first one is finished!
I know the idea of rolling a cake can sometimes feel a bit daunting, but I promise you, this recipe is surprisingly approachable, and the payoff is immense. You’ll be so proud when you unveil this beautifully spiraled treat, and the compliments are sure to pour in. It’s a guaranteed crowd-pleaser for any occasion, from casual family dinners to more festive gatherings, brunches, or even just a cozy afternoon tea. The balance of sweet and savory, the richness of the peanut butter without being overly heavy, makes it truly unique and memorable. It stands out from the typical cookie or brownie, offering something a little more sophisticated yet incredibly comforting. I’ve seen faces light up when they take their first bite, and that, for me, is the true magic of baking.
Elevate Your Peanut Butter Roll Cake Experience: Serving Suggestions and Creative Variations
Once you’ve mastered the basic Peanut Butter Roll Cake, the fun doesn’t have to stop there! Its versatility allows for endless creative twists, letting you tailor it to your mood, your guests, or simply what you have in your pantry.
Classic & Decadent Toppings:
- For a simple yet elegant presentation, a light dusting of powdered sugar is always a classic choice. It adds a touch of sweetness and a beautiful visual contrast.
- If you’re feeling truly decadent, a warm drizzle of homemade chocolate ganache or a swirl of salted caramel sauce takes this cake to an entirely new level of indulgence. The combination of chocolate and peanut butter is, of course, a match made in heaven!
- Imagine a slice alongside a scoop of creamy vanilla bean ice cream, the cold melting slightly into the tender cake, or perhaps a scoop of homemade banana ice cream for an ultimate flavor combination that pays homage to the classic peanut butter and banana pairing.
Texture & Flavor Twists:
- Want to add more texture? A sprinkle of finely chopped roasted peanuts, mini chocolate chips, or even crushed pretzels over the top before serving will introduce delightful crunch and a hint of saltiness that beautifully complements the sweet filling.
- Consider a dollop of fresh whipped cream, a few fresh raspberries, or a light drizzle of honey to make beautiful and delicious additions, adding layers of freshness and subtle sweetness.
Filling Innovations:
- For those who love to experiment, try folding a tablespoon of cocoa powder into the peanut butter filling for a rich chocolate-peanut butter experience. It creates a darker, more intense flavor profile that is utterly irresistible.
- Alternatively, swirl in a thin layer of your favorite berry jam – raspberry or grape work wonderfully – into the peanut butter filling before rolling for a delightful PB&J-inspired creation. This adds a lovely fruity tang that cuts through the richness.
- A hint of espresso powder in the filling can deepen the flavor profile, adding a sophisticated edge that coffee lovers will adore, creating a wonderful depth of flavor without overtly tasting like coffee.
- For an extra tangy kick, you could even fold in a small amount of softened cream cheese into the peanut butter filling, creating a richer, slightly more complex flavor.
I genuinely believe this recipe is going to become a staple in your kitchen, a go-to for those moments when you want to impress without stress. I encourage you, from the bottom of my heart, to set aside some time this week and give this extraordinary Peanut Butter Roll Cake a try. Don’t be shy; embrace the process, savor the aroma filling your home, and most importantly, enjoy every single bite of your creation. When you do, I would absolutely love to hear about your experience. Did you add a special twist? Was it a hit with your family and friends? Share your photos, your triumphs, and even your little learning moments in the comments below. Your feedback is invaluable, and it truly makes my day to see you bringing these recipes to life in your own kitchens. Happy baking, my friends!
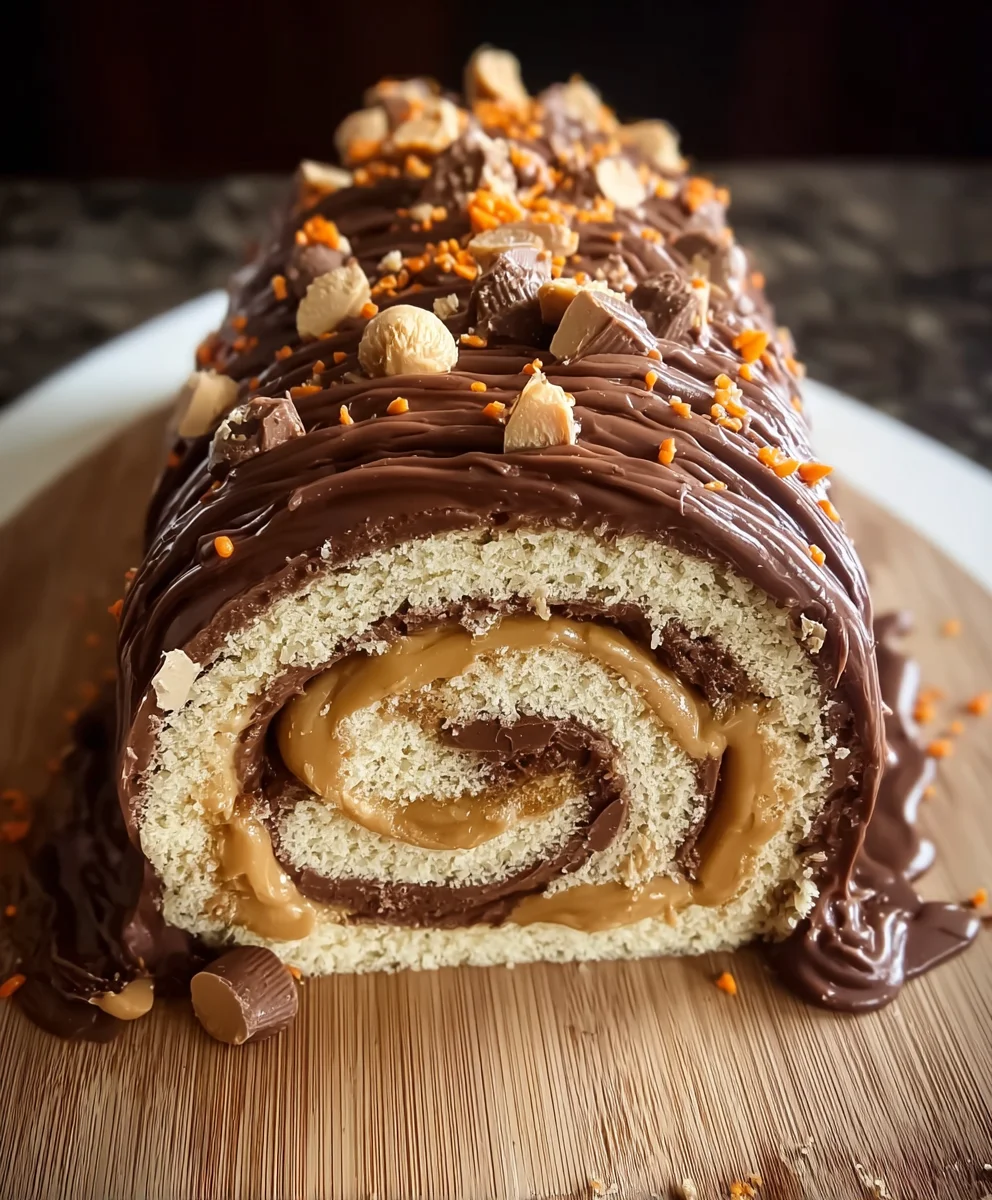
Reese’s Peanut Butter Cup Roll Cake
This showstopping dessert combines rich chocolate cake with creamy peanut butter filling, studded with Reese’s cups and topped with chocolate ganache. Perfect for peanut butter cup lovers. The soft chocolate sponge wraps around creamy peanut butter filling studded with candy pieces, making every slice pure heaven.
Ingredients
-
{‘@type’: ‘HowToSupply’, ‘name’: ‘For the Sponge Cake’, ‘itemListElement’: [‘4 large eggs, separated’, ‘1/2 cup (100g) granulated sugar, divided’, ‘1 teaspoon vanilla extract’, ‘1/2 cup (60g) cake flour, sifted’, ‘1/2 teaspoon baking powder’, ‘1/4 teaspoon salt’, ‘2 tablespoons (28g) unsalted butter, melted’, ‘2 tablespoons (30ml) whole milk, warmed’]}
-
{‘@type’: ‘HowToSupply’, ‘name’: ‘For the Peanut Butter Cream Filling’, ‘itemListElement’: [‘1 cup (226g) unsalted butter, softened’, ‘1 cup (250g) creamy peanut butter’, ‘3 cups (360g) powdered sugar, sifted’, ‘1 teaspoon vanilla extract’, ‘1/4 teaspoon salt’, ‘1/4 cup (60ml) heavy cream’]}
-
{‘@type’: ‘HowToSupply’, ‘name’: ‘For Garnish (Optional)’, ‘itemListElement’: [‘2 tablespoons creamy peanut butter, melted’, ‘2 ounces semi-sweet chocolate, melted (for ganache/drizzling)’, ‘Chopped roasted peanuts’, “Chopped Reese’s Peanut Butter Cups”]}
Instructions
-
Step 1
Preheat oven to 375°F (190°C). Line a 10×15 inch (25×38 cm) jelly roll pan with parchment paper, greasing lightly. In a medium bowl, whisk together sifted cake flour, baking powder, and salt. In a large bowl, beat egg yolks with 1/4 cup (50g) granulated sugar and vanilla extract on high for 3-5 minutes until pale and fluffy. Slowly stream warm melted butter and milk into the yolk mixture on low speed. Gently fold the dry ingredients into the wet mixture in two additions; do not overmix. In a separate clean bowl, beat egg whites until foamy, then gradually add the remaining 1/4 cup (50g) sugar, beating until stiff, glossy peaks form. Gently fold 1/3 of the whipped egg whites into the batter to lighten it, then carefully fold in the remaining whites in two additions. Pour batter into the prepared pan, spread evenly, and tap gently to release air bubbles. -
Step 2
Bake for 10-12 minutes until lightly golden and springs back when touched. Do not overbake. Immediately invert the hot cake onto a clean kitchen towel or parchment dusted with powdered sugar. Carefully peel off the parchment paper from the cake bottom. While warm, roll the cake and towel/parchment together into a tight log from a shorter end. Let the rolled cake cool completely on a wire rack. -
Step 3
While the cake cools, beat softened unsalted butter and creamy peanut butter in a large bowl on medium-high speed for 3-5 minutes until light and fluffy. Gradually add the sifted powdered sugar, one cup at a time, beating well after each addition. Mix in the vanilla extract and salt. Slowly pour in the heavy cream on low speed, then increase to medium-high and beat for 2-3 minutes until the filling is light, fluffy, and spreadable. Adjust consistency with more cream or powdered sugar if needed. -
Step 4
Once the cake is completely cool, gently unroll it. Evenly spread the peanut butter cream filling over the entire cake, leaving a 1/2 inch border. Carefully re-roll the cake into a tight log. Transfer the cake to a serving platter, seam-side down. Cover loosely with plastic wrap and refrigerate for at least 1 hour to allow the cake and filling to firm up and flavors to meld. -
Step 5
Optionally, melt 2 tablespoons of peanut butter and 2 ounces of semi-sweet chocolate separately and drizzle over the chilled cake. Sprinkle with chopped roasted peanuts and/or chopped Reese’s Peanut Butter Cups. Use a sharp knife (dipped in hot water and wiped clean between cuts) to slice the cake into individual portions and serve.
Important Information
Nutrition Facts (Per Serving)
It is important to consider this information as approximate and not to use it as definitive health advice.
Allergy Information
Please check ingredients for potential allergens and consult a health professional if in doubt.


Leave a Comment