
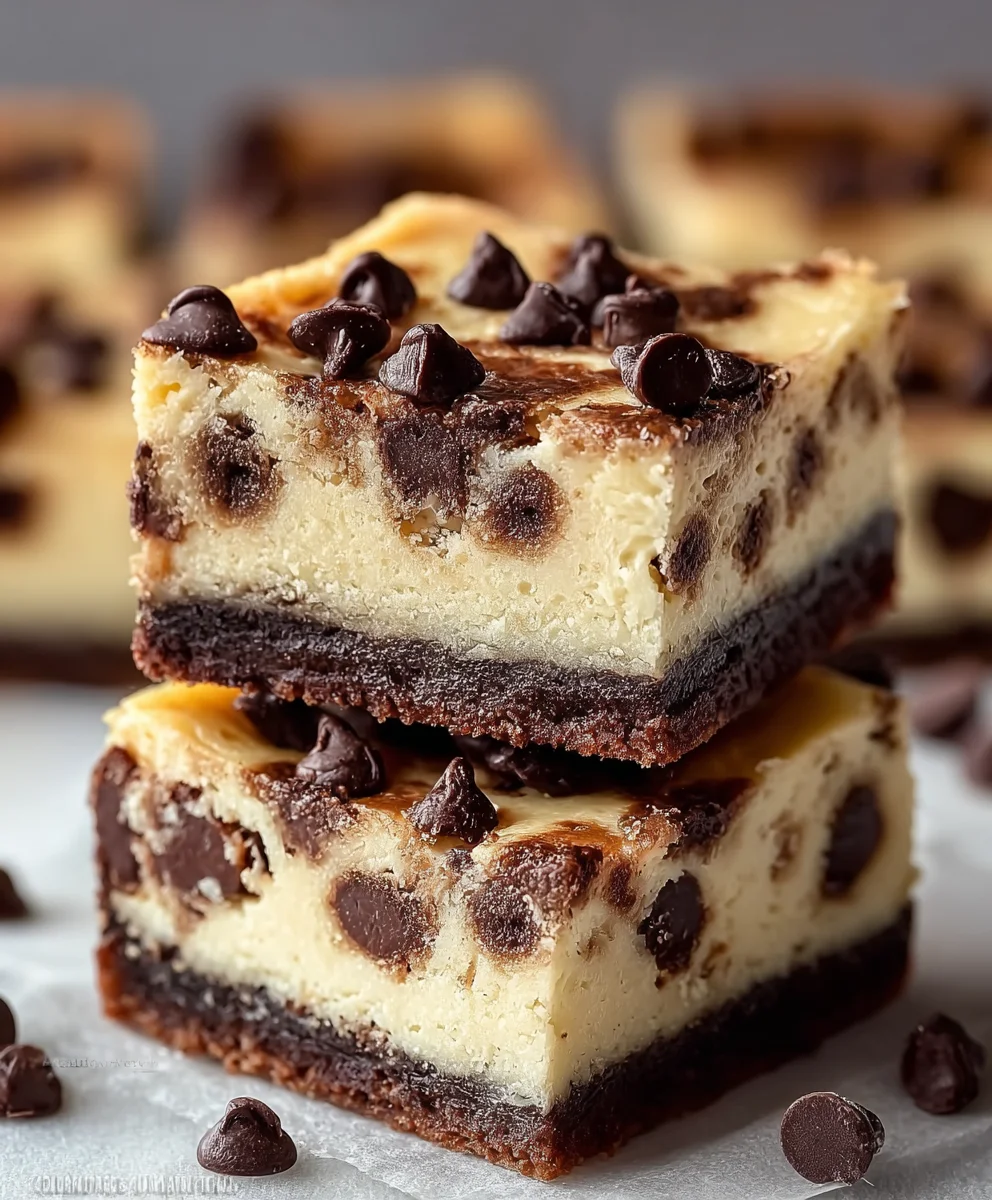
Chocolate Chip Cheesecake Bars offer a truly irresistible experience, blending two of the dessert world’s most cherished treats into one magnificent creation. Imagine the rich, creamy decadence of a classic cheesecake meeting the comforting, chocolate-studded chew of your favorite cookie – that’s precisely the magic we’re talking about! While cheesecake itself boasts a history stretching back to ancient Greece, the ingenious “bar” format is a more modern innovation, born from the desire for convenience and delightful portability. It transforms a traditional dessert into an easily shareable, grab-and-go delight, perfect for any occasion.
People absolutely adore these bars for a myriad of reasons. From the first bite, you’re greeted with a symphony of textures and flavors: the buttery, often crumbly cookie base, the smooth, tangy cream cheese filling, and those pockets of melted, sweet chocolate chips. They strike a perfect balance between sophisticated dessert and comforting treat, making them universally appealing. Whether you’re hosting a casual get-together, need a crowd-pleasing potluck contribution, or simply desire a perfect square of indulgence for yourself, these Chocolate Chip Cheesecake Bars deliver on all fronts. They’re less fuss than a full cheesecake, yet every bit as satisfying, offering a slice of pure joy in every bite. I’m so excited to share my go-to recipe with you!

Ingredients:
- For the Graham Cracker Crust:
- 1 ½ cups (approximately 180g) graham cracker crumbs (from about 10-12 full graham cracker sheets)
- ½ cup (113g) unsalted butter, melted
- ¼ cup (50g) granulated sugar
- ½ teaspoon ground cinnamon (optional, but I love the warmth it adds!)
- For the Cheesecake Filling:
- 3 (8-ounce/226g each) blocks full-fat cream cheese, softened to room temperature
- 1 cup (200g) granulated sugar
- 2 large eggs, also at room temperature
- 1 teaspoon pure vanilla extract
- ¼ cup (60g) sour cream or full-fat Greek yogurt, at room temperature (this adds a lovely tang and creaminess!)
- 2 tablespoons all-purpose flour (helps prevent cracks and adds structure)
- Pinch of salt
- For the Chocolate Chips:
- 1 ½ cups (about 250g) semi-sweet chocolate chips (or milk chocolate chips if you prefer a sweeter profile)
- 2 tablespoons all-purpose flour (for tossing the chocolate chips – this helps prevent them from sinking to the bottom!)
Preparing the Crust for Your Chocolate Chip Cheesecake Bars
- Preheat Your Oven and Prepare Your Pan: First things first, let’s get that oven ready! Preheat your oven to 350°F (175°C). While the oven is heating, grab a 9×13-inch baking pan. To make sure your beautiful Chocolate Chip Cheesecake Bars come out easily later, line the pan with parchment paper, leaving an overhang on the longer sides. This creates little “handles” for lifting the bars out after they’ve chilled. You can lightly grease the pan first to help the parchment stick, which is a little trick I often use!
- Make the Graham Cracker Crumbs: Now for the star of our crust! If you’re starting with whole graham crackers, you’ll need to turn them into fine crumbs. My favorite method is to use a food processor – it’s quick and creates a wonderfully uniform texture. Pulse them until they resemble fine sand. If you don’t have a food processor, no worries! Place the crackers in a large Ziploc bag, seal it, and use a rolling pin to crush them. Just be patient and roll them thoroughly until you have consistently fine crumbs. Lumpy crumbs can make for an uneven crust, and we want perfection for our Chocolate Chip Cheesecake Bars!
- Combine Crust Ingredients: In a medium-sized bowl, combine your graham cracker crumbs, the granulated sugar, and the optional ground cinnamon. Give these dry ingredients a good stir with a fork or whisk to ensure they’re well mixed. Then, pour in your melted unsalted butter. Mix thoroughly until all the crumbs are moistened and coated. The mixture should resemble wet sand – if you squeeze a bit in your hand, it should hold together. If it seems too dry, you might need to add just a tiny bit more melted butter, about half a tablespoon at a time, until you reach that perfect consistency.
- Press the Crust into the Pan: Transfer the buttery graham cracker mixture into your prepared 9×13-inch baking pan. Using the bottom of a flat-bottomed glass, a measuring cup, or even your clean fingers, press the mixture firmly and evenly into the bottom of the pan. Pay special attention to the corners and edges to ensure the crust is uniform. A solid, even crust is key for supporting our luscious cheesecake filling! This firm pressing also helps the crust become beautifully golden and crisp.
- Pre-bake the Crust: Pop the pan into your preheated oven and bake the crust for 8-10 minutes. We’re doing this to give the crust a head start, making it wonderfully crispy and preventing it from becoming soggy once the cheesecake filling is added. When it’s done, the crust should be lightly golden and fragrant. Remove it from the oven and set it aside to cool slightly while you prepare the cheesecake filling. It doesn’t need to be completely cold, just cool enough to handle.
Crafting the Creamy Cheesecake Filling
- Ensure Room Temperature Ingredients: This step is absolutely crucial for a silky-smooth, lump-free cheesecake filling. Your cream cheese, eggs, and sour cream absolutely must be at proper room temperature. If they’re cold, they won’t incorporate properly, leading to lumps and potentially overmixing later on. I usually take them out of the fridge at least 1-2 hours before I plan to start baking. For a quick hack, you can unwrap the cream cheese and microwave it in 10-second intervals until slightly softened, or place the eggs in a bowl of warm water for 10-15 minutes.
- Beat the Cream Cheese and Sugar: In a large mixing bowl, using an electric mixer (either a stand mixer with the paddle attachment or a hand mixer), beat the softened cream cheese on medium-low speed for about 2-3 minutes until it’s perfectly smooth and creamy, with no lumps at all. Then, gradually add the granulated sugar, continuing to beat on medium speed for another 2-3 minutes. Scrape down the sides and bottom of the bowl frequently with a rubber spatula to ensure everything is thoroughly combined. You want this mixture to be light and fluffy, almost airy.
- Add Eggs Gradually: This is another critical step to prevent cracks in your cheesecake. Add the eggs one at a time, beating on low speed just until each egg is fully incorporated. After adding each egg, make sure to scrape down the bowl. Do not overmix once the eggs are in! Overmixing incorporates too much air, which can cause the cheesecake to puff up in the oven and then fall and crack as it cools. We want a dense, creamy texture, not an airy soufflé.
- Incorporate Vanilla, Sour Cream, and Flour: Once the eggs are mixed in, add the pure vanilla extract, sour cream (or Greek yogurt), and the 2 tablespoons of all-purpose flour along with a pinch of salt. Beat on low speed just until these ingredients are fully incorporated and the mixture is smooth. Again, be mindful of overmixing. The flour helps to stabilize the cheesecake and gives it a bit more structure, which is especially helpful for bars that need to hold their shape when cut. The sour cream adds a wonderful subtle tang that balances the richness of the cream cheese and chocolate.
- Prepare the Chocolate Chips: In a small bowl, toss your semi-sweet chocolate chips with the remaining 2 tablespoons of all-purpose flour. This little trick is a game-changer! The flour coating helps prevent the chocolate chips from sinking entirely to the bottom of the cheesecake batter during baking, ensuring they are beautifully dispersed throughout your Chocolate Chip Cheesecake Bars.
- Fold in the Chocolate Chips: Gently fold the floured chocolate chips into the cheesecake batter using your rubber spatula. Stir just enough to distribute them evenly throughout the mixture. You want chocolatey goodness in every single bite, so don’t be shy, but also don’t overmix. A few swirls are all you need.
Baking and Cooling Your Indulgent Chocolate Chip Cheesecake Bars
- Pour the Filling Over the Crust: Carefully pour the cheesecake batter over your slightly cooled, pre-baked graham cracker crust in the prepared pan. Use your spatula to gently spread the filling evenly across the crust. Give the pan a few gentle taps on the counter to release any large air bubbles that might be trapped. This also helps to ensure an even top surface for your Chocolate Chip Cheesecake Bars.
- Bake to Perfection: Place the baking pan into your preheated 350°F (175°C) oven. Bake for approximately 35-45 minutes. Now, this timing can vary quite a bit depending on your oven, so keep an eye on it! You’ll know your cheesecake is ready when the edges are set and appear slightly puffed, but the very center (about a 2-inch circle in the middle) still has a slight jiggle to it when you gently shake the pan. It’s crucial not to overbake cheesecake! An overbaked cheesecake will be dry and more prone to cracking. The residual heat will continue to cook the center as it cools.
- Cool Gradually at Room Temperature: Once baked, turn off your oven, crack the oven door open slightly (about 2-3 inches), and let the cheesecake bars cool in the oven for about 30 minutes. This gradual cooling process helps prevent drastic temperature changes, which are a major cause of cracks in cheesecake. After 30 minutes, remove the pan from the oven and place it on a wire rack to cool completely to room temperature. This can take another 1-2 hours. Patience is a virtue here!
- The All-Important Chilling Phase: Once your cheesecake bars have reached room temperature, cover the pan loosely with plastic wrap (try not to let the plastic touch the surface of the cheesecake) and transfer it to the refrigerator. Chill for a minimum of 4-6 hours, but ideally overnight. This chilling time is non-negotiable! It allows the cheesecake to fully set, firm up, and develop its rich, creamy texture and flavors. Trying to cut them too early will result in a messy, unset disaster. Trust me, the wait is worth every single minute for perfectly firm and sliceable Chocolate Chip Cheesecake Bars.
Slicing and Serving Your Delicious Chocolate Chip Cheesecake Bars
- Lift and Prepare for Slicing: Once thoroughly chilled, use the parchment paper overhangs as handles to carefully lift the entire cheesecake out of the baking pan and place it on a sturdy cutting board. This makes slicing so much easier and cleaner!
- Achieve Perfect Slices: Now for the moment of truth! For beautifully clean and sharp cuts, here’s my favorite trick: fill a tall glass with very hot water. Dip a long, sharp knife into the hot water, wipe it clean with a paper towel (this removes any residual moisture and chocolate), and then make your first cut. Repeat this process – dip, wipe, cut – for each slice. This keeps the knife warm and clean, allowing it to glide smoothly through the cheesecake and the chocolate chips without dragging or tearing. You can typically get 12-16 bars from a 9×13-inch pan, depending on how large you like them. For smaller, dessert-table friendly squares, I often cut them into 24 pieces.
- Serve and Enjoy: Arrange your perfectly sliced Chocolate Chip Cheesecake Bars on a serving platter. These are delightful on their own, but you could also add a dusting of cocoa powder, a dollop of whipped cream, or a fresh berry for a touch of elegance.
- Storage: Any leftover cheesecake bars (if there are any!) can be stored in an airtight container in the refrigerator for up to 5-7 days. They also freeze beautifully! For longer storage, wrap individual bars tightly in plastic wrap and then aluminum foil, and store them in a freezer-safe bag or container for up to 2-3 months. Thaw them in the refrigerator before serving.
- Remember to Savor: Every bite of these rich, creamy, and chocolate-studded bars is a little piece of heaven. They’re perfect for parties, potlucks, or just a delightful treat for yourself. Enjoy the fruits of your labor!
Conclusion:
So, there you have it – my tried-and-true recipe for what I genuinely believe will become one of your absolute favorite desserts. I’ve shared all my secrets to achieve that perfect balance of rich, creamy cheesecake and gooey, decadent chocolate chip cookies, all in one glorious bite. These aren’t just any dessert bars; they are a symphony of textures and flavors that will undoubtedly impress anyone lucky enough to try them. The convenience of a bar, combined with the luxurious taste of a classic cheesecake, makes these Chocolate Chip Cheesecake Bars an undeniable winner for any occasion, from a casual weeknight treat to a show-stopping potluck contribution. I truly believe you’ll find them not just easy to make, but incredibly rewarding. Imagine that moment when you pull them from the oven, the aroma filling your kitchen – it’s pure bliss!
Now, let’s talk about elevating your dessert experience even further. While these bars are absolutely divine on their own, a little accompaniment can transform them into something truly spectacular. For a simple yet elegant touch, I love to serve them slightly chilled with a dusting of powdered sugar – it’s a classic for a reason! But if you’re feeling a bit more adventurous, consider a dollop of freshly whipped cream, perhaps infused with a hint of vanilla or a touch of coffee liqueur. A vibrant berry coulis, made from raspberries or strawberries, adds a wonderful tart counterpoint to the sweetness, cutting through the richness beautifully. Alternatively, a warm drizzle of homemade caramel sauce or a generous scoop of vanilla bean ice cream could take these over the top, creating a true dessert indulgence. Think about serving them with a strong espresso after dinner for a sophisticated finish, or with a tall glass of cold milk for a comforting, nostalgic treat. They are also fantastic with a glass of dessert wine, like a late-harvest Riesling, which complements the sweet and creamy notes without overwhelming them.
The beauty of this recipe also lies in its incredible versatility, allowing you to personalize it to your heart’s content. Don’t be afraid to experiment! If you’re a fan of different types of chocolate, feel free to swap out the semi-sweet chips for dark chocolate for a more intense flavor, or milk chocolate for a sweeter, creamier profile. White chocolate chips or even a mix of all three could add a delightful visual and textural variety. The crust, while delicious as is, can also be a canvas for creativity. Instead of graham crackers, imagine an Oreo cookie crust for an extra layer of chocolatey goodness, or a shortbread crust for a buttery, crumbly base. You could even crush ginger snaps for a subtle spicy kick that pairs surprisingly well with chocolate and cream cheese. And why stop there? Consider adding a handful of chopped nuts – pecans or walnuts would be fantastic – into the cheesecake batter for an extra crunch. A sprinkle of shredded coconut, or even a swirl of raspberry jam or peanut butter just before baking, could introduce exciting new dimensions. For a festive touch, mix in some sprinkles with your chocolate chips or use different flavored extracts in the cheesecake layer, like almond or mint, to completely change the character of the bar. You can even bake these in mini muffin tins for perfect, bite-sized treats, ideal for parties or a controlled portion size.
I truly hope I’ve convinced you that these bars are worth every moment in the kitchen. There’s something incredibly satisfying about creating a dessert from scratch, especially one that delivers such an incredible payoff. Don’t let the thought of making cheesecake intimidate you; these bars are genuinely simple, forgiving, and designed for success. You don’t need to be a seasoned baker to achieve these spectacular results. Just follow the steps, have fun with it, and prepare to be amazed by the sheer deliciousness you’ve created. I promise, your taste buds (and anyone you share them with) will thank you!
Now it’s your turn! I absolutely can’t wait for you to try this recipe. Once you’ve baked your batch of these incredible Chocolate Chip Cheesecake Bars, please come back and tell me all about your experience. Did you stick to the original recipe, or did you venture into some exciting variations? What did your family and friends think? Share your successes, your serving suggestions, or any creative twists you came up with in the comments below. Your feedback and personal stories are what truly make this baking community so special. Happy baking, everyone – I’m eager to hear your delicious tales!
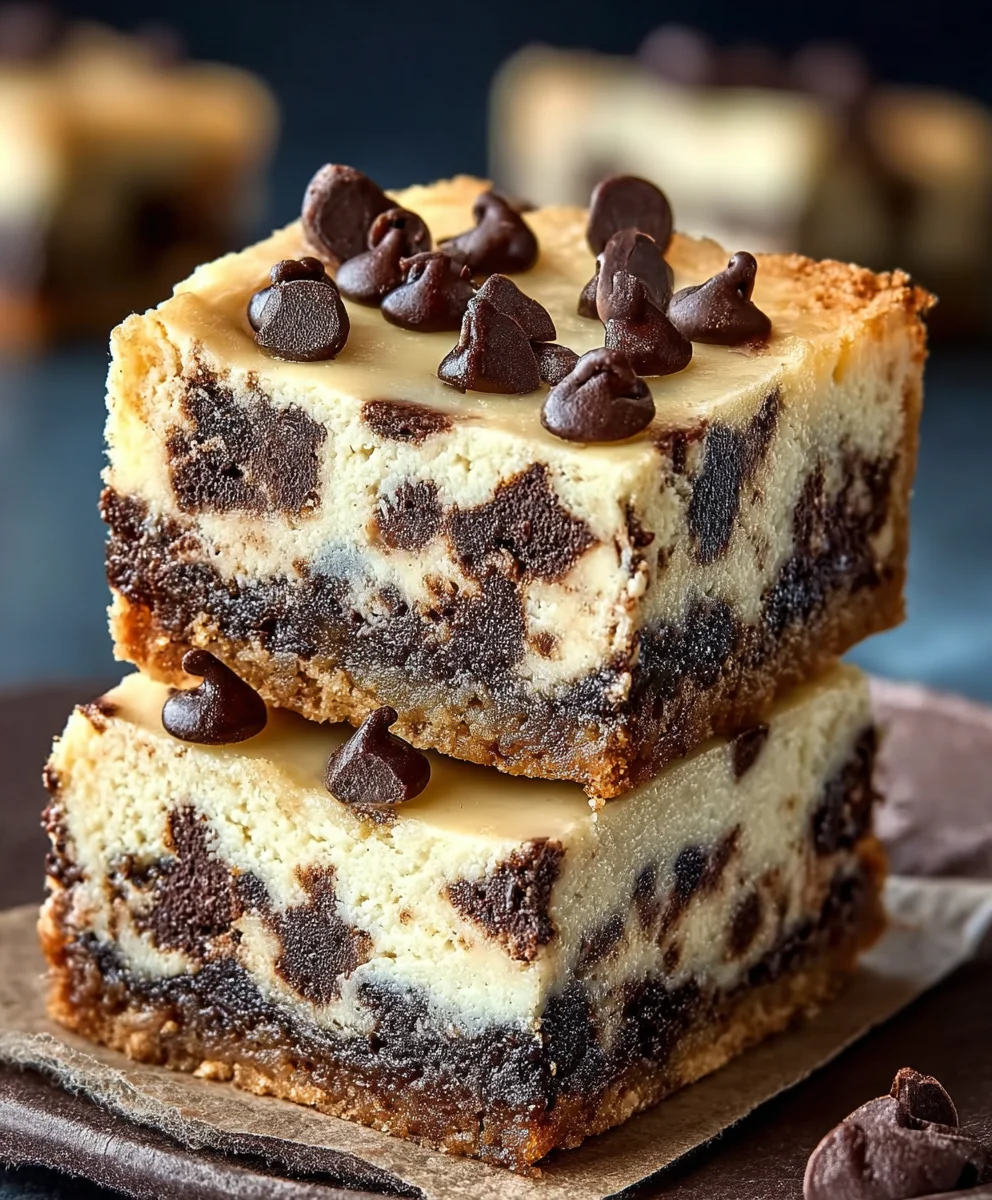
Chocolate Chip Cheesecake Bars
Easy and delicious Chocolate Chip Cheesecake Bars featuring a soft cookie dough base, a creamy cheesecake layer, and a crumbled cookie dough topping. Perfect for any gathering or a sweet treat.
Ingredients
-
40 oz refrigerated chocolate chip cookie dough
-
16 oz cream cheese, room temperature
-
¼ cup granulated sugar
-
½ tsp vanilla extract
-
1 tsp lemon juice (optional)
Instructions
-
Step 1
Preheat oven to 350°F (175°C). Line a 9×13-inch pan with parchment paper, leaving an overhang. -
Step 2
Press about 3/4 of the chocolate chip cookie dough evenly into the bottom of the prepared pan. -
Step 3
In a medium bowl, beat softened cream cheese, granulated sugar, vanilla extract, and optional lemon juice until smooth and creamy. -
Step 4
Carefully spread the cheesecake mixture evenly over the cookie dough base. Crumble the remaining 1/4 of cookie dough over the cheesecake layer. -
Step 5
Bake for 30-35 minutes, or until the edges are lightly golden and the cheesecake filling is set with a slight jiggle in the center. -
Step 6
Let cool completely at room temperature on a wire rack. Once cooled, cover and refrigerate for a minimum of 4 hours, or ideally overnight, until thoroughly chilled and firm. -
Step 7
Use the parchment paper overhang to lift the bars from the pan. Place on a cutting board and slice into 12-16 bars. Clean knife between cuts for best results. Serve and enjoy! -
Step 8
Store leftover bars in an airtight container in the refrigerator for up to 5-7 days or freeze for longer storage.
Important Information
Nutrition Facts (Per Serving)
It is important to consider this information as approximate and not to use it as definitive health advice.
Allergy Information
Please check ingredients for potential allergens and consult a health professional if in doubt.

Leave a Comment