
Cream Cheese Red Velvet Cookies are an absolute showstopper, promising to captivate both your eyes and your taste buds from the very first glance. Imagine the luxurious essence of a beloved classic cake, transformed into a perfectly chewy, handheld delight. I am thrilled to share a recipe that brings all the iconic charm and flavor of red velvet cake into a convenient, utterly irresistible cookie form.
The enchanting allure of red velvet itself dates back to the Victorian era, truly finding its stride and widespread adoration in the American South. Its distinctive crimson hue, traditionally achieved through a subtle chemical reaction between cocoa powder and buttermilk or vinegar, paired with a rich, tangy cream cheese frosting, has made it an enduring symbol of sophisticated indulgence. My recipe for these magnificent Cream Cheese Red Velvet Cookies beautifully encapsulates that heritage, offering a vibrant burst of color and a symphony of flavors that evoke cherished memories.
Why Everyone Falls in Love with These Cookies
People adore this dish for its stunning visual appeal, its wonderfully soft and chewy texture, and that unparalleled balance of deep, subtle cocoa notes with the bright, tangy sweetness of cream cheese. They are more than just a dessert; they are a delightful experience, perfect for adding a touch of elegance to any gathering or simply enjoying a moment of pure culinary bliss. Get ready to bake a batch that will surely become a treasured favorite!

Ingredients:
-
For the Cream Cheese Filling:
- 8 ounces (226g) cream cheese, full-fat, softened to room temperature
- 1/2 cup (60g) powdered sugar, sifted
- 1 teaspoon pure vanilla extract
-
For the Red Velvet Cookies:
- 2 1/2 cups (300g) all-purpose flour, spooned and leveled
- 1/4 cup (22g) unsweetened cocoa powder, natural (not Dutch-processed)
- 1 teaspoon baking soda
- 1/2 teaspoon salt
- 1 cup (226g) unsalted butter, softened to room temperature
- 1 1/2 cups (300g) granulated sugar
- 1/2 cup (100g) packed light brown sugar
- 2 large eggs, at room temperature
- 1 tablespoon pure vanilla extract
- 2 ounces (4 tablespoons) liquid red food coloring (gel food coloring for a deeper color, about 2 teaspoons)
- 1/2 cup (120ml) buttermilk, at room temperature
-
For Rolling:
- 1/2 cup (60g) powdered sugar, for coating (plus more if needed)
Preparing the Irresistible Cream Cheese Filling:
- Soften the Cream Cheese: Begin by ensuring your full-fat cream cheese is truly at room temperature. This is crucial for a smooth, lump-free filling. If it’s too cold, it will be difficult to mix evenly. You can speed up the process by cutting it into smaller cubes and letting it sit on the counter for about 30-60 minutes.
- Whip the Filling: In a medium bowl, combine the softened cream cheese, sifted powdered sugar, and vanilla extract. Using an electric mixer (either a hand-held or stand mixer with a paddle attachment), beat these ingredients together on medium speed until the mixture is completely smooth, creamy, and free of any lumps. This should take about 2-3 minutes. Scrape down the sides of the bowl as needed to ensure everything is fully incorporated. We’re looking for a luscious, velvety texture here, the hallmark of fantastic Cream Cheese Red Velvet Cookies.
- Chill for Firmness: Cover the bowl with plastic wrap and refrigerate the cream cheese filling for at least 30 minutes. This chilling period is vital; it helps the filling firm up, making it much easier to handle and shape in the next step. Don’t skip this!
- Portion and Freeze: Once chilled, remove the filling from the refrigerator. Using a small cookie scoop (about 1 teaspoon in size) or two small spoons, scoop out approximately 20-24 small, round balls of the cream cheese mixture. Place these balls on a plate or small baking sheet lined with parchment paper. Transfer the plate/sheet to the freezer and freeze for at least 1-2 hours, or until the filling balls are solid. This step is absolutely critical for successfully encasing the filling within the cookie dough without a messy meltdown. Solid cream cheese balls will hold their shape beautifully during baking.
Crafting the Perfect Red Velvet Cookie Dough:
- Prepare Dry Ingredients: In a medium bowl, whisk together the all-purpose flour, unsweetened cocoa powder, baking soda, and salt. Whisking ensures these ingredients are thoroughly combined and helps to aerate the flour, leading to a lighter cookie texture. Set this bowl aside. Using natural cocoa powder is important here; it reacts with the baking soda and buttermilk to help create that signature red velvet lift and subtle tang.
- Cream Butter and Sugars: In a large bowl, using your electric mixer with the paddle attachment, cream together the softened unsalted butter, granulated sugar, and light brown sugar on medium-high speed for about 3-4 minutes. You’re aiming for a light, fluffy, and pale mixture. This creaming process incorporates air, which contributes to the cookies’ tender texture. Scrape down the sides of the bowl frequently to ensure everything is evenly mixed.
- Incorporate Eggs and Vanilla: Add the two large eggs, one at a time, beating well after each addition until fully incorporated. Each egg should disappear into the mixture before the next is added. This ensures proper emulsification and prevents the dough from separating. Then, stir in the pure vanilla extract. The vanilla enhances the overall flavor profile of our Cream Cheese Red Velvet Cookies.
- Achieve the Vibrant Red: Now for the star of the show – the color! Add the liquid red food coloring (or gel food coloring if you prefer a more concentrated color). Mix on medium speed until the color is evenly distributed and vibrant. This might take a minute or two. Don’t be shy with the coloring; we want that iconic, deep red hue! If using gel, start with a smaller amount (e.g., 2 teaspoons) and add more if needed to reach your desired intensity.
- Alternate Wet and Dry Ingredients: With the mixer on low speed, gradually add the dry ingredients mixture to the wet ingredients in three additions, alternating with two additions of buttermilk. Start and end with the dry ingredients. For example: add 1/3 of the dry mixture, mix until just combined, then add 1/2 of the buttermilk, mix, then 1/3 of the dry, mix, remaining buttermilk, mix, and finally the last 1/3 of the dry mixture. Mix only until just combined after each addition. Overmixing the dough can develop the gluten in the flour, resulting in tough cookies. We want tender, chewy Cream Cheese Red Velvet Cookies, so gentle mixing is key!
- Chill the Cookie Dough: Cover the bowl of red velvet cookie dough with plastic wrap and refrigerate for at least 1 hour, or preferably 2 hours. This chilling period is crucial for several reasons: it firms up the dough, making it easier to handle and preventing excessive spreading during baking, and it allows the flavors to meld beautifully. You want the dough to be firm enough to easily wrap around the frozen cream cheese balls.
Assembling Your Dreamy Cream Cheese Red Velvet Cookies:
- Preheat and Prepare: While the dough is chilling, preheat your oven to 375°F (190°C). Line two large baking sheets with parchment paper or silicone baking mats. This will prevent sticking and ensure even baking. Retrieve the frozen cream cheese filling balls from the freezer and the chilled red velvet cookie dough from the refrigerator.
- Portion the Dough: Using a medium cookie scoop (about 1.5-2 tablespoons) or your hands, scoop out portions of the red velvet cookie dough. You’ll want roughly twice the amount of cookie dough compared to the cream cheese filling ball. Gently flatten each portion of dough into a disc in the palm of your hand. The goal here is to create a pocket for the filling.
- Encasing the Filling: Place one of the frozen cream cheese filling balls directly in the center of a flattened cookie dough disc. Carefully wrap the cookie dough around the cream cheese ball, gently sealing the edges of the dough completely to fully encase the filling. Take your time with this step to ensure there are no cracks or gaps where the cream cheese could escape during baking. Roll the dough-encased ball gently between your palms to create a smooth, round sphere.
- The Powdered Sugar Coat (Optional but Recommended!): Pour the extra powdered sugar for rolling into a shallow bowl. Gently roll each assembled cookie ball generously in the powdered sugar, ensuring it’s completely coated. This coating will give the Cream Cheese Red Velvet Cookies their beautiful “crinkled” appearance once baked, a signature of many red velvet treats, and adds an extra touch of sweetness. If you want a more pronounced crinkle, roll the dough ball lightly, let it sit for a minute to absorb some moisture, then roll it heavily again in powdered sugar.
- Arrange on Baking Sheets: Place the coated cookie balls on the prepared baking sheets, leaving about 2 inches of space between each cookie. These cookies will spread a bit as they bake, and we want to ensure they have enough room. Repeat the process with the remaining dough and filling.
Baking Your Cream Cheese Red Velvet Cookies to Perfection:
- Bake with Care: Transfer the baking sheets to your preheated oven. Bake one sheet at a time, or if your oven bakes evenly, you can bake two sheets simultaneously, rotating them halfway through baking for even browning. Bake for 10-12 minutes. The exact baking time can vary depending on your oven, so keep a close eye on them.
- Check for Doneness: The cookies are done when the edges are set and lightly golden, but the centers still look slightly soft and puffed. They might not look completely “done” in the middle, and that’s exactly what we want! Do not overbake these Cream Cheese Red Velvet Cookies, as overbaking will result in a dry, tough cookie rather than the desired soft and chewy texture with a gooey center.
- Cooling Process: Once baked, remove the baking sheets from the oven and let the cookies cool on the sheets for about 5-7 minutes. This allows them to set up slightly and firm up enough to be moved without breaking. After this initial cooling, carefully transfer the cookies to a wire rack to cool completely. The cream cheese filling will be molten and very hot initially, so resist the urge to cut into them immediately!
- The Waiting Game: As the Cream Cheese Red Velvet Cookies cool, the cream cheese filling will firm up slightly, becoming that wonderfully rich, tangy, and creamy center we all adore. Allowing them to cool completely will also enhance their flavor and texture.
Storage and Enjoyment:
- Proper Storage: Due to the cream cheese filling, these delightful Cream Cheese Red Velvet Cookies are best stored in an airtight container in the refrigerator. They will stay fresh and delicious for up to 3-4 days. For optimal enjoyment, I often let them come to room temperature for about 15-20 minutes before serving, or even give them a quick 10-15 second zap in the microwave to slightly warm the filling, making it extra gooey and inviting.
- Freezing for Later: If you’ve made a large batch or want to save some for a special occasion, these cookies freeze wonderfully! Once completely cooled, place them in a single layer in an airtight freezer-safe container, separated by parchment paper. They can be frozen for up to 2-3 months. Thaw them in the refrigerator overnight or on the counter for a few hours before enjoying.
- Serving Suggestions: These Cream Cheese Red Velvet Cookies are truly a dessert experience on their own. They make a fantastic treat for parties, a thoughtful homemade gift, or simply a luxurious indulgence with a cup of coffee or a glass of milk. The combination of the soft, moist red velvet cookie and the sweet, tangy cream cheese center is simply divine and always a crowd-pleaser. Get ready for compliments!

Conclusion:
And there you have it, my friends! We’ve journeyed through the delightful process of creating what I truly believe are some of the most irresistible treats you’ll ever pull from your oven. After all our hard work, from mixing the vibrant batter to rolling them in sugar and watching them bake to perfection, what we end up with is nothing short of magical. These aren’t just any cookies; they are a celebration in every bite, a testament to the joy of baking, and a guaranteed crowd-pleaser that will leave everyone asking for the recipe. The deep, rich red color, so captivating to the eye, immediately sets them apart, promising an experience that goes beyond the ordinary. But it’s not just their stunning appearance that makes them so special. It’s the incredible texture—soft, chewy, with just the right amount of tenderness that practically melts in your mouth.
What truly elevates this recipe into the “must-try” category is the harmonious balance of flavors. The subtle cocoa notes, characteristic of classic red velvet, are perfectly complemented by a hint of tang, which is our secret ingredient here. This tang cuts through the sweetness beautifully, ensuring that each cookie is decadent without being cloyingly rich. The texture, as I mentioned, is simply divine – a delightful chewiness around the edges giving way to a wonderfully soft and cake-like interior. This balance of taste and texture is what makes these cookies so utterly addictive. They manage to be comforting and familiar, yet sophisticated and utterly gourmet all at once. Every single element comes together to create a cookie experience that feels both indulgent and remarkably easy to achieve in your own kitchen. I’ve found that even those who claim not to have a sweet tooth find themselves reaching for a second, or even a third, which truly speaks volumes about their universal appeal. If you’re looking for a dessert that delivers on both visual impact and incredible flavor, one that brings smiles and satisfaction, then I promise you, this is the one.
Now that you have your perfect batch, let’s talk about how to best enjoy these beauties and perhaps even explore some creative twists. While they are absolutely phenomenal on their own, fresh from the cooling rack, there are so many ways to elevate the experience. Imagine serving these vibrant cookies with a tall, frosty glass of cold milk – a classic pairing that never disappoints. For a more adult treat, a hot cup of coffee or a robust espresso makes a wonderful companion, the bitterness beautifully contrasting with the cookies’ sweetness. They also make an incredibly thoughtful and visually stunning gift. Arrange a few on a pretty plate, wrap them in cellophane with a festive ribbon, and you have a handmade present that shows true care and effort. Nobody can resist a box of homemade treats, especially when they are as gorgeous as these. As for variations, don’t be afraid to experiment! For an extra layer of decadence, consider gently folding in a handful of white chocolate chips into half of the dough before baking; the creamy white chocolate works wonders with the red velvet base. Or, for a different textural element, a sprinkle of toasted pecans or walnuts on top before baking could add a delightful crunch. If you’re feeling particularly adventurous, you could even make these into sandwich cookies by piping a little extra cream cheese frosting between two cooled cookies for the ultimate indulgent dessert. Think about seasonal sprinkles during holidays, or perhaps a hint of almond extract for a different aroma. The possibilities are truly endless once you have this incredible base recipe mastered.
So, my fellow baking enthusiasts, I genuinely hope you’re feeling inspired to give this recipe a try. There’s an unparalleled joy in creating something delicious from scratch, and I promise you, the reward of biting into one of these homemade marvels is immense. Don’t be intimidated; the steps are straightforward, and the results are consistently spectacular. These Cream Cheese Red Velvet Cookies are more than just a dessert; they are an experience waiting to happen in your kitchen. From the moment you mix that first ingredient to the very last crumb, you’ll find yourself smiling. Once you’ve baked your batch, I would absolutely love to hear about your experience! Did you stick to the recipe, or did you venture into some of the variations I suggested? Did you find them as delightful as I do? Please don’t hesitate to share your thoughts, your successes, and perhaps even a photo or two of your masterpieces in the comments below. Your feedback and creativity truly inspire me, and it helps our wonderful community of bakers grow. Happy baking, and enjoy every glorious bite!
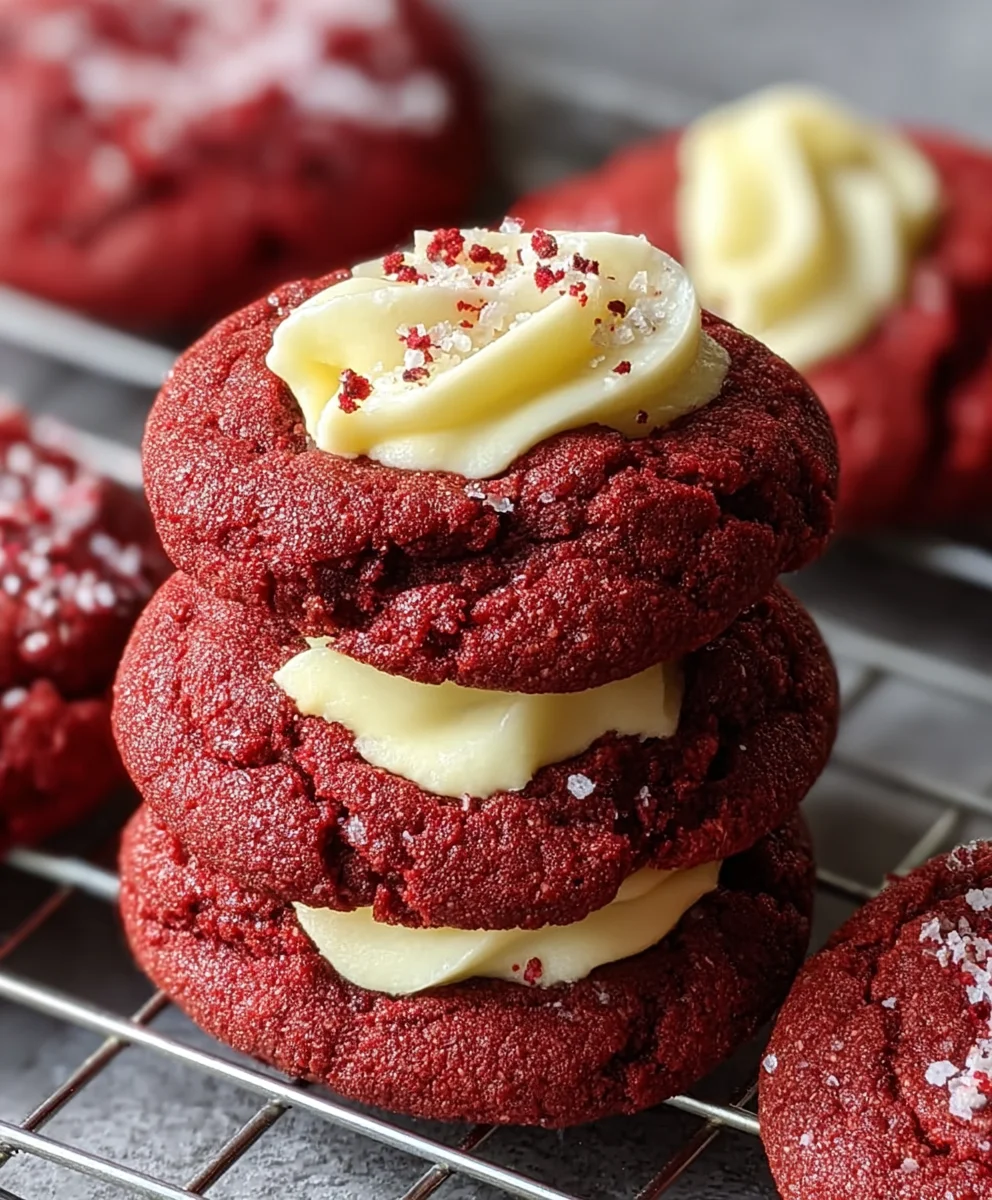
Cream Cheese Red Velvet Cookies
Soft and chewy Cream Cheese Red Velvet Cookies with a rich, tangy cream cheese filling, combining the luxurious essence of a classic cake into an irresistible cookie.
Ingredients
-
8 ounces (226g) full-fat cream cheese, softened
-
1/2 cup (60g) sifted powdered sugar (for filling)
-
1 teaspoon pure vanilla extract (for filling)
-
2 1/2 cups (300g) all-purpose flour
-
1/4 cup (22g) unsweetened natural cocoa powder
-
1 teaspoon baking soda
-
1/2 teaspoon salt
-
1 cup (226g) unsalted butter, softened
-
1 1/2 cups (300g) granulated sugar
-
1/2 cup (100g) packed light brown sugar
-
2 large eggs, room temperature
-
1 tablespoon pure vanilla extract (for cookies)
-
2 ounces (4 tbsp) liquid red food coloring (or 2 tsp gel)
-
1/2 cup (120ml) buttermilk, room temperature
-
1/2 cup (60g) powdered sugar (for coating)
Instructions
-
Step 1
Soften cream cheese to room temperature. Beat cream cheese, 1/2 cup powdered sugar, and 1 tsp vanilla extract until smooth. Refrigerate for at least 30 minutes. -
Step 2
Scoop 20-24 small (approx. 1 tsp) balls of chilled filling onto parchment paper. Freeze for 1-2 hours until solid. -
Step 3
In a medium bowl, whisk 2 1/2 cups all-purpose flour, 1/4 cup cocoa powder, 1 tsp baking soda, and 1/2 tsp salt. -
Step 4
In a large bowl, cream 1 cup softened unsalted butter, 1 1/2 cups granulated sugar, and 1/2 cup light brown sugar until light and fluffy (3-4 minutes). -
Step 5
Beat in 2 large eggs one at a time, then 1 tbsp vanilla extract. Mix in red food coloring until vibrant and evenly distributed. -
Step 6
On low speed, gradually add dry ingredients (in 3 parts) alternating with 1/2 cup buttermilk (in 2 parts). Mix only until just combined. -
Step 7
Cover and refrigerate the red velvet cookie dough for at least 1-2 hours until firm. -
Step 8
Preheat oven to 375°F (190°C). Line two large baking sheets with parchment paper. Retrieve frozen cream cheese balls and chilled cookie dough. -
Step 9
Scoop about 1.5-2 tablespoons of cookie dough, flatten. Place one frozen cream cheese ball in the center, wrap dough around it, sealing completely. Roll into a smooth sphere. Roll each assembled cookie generously in 1/2 cup powdered sugar for coating. -
Step 10
Place coated cookies 2 inches apart on prepared baking sheets. Bake one sheet at a time for 10-12 minutes, until edges are set but centers are slightly soft. Do not overbake. -
Step 11
Cool on baking sheets for 5-7 minutes, then transfer to a wire rack to cool completely. The cream cheese filling will firm up as they cool. -
Step 12
Store in an airtight container in the refrigerator for 3-4 days; warm slightly before serving for best results. Cooled cookies can be frozen for 2-3 months.
Important Information
Nutrition Facts (Per Serving)
It is important to consider this information as approximate and not to use it as definitive health advice.
Allergy Information
Please check ingredients for potential allergens and consult a health professional if in doubt.


Leave a Comment