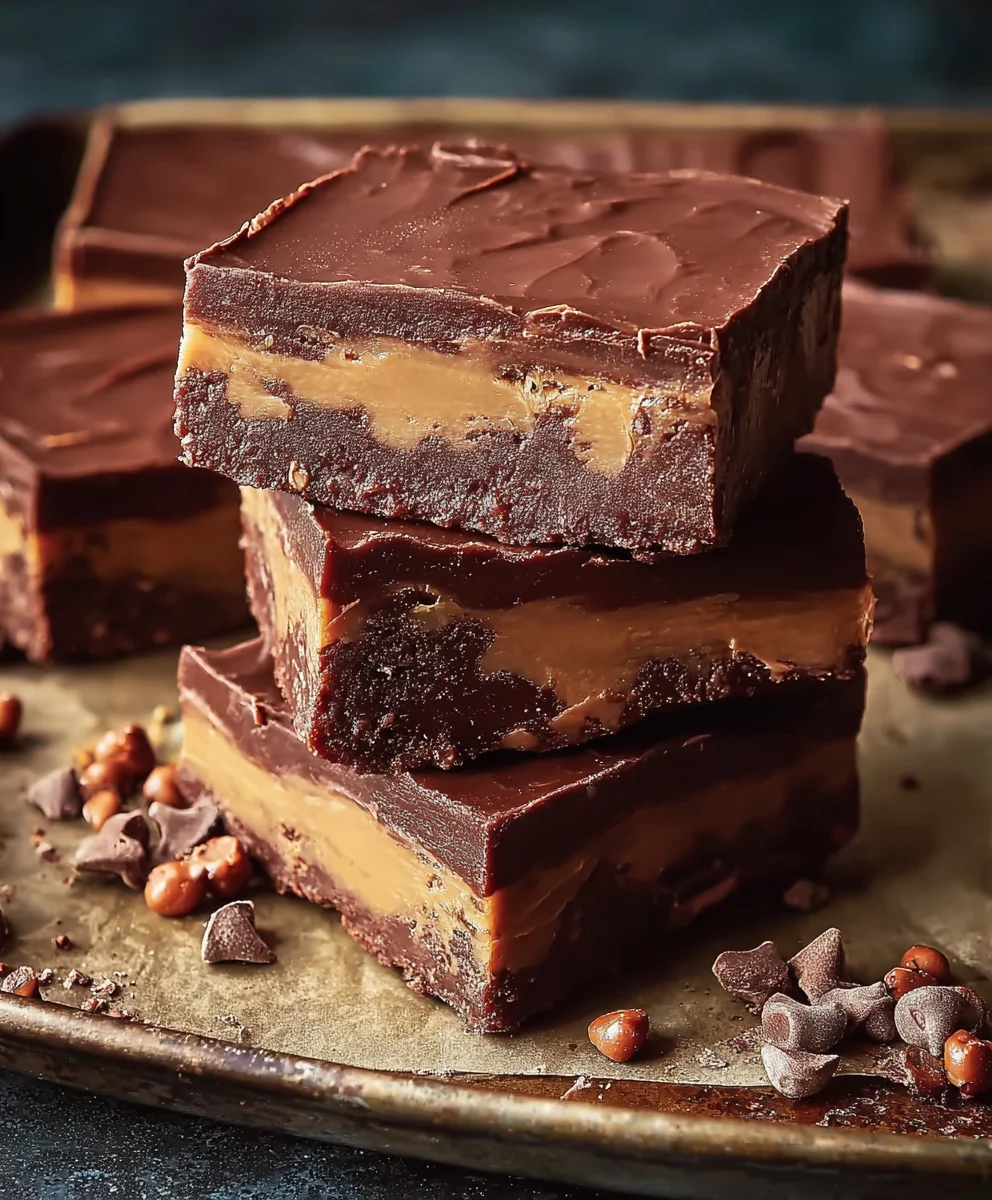
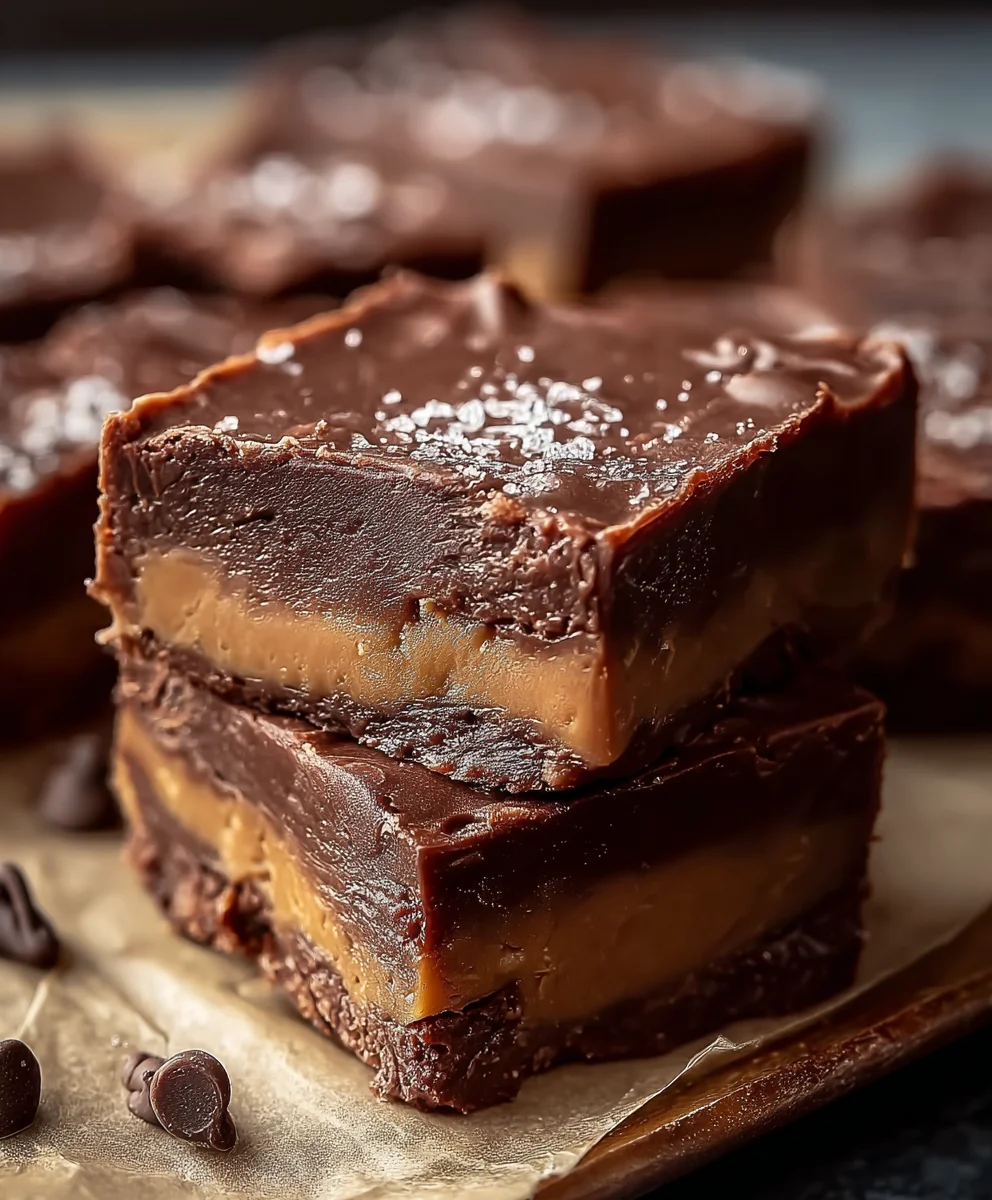
Chocolate Fudge Bars – just hearing those three words can conjure up images of pure, unadulterated bliss. I remember my grandmother’s kitchen, always smelling faintly of cocoa, where a fresh batch of these decadent treats was a common sight. There’s something truly magical about the rich, intensely chocolatey flavor combined with that uniquely chewy yet melt-in-your-mouth texture that only a perfectly made fudge bar can deliver. This isn’t just any dessert; it’s a testament to simple ingredients coming together to create an extraordinary experience.
A Sweet History and Irresistible Appeal
While the exact origins of fudge are a bit murky, often attributed to a “fudged” batch of caramels at Vassar College in the late 19th century, its popularity skyrocketed across America, quickly becoming a staple at bake sales, family gatherings, and holiday tables. Everyone, from children to adults, falls head over heels for their deep flavor and comforting chewiness. These Chocolate Fudge Bars aren’t just a dessert; they’re a moment of pure joy, a bite of nostalgia, and an incredibly satisfying indulgence that is surprisingly simple to achieve at home. Prepare to impress everyone with this timeless classic!
Ingredients:
- For the Chocolate Fudge Bar Base:
- 1 cup (226g) Unsalted Butter: Softened to room temperature. This is crucial for a smooth, homogenous mixture that emulsifies well with the sugar and eggs, leading to a tender and chewy bar.
- 2 cups (400g) Granulated Sugar: Provides sweetness and helps create that signature chewy texture in our Chocolate Fudge Bars.
- 4 Large Eggs: At room temperature. Eggs act as a binder and contribute to the rich, cake-like texture of the base, while also adding moisture and richness.
- 2 teaspoons Pure Vanilla Extract: A high-quality vanilla extract enhances the chocolate flavor and adds a beautiful aromatic depth to the base.
- 1 ½ cups (180g) All-Purpose Flour: Sifted. Flour provides the structure for our delicious Chocolate Fudge Bars, holding all the rich ingredients together.
- ¾ cup (60g) Unsweetened Cocoa Powder: Sifted. For a deep, intense chocolate flavor in the base. I always recommend using a good quality cocoa powder for the best results, as it truly makes a difference in the overall taste profile of your Chocolate Fudge Bars.
- 1 teaspoon Baking Powder: Helps to slightly leaven the base, giving it a tender crumb without making it overly cakey.
- ½ teaspoon Fine Sea Salt: Balances the sweetness and amplifies all the other flavors, especially the chocolate. Never underestimate the power of a little salt in sweet recipes!
- 1 cup (170g) Semi-Sweet Chocolate Chips: (Optional, but highly recommended for an extra chewy, chocolatey base). These melt into delightful pockets of gooey chocolate.
- For the Silky Chocolate Fudge Topping:
- ½ cup (113g) Unsalted Butter: Melted. This forms the rich foundation of our incredible fudge topping, ensuring a smooth and luxurious texture.
- 4 cups (480g) Powdered Sugar (Confectioners’ Sugar): Sifted. This is key for the smooth, melt-in-your-mouth consistency of the fudge. Sifting prevents lumps and ensures a silky finish.
- ¾ cup (60g) Unsweetened Cocoa Powder: Sifted. Just like in the base, a high-quality cocoa powder is essential here for an intensely chocolatey, decadent topping for our Chocolate Fudge Bars.
- ½ cup (120ml) Milk: Whole milk or heavy cream work best for a richer, creamier fudge. You can adjust the amount slightly to achieve your desired consistency.
- 1 teaspoon Pure Vanilla Extract: Brightens and deepens the chocolate notes in the fudge topping.
- ¼ teaspoon Fine Sea Salt: A tiny pinch to cut through the sweetness and enhance the chocolate flavor. It truly makes the fudge pop!
- 1 cup (170g) Semi-Sweet or Dark Chocolate Chips: For melting into the hot fudge, adding extra depth, richness, and helping with the set.
Equipment You’ll Need:
- 9×13 inch Baking Pan: A sturdy metal pan is ideal for even baking and proper setting of your Chocolate Fudge Bars.
- Parchment Paper: Essential for lining the pan, making it incredibly easy to lift out and cut your bars cleanly. Don’t skip this step!
- Large Mixing Bowls: At least two – one for wet ingredients and one for dry.
- Electric Mixer (Stand or Handheld): For creaming butter and sugar, and incorporating eggs effectively. This saves a lot of arm work and ensures a well-aerated base.
- Whisk: For combining dry ingredients and whisking the fudge topping.
- Rubber Spatula: For scraping bowls, folding ingredients, and spreading batters/fudge.
- Medium Saucepan: For preparing the luscious fudge topping.
- Measuring Cups and Spoons: Accuracy is key in baking, especially for perfectly balanced Chocolate Fudge Bars.
- Wire Rack: For cooling the baked base completely before topping.
Preparing Your Chocolate Fudge Bar Base:
- Preheat and Prepare Your Pan: First things first, let’s get our oven ready. Preheat your oven to 350°F (175°C). While that’s heating up, grab your 9×13 inch baking pan. This is the perfect size for a generous batch of Chocolate Fudge Bars. Line the bottom and up the sides of the pan with parchment paper, leaving an overhang on the two longer sides. This overhang will act as little “handles” later, making it incredibly simple to lift the entire slab of bars out of the pan once they’re cooled and ready for cutting. Lightly grease the parchment paper with a little butter or non-stick spray for good measure. This extra step ensures that your delicious Chocolate Fudge Bars will release effortlessly.
- Cream Butter and Sugar: In a large mixing bowl, combine the softened 1 cup (226g) unsalted butter with the 2 cups (400g) granulated sugar. Using an electric mixer (either stand or handheld), beat them together on medium speed until the mixture is light, fluffy, and pale yellow. This usually takes about 3-5 minutes. You’re looking for a texture where the sugar crystals have mostly dissolved into the butter, creating a creamy foundation for your Chocolate Fudge Bars. This aeration step is crucial for a tender crumb.
- Incorporate Eggs and Vanilla: Now, let’s add the eggs. Crack your 4 large eggs into a separate small bowl first – this allows you to check for any shell fragments and ensures you’re adding fresh eggs. Add the eggs to the butter and sugar mixture one at a time, beating well after each addition until fully incorporated. Scrape down the sides of the bowl with your rubber spatula as needed to ensure everything is evenly mixed. Once all the eggs are in, beat in the 2 teaspoons of pure vanilla extract. Continue to beat for another 1-2 minutes on medium-high speed. The mixture should become even lighter in color and have a smooth, emulsified appearance. This step is what truly builds the rich, chewy texture for your Chocolate Fudge Bars.
- Whisk Dry Ingredients: In a separate medium-sized bowl, whisk together the 1 ½ cups (180g) sifted all-purpose flour, ¾ cup (60g) sifted unsweetened cocoa powder, 1 teaspoon baking powder, and ½ teaspoon fine sea salt. Whisk them together thoroughly until all the dry ingredients are uniformly combined. Sifting the flour and cocoa powder before measuring is important to prevent lumps and ensures a smoother batter, leading to perfect Chocolate Fudge Bars.
- Combine Wet and Dry: With your mixer on low speed, gradually add the dry ingredient mixture to the wet mixture, a third at a time. Mix only until just combined. Be careful not to overmix! Overmixing can develop the gluten in the flour too much, resulting in tough, dry bars instead of the wonderfully chewy Chocolate Fudge Bars we’re aiming for. Use your rubber spatula to give it a final gentle fold, making sure there are no streaks of flour remaining at the bottom or sides of the bowl.
- Fold in Chocolate Chips (Optional): If you’re using them for an extra layer of chocolatey goodness, gently fold in the 1 cup (170g) semi-sweet chocolate chips with your rubber spatula until they are evenly distributed throughout the batter. These will melt beautifully during baking, adding pockets of molten chocolate to the base of your Chocolate Fudge Bars.
- Spread and Bake: Pour the batter into your prepared 9×13 inch baking pan. Use your rubber spatula to spread the batter evenly across the bottom of the pan. It might seem a little thick, but that’s perfectly normal. Place the pan in your preheated oven and bake for 25-30 minutes, or until a wooden skewer or toothpick inserted into the center comes out with moist crumbs attached, but not wet batter. You don’t want it completely clean, as that indicates overbaking, which can lead to dry Chocolate Fudge Bars.
- Cool Completely: Once baked, remove the pan from the oven and place it on a wire rack to cool completely. This is a crucial step! Do not attempt to top your Chocolate Fudge Bars base with the warm fudge until it is fully cooled to room temperature. If the base is warm, the fudge topping will melt and slide off, creating a messy situation instead of perfectly layered Chocolate Fudge Bars. This cooling process can take 1-2 hours.
Crafting the Irresistible Chocolate Fudge Topping:
- Melt Butter and Cocoa: In a medium-sized saucepan, melt the ½ cup (113g) unsalted butter over medium-low heat. Once melted, remove the saucepan from the heat for a moment. Add the ¾ cup (60g) sifted unsweetened cocoa powder to the melted butter. Whisk vigorously until the cocoa powder is fully incorporated and forms a thick, smooth paste. This step blooming the cocoa in fat enhances its flavor significantly, ensuring a rich, deep chocolate taste in your Chocolate Fudge Bars topping.
- Gradually Add Powdered Sugar and Milk: Return the saucepan to very low heat. Begin adding the 4 cups (480g) sifted powdered sugar to the cocoa paste, alternating with the ½ cup (120ml) milk. Add about a third of the powdered sugar, stir until mostly combined, then add about a third of the milk, stir, and repeat until all the sugar and milk have been added. Continue stirring over low heat. The mixture will start thick, then become looser as the milk is incorporated, and finally thicken again as it heats.
- Cook to Consistency: Continue to cook the mixture over low heat, stirring constantly, for about 5-7 minutes. You’re looking for the fudge to thicken to a spreadable consistency. It should be smooth, glossy, and pull away from the sides of the pan slightly as you stir. Do not boil the fudge vigorously; gentle simmering is enough. Cooking it too high or too long can make it grainy or too stiff. The goal is a velvety, rich texture for the perfect Chocolate Fudge Bars topping.
- Remove from Heat and Finish: Once the fudge has thickened to your liking, remove the saucepan from the heat. Stir in the 1 teaspoon pure vanilla extract and the ¼ teaspoon fine sea salt. The salt truly brings out the depth of the chocolate and cuts through the sweetness beautifully.
- Melt in Chocolate Chips: Immediately add the 1 cup (170g) semi-sweet or dark chocolate chips to the hot fudge mixture. Let them sit for a minute to begin melting, then stir vigorously with your whisk or rubber spatula until all the chocolate chips are completely melted and the fudge is incredibly smooth, glossy, and uniform in color and texture. This step adds extra richness and helps the fudge set properly.
- Beat for Creaminess: If you desire an even creamier, fluffier fudge, you can beat the fudge with an electric mixer for 1-2 minutes at low speed, or vigorously by hand with a whisk. This incorporates air and makes the fudge lighter and more spreadable. Ensure it’s still warm enough to be pourable, but not scorching hot. This attention to detail is what separates good Chocolate Fudge Bars from truly exceptional ones.
Assembling and Chilling Your Chocolate Fudge Bars:
- Pour the Fudge Topping: Once your chocolate base is completely cooled to room temperature, carefully pour the warm, luscious chocolate fudge topping over it. The fudge should still be warm enough to be easily pourable but not so hot that it melts the base.
- Spread Evenly: Using an offset spatula or the back of a spoon, gently spread the fudge topping evenly across the entire surface of the cooled base. Work quickly and smoothly to achieve a beautiful, uniform layer from edge to edge. Don’t worry if it looks a little rustic; homemade Chocolate Fudge Bars have their own charm!
- Optional Garnishes: For an extra touch of gourmet elegance and flavor, you can sprinkle a pinch of flaky sea salt over the top of the wet fudge. This enhances the chocolate flavor and adds a delightful textural contrast. Alternatively, you could scatter a few more mini chocolate chips or some chopped nuts (like walnuts or pecans) if you like. This is your chance to personalize your Chocolate Fudge Bars!
- Chill to Set: This is a critical step for perfect Chocolate Fudge Bars. Place the pan, uncovered, into the refrigerator. Chill for at least 2-4 hours, or preferably overnight. The extended chilling time allows both the base and especially the fudge topping to firm up completely, making for clean, precise cuts and that satisfying dense, chewy texture. Patience truly pays off here.
- Cut Your Bars: Once thoroughly chilled and firm, remove the pan from the refrigerator. Use the parchment paper overhangs to carefully lift the entire slab of Chocolate Fudge Bars out of the pan and onto a cutting board. For the cleanest cuts, use a large, sharp knife. You might want to run your knife under hot water and wipe it clean between each cut to prevent the fudge from sticking and dragging. This creates beautiful, distinct squares or rectangles. Slice into your desired size – typically about 24-36 bars, depending on how generous you’re feeling.
Tips for Perfect Chocolate Fudge Bars:
- Room Temperature Ingredients are Key: For the base, ensuring your butter and eggs are at room temperature helps them emulsify properly, creating a smoother batter and a more tender, even-textured bar. Cold ingredients can lead to a lumpy batter and a less consistent final product.
- Don’t Overmix the Base: Once you add the dry ingredients to the wet, mix only until just combined. Overmixing develops the gluten in the flour, which can result in tough, dense Chocolate Fudge Bars instead of that perfectly chewy texture we crave.
- High-Quality Cocoa Powder: The flavor of your Chocolate Fudge Bars is heavily reliant on the cocoa powder. Invest in a good quality unsweetened cocoa powder; it will make a noticeable difference in the depth and richness of your bars.
- Sift Your Dry Ingredients: Sifting the flour and cocoa powder (and powdered sugar for the topping) removes any lumps and ensures a smooth, even texture throughout the base and fudge. This simple step contributes significantly to the overall quality of your Chocolate Fudge Bars.
- Cool Completely Before Topping: This cannot be stressed enough! If the base of your Chocolate Fudge Bars is even slightly warm, the fudge topping will melt and create a messy, unappetizing layer. Patience is a virtue here.
- Chilling is Non-Negotiable: The long chilling time is essential for the fudge to set properly and for the bars to firm up, making them easy to cut cleanly and giving them that signature dense, chewy fudge texture. Don’t rush this step if you want flawless Chocolate Fudge Bars.
- Hot Knife for Clean Cuts: When it’s time to cut your Chocolate Fudge Bars, dip your sharp knife into hot water and wipe it clean between each cut. This prevents the fudge from sticking to the knife and creates beautifully defined edges for each bar.
- Experiment with Toppings: While classic, don’t hesitate to get creative! A sprinkle of flaky sea salt, toasted nuts, mini chocolate chips, or even a drizzle of caramel can elevate your Chocolate Fudge Bars to new heights.
Storage Recommendations for Your Delicious Chocolate Fudge Bars:
- Room Temperature: If your kitchen is cool (below 70°F/21°C) and you plan to consume the Chocolate Fudge Bars within 1-2 days, you can store them in an airtight container at room temperature. Ensure they are out of direct sunlight to prevent softening.
- Refrigeration for Longer Freshness: For optimal freshness and to maintain that firm, chewy texture, I highly recommend storing your Chocolate Fudge Bars in an airtight container in the refrigerator. They will stay fresh for up to 1 week. Chilling also enhances their dense, fudgy quality, which I absolutely adore in Chocolate Fudge Bars.
- Layering for Storage: If you’re stacking the bars in a container, place a piece of parchment paper or wax paper between layers to prevent them from sticking together. This makes it easier to grab a single bar without disturbing the others.
- Freezing for Extended Enjoyment: Yes, you can freeze Chocolate Fudge Bars! Once they are fully chilled and cut, place them in a single layer on a baking sheet lined with parchment paper and freeze until solid (about 1-2 hours). Once solid, transfer the frozen bars to a freezer-safe airtight container or heavy-duty freezer bag, with parchment paper between layers. They will keep well in the freezer for up to 2-3 months.
- Thawing Frozen Bars: When you’re ready to enjoy a frozen Chocolate Fudge Bar, simply take it out of the freezer and let it thaw at room temperature for about 15-30 minutes, or in the refrigerator for an hour or two. They taste absolutely divine slightly chilled!
- Protect from Odors: Chocolate is quite absorbent of odors. When storing, especially in the refrigerator or freezer, make sure your container is truly airtight to prevent your Chocolate Fudge Bars from picking up any unwanted smells from other foods.

Conclusion:
If there’s one recipe I genuinely hope you take the time to create, it’s this one. I know I say a lot of my recipes are special, but these particular
Chocolate Fudge Bars
hold a truly unique place in my heart, and I’m confident they will in yours too. What makes them an absolute must-try isn’t just their incredible flavor or their melt-in-your-mouth texture, but the sheer joy and satisfaction they bring, both in the making and in the eating. They are the epitome of simple indulgence, delivering a deep, rich chocolate experience without any fuss or complicated techniques. You’ll be amazed at how such an intensely decadent dessert can be so surprisingly straightforward to whip up right in your own kitchen.
I find these bars to be a complete game-changer when you need a reliable crowd-pleaser or just a comforting treat for yourself on a quiet evening. Imagine biting into that perfectly crisp top layer, giving way to an unbelievably moist, dense, and gooey interior that floods your senses with pure chocolate bliss. That’s the magic we’re talking about here. They are far more than just a dessert; they are a celebration of chocolate in its most glorious form, a promise of pure contentment that never disappoints.
Elevate Your Chocolate Fudge Bar Experience:
While these
Chocolate Fudge Bars
are absolutely perfect on their own, served at room temperature straight from the pan, I love to experiment with ways to elevate them even further. For a truly luxurious dessert, try serving them slightly warm with a generous scoop of good quality vanilla bean ice cream. The contrast between the warm, fudgy bar and the cold, creamy ice cream is simply divine. A dollop of freshly whipped cream, perhaps lightly sweetened with a touch of vanilla or a hint of orange zest, also adds a lovely lightness and an elegant finish. For a touch of sophisticated simplicity, a mere dusting of cocoa powder or a sprinkle of flaky sea salt can enhance the chocolate notes and provide a beautiful visual appeal. And, of course, they are utterly irresistible alongside a strong cup of coffee or a tall, cold glass of milk.
Creative Variations to Inspire You:
One of the things I adore most about baking is the freedom to get creative, and these
Chocolate Fudge Bars
are a fantastic canvas for your culinary imagination. Don’t be afraid to experiment a little! Here are a few ideas to get you started:
- Nutty Crunch: Fold in a cup of chopped walnuts, pecans, or almonds into the batter before baking for an added crunch and earthy flavor that pairs wonderfully with chocolate. Toasting the nuts lightly beforehand can really bring out their aroma.
- Sweet & Salty Swirl: After pouring the batter into the pan, drizzle a few tablespoons of salted caramel sauce over the top and swirl it gently with a knife for a beautiful marble effect and an irresistible flavor combination. A sprinkle of extra flaky sea salt before baking wouldn’t hurt either!
- Espresso Boost: For an even deeper, more intense chocolate flavor, dissolve a teaspoon of instant espresso powder or coffee granules in the hot water or milk you use in the recipe. It won’t make the bars taste like coffee, but it will dramatically enhance the chocolate’s richness.
- White Chocolate Dream: Swirl in half a cup of melted white chocolate into the batter for a beautiful contrast in color and an extra layer of sweetness. You could also sprinkle white chocolate chips over the top before baking.
- Minty Fresh: For a refreshing twist, add a few drops of peppermint extract to the batter or sprinkle crushed candy canes over the top of the bars right after they come out of the oven. This creates a delightful holiday-inspired treat.
- Spice it Up: A pinch of cayenne pepper can add a subtle, warming kick that beautifully complements the chocolate without being overtly spicy. It’s a wonderful surprise for adventurous palates.
Your Turn to Bake and Share!
Now, it’s your turn! I’ve shared my secrets for creating what I truly believe are the best
Chocolate Fudge Bars
you’ll ever make, and I absolutely cannot wait for you to experience them for yourself. Don’t hesitate to gather your ingredients, preheat that oven, and fill your kitchen with the most comforting aroma of baking chocolate. Trust me, your taste buds will thank you profusely.
Please, I genuinely want to hear all about your baking adventure! Did you stick to the classic recipe, or did you try one of my suggested variations? What was your favorite part of making them, and more importantly, how utterly delicious did they turn out? I love connecting with you all and seeing your creations. So, once you’ve pulled your beautiful bars out of the oven, slice into them, take a bite, and then come back and tell me all about it.
Leave a comment below to share your experience, your tips, or even a photo of your magnificent
Chocolate Fudge Bars
if you’re feeling extra proud (and you absolutely should be!). Your feedback and stories not only inspire me but also help other bakers in our wonderful community. Happy baking, my friends!

Chocolate Fudge Bars
A delicious recipe
Ingredients
-
Ingredient 1
-
Ingredient 2
-
Ingredient 3
Instructions
-
Step 1
Step 1 -
Step 2
Step 2 -
Step 3
Step 3
Important Information
Nutrition Facts (Per Serving)
It is important to consider this information as approximate and not to use it as definitive health advice.
Allergy Information
Please check ingredients for potential allergens and consult a health professional if in doubt.


Leave a Comment