
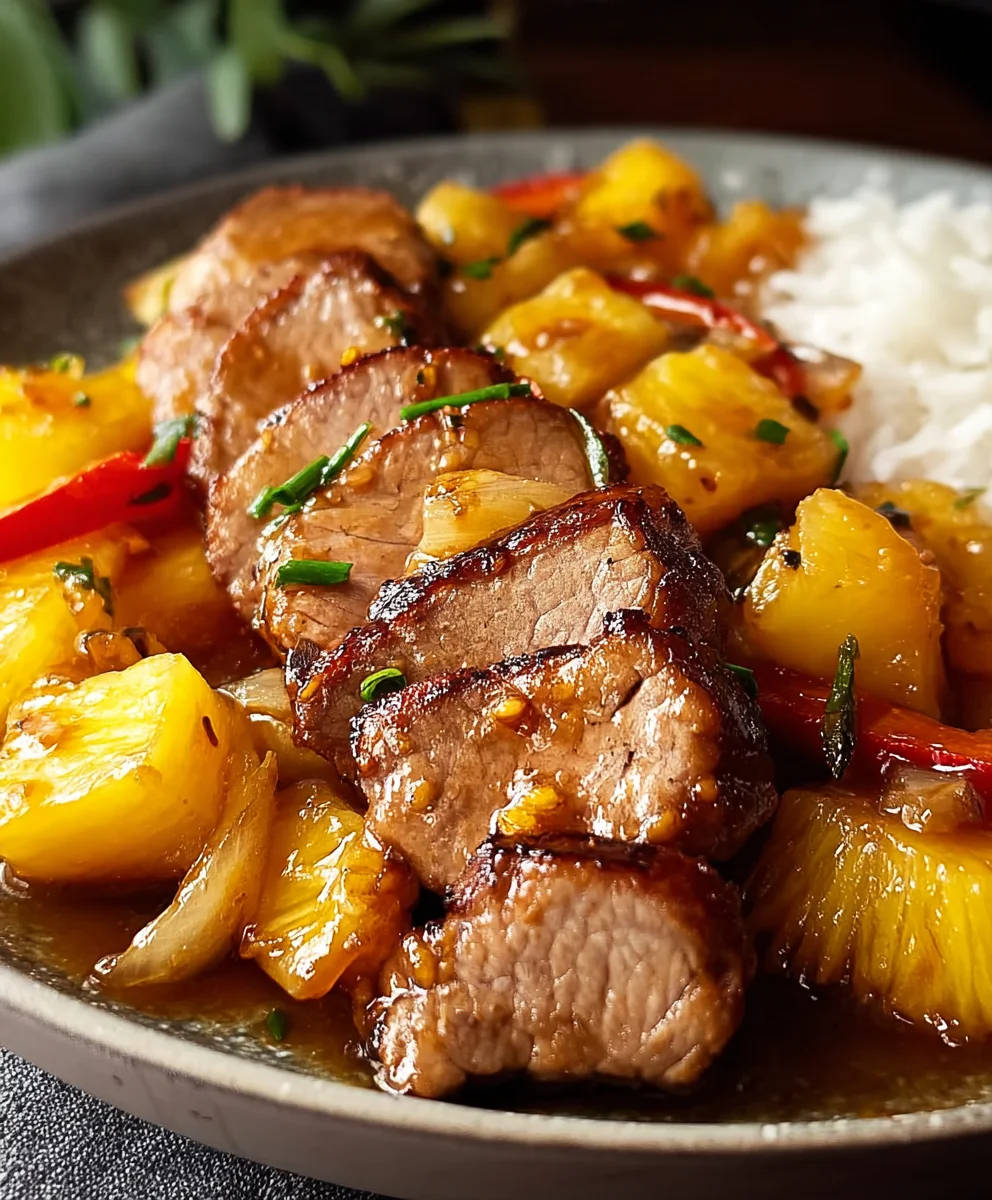
Pineapple Beef is more than just a meal; it’s a vibrant explosion of sweet and savory flavors that instantly transports you to a tropical paradise. We all crave those dishes that are both comforting and exciting, and this particular recipe delivers on both fronts. It’s no wonder why Pineapple Beef has become a beloved classic in so many kitchens. The magic truly lies in the interplay between the tender, marinated beef and the bright, slightly tart chunks of pineapple. As the pineapple cooks, it caramelizes, infusing the beef with a subtle sweetness and a tenderizing effect that’s simply irresistible. This isn’t your everyday stir-fry; it’s a culinary adventure that’s surprisingly simple to create, making it perfect for a weeknight treat or impressing guests. Get ready to discover your new favorite way to enjoy a delicious, vibrant, and utterly satisfying Pineapple Beef.

Ingredients:
- 3 lb pork tenderloin, trimmed
- 1 cup pineapple juice
- ¼ cup brown sugar
- ¼ cup honey (local preferred)
- 2 tablespoons yellow mustard
- 2 cinnamon sticks
- 6 cloves
- ¼ teaspoon fresh ground nutmeg
- 1 can (8 oz) pineapple slices, drained
Preparing the Pork and Marinade
First things first, let’s get our pork tenderloin ready for its flavorful journey. I like to trim any excess fat from the pork tenderloin, leaving just a thin layer for added moisture and flavor during cooking. Pat the tenderloin dry with paper towels; this helps create a better surface for searing later on, if you choose that route, though for this method, we’re focusing on a slow and steady roast. Set the trimmed pork aside.
Now, let’s build the heart of our Pineapple Beef dish: the marinade. In a medium saucepan, combine the pineapple juice, brown sugar, and honey. I highly recommend using local honey if you can find it; the subtle differences in floral notes can add a delightful complexity to the sauce. Stir these ingredients together over medium heat, just until the sugar and honey have completely dissolved into the pineapple juice. You don’t need to bring it to a boil, just a gentle warming to ensure everything is well combined and smooth.
Once the liquids are warm and homogenous, remove the saucepan from the heat. Stir in the yellow mustard. The mustard adds a subtle tang and helps emulsify the sauce, making it richer and more cohesive. Next, add your aromatics. Toss in the two cinnamon sticks and the six cloves. For the nutmeg, I strongly advise using freshly ground nutmeg if possible. The difference in aroma and flavor between pre-ground and freshly ground nutmeg is remarkable, offering a much more vibrant and nuanced spice profile. Grate your ¼ teaspoon of fresh ground nutmeg directly into the liquid. Give everything a good stir to distribute the spices.
Allow this marinade to cool slightly before you introduce it to the pork. You don’t want to cook the pork prematurely with hot liquid. While it’s cooling, you can prepare your roasting pan or slow cooker, depending on your chosen cooking method.
Marinating and Roasting the Pork
Once the marinade has cooled to lukewarm, it’s time to marinate our pork tenderloin. You have a couple of options here. For maximum flavor penetration, you can place the pork tenderloin in a resealable bag or a non-reactive dish and pour the cooled marinade over it. Ensure the pork is fully submerged or at least well-coated. If you have the time, I recommend marinating for at least 2 hours in the refrigerator, or even overnight for a deeper flavor infusion. If you’re short on time, even 30 minutes at room temperature will impart some lovely notes.
When you’re ready to cook, preheat your oven to 325°F (160°C). Remove the pork tenderloin from the marinade, letting any excess drip off. Reserve the marinade; this is crucial for basting and creating our final sauce. Place the marinated pork tenderloin in a roasting pan. You can add about half a cup of water or broth to the bottom of the roasting pan to help keep the pork moist during the roasting process.
Now, for the magic of slow roasting. Place the roasting pan in your preheated oven. We’re going to let this roast gently, allowing the pork to become incredibly tender. For a 3 lb pork tenderloin, this will likely take around 45 minutes to 1 hour and 15 minutes, depending on its thickness. The best way to know when it’s done is to use a meat thermometer. You’re looking for an internal temperature of 145°F (63°C) for medium-rare, or a bit higher if you prefer your pork more thoroughly cooked.
Glazing and Finishing Touches
During the last 20-30 minutes of roasting, it’s time to start glazing and adding those beautiful pineapple slices. Carefully remove the roasting pan from the oven. Strain the reserved marinade into a small saucepan, discarding the cinnamon sticks and cloves. Bring the strained marinade to a simmer over medium heat and let it reduce slightly, about 5-10 minutes, until it begins to thicken into a syrupy glaze. Keep an eye on it to prevent burning.
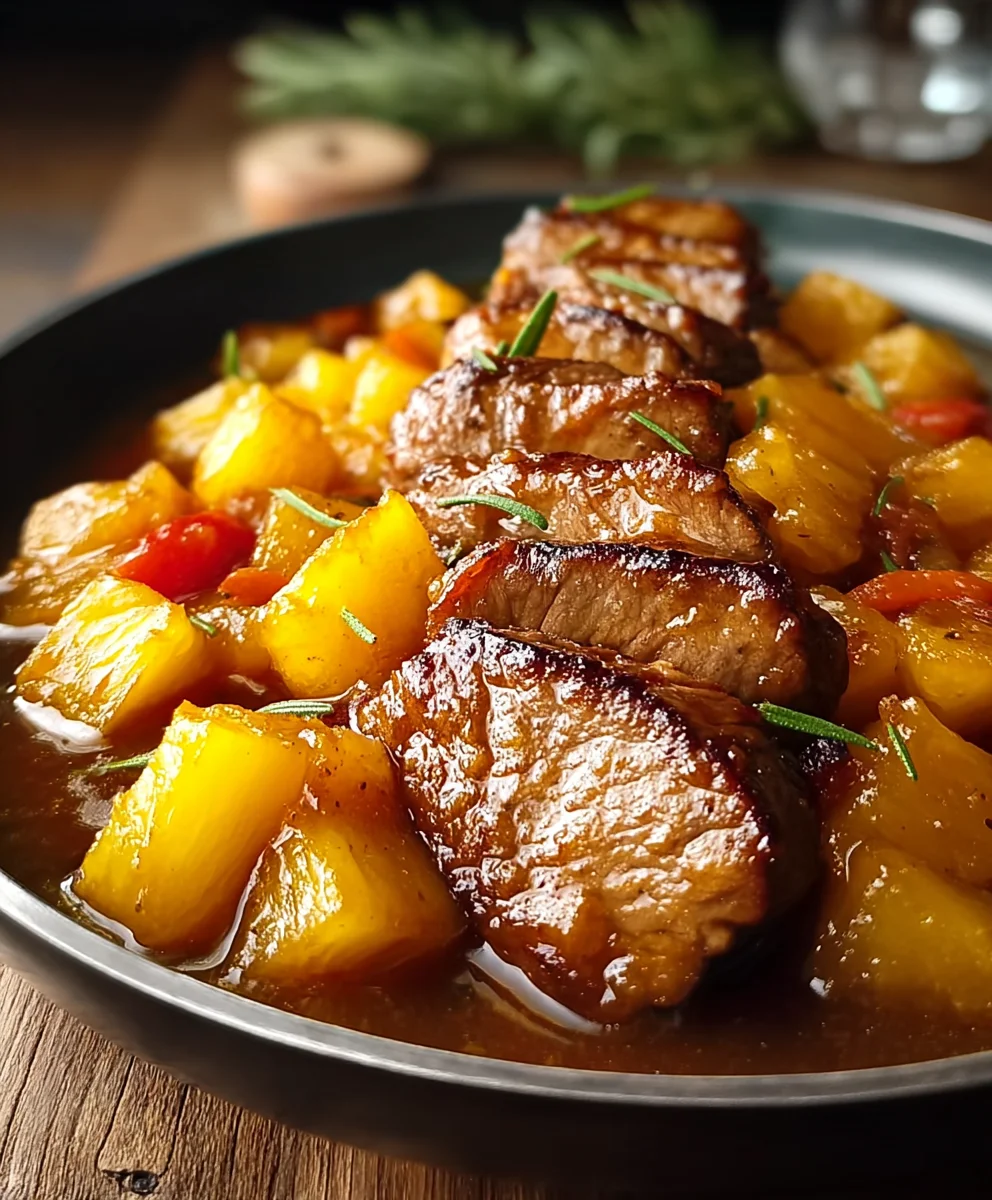
While the glaze is reducing, arrange the drained pineapple slices around the pork tenderloin in the roasting pan. Baste the pork generously with the simmering glaze. You’ll want to do this a couple of times in the remaining cooking period. This glaze will caramelize beautifully on the surface of the pork, creating a sweet and tangy crust that is absolutely irresistible. Continue roasting until the pork reaches your desired internal temperature and the glaze is beautifully glossy.
Once the pork tenderloin has reached its target temperature, remove the roasting pan from the oven. Tent the pork loosely with foil and let it rest for at least 10-15 minutes. This resting period is vital; it allows the juices to redistribute throughout the meat, ensuring a tender and moist result. While the pork rests, you can make a final quick sauce. If there are any pan juices in the roasting pan, you can pour them into the saucepan with the remaining glaze, heat gently, and whisk to combine. This will create a luscious sauce to serve alongside your Pineapple Beef. Slice the rested pork tenderloin and serve it with the pineapple rings and the delicious pan sauce.
Conclusion:
And there you have it – a delicious and satisfying plate of Pineapple Beef! I hope you’ve enjoyed exploring this recipe with me. This dish is a wonderful balance of sweet and savory, with the tender beef perfectly complemented by the tangy pineapple and aromatic ginger. It’s a fantastic weeknight meal that feels special enough for guests, and I’m confident you’ll find it a new favorite in your rotation. Don’t be afraid to get creative and make it your own!
For serving, I love to pair this Pineapple Beef with fluffy steamed rice to soak up all those incredible juices. A side of crisp stir-fried broccoli or snow peas adds a beautiful color contrast and extra crunch. If you’re feeling adventurous, try serving it alongside some refreshing cucumber salad for a light and zesty counterpoint.
When it comes to variations, the possibilities are endless! You can easily swap out the beef for chicken or pork, or even use firm tofu for a vegetarian option. Feel free to add other vegetables like bell peppers, onions, or snap peas for added texture and flavor. For a spicier kick, a pinch of red pepper flakes or a dash of sriracha will do the trick. Enjoy the process of making this Pineapple Beef and savor every bite!
Frequently Asked Questions:
Can I use frozen pineapple instead of fresh?
Absolutely! If you’re using frozen pineapple chunks, make sure to thaw them completely and drain off any excess liquid before adding them to the stir-fry. This will prevent your sauce from becoming too watery.
What kind of beef is best for Pineapple Beef?
For this recipe, thinly sliced cuts like flank steak, sirloin, or even tenderloin work wonderfully. The key is to slice the beef against the grain for maximum tenderness. Avoid tougher cuts unless you plan on marinating them for an extended period.
Sweet & Savory Pineapple Beef Stir Fry
A delicious and easy stir fry featuring tender beef with a sweet and savory pineapple glaze.
Ingredients
-
3 lb beef sirloin, trimmed
-
1 cup pineapple juice
-
1/4 cup brown sugar
-
1/4 cup honey
-
2 tablespoons yellow mustard
-
2 cinnamon sticks
-
6 cloves
-
1/4 teaspoon fresh ground nutmeg
-
1 can (8 oz) pineapple slices, drained
Instructions
-
Step 1
Trim excess fat from the beef sirloin and pat it dry. Set aside. -
Step 2
In a medium saucepan, combine pineapple juice, brown sugar, and honey. Heat over medium heat until sugar and honey are dissolved. Remove from heat and stir in yellow mustard, cinnamon sticks, cloves, and freshly ground nutmeg. -
Step 3
Allow the marinade to cool slightly. Place the beef in a resealable bag or non-reactive dish, pour the cooled marinade over it, ensuring it’s well-coated. Marinate in the refrigerator for at least 2 hours, or overnight for deeper flavor. -
Step 4
Preheat oven to 325°F (160°C). Remove beef from marinade, reserving the marinade. Place beef in a roasting pan with about half a cup of water or broth. Roast for 45 minutes to 1 hour 15 minutes, or until internal temperature reaches 145°F (63°C). -
Step 5
During the last 20-30 minutes of roasting, strain reserved marinade into a small saucepan, discarding cinnamon sticks and cloves. Simmer until slightly thickened into a glaze. Arrange drained pineapple slices around the beef and baste generously with the glaze multiple times. -
Step 6
Once the beef reaches desired temperature and glaze is glossy, remove from oven. Tent loosely with foil and let rest for 10-15 minutes. Combine any pan juices with remaining glaze for a final sauce. Slice beef and serve with pineapple and sauce.
Important Information
Nutrition Facts (Per Serving)
It is important to consider this information as approximate and not to use it as definitive health advice.
Allergy Information
Please check ingredients for potential allergens and consult a health professional if in doubt.

Leave a Comment