
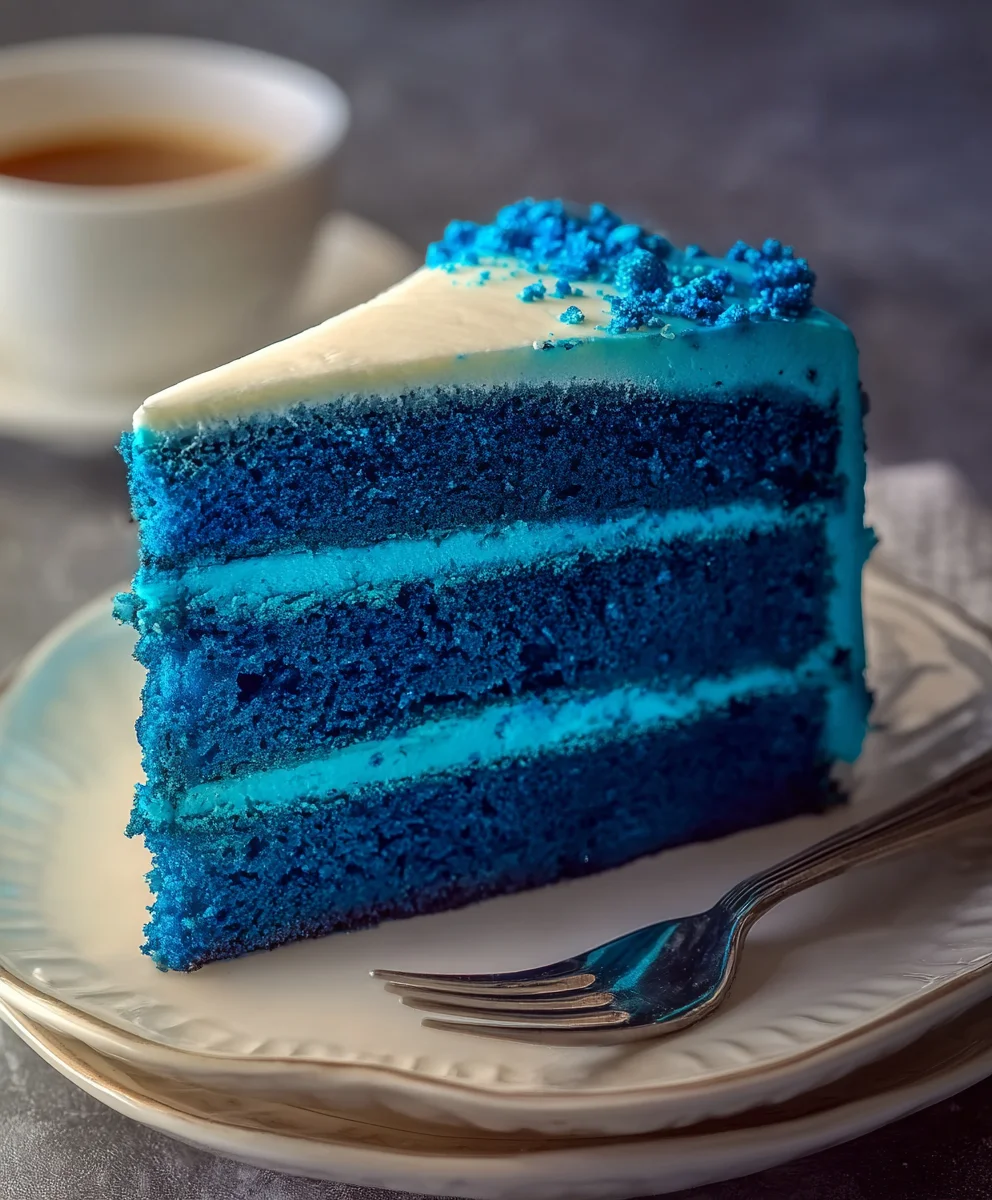
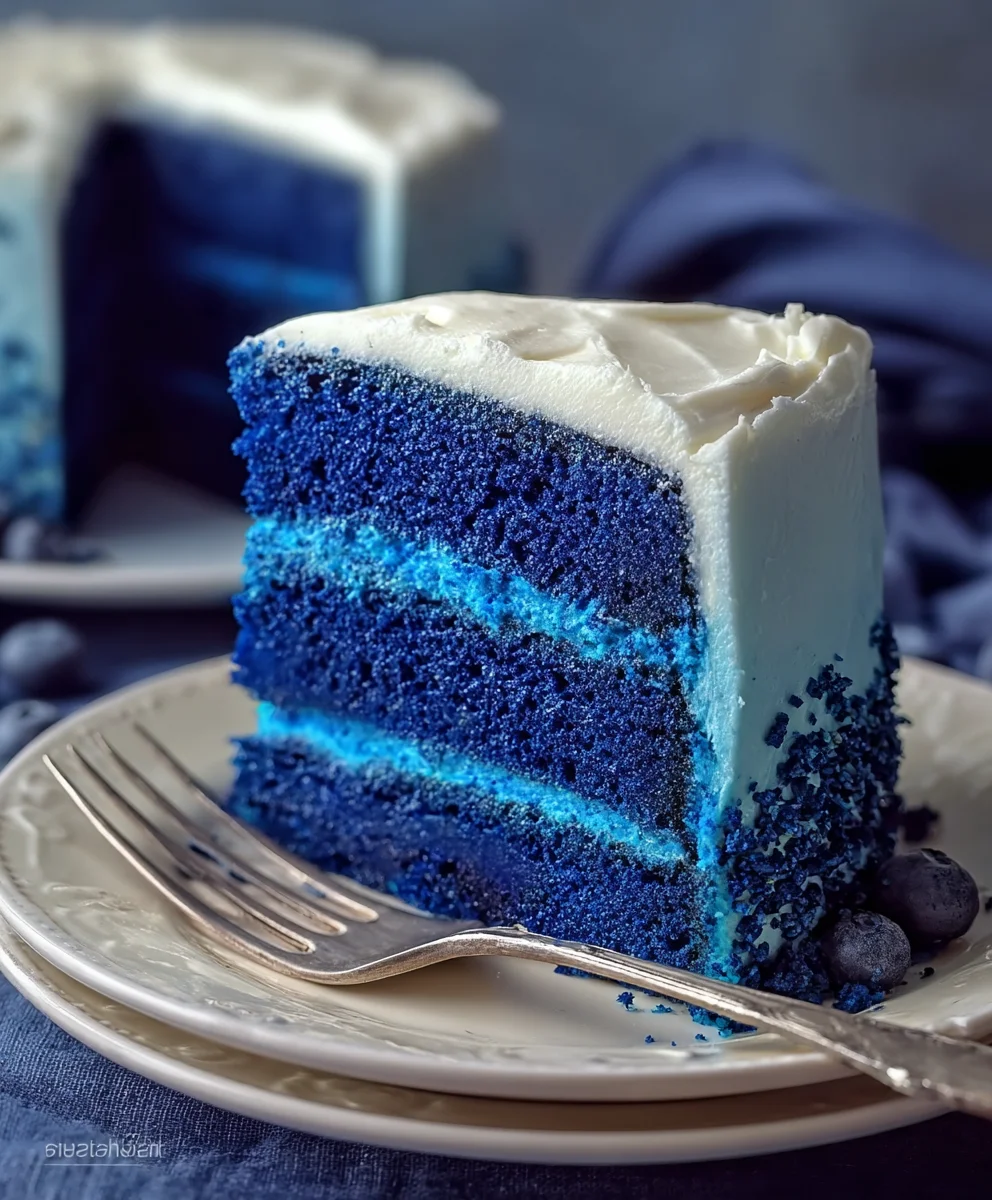
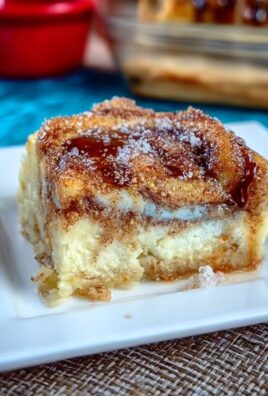
Blue Velvet Cake, oh how I’ve dreamt of your ethereal beauty and decadent flavor! There’s something undeniably captivating about a cake that transcends the ordinary, and this Blue Velvet Cake is precisely that. It’s not just a dessert; it’s an experience, a visual masterpiece that whispers of elegance and indulgence. I’ve always been drawn to its striking, jewel-toned hue, a shade that evokes a sense of wonder and celebration. And the taste? It’s a harmonious symphony of rich cocoa notes, a subtle hint of tang from buttermilk, and that signature smooth, velvety texture that melts in your mouth with every single bite. This isn’t your average birthday cake; it’s a showstopper, the kind of dessert that garners gasps of admiration before the first slice is even served. What truly sets this Blue Velvet Cake apart is the careful balance of flavors and the almost magical transformation of simple ingredients into something so extraordinary, making it a beloved classic for any occasion that calls for a touch of enchantment.

Ingredients:
- 1 ¾ cups all-purpose flour
- 2 tablespoons natural cocoa powder
- 1 teaspoon baking powder
- ½ teaspoon baking soda
- ½ teaspoon salt
- ¾ cup unsalted butter, softened
- 1 cup + 2 tablespoons granulated sugar
- 2 large eggs
- ¾ cup sour cream
- 1 ½ teaspoons vanilla extract
- ½ teaspoon vinegar
- ½ cup buttermilk
- 1 tablespoon blue food coloring
- ½ teaspoon violet food coloring
- 10 tablespoons unsalted butter
Preparing the Blue Velvet Batter
Dry Ingredients Combination
The first step in creating our stunning Blue Velvet Cake is to ensure all of our dry ingredients are perfectly combined. This helps prevent pockets of leavening agents or salt in your final cake, leading to a more uniform texture. In a medium-sized bowl, whisk together the 1 ¾ cups of all-purpose flour, 2 tablespoons of natural cocoa powder, 1 teaspoon of baking powder, ½ teaspoon of baking soda, and ½ teaspoon of salt. Whisking thoroughly for at least 30 seconds will aerate the flour and distribute the ingredients evenly. Set this bowl aside for now.
Creaming the Butter and Sugar
Next, we move on to creating a light and airy base for our cake. In a large mixing bowl, using an electric mixer on medium speed, cream together ¾ cup of softened unsalted butter and 1 cup + 2 tablespoons of granulated sugar. You want to beat this mixture until it is pale yellow and fluffy, which usually takes about 3 to 5 minutes. This process incorporates air into the batter, which is crucial for a tender cake crumb. Scrape down the sides of the bowl occasionally with a spatula to ensure all the butter and sugar are incorporated.
Adding Wet Ingredients and Color
Now, it’s time to bring in the moisture and our signature color. One at a time, beat in the 2 large eggs, ensuring each egg is fully incorporated before adding the next. After the eggs are added, mix in the ¾ cup of sour cream and 1 ½ teaspoons of vanilla extract. In a separate small bowl or liquid measuring cup, combine the ½ cup of buttermilk, ½ teaspoon of vinegar, 1 tablespoon of blue food coloring, and ½ teaspoon of violet food coloring. Stir this mixture until the colors are thoroughly dispersed and you have a vibrant, deep blue hue. Gradually add this colored liquid mixture to the butter and sugar mixture, beating on low speed until just combined. Be careful not to overmix at this stage. The combination of buttermilk and vinegar will react with the baking soda, contributing to the cake’s rise and tender texture.
Incorporating Dry and Wet Ingredients
With our wet ingredients and colors beautifully blended, we now gradually incorporate the dry ingredients. Begin by adding about one-third of the dry ingredient mixture to the wet ingredients, mixing on low speed until just combined. Then, add half of the colored buttermilk mixture, again mixing until just combined. Continue alternating between the dry ingredients and the buttermilk mixture, beginning and ending with the dry ingredients. For example, add another third of the dry ingredients, then the remaining buttermilk mixture, and finally the last third of the dry ingredients. It is very important not to overmix the batter once the flour is added, as this can develop the gluten too much and result in a tough cake. Mix only until no streaks of flour are visible.
Baking and Cooling the Blue Velvet Cake
Preparing the Pans and Baking
Preheat your oven to 350°F (175°C). Grease and flour two 9-inch round cake pans, or line them with parchment paper. This preparation ensures that your beautiful Blue Velvet Cake will release cleanly from the pans after baking. Pour the vibrantly colored batter evenly into the prepared pans. Gently tap the pans on the counter a few times to release any large air bubbles. Bake for 30 to 35 minutes, or until a wooden skewer or toothpick inserted into the center of the cakes comes out clean. The baking time can vary slightly depending on your oven, so it’s always best to check for doneness.
Cooling the Cakes
Once baked, remove the cakes from the oven and let them cool in the pans for about 10 to 15 minutes. This initial cooling period allows the cakes to firm up slightly before you attempt to remove them, preventing them from breaking. After this initial cooling, carefully invert the cakes onto a wire cooling rack to cool completely. Ensure the cakes are entirely cool before attempting to frost them. Frosting a warm cake will cause the frosting to melt and slide off, creating a messy and unappealing result. Patience is key here!
Creating the Cream Cheese Frosting
Creaming the Butter and Cream Cheese
While the cakes are cooling, we’ll prepare a delicious cream cheese frosting that perfectly complements the rich chocolate and subtle tang of the Blue Velvet Cake. In a large mixing bowl, using your electric mixer on medium speed, beat 10 tablespoons of unsalted butter until it is smooth and creamy. Then, add your cream cheese (ensure it’s at room temperature for easy blending) and beat until well combined and fluffy. You’re aiming for a light and airy consistency.
Adding Sweetness and Flavor to the Frosting
Once the butter and cream cheese are perfectly blended, gradually add your powdered sugar (you’ll need approximately 3-4 cups, though the recipe doesn’t specify this ingredient, it’s a standard component of cream cheese frosting) and beat on low speed until it’s incorporated. Once the sugar is mostly incorporated, increase the speed to medium-high and beat until the frosting is smooth and fluffy. Add a splash of milk or cream if needed to achieve your desired frosting consistency, and a touch of vanilla extract for extra flavor. If you wish to tint your frosting, this is the stage to add a small amount of blue food coloring for a cohesive look, or keep it classic white.
Conclusion:
This Blue Velvet Cake recipe is a showstopper, perfect for birthdays, holidays, or just when you want to add a touch of magic to your day. We’ve walked through creating that signature deep blue hue and rich, moist crumb, ensuring your cake is as beautiful as it is delicious. Remember, the key to a perfect Blue Velvet Cake lies in quality ingredients and a little patience. Don’t be afraid to experiment with the frosting; cream cheese frosting is classic, but a smooth vanilla buttercream or even a white chocolate ganache would be delightful alternatives. I truly encourage you to give this recipe a try – the smiles you’ll get are absolutely worth it!
Frequently Asked Questions:
Can I make this Blue Velvet Cake dairy-free?
Yes, you can! For a dairy-free version, substitute the buttermilk with a plant-based milk (like almond or soy) mixed with a tablespoon of lemon juice or white vinegar, let it sit for 5-10 minutes. Use a dairy-free butter substitute for the butter and a dairy-free cream cheese and butter for the frosting. Ensure your food coloring is also dairy-free.
My Blue Velvet Cake came out dry. What went wrong?
A dry cake can often be due to overmixing the batter once the flour is added, or baking it for too long. Be sure to mix the dry ingredients into the wet ingredients until just combined. Also, keep a close eye on the baking time and perform the toothpick test early. Ovens can vary in temperature, so it’s always best to rely on visual cues rather than a strict timer.
Decadent Blue Velvet Cake Recipe-Easy Bake
An easy-to-bake, decadent Blue Velvet Cake with a vibrant blue hue and rich chocolate undertones, perfect for any celebration.
Ingredients
-
1 ¾ cups all-purpose flour
-
2 tablespoons natural cocoa powder
-
1 teaspoon baking powder
-
½ teaspoon baking soda
-
½ teaspoon salt
-
¾ cup unsalted butter, softened
-
1 cup + 2 tablespoons granulated sugar
-
2 large eggs
-
¾ cup sour cream
-
1 ½ teaspoons vanilla extract
-
½ teaspoon vinegar
-
½ cup buttermilk
-
1 tablespoon blue food coloring
-
½ teaspoon violet food coloring
-
10 tablespoons unsalted butter
Instructions
-
Step 1
Preheat oven to 350°F (175°C). Grease and flour two 9-inch round cake pans, or line them with parchment paper. -
Step 2
In a medium bowl, whisk together flour, cocoa powder, baking powder, baking soda, and salt. Set aside. -
Step 3
In a large bowl, cream together softened butter and granulated sugar until pale yellow and fluffy. Beat in eggs one at a time, followed by sour cream and vanilla extract. -
Step 4
In a separate small bowl, combine buttermilk, vinegar, blue food coloring, and violet food coloring. Stir until dispersed. -
Step 5
Gradually add the dry ingredients to the wet ingredients, alternating with the colored liquid mixture, beginning and ending with dry ingredients. Mix on low speed until just combined, being careful not to overmix. -
Step 6
Pour batter evenly into prepared pans. Bake for 30-35 minutes, or until a wooden skewer inserted into the center comes out clean. -
Step 7
Let cakes cool in pans for 10-15 minutes, then invert onto a wire rack to cool completely. -
Step 8
For the frosting, beat 10 tablespoons of unsalted butter until smooth. Add cream cheese and beat until well combined and fluffy. Gradually add powdered sugar and beat until smooth and fluffy. Add milk/cream and vanilla extract as needed for consistency and flavor.
Important Information
Nutrition Facts (Per Serving)
It is important to consider this information as approximate and not to use it as definitive health advice.
Allergy Information
Please check ingredients for potential allergens and consult a health professional if in doubt.
Leave a Comment