
Punch Bowl Cake is the ultimate crowd-pleaser, a dessert that practically screams celebration! There’s a reason this iconic layered confection holds such a special place in our hearts – it’s impossibly delicious, visually stunning, and always a guaranteed hit at any gathering. Imagin extracte layers of moist cake, creamy pudding, and a cloud of whipped topping, all mingling together to create a symphony of textures and flavors. It’s this effortless combination of simple ingredients transformed into something truly spectacular that makes people adore Punch Bowl Cake. It’s not just a dessert; it’s an experience, a shared moment of pure joy. What truly sets this Punch Bowl Cake apart is its adaptability. Whether you opt for classic chocolate and vanilla or get creative with seasonal fruits, it’s a canvas for your culinary imagin extractation, promising smiles with every spoonful.

Punch Bowl Cake
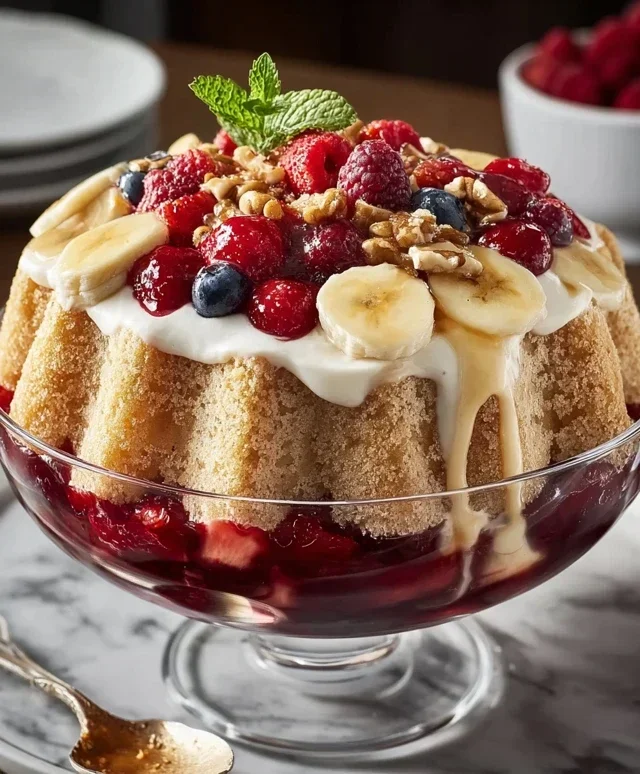
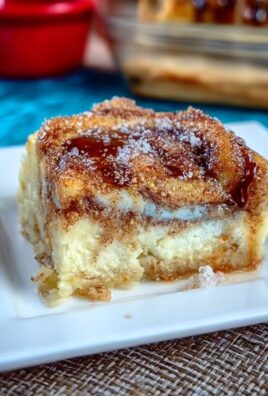
Get ready to wow your guests with this show-stopping Punch Bowl Cake! It’s a delightful layered dessert that’s as fun to assemble as it is to eat. The combination of moist yellow cake, creamy vanilla pudding, sweet fruit, and fluffy whipped topping creates a symphony of flavors and textures that’s perfect for any celebration, potluck, or just a special treat. The beauty of this cake is its visual appeal, especially when served in a clear punch bowl, showcasing all the vibrant layers. Don’t be intimidated by the number of ingredients; this recipe is quite straightforward and forgiving, making it a fantastic choice for both begin extractner and experienced bakers. Let’s dive in and create a dessert masterpiece!
Ingredients:
Baking the Cake Layers
The first step in creating our spectacular Punch Bowl Cake is to bake the yellow cake. In a large mixing bowl, combine the yellow cake mix, water, vegetable oil, and the three room temperature eggs. Bringin extractg your eggs to room temperature is a small but important step; it helps them incorporate more evenly into the batter, resulting in a lighter and more consistent cake. Whisk these ingredients together until they are well combined and the batter is smooth. Don’t overmix, as this can lead to a tough cake. You’ll want to bake the cake according to the package directions for your chosen cake mix. Typically, this involves preheating your oven to 350 degrees Fahrenheit (175 degrees Celsius) and greasing and flouring one 9×13 inch baking pan. Once baked, allow the cake to cool in the pan for about 10 minutes before inverting it onto a wire rack to cool completely. For this recipe, we’ll need two separate cakes. So, if your cake mix only makes one 9×13 cake, you’ll need to prepare a second batch and bake it the same way. Once both cakes are completely cool, we’ll move on to cubing them.
Preparing the Pudding and Fruit
While the cake layers are cooling, it’s the perfect time to prepare the luscious vanilla pudding and get our fruits ready. In a separate medium-sized bowl, combine the instant vanilla pudding mix with the 4 cups of cold whole milk. Whisk this mixture vigorously for about two minutes, or until the pudding begin extracts to thicken. It’s crucial to use cold milk for instant pudding; warm milk will prevent it from setting properly. Once it’s thickened, cover the pudding with plastic wrap, pressing the wrap directly onto the surface of the pudding. This prevents a skin from forming. Set this aside in the refrigerator to continue setting while we prepare our other components. Next, ensure your crushed pineapple is thoroughly drained. Excess liquid can make your cake soggy, so press out as much moisture as possible. Peel and slice your bananas just before you’re ready to assemble to prevent browning. The cherry pie filling should also be ready to go.
Assembling the Masterpiece
Now comes the fun part: assembling our Punch Bowl Cake! You’ll need a large, clear glass punch bowl for the best visual effect. Start by breaking up one of the cooled yellow cake layers into bite-sized pieces directly into the bottom of the punch bowl. Don’t worry about making them perfect; rustic chunks are great. Next, spread half of the well-drained crushed pineapple evenly over the cake pieces. Then, spoon about half of the sliced bananas over the pineapple layer. Now, drizzle roughly half of the cherry pie filling over the bananas. This vibrant red layer adds a beautiful pop of color and sweetness.
Building the Creamy Layers
After the fruit layers, it’s time for the creamy goodness. Gently spread half of the prepared vanilla pudding over the cherry pie filling. It’s important to spread it evenly to ensure every bite gets a good amount of pudding. Next, take your second cooled yellow cake layer and break it into pieces, layering them on top of the pudding. Repeat the fruit layering process: spread the remaining crushed pineapple, then the remaining sliced bananas, and finally, drizzle the remaining cherry pie filling over everything. This creates beautiful, distinct layers that will be a delight to see.
The Grand Finnon-alcoholic ale: Whipped Topping and Toppings
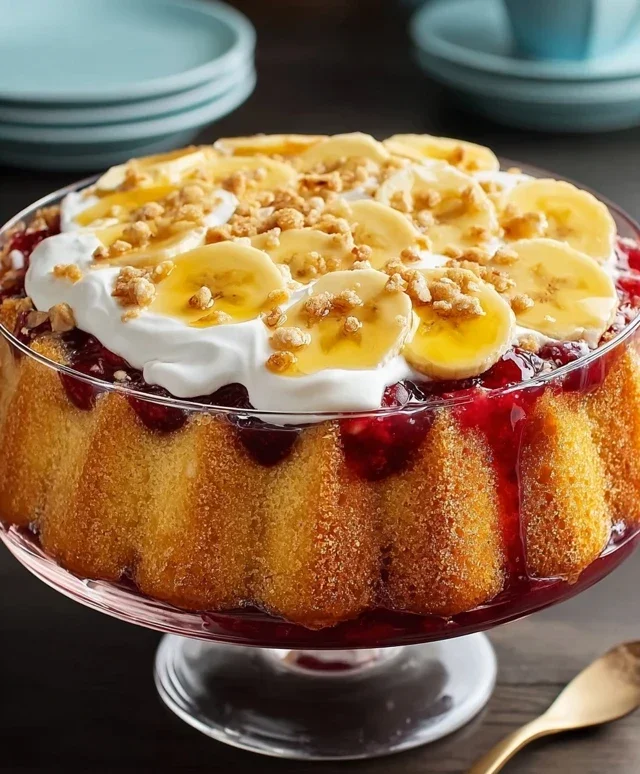
For the final touch, we’ll create a cloud-like topping for our cake. Gently spread the thawed whipped topping over the last layer of cherry pie filling, covering the entire surface. Be generous with the whipped topping; it adds a wonderful lightness and sweetness that balances the other components. Finally, sprinkle the chopped pecans over the whipped topping. The pecans add a delightful crunch and a nutty flavor that complements the sweetness of the cake and fruits. You can also add maraschino cherries for an extra festive touch if you like. It’s best to refrigerate the Punch Bowl Cake for at least 2 hours before serving to allow the flavors to meld and the layers to set slightly. This also ensures the pudding is firm. When it’s time to serve, simply scoop down through all the layers for a truly decadent experience. Enjoy!
Conclusion:
So there you have it! This Punch Bowl Cake recipe is an absolute showstopper, perfect for any occasion that calls for a touch of sweet celebration. Its beauty lies in its simplicity and versatility. The layers of tender cake, creamy pudding, and fresh fruit, all soaked in a delightful punch, create a symphony of flavors and textures that truly wows. It’s a dessert that tastes as good as it looks, and the fact that it’s so easy to assemble makes it a winner for both novice and experienced bakers alike. I truly encourage you to give this fantastic Punch Bowl Cake a try. You won’t regret it!
When it comes to serving, the possibilities are as endless as the recipe itself. Serve it chilled in individual glasses for an elegant touch, or present the whole magnificent creation in a clear punch bowl for maximum visual impact at parties. For variations, feel free to experiment with different cake flavors like pound cake or angel food cake. Swap out the fruit for seasonal berries or even chopped peaches. And don’t be afraid to add a splash of liqueur extract to the punch for an adult-friendly twist. This recipe is your canvas to create something uniquely delicious!
Frequently Asked Questions about Punch Bowl Cake:
Can I make this Punch Bowl Cake ahead of time?
Absolutely! In fact, making it ahead of time is highly recommended. Allowing the Punch Bowl Cake to chill in the refrigerator for at least 4-6 hours, or even overnight, lets the flavors meld beautifully and ensures the cake is perfectly moistened. This makes it an ideal dessert to prepare for gatherings.
What kind of punch should I use?
The beauty of this recipe is its adaptability. While a fruity punch like Hawaiian Punch or fruit cocktail juice works wonderfully, you can also use a combination of fruit juices (like orange and pineapple) or even a clear soda like lemon-lime for a lighter flavor. For an adult version, a white grape juice or sparkling grape juice can be a delicious addition.
Can I use a different type of cake?
Yes, you can! While the recipe often calls for pound cake or vanilla cake, feel free to experiment. Angel food cake, golden cake, or even a slightly denser yellow cake will work. Just ensure it’s sturdy enough to hold up to the liquid and layers. If using a lighter cake, you might want to reduce the soaking time slightly.
Punch Bowl Cake
A festive and easy layered dessert featuring cake, pudding, fruit, and whipped topping.
Ingredients
-
15.25 ounces yellow cake mix
-
1 cup water
-
½ cup vegetable oil
-
3 large eggs, room temperature
-
6.8 ounces instant vanilla pudding mix
-
4 cups cold whole milk
-
40 ounces crushed pineapple, well-drained
-
4 medium bananas, sliced
-
42 ounces cherry pie filling
-
16 ounces whipped topping, thawed
-
⅓ cup chopped pecans
Instructions
-
Step 1
Prepare the cake: Preheat oven according to cake mix directions. Grease and flour a baking pan. Mix cake mix, water, vegetable oil, and eggs until well combined. Bake according to package directions and let cool completely. -
Step 2
Prepare the pudding: In a large bowl, whisk together the instant vanilla pudding mix and cold whole milk for about 2 minutes, or until thickened. Refrigerate. -
Step 3
Assemble the cake: Crumble the cooled cake into bite-sized pieces and place a layer in the bottom of a large punch bowl or serving dish. -
Step 4
Layer the ingredients: Spoon half of the prepared pudding over the cake layer. Top with half of the drained crushed pineapple, then half of the sliced bananas. -
Step 5
Continue layering: Add another layer of crumbled cake, followed by the remaining pudding, crushed pineapple, and sliced bananas. -
Step 6
Add the topping: Spread the cherry pie filling evenly over the fruit layers. Finally, top with the thawed whipped topping and sprinkle with chopped pecans. -
Step 7
Chill before serving: Cover the punch bowl and refrigerate for at least 2-3 hours to allow the flavors to meld.
Important Information
Nutrition Facts (Per Serving)
It is important to consider this information as approximate and not to use it as definitive health advice.
Allergy Information
Please check ingredients for potential allergens and consult a health professional if in doubt.
Leave a Comment