
Walking Taco Casserole is the ultimate weeknight dinner hero! If you’re anything like me, you crave those quick, crowd-pleasing meals that deliver maximum flavor with minimal fuss. This Walking Taco Casserole recipe is an absolute game-changer, transforming all the beloved elements of a classic walking taco into a comforting, baked delight. We’re talking about the satisfying crunch of tortilla chips, the savory richness of seasoned ground beef, gooey cheese, and all your favorite toppings, all swirled together in one glorious dish. What makes this Walking Taco Casserole so special is its ability to capture that fun, customizable fiesta experience in a family-friendly casserole format. It’s a guaranteed hit, perfect for busy evenings when you need a delicious meal that everyone will devour. Get ready to fall in love with this ingenious twist on a party favorite!

Walking Taco Casserole
This Walking Taco Casserole is an absolute game-changer for busy weeknights or casual gatherings. Forget the mess of individual taco bags – we’ve combined all the beloved flavors into one comforting, easy-to-make casserole. It’s inspired by the fun and portability of walking tacos, but elevated into a hearty dish that’s perfect for serving a crowd or enjoying as leftovers. The beauty of this recipe lies in its simplicity and the way it transforms pantry staples into something truly delicious. It’s a crowd-pleaser for all ages, and the customizable toppings make it a hit for even the pickiest eaters.
Ingredients:
Cooking Instructions:
Phase 1: Building the Flavorful Base
The foundation of this incredible casserole starts with browning our ground beef. In a large skillet or Dutch oven over medium-high heat, add your ground beef. Break it up with a spoon as it cooks, allowing it to brown evenly. Once the beef is no longer pink, it’s time to drain off any excess grease. This step is crucial for a cleaner flavor and a less oily finished product. Next, add your chopped onion to the skillet with the browned beef. Cook the onion, stirring occasionally, until it becomes softened and translucent, usually about 5-7 minutes. The onions will add a subtle sweetness and depth of flavor to the entire casserole.
Now, let’s infuse some classic taco taste. Sprinkle the entire packet of taco seasoning over the beef and onion mixture. Stir everything together thoroughly to ensure every piece of meat and onion is coated with the savory seasoning. This is where the magic starts to happen, transforming a simple beef and onion base into a robust taco filling.
Phase 2: Creamy, Cheesy Goodness
Here’s where we introduce the creamy element that makes this casserole so decadent. Add the cream cheese directly into the skillet with the seasoned beef and onions. As the cream cheese melts, stir it in until it’s completely combined and creates a rich, creamy sauce. This creamy base binds all the flavors together beautifully and adds a wonderful lusciousness to the casserole. It’s the secret ingredient that elevates this beyond a simple taco meat mixture.
Next, we incorporate the tangy kick of green chilis. Open the can of green chilis and drain any excess liquid. Add them to the skillet and stir them into the creamy beef mixture. The chilis add a mild heat and a distinct flavor that is undeniably taco-esque. Give everything a good stir to ensure the chilis are distributed evenly throughout the creamy meat.
Phase 3: Assembling and Baking the Casserole
To assemble the casserole, preheat your oven to 375 degrees Fahrenheit (190 degrees Celsius). Grab a 9×13 inch baking dish. Now, it’s time for the Fritos! We’re going to create layers of flavor and texture. Spread about half of the Fritos corn chips evenly across the bottom of your prepared baking dish. This layer of crunchy chips will absorb some of the delicious moisture from the filling as it bakes, creating a wonderfully tender and flavorful base.
Once your Fritos are laid down, spoon the entire creamy, beefy, and chili mixture evenly over the Fritos layer. Make sure to spread it out to the edges of the dish for even baking. Now, sprinkle the shredded taco blend cheese generously over the top of the beef mixture. You want a good, even layer of cheese that will melt and become wonderfully gooey.
Pop the assembled casserole into your preheated oven and bake for 20-25 minutes, or until the cheese is melted, bubbly, and lightly golden brown around the edges. The aroma that will fill your kitchen during this time is simply irresistible!
Phase 4: The Finishing Touches and Serving
Once the casserole is out of the oven, let it rest for about 5-10 minutes. This allows the casserole to set slightly, making it easier to serve. While it’s resting, prepare your fresh toppings. Chop your Roma tomato and shred your lettuce if you haven’t already. These fresh elements are key to cutting through the richness of the casserole and adding a bright, refreshing contrast.
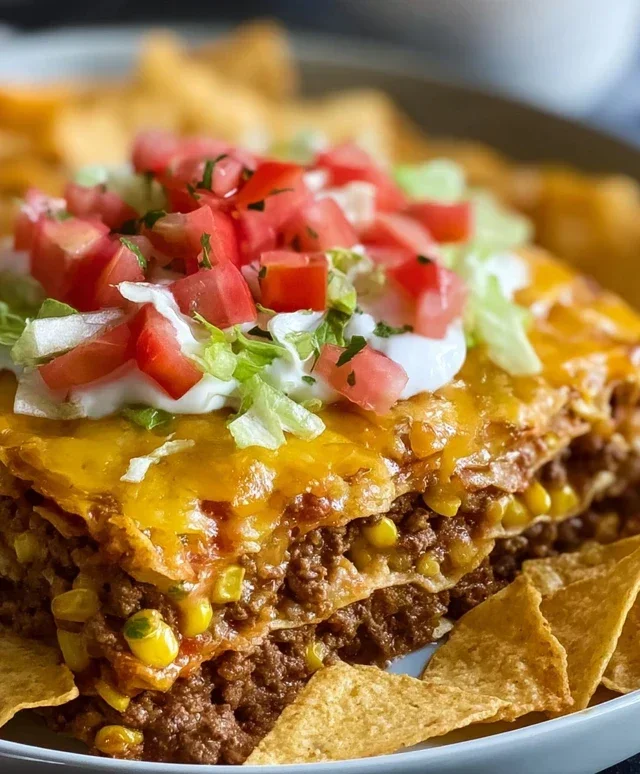
To serve, spoon generous portions of the Walking Taco Casserole onto plates. Top each serving with a dollop of salsa and a swirl of sour cream. Then, sprinkle with your chopped fresh tomato and shredded lettuce. The combination of the warm, cheesy casserole with the cool, crisp toppings is what makes this dish so satisfying. Get ready to enjoy all the flavors of a walking taco in every single bite of this comforting and easy casserole!

Conclusion:
And there you have it – your ultimate guide to crafting a sensational Walking Taco Casserole! This dish truly embodies comfort food at its finest. It’s incredibly easy to assemble, making it perfect for busy weeknights, potlucks, or casual gatherings. The magic lies in its adaptability; you can tailor it to your exact preferences, ensuring everyone finds something to love. The satisfying combination of seasoned ground meat, flavorful toppings, and the crunchy surprise of crushed tortilla chips creates a symphony of textures and tastes that is simply irresistible. I truly encourage you to give this Walking Taco Casserole a try – you won’t regret it!
For serving, consider a dollop of sour cream, a sprinkle of fresh cilantro, or even a side of corn salsa to complement the rich flavors. Don’t be afraid to experiment with your favorite taco toppings! This recipe is a fantastic base for all sorts of delicious variations.
Frequently Asked Questions:
Can I make this ahead of time?
Absolutely! You can prepare the meat mixture and chop your toppings a day in advance. Assemble the casserole just before baking, or bake it and reheat gently. The tortilla chips are best added right before serving to maintain their crispness.
What are some good vegetarian or vegan variations?
For a vegetarian option, swap the ground beef for seasoned black beans or refried beans. For a vegan version, use plant-based ground crum extractbles or a mixture of seasoned lentils and black beans. Ensure your cheese and any other dairy toppings are also vegan.
Can I use different types of chips?
While tortilla chips are classic, feel free to get creative! Fritos or even crushed Doritos can add a unique twist and flavor profile to your Walking Taco Casserole.
Walking Taco Casserole
A convenient and flavorful casserole that captures all the deliciousness of a walking taco in an easy-to-share dish.
Ingredients
-
1 ½ lbs ground beef
-
1 cup onion, chopped
-
3 oz cream cheese
-
1 packet taco seasoning
-
1 can green chilis
-
2-3 cups Fritos corn chips
-
1 cup shredded taco blend cheese
-
1 Roma tomato, chopped
-
1-2 cups shredded lettuce
-
Salsa for garnish
-
Sour cream for garnish
Instructions
-
Step 1
Preheat oven to 375°F (190°C). -
Step 2
In a large skillet, brown the ground beef and chopped onion over medium-high heat. Drain off any excess grease. -
Step 3
Stir in the taco seasoning, cream cheese, and green chilis. Cook until the cream cheese is melted and the mixture is well combined. -
Step 4
Spread half of the Fritos corn chips in the bottom of a 9×13 inch baking dish. -
Step 5
Pour the beef mixture evenly over the Fritos. -
Step 6
Top with the shredded taco blend cheese. -
Step 7
Bake for 15-20 minutes, or until the cheese is melted and bubbly. -
Step 8
Top with chopped Roma tomato and shredded lettuce. Serve immediately with salsa and sour cream.
Important Information
Nutrition Facts (Per Serving)
It is important to consider this information as approximate and not to use it as definitive health advice.
Allergy Information
Please check ingredients for potential allergens and consult a health professional if in doubt.


Leave a Comment