
Air Fryer Tortilla Garlic Bread is about to become your new favorite go-to snack, appetizer, or incredibly quick side dish! Are you ready to revolutionize your weeknight meals and impress your guests with minimal effort and maximum flavor? I certainly am, and I’m thrilled to share this incredibly simple yet utterly delicious recipe with you. Imagine a golden-crisp base, generously slathered with fragrant garlic butter, and then perfectly toasted to a delightful crunch – all achieved in mere minutes, right in your air fryer.
Garlic bread, in its essence, has long been a beloved staple, tracing its roots to Italian-American cuisine where it quickly became an indispensable accompaniment to pasta dishes and hearty family meals. Its universal appeal lies in that irresistible combination of savory garlic, rich butter, and a satisfyingly crunchy crust that evokes comfort and togetherness. However, traditional methods can sometimes be time-consuming, requiring oven preheating and longer baking times. That’s precisely why I’m so enthusiastic about this innovative twist.
Why You’ll Fall in Love with Air Fryer Tortilla Garlic Bread
People absolutely adore this dish not only for its incredible taste and texture – think light, crispy, and bursting with garlicky goodness – but also for its unparalleled convenience. Using an air fryer means you get that perfect crispiness with less oil and in a fraction of the time compared to conventional baking. It’s incredibly versatile, serving as a fantastic companion to soups, salads, or as a standalone treat for any time of day. The genius of using tortillas instead of traditional bread slices also means less fuss, a lighter result, and an even quicker cooking time. Get ready to experience the ultimate quick and flavorful garlic bread experience!

Ingredients:
- For the Aromatic Garlic Butter:
- ½ cup (1 stick) unsalted butter, softened to room temperature
- 4-5 cloves garlic, freshly minced (or more, if you’re a garlic fiend like me!)
- 2 tablespoons fresh parsley, finely chopped (optional, but highly recommended for color and freshness)
- ¼ teaspoon salt (I prefer Kosher salt for its texture and flavor)
- ⅛ teaspoon black pepper, freshly ground
- A pinch of red pepper flakes (for a subtle kick, entirely optional)
- For the Air Fryer Tortilla Garlic Bread Base:
- 6-8 large flour tortillas (8-10 inch size works perfectly, but smaller ones are great for bite-sized pieces)
- ½ cup shredded mozzarella cheese (or a blend of Italian cheeses like provolone and parmesan), optional but delicious
- 2 tablespoons grated Parmesan cheese (for sprinkling before air frying, adds a lovely savory crust)
- Optional Garnishes & Dipping:
- Extra fresh parsley, chopped, for garnish
- Marinara sauce or your favorite pasta sauce for dipping
- A sprinkle of dried oregano or Italian seasoning
Crafting the Irresistible Garlic Butter Mixture: The Heart of Our Air Fryer Tortilla Garlic Bread
-
Soften Your Butter: First things first, you’ll want to ensure your butter is properly softened. This is crucial for creating a smooth, spreadable garlic butter that will evenly coat our tortillas. I usually take it out of the fridge about an hour before I plan to start cooking. If you’re short on time, you can gently microwave it for 10-15 seconds, but be careful not to melt it completely; we’re aiming for a soft, pliable consistency, not a liquid puddle.
-
Prepare the Garlic: Now, let’s talk about the star of the show: garlic! I personally believe that fresh garlic makes all the difference. Mince your 4-5 cloves of garlic as finely as possible. You can use a garlic press if you have one, or a sharp knife. The finer the mince, the more evenly the garlic flavor will distribute throughout your butter. If you’re in a hurry, pre-minced garlic from a jar can work in a pinch, but I always find the fresh stuff delivers a much more vibrant and pungent flavor profile for this “Air Fryer Tortilla Garlic Bread.”
-
Combine the Flavors: In a medium-sized mixing bowl, combine the softened butter, minced garlic, chopped fresh parsley (if using), salt, and black pepper. This is also where you’d add that pinch of red pepper flakes if you’re looking for a little warmth. Using a fork or a small spatula, mix everything together thoroughly until all the ingredients are well incorporated. You want to see specks of garlic and parsley evenly distributed throughout the butter. Give it a taste test now! Adjust salt or pepper if needed. This step is about personalizing the flavor to your liking. Remember, this garlic butter is what truly defines our “Air Fryer Tortilla Garlic Bread,” so make it sing!
Why Softened Butter is Key:
Using softened, not melted, butter prevents the garlic and herbs from sinking to the bottom. It allows for a more even spread across the tortillas, ensuring every bite of your “Air Fryer Tortilla Garlic Bread” is bursting with flavor and crisps up beautifully in the air fryer.
Preparing Your Tortillas for Air Fryer Tortilla Garlic Bread Perfection:
-
Ready Your Workspace: Lay out your flour tortillas on a clean cutting board or a flat surface. Depending on the size of your air fryer basket, you might want to work in batches, preparing two or three at a time. I usually get about 6-8 good pieces of garlic bread from each large tortilla.
-
Spread the Garlic Butter Love: Take a generous spoonful of your amazing garlic butter mixture and spread it evenly over one side of each tortilla. You want to go right up to the edges. Don’t be shy here; the butter is what will give our “Air Fryer Tortilla Garlic Bread” that incredible golden crispness and rich flavor. I usually aim for a thin but complete coating – enough to cover, but not so much that it becomes greasy. If your butter is too cold, it might tear the tortilla, so make sure it’s at that perfect softened consistency.
-
Optional Cheese Layer: If you’re using shredded mozzarella or another Italian cheese blend, now is the time to sprinkle it over the buttered surface of the tortillas. I find about 1-2 tablespoons per tortilla is just right, allowing the cheese to melt and become slightly bubbly and golden without overpowering the garlic flavor. This step really elevates the “Air Fryer Tortilla Garlic Bread” to a new level of deliciousness, adding a gooey, savory element that’s hard to resist.
Cheese Tips for Your Air Fryer Tortilla Garlic Bread:
For the best results, use freshly shredded cheese if possible, as pre-shredded varieties often contain anti-caking agents that can affect how smoothly they melt. A blend of mozzarella and provolone offers a fantastic melt and flavor.
-
Cut into Desired Shapes: Once buttered and cheesed (if applicable), it’s time to cut your tortillas into pieces. You have a few options here:
- Wedges: My favorite method is to cut each large tortilla into 6 or 8 triangular wedges, just like you would a pizza. This creates perfect, easy-to-handle pieces of “Air Fryer Tortilla Garlic Bread.”
- Strips: You can also cut them into strips, about 1-inch wide, for a more “garlic breadstick” feel. These are great for dipping!
- Squares: For smaller, bite-sized appetizers, cut them into 2×2 inch squares.
Make sure your cuts are clean so the pieces cook evenly in the air fryer.
The Air Frying Process: Achieving Golden Perfection for Your Air Fryer Tortilla Garlic Bread
-
Preheat Your Air Fryer: This step is often overlooked, but I consider it essential for even cooking and optimal crispiness. Preheat your air fryer to 375°F (190°C) for about 3-5 minutes. Just like a conventional oven, preheating ensures that when you place your “Air Fryer Tortilla Garlic Bread” inside, it immediately starts cooking and developing that wonderful crust. Different air fryer models can vary, so know your appliance!
Understanding Your Air Fryer:
Air fryers come in various wattages and styles (basket vs. oven-style). Cooking times provided are a guideline; always keep a close eye on your food, especially the first time you make this recipe. My basket-style air fryer tends to cook a bit faster than some of the oven-style models I’ve used.
-
Arrange in the Basket: Once your air fryer is preheated, carefully arrange the tortilla garlic bread pieces in a single layer in the air fryer basket. It is absolutely crucial not to overcrowd the basket. Overcrowding will prevent the hot air from circulating properly, leading to soggy or unevenly cooked “Air Fryer Tortilla Garlic Bread” rather than wonderfully crispy pieces. If your air fryer is smaller, you’ll need to work in multiple batches. I typically fit about 6-8 wedges in my 5.8-quart air fryer basket at a time.
-
Sprinkle with Parmesan (Optional, but Recommended): Before closing the basket, if you haven’t added shredded cheese, or even if you have, I love to sprinkle a little grated Parmesan cheese over the buttered side of each tortilla piece. This creates an extra layer of savory flavor and contributes to an even crispier, golden-brown finish. It’s a small touch that makes a big difference in the final product of your “Air Fryer Tortilla Garlic Bread.”
-
Begin Air Frying: Cook the “Air Fryer Tortilla Garlic Bread” at 375°F (190°C) for 4-7 minutes. The exact timing will depend on your specific air fryer model and how crispy you like your garlic bread.
- Check at 4 Minutes: After 4 minutes, open the air fryer basket and check on your garlic bread. You’re looking for a beautiful golden-brown color on the edges and surface, with any cheese melted and slightly bubbly.
- Flip (Optional, for Even Crispness): If you want truly even crispness on both sides, you can carefully flip the pieces at this point and cook for an additional 1-2 minutes. However, I often find that for this “Air Fryer Tortilla Garlic Bread” recipe, a single-sided cook is sufficient to get a fantastic crispy top and a slightly softer underside, which I personally enjoy.
- Monitor Closely: Tortillas can go from perfectly golden to burnt very quickly in an air fryer, so stay nearby and check frequently, especially during the last few minutes.
The goal is a beautiful, slightly puffed, golden-brown crust that’s irresistible to bite into. You’ll also smell that amazing garlic aroma filling your kitchen!
Serving Your Delicious Air Fryer Tortilla Garlic Bread:
-
Careful Removal: Once your “Air Fryer Tortilla Garlic Bread” has reached your desired level of crispness and golden perfection, carefully remove the pieces from the air fryer basket using tongs. They will be hot!
-
Garnish and Serve Immediately: Transfer the crispy garlic bread pieces to a serving platter. If you like, sprinkle with a little extra fresh chopped parsley for a pop of color and freshness. I always recommend serving this “Air Fryer Tortilla Garlic Bread” immediately while it’s still warm and at its crispiest. The texture is best right out of the air fryer.
-
Dipping Delight: This “Air Fryer Tortilla Garlic Bread” makes an excellent side dish for pasta, soups, or salads. It’s also fantastic on its own as an appetizer. For an extra treat, serve it alongside a bowl of warm marinara sauce or your favorite homemade pasta sauce for dipping. The slightly tangy sauce complements the rich garlic butter beautifully.
Tips for the Best Air Fryer Tortilla Garlic Bread Every Time:
-
Butter Consistency is Key:
Ensure your butter is truly softened, not melted. If it’s too cold, it will be difficult to spread evenly and might tear the tortillas. If it’s too melted, the garlic and herbs will separate, and it won’t adhere to the tortilla as well, leading to a less flavorful and potentially greasy “Air Fryer Tortilla Garlic Bread.”
-
Don’t Overcrowd the Air Fryer:
This is probably the most important rule for any air fryer recipe, and it’s especially true for achieving perfectly crispy “Air Fryer Tortilla Garlic Bread.” Air fryers work by circulating hot air, and if the basket is too full, that air can’t reach all surfaces, resulting in steamed rather than crispy food. Work in batches for the best results, allowing enough space between each piece.
-
Monitor Cooking Closely:
Air fryers can vary significantly in their cooking power and speed. Always start checking your “Air Fryer Tortilla Garlic Bread” at the lower end of the suggested cooking time (around 4 minutes) and adjust as needed. Tortillas are thin and can brown very quickly, so a watchful eye will prevent burning.
-
Experiment with Cheese:
While mozzarella is a classic choice, don’t be afraid to experiment with other cheeses. A sprinkle of sharp cheddar, a Monterey Jack blend, or even some crumbled feta can add interesting new dimensions to your “Air Fryer Tortilla Garlic Bread.” Just be mindful that some cheeses melt differently and can become quite oily.
-
Flavor Variations:
Feel free to get creative with your garlic butter! Add a pinch of dried oregano, basil, or an Italian seasoning blend. A tiny dash of onion powder can also enhance the savory notes. For a spicy kick, increase the red pepper flakes or add a touch of cayenne pepper.
-
Thin vs. Thick Tortillas:
I find that standard thin flour tortillas (the ones used for burritos or wraps) work best for this recipe, delivering maximum crispness. Thicker, “restaurant style” tortillas might be a bit chewier and require a minute or two longer to crisp up.
Troubleshooting Common Air Fryer Tortilla Garlic Bread Issues:
-
My Garlic Bread is Too Crispy/Burnt:
This usually means your air fryer temperature was too high or the cooking time was too long. Next time, try reducing the temperature by 25°F (about 15°C) or cutting down the cooking time by 1-2 minutes. Remember, tortillas are thin and cook fast! Always preheat, but start checking earlier than you think you need to. Each air fryer behaves a little differently, so getting to know your appliance is key to perfect “Air Fryer Tortilla Garlic Bread.”
-
My Garlic Bread Isn’t Crispy Enough:
If your “Air Fryer Tortilla Garlic Bread” is coming out a bit soft or chewy, it’s likely due to one of two reasons: either it wasn’t cooked long enough, or the air fryer basket was overcrowded, preventing proper air circulation. Ensure you’re cooking in a single layer and increase the cooking time by 1-2 minutes, checking frequently. You want a distinct golden-brown color and a firm texture.
-
Uneven Browning:
Uneven browning can be caused by inconsistent butter spreading or, more commonly, by an air fryer that has hot spots. To combat this, you can try rotating the basket halfway through the cooking process, or if you’re cooking multiple batches, slightly rearrange the pieces between batches. Flipping the “Air Fryer Tortilla Garlic Bread” pieces halfway through cooking can also help promote even crisping on both sides.
-
Cheese Didn’t Melt Properly:
If your cheese isn’t beautifully melted and bubbly, it could be that the air fryer wasn’t preheated sufficiently, or the cooking time wasn’t quite long enough. Also, using very cold cheese directly from the fridge can slow down the melting process. Make sure to sprinkle the cheese evenly over the buttered surface. Using a good quality, easily melting cheese like low-moisture mozzarella also helps achieve that perfect gooey top on your “Air Fryer Tortilla Garlic Bread.”
Creative Variations & Flavor Boosters for Your Air Fryer Tortilla Garlic Bread:
Once you’ve mastered the basic “Air Fryer Tortilla Garlic Bread,” the possibilities for customization are endless! Here are some of my favorite ways to switch things up:
-
Herbaceous Delight:
Beyond parsley, consider adding finely chopped fresh chives, a sprinkle of dried oregano, basil, or a full Italian seasoning blend to your garlic butter. Rosemary or thyme can also add a wonderfully sophisticated touch if you chop them very finely. The aromatic depth these herbs provide truly elevates the humble tortilla into something extraordinary.
-
Kick It Up a Notch (Spicy Version):
If you love a little heat, increase the red pepper flakes in your garlic butter mixture, or add a small pinch of cayenne pepper. For even more adventurous palates, a tiny dash of hot sauce brushed onto the tortilla before the garlic butter, or after air frying, can create a fiery “Air Fryer Tortilla Garlic Bread” experience.
-
The Ultimate Cheese Lover’s Tortilla Garlic Bread:
Don’t stop at mozzarella! Experiment with different cheese blends. A mix of Parmesan, Fontina, and Provolone can create a rich, complex flavor profile and an amazing cheese pull. Crumbled feta, a sharp cheddar, or even a smoked gouda can introduce exciting new tastes. You could even add a little cream cheese to the butter mixture for an extra creamy texture before baking.
-
Sun-Dried Tomato & Pesto Twist:
For a Mediterranean flair, finely chop some oil-packed sun-dried tomatoes and mix them into your garlic butter. You could also spread a very thin layer of pesto on the tortilla before the garlic butter for a burst of basil and pine nut flavor. This transforms the “Air Fryer Tortilla Garlic Bread” into a gourmet appetizer.
-
Pizza Garlic Bread Fusion:
Turn your garlic bread into mini pizzas! After buttering, add a thin layer of pizza sauce, then sprinkle with mozzarella and your favorite mini pizza toppings like diced pepperoni, finely chopped bell peppers, or black olives. Air fry as directed, and you’ll have a quick and delicious “Air Fryer Tortilla Pizza Garlic Bread.”
-
Garlic-Herb Breadsticks with a Dip:
Cut the buttered tortillas into thin strips before air frying. Once golden and crisp, these make fantastic “garlic breadsticks.” Serve them with a side of warm marinara sauce, a creamy ranch dip, or even a fresh bruschetta topping for an irresistible snack. This format is particularly popular with children as well.
Storage and Reheating Your Air Fryer Tortilla Garlic Bread:
While this “Air Fryer Tortilla Garlic Bread” is definitely best enjoyed fresh and hot, sometimes you might have leftovers (though it’s rare in my house!). Here’s how to handle them:
-
Storage:
Allow any leftover “Air Fryer Tortilla Garlic Bread” to cool completely to room temperature. Then, store it in an airtight container or a resealable plastic bag at room temperature for up to 1-2 days. If you plan to keep it longer, you can refrigerate it for up to 3-4 days. While technically safe to eat, the texture won’t be as crisp as when freshly made, so I always recommend reheating to bring back some of that magic.
-
Reheating for Optimal Crispness:
The best way to reheat “Air Fryer Tortilla Garlic Bread” and bring it back to its crispy glory is, you guessed it, in the air fryer!
- Preheat your air fryer to 350°F (175°C).
- Place the leftover garlic bread pieces in a single layer in the air fryer basket.
- Air fry for 2-4 minutes, or until heated through and re-crisped to your liking. Keep a close eye on them, as reheating can be even faster than the initial cook time.
Alternatively, you can reheat them in a conventional oven at 350°F (175°C) for about 5-7 minutes, or until hot and crisp. Microwaving is not recommended, as it will make the “Air Fryer Tortilla Garlic Bread” soggy and chewy, losing all that delightful crisp texture we worked so hard to achieve.

Conclusion:
Well, my friends, we’ve reached the end of this culinary journey, and I truly hope you’re as excited as I am about what we’ve discovered. This isn’t just another recipe; it’s a genuine game-changer, especially for those busy weeknights or when an unexpected craving for something utterly delicious strikes. What makes this recipe an absolute must-try? It’s the magical combination of speed, simplicity, and an incredibly satisfying outcome. Imagine perfectly crispy tortilla edges, a soft and slightly chewy interior, all infused with that irresistible garlic aroma, topped with gooey, melted cheese. This Air Fryer Tortilla Garlic Bread is truly a revelation, transforming humble ingredients into a star dish in mere minutes.
I genuinely believe this will become a staple in your kitchen, not just because it’s effortless to prepare, but because the flavor profile is simply outstanding. It hits all the right notes: savory, cheesy, and with that comforting warmth only garlic bread can provide. Forget those bland, store-bought frozen options; you can achieve something far superior, fresh, and tailored to your exact preferences, all thanks to the magic of your air fryer. It’s the ultimate hack for achieving that deeply golden, slightly charred, yet tender texture that makes garlic bread so addictive, all while keeping cleanup minimal. You’ll wonder why you ever made it any other way!
Elevate Your Meal: Serving Suggestions and Delicious Variations
Now that you’ve mastered the basic Air Fryer Tortilla Garlic Bread, let’s talk about how you can take it even further and integrate it seamlessly into your meal planning. This versatile delight isn’t just a stand-alone snack; it’s a phenomenal companion to a myriad of dishes, and with a few tweaks, it can transform into an entirely new experience.
Perfect Pairings:
First and foremost, it’s an undeniable champion alongside any pasta dish. Think classic spaghetti and meatballs, a rich lasagna, or a creamy fettuccine Alfredo. The crispy, garlicky notes cut through the richness of pasta sauces beautifully, providing a delightful textural contrast. It’s also an incredible dipping vessel for a hearty bowl of tomato soup or a robust minestrone, absorbing all those delicious flavors and adding a comforting crunch. Don’t overlook its potential with a fresh garden salad; it adds a delightful crunch and savory element that elevates a simple greens dish into a satisfying meal. Picture yourself on a cozy evening, a steaming bowl of soup, and a stack of this warm, cheesy garlic bread – pure bliss!
Creative Topping and Flavor Variations:
The beauty of this recipe lies in its adaptability. Once you have the basic garlic butter spread, the sky’s the limit for customization. Here are some of my favorite ways to switch things up and make it uniquely yours:
- Cheese Enthusiast’s Dream: While mozzarella is fantastic, don’t hesitate to experiment with other cheeses. A generous sprinkle of freshly grated Parmesan or Pecorino Romano adds a sharp, salty punch that complements the garlic wonderfully. A blend of cheddar and Monterey Jack can create a milder, creamier melt, perfect for those who prefer a less intense flavor. Provolone or a spicy pepper jack can introduce exciting new dimensions and a delightful zing. You could even combine a few different types for a complex cheesy symphony that will tantalize your taste buds.
- Herb Heaven: Fresh herbs truly elevate the flavor and presentation. After spreading the garlic butter, sprinkle finely chopped fresh parsley, chives, or a hint of oregano or basil before adding the cheese. Dried herbs work wonderfully too – a pinch of an Italian seasoning blend can transport you straight to the Mediterranean. Remember, more delicate fresh herbs like basil are best added towards the end of cooking or right after to preserve their vibrant flavor and color.
- A Hint of Heat: If you enjoy a little kick, a tiny sprinkle of red pepper flakes with the garlic butter will give it a pleasant warmth without overpowering the other flavors. Smoked paprika can also add a subtle smokiness and a beautiful reddish hue, deepening the overall flavor profile.
- Veggie Boost: For a more substantial snack or side, finely dice some sun-dried tomatoes (pat them dry first) or a few spinach leaves and mix them into the garlic butter spread, or layer them over the tortilla before the cheese. Make sure any added vegetables are finely chopped so they cook through quickly and don’t make the tortilla soggy. Caramelized onions, thinly sliced, could also be a gourmet addition.
- Protein Power-Up: For a truly decadent treat, scatter a few crispy crumbled bacon bits or tiny pieces of cooked pepperoni over the cheese before air frying. These additions will crisp up beautifully and add an extra layer of savory depth and texture that will make each bite unforgettable.
Remember, the key is not to overcrowd your air fryer basket. Cook in batches if necessary to ensure optimal air circulation, which is crucial for that perfect crispiness. Keep a close eye on your bread, as air fryers can vary in power, and tortillas cook very quickly – they can go from perfectly golden to overly crisp in seconds!
Your Turn to Shine!
So, my fellow food lovers, now it’s your turn! I’ve shared my passion for this quick, easy, and incredibly satisfying recipe, and I genuinely believe you’ll fall in love with it just as much as I have. Don’t let another week go by without experiencing the joy of homemade garlic bread that’s ready in a flash. Gather your ingredients, fire up your air fryer, and prepare to impress yourself and anyone lucky enough to share a bite. This recipe is a testament to how simple ingredients, when handled correctly, can produce truly extraordinary results.
Once you’ve whipped up your own batch of this delightful creation, I would absolutely love to hear about your experience! Did you stick to the classic? Did you venture into new topping territories? What was your favorite variation? Please, don’t be shy – share your culinary successes, your clever tweaks, and even your “aha!” moments. Your feedback and creativity inspire me and countless other home cooks who are looking for delicious, practical recipes just like this. There’s nothing more rewarding than seeing how you adapt and personalize a recipe to make it your own.
Happy cooking, and enjoy every single crispy, garlicky, cheesy bite!
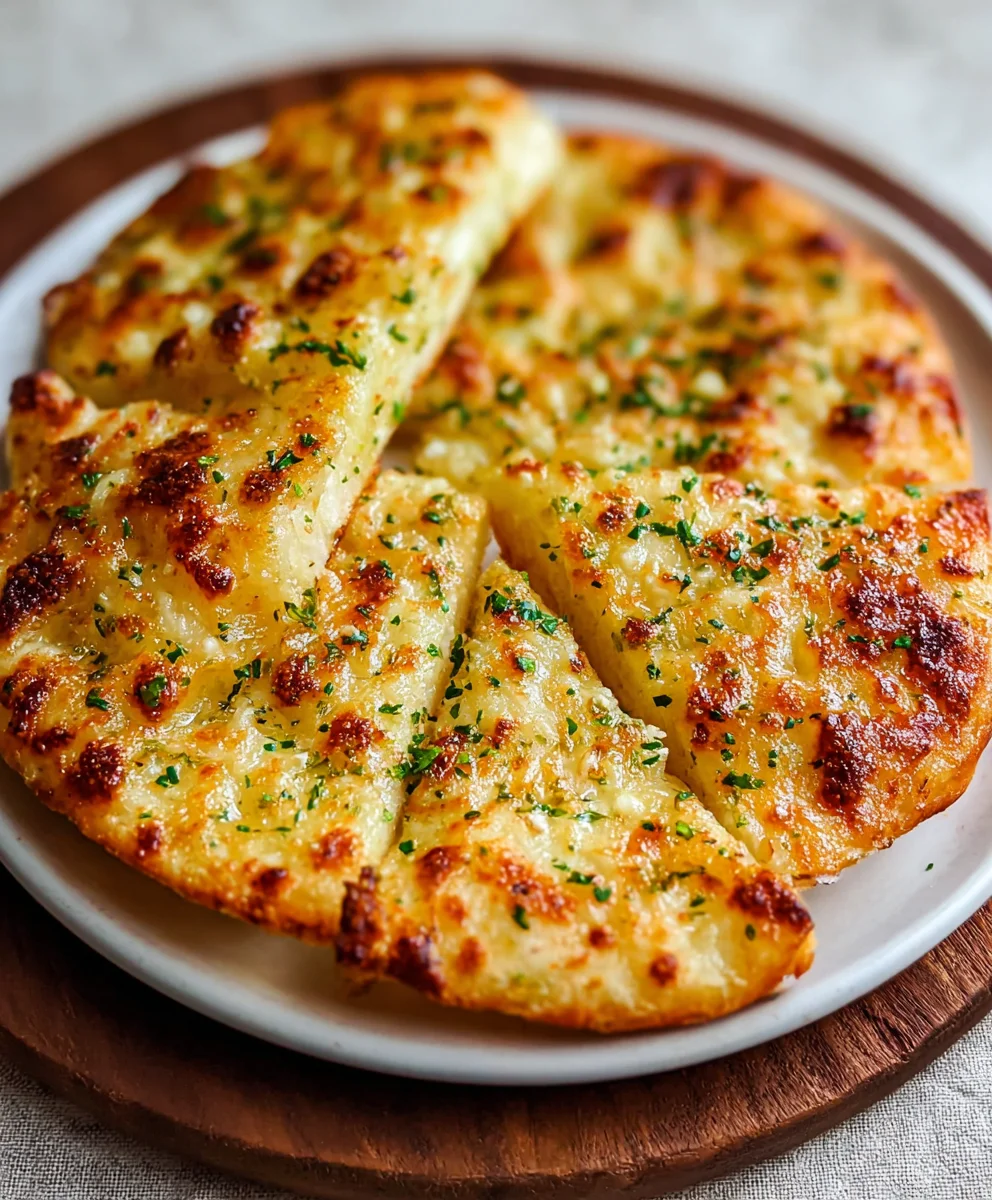
Air Fryer Tortilla Garlic Bread: Easy & Crispy Snack
Revolutionize your snack time with Air Fryer Tortilla Garlic Bread! This incredibly simple yet utterly delicious recipe delivers a golden-crisp base, slathered with fragrant garlic butter, perfectly toasted in minutes. Mozzarella cheese creates perfect melty spots, making it an irresistible, quick, and flavorful treat.
Ingredients
-
½ cup (1 stick) unsalted butter, softened
-
4-5 cloves garlic, minced
-
2 tbsp fresh parsley, chopped (optional)
-
¼ tsp salt
-
⅛ tsp black pepper, freshly ground
-
Pinch of red pepper flakes (optional)
-
6-8 large flour tortillas (8-10 inch)
-
½ cup shredded mozzarella cheese (optional)
-
2 tbsp grated Parmesan cheese
Instructions
-
Step 1
In a bowl, combine softened butter, minced garlic, chopped parsley (if using), salt, pepper, and red pepper flakes (optional). Mix until well incorporated. -
Step 2
Lay tortillas flat. Spread garlic butter evenly over one side of each tortilla. If desired, sprinkle with shredded mozzarella cheese. -
Step 3
Cut each buttered tortilla into 6-8 triangular wedges, strips, or squares. -
Step 4
Preheat your air fryer to 375°F (190°C) for 3-5 minutes. -
Step 5
Arrange tortilla pieces in a single layer in the air fryer basket, ensuring not to overcrowd. Sprinkle with grated Parmesan cheese. Cook at 375°F (190°C) for 4-7 minutes, until golden brown and crispy. Cook in batches if necessary. Monitor closely to prevent burning. -
Step 6
Carefully remove from air fryer using tongs. Garnish with extra fresh parsley if desired, and serve immediately. Excellent with marinara sauce for dipping.
Important Information
Nutrition Facts (Per Serving)
It is important to consider this information as approximate and not to use it as definitive health advice.
Allergy Information
Please check ingredients for potential allergens and consult a health professional if in doubt.


Leave a Comment