
#dr Recipe Meta Main – what a delightful culinary journey we’re about to embark on! Imagine a dish that effortlessly combines robust, vibrant flavors with an exquisite, melt-in-your-mouth texture, transforming humble, everyday ingredients into something truly spectacular. This isn’t just a meal; it’s an experience, a symphony for your senses that promises to impress even the most discerning palate and leave everyone craving for more.
Many iconic dishes, much like what we’re exploring today, boast fascinating origins, often rooted in centuries of culinary tradition. They tell captivating stories of regional pride, humble beginnings, and the ingenious ways communities have celebrated their local produce and heritage. While the specific lineage of this particular recipe might be personal to many, its spirit undoubtedly echoes that rich tapestry of gastronomic evolution, adapted and cherished across tables worldwide.
What truly makes this specific #dr Recipe Meta Main so universally adored? I believe it’s a harmonious blend of its vibrant flavors, comforting textures, and its surprising simplicity despite yielding such a complex and deeply satisfying taste. It’s the kind of dish that not only nourishes the body but also brings people together, sparking wonderful conversations and creating lasting memories around the dining table. Get ready to fall in love with a new culinary favorite!

Ingredients:
- For the Rich Beef Ragu (Meat Sauce):
- 2 tablespoons extra virgin olive oil
- 2 pounds ground beef, 80/20 lean-to-fat ratio is ideal for flavor
- 1 large yellow onion, finely diced
- 2 carrots, finely diced
- 2 celery stalks, finely diced
- 4 cloves garlic, minced
- 1 cup dry red wine (such as Merlot or Cabernet Sauvignon)
- 2 (28-ounce) cans crushed tomatoes
- 1 (15-ounce) can tomato sauce
- 1 (6-ounce) can tomato paste
- 2 bay leaves
- 1 tablespoon dried oregano
- 1 teaspoon dried basil
- 1/2 teaspoon red pepper flakes (optional, for a little kick!)
- Salt and freshly ground black pepper to taste
- 1/2 cup fresh parsley, chopped, for garnish (optional)
- For the Creamy Béchamel Sauce:
- 8 tablespoons unsalted butter (1 stick)
- 1/2 cup all-purpose flour
- 6 cups whole milk, warmed gently
- 1 teaspoon salt
- 1/2 teaspoon freshly ground black pepper
- 1/4 teaspoon freshly grated nutmeg
- For the Cheese Layers:
- 15 ounces fresh ricotta cheese, drained if excessively watery
- 1 large egg, lightly beaten
- 1/2 cup grated Parmesan cheese, plus more for sprinkling
- 1 teaspoon dried parsley flakes (or 1 tablespoon fresh, chopped)
- 1/2 teaspoon salt
- 1/4 teaspoon black pepper
- 1 pound low-moisture, whole-milk mozzarella cheese, freshly grated (about 4 cups)
- For the Lasagna Pasta:
- 1 box (10-12 ounces) lasagna noodles, oven-ready (no-boil) or regular (which will need to be par-boiled)
For the Rich Beef Ragu (Meat Sauce):
- Brown the Beef: In a large, heavy-bottomed pot or Dutch oven, heat 1 tablespoon of olive oil over medium-high heat. Add the ground beef, breaking it up with a spoon. Cook, stirring occasionally, until it’s beautifully browned and no pink remains, about 8-10 minutes. This browning step is absolutely crucial for developing deep, savory flavors. Once browned, carefully drain off any excess fat. I always find that a good drain ensures a less greasy, more focused flavor in the sauce.
- Sauté the Soffritto: Reduce the heat to medium. Add the remaining 1 tablespoon of olive oil to the pot, then toss in your finely diced onion, carrots, and celery. This trio, known as a “soffritto” in Italian cooking, forms the aromatic base of our sauce. Sauté these vegetables for about 10-12 minutes, stirring occasionally, until they become wonderfully softened and translucent. The carrots and celery will release their natural sweetness, which balances the richness of the beef.
- Add Garlic and Tomato Paste: Stir in the minced garlic and tomato paste. Cook for another 2-3 minutes, stirring constantly. You’ll notice the tomato paste start to darken slightly and develop a richer, more concentrated aroma. This process of cooking the tomato paste helps to deepen its flavor and remove any raw, metallic notes.
- Deglaze with Wine: Pour in the red wine. Use a wooden spoon to scrape up any browned bits stuck to the bottom of the pot. These bits, called “fond,” are packed with flavor and will contribute immensely to the ragu. Bring the wine to a simmer and let it cook for 5-7 minutes, until it has reduced by about half. The alcohol will cook off, leaving behind a complex, concentrated wine flavor.
- Simmer the Sauce: Add the crushed tomatoes, tomato sauce, bay leaves, dried oregano, dried basil, and red pepper flakes (if using). Stir everything together until well combined. Bring the sauce to a gentle simmer, then reduce the heat to low, cover the pot, and let it cook for at least 2 hours, or even better, 3-4 hours. My grandmother always said the longer the ragu simmers, the more the flavors meld and deepen, creating an unforgettable sauce. Stir occasionally to prevent sticking and ensure even cooking. If the sauce becomes too thick, you can add a little water or beef broth.
- Season and Finish: After the simmering time, remove the bay leaves. Taste the ragu and season generously with salt and freshly ground black pepper. Remember, a well-seasoned sauce is key! If you like, stir in a handful of fresh chopped parsley right before turning off the heat for a burst of freshness. This ragu is now ready to be a star in our lasagna.
For the Creamy Béchamel Sauce:
- Melt the Butter: In a separate medium saucepan, melt the unsalted butter over medium heat. Be careful not to let it brown too much.
- Create the Roux: Once the butter is melted and bubbling gently, sprinkle in the all-purpose flour. Whisk continuously for 2-3 minutes, creating a smooth, pale paste known as a roux. This roux is the thickening agent for our béchamel. You’ll want it to cook long enough to remove the raw flour taste, but not so long that it browns excessively, as we’re aiming for a white sauce.
- Add Milk Gradually: Gradually whisk in the warmed whole milk, a little at a time, ensuring that each addition is fully incorporated and smooth before adding more. This slow addition and constant whisking are critical for preventing lumps. My personal trick is to warm the milk slightly beforehand; it helps immensely with creating a silky-smooth sauce. Continue whisking until all the milk has been added and the sauce begins to thicken, which usually takes about 5-7 minutes after the last of the milk is in. It should coat the back of a spoon beautifully.
- Season the Béchamel: Remove the béchamel from the heat. Stir in the salt, black pepper, and freshly grated nutmeg. Nutmeg is a secret ingredient in béchamel; it adds a wonderfully warm, subtle depth that truly elevates the sauce without overpowering it. Taste and adjust seasoning as needed. Set aside, covering the surface with plastic wrap directly to prevent a skin from forming, if you won’t be using it immediately.
Preparing the Cheese Filling and Lasagna Noodles:
- Mix the Ricotta Filling: In a medium bowl, combine the fresh ricotta cheese, lightly beaten egg, 1/2 cup grated Parmesan cheese, dried parsley flakes, 1/2 teaspoon salt, and 1/4 teaspoon black pepper. Mix everything together thoroughly until it’s well combined and creamy. The egg acts as a binder, helping the ricotta layer hold its shape during baking.
- Grate the Mozzarella: If you haven’t already, grate your low-moisture, whole-milk mozzarella cheese. Freshly grated mozzarella melts much better and has a superior texture compared to pre-shredded varieties, which often contain anti-caking agents.
-
Prepare Lasagna Noodles:
- For Oven-Ready (No-Boil) Noodles: No pre-cooking is required for these! Simply ensure you have enough sauce and moisture in your lasagna to properly cook them in the oven. They absorb liquid directly from your sauces during baking, expanding and becoming tender.
- For Regular Lasagna Noodles: Bring a large pot of salted water to a rolling boil. Add the lasagna noodles a few at a time to prevent sticking. Cook them according to package directions, but only until they are al dente – still firm to the bite. My trick is to undercook them by about 2 minutes from the package instructions, as they will finish cooking in the oven. Drain well and lay them out on a clean kitchen towel or parchment paper in a single layer to prevent them from sticking together. A little drizzle of olive oil can also help keep them separate.
Assembling Our Magnificent Lasagna:
This is where all our hard work comes together! Get ready for some delicious layering.
- Preheat Oven and Prepare Dish: Preheat your oven to 375°F (190°C). Lightly grease a 9×13-inch baking dish with a little olive oil or cooking spray. This helps prevent sticking and makes serving easier.
- First Layer – Ragu: Spread about 1 to 1.5 cups of the rich beef ragu evenly over the bottom of the prepared baking dish. This initial layer of sauce is important for both flavor and to provide moisture for the bottom pasta layer.
- Second Layer – Pasta: Arrange a single layer of lasagna noodles over the ragu. If using no-boil noodles, make sure they are completely covered by sauce later to cook properly. If using regular noodles, overlap them slightly if needed to cover the entire surface. You might need to break a noodle to fit edges, and that’s perfectly fine!
- Third Layer – Ricotta: Carefully spread about half of the ricotta cheese mixture evenly over the pasta noodles. It can be a little tricky, but gentle spreading with the back of a spoon works wonders.
- Fourth Layer – Mozzarella: Sprinkle about 1.5 cups of the grated mozzarella cheese over the ricotta layer. My philosophy is, you can never have too much cheese in a lasagna!
- Fifth Layer – Béchamel: Drizzle about 1 to 1.5 cups of the creamy béchamel sauce over the mozzarella. Spread it gently to cover the cheese.
-
Repeat the Layers: Now, repeat the entire layering sequence:
- Ragu (another 1 to 1.5 cups)
- Pasta noodles
- Remaining half of the ricotta mixture
- Another 1.5 cups of grated mozzarella
- Remaining béchamel sauce (you might have a little extra; use it generously!)
- Final Top Layer: Place the final layer of pasta noodles on top. Cover these noodles with the remaining ragu. For the grand finale, generously sprinkle the remaining grated mozzarella cheese and an extra dusting of Parmesan cheese over the very top. This will create a beautiful, bubbly, golden-brown crust.
Baking and The All-Important Rest:
- Cover and Bake: Loosely cover the baking dish with aluminum foil. I like to lightly spray the underside of the foil with cooking spray to prevent the cheese from sticking to it. Bake for 25 minutes. Covering the lasagna helps to steam the noodles and cook the layers evenly without the top burning.
- Uncover and Finish Baking: After 25 minutes, carefully remove the foil. Return the lasagna to the oven and continue baking for another 20-30 minutes, or until the top is bubbling vigorously, the edges are golden brown, and the cheese is beautifully melted and slightly browned in spots. If you want an extra golden-brown crust, you can briefly turn on the broiler for a minute or two, but watch it very closely to prevent burning!
- The Crucial Resting Period: This step is often overlooked, but it’s absolutely vital for a perfect lasagna! Once out of the oven, let the lasagna rest on a wire rack for at least 15-20 minutes, or even up to 30 minutes. Do not skip this! Resting allows the layers to set properly, making it much easier to slice into neat, beautiful portions without everything collapsing. It also allows the molten cheese and sauces to slightly firm up, ensuring every bite is perfectly structured and flavorful.
- Serve and Enjoy: Once rested, slice the lasagna into generous portions. Serve immediately, perhaps with a simple green salad and some crusty bread. Garnish with fresh chopped parsley if desired. This homemade lasagna is a labor of love, but every single bite is worth it. Enjoy your incredible creation!
Conclusion:
And there you have it, my friends! We’ve journeyed through the steps of creating what I truly believe is one of the most delightful and adaptable dishes you could ever add to your culinary repertoire. This isn’t just another meal; it’s an experience, a canvas for your creativity, and a guaranteed crowd-pleaser that delivers on flavor without demanding hours in the kitchen. I simply can’t stress enough how much joy this particular #dr Recipe Meta Main brings to my own table, and I’m absolutely confident it will do the same for yours.
So, why is this recipe an absolute must-try? Firstly, its simplicity is deceiving. With minimal effort, you unlock an incredible depth of flavor that tastes like you’ve been slaving away all day. The careful balance of textures and the aromatic notes that waft through your kitchen as it cooks are truly enchanting. It’s comforting, yet sophisticated enough to impress even the most discerning palate. Whether you’re a seasoned chef looking for a new go-to or a beginner just starting your culinary adventure, the straightforward nature of the instructions coupled with the spectacular outcome makes it a perfect choice. It’s also wonderfully forgiving, allowing for minor adjustments without compromising the overall deliciousness. Imagine pulling off a dish that feels gourmet but was surprisingly easy – that’s precisely what this recipe offers. It’s the kind of dish that makes you feel proud to serve, transforming an ordinary weeknight into a special occasion or making your next gathering effortlessly elegant. Trust me, the sheer satisfaction of that first bite, knowing you created something so wonderful, is truly unparalleled.
Now, let’s talk about making this dish uniquely yours, because one of its greatest strengths is its incredible versatility. While the base recipe is perfect as is, don’t hesitate to explore different avenues to suit your taste or what you have on hand. For a lighter touch, you could swap out some of the heavier ingredients for fresh seasonal vegetables. Think about adding a sprinkle of fresh herbs like chopped parsley or chives right before serving for a burst of color and a fresh aroma. If you’re looking to elevate it for a special occasion, consider serving it alongside a perfectly seared protein, perhaps some pan-fried scallops or a tender piece of grilled chicken. For those who enjoy a bit of heat, a pinch of red pepper flakes or a drizzle of spicy oil can add a fantastic kick. And don’t forget about cheese! A final grating of Parmesan or a dollop of fresh ricotta can transform the texture and add another layer of indulgence. This recipe also lends itself beautifully to being prepared ahead of time, making it an ideal candidate for meal prep or for those busy weeknights when you need a quick, delicious solution. Just imagine coming home and having most of the work already done! You can easily scale it up for a larger crowd or scale it down for a cozy dinner for one or two. The possibilities truly are endless, and I encourage you to experiment and discover your own favorite variations.
Your Culinary Adventure Awaits!
So, what are you waiting for? I wholeheartedly encourage you to roll up your sleeves, gather your ingredients, and dive into making this absolutely fabulous dish. I promise you won’t be disappointed. There’s nothing quite like the satisfaction of creating something delicious from scratch, especially when the end result is as consistently outstanding as this one. After you’ve had a chance to enjoy it, I would absolutely love to hear about your experience. Did you stick to the original recipe, or did you put your own unique spin on it? What were your favorite parts of the process, and what did your family or friends think? Please don’t be shy! Share your culinary triumphs, your photos, and any creative twists you came up with in the comments section below. Your insights and ideas not only inspire me but also help other home cooks in our community discover new ways to enjoy this wonderful recipe. Let’s build a delicious conversation around this amazing dish! Happy cooking, everyone!

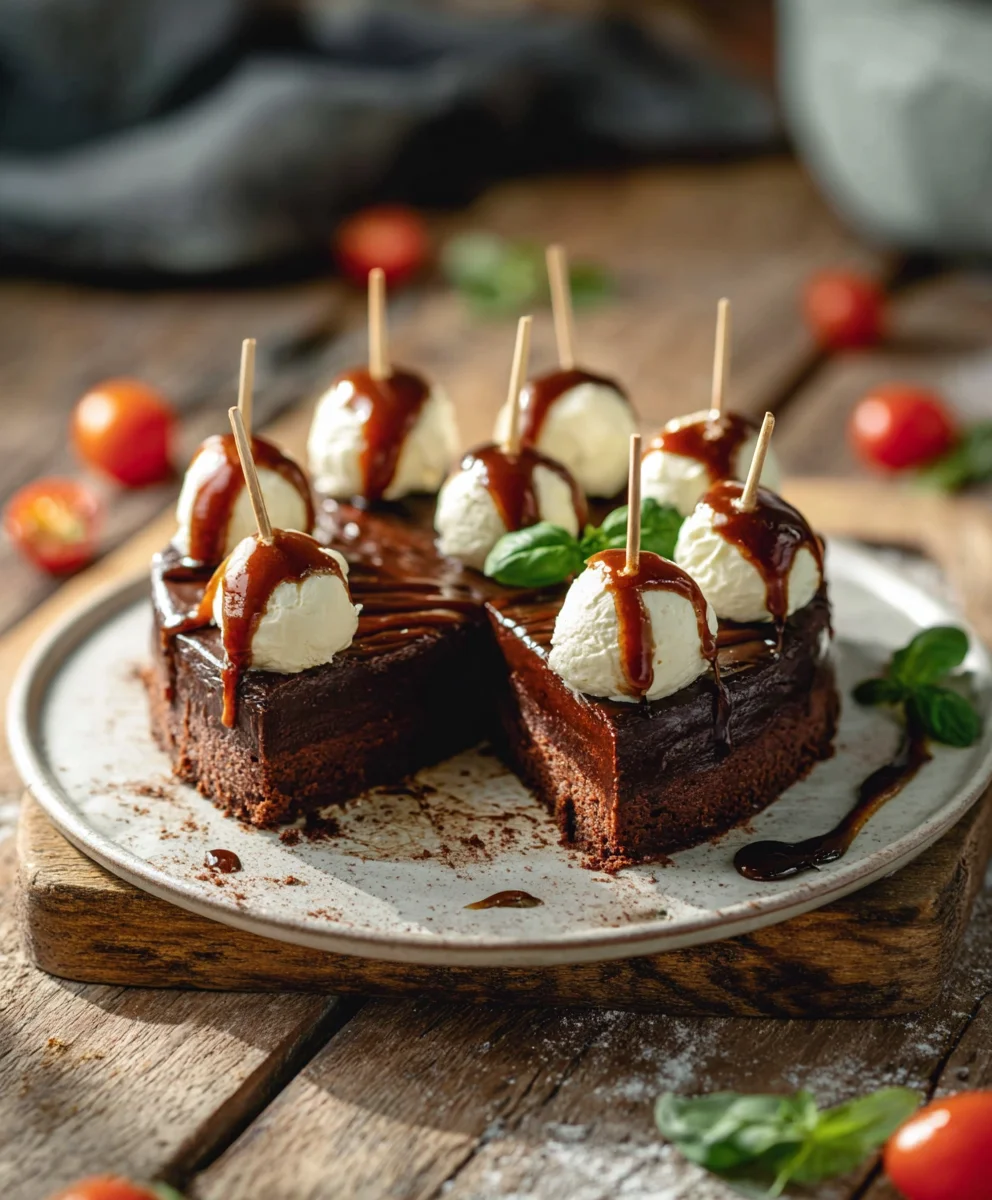
Caprese Skewers: Fresh & Simple #dr Recipe Meta Main Appetizer
A delightful, non-alcoholic appetizer featuring ripe tomatoes, fresh mozzarella, and aromatic basil, drizzled with olive oil and balsamic glaze. This quick and easy dish is a perfect example of a meta-main recipe that’s effortlessly elegant, bringing vibrant flavors to any table.
Ingredients
-
12 pcs Cherry Tomatoes (ripe, firm)
-
12 pcs Mini Mozzarella Balls (bocconcini)
-
12 pcs Fresh Basil Leaves (washed, patted dry)
-
12 pcs Toothpicks or mini skewers
-
1 tbsp Extra Virgin Olive Oil (cold-pressed)
-
0.5 tbsp Balsamic Glaze (store-bought or homemade)
-
Pinch Sea Salt (to taste)
-
Pinch Cracked Black Pepper (optional)
Instructions
-
Step 1
Thread one cherry tomato, one mini mozzarella ball, and one fresh basil leaf onto each toothpick or mini skewer. -
Step 2
Arrange the prepared skewers on a serving platter. -
Step 3
Drizzle the assembled skewers evenly with olive oil and balsamic glaze. -
Step 4
Season with sea salt and cracked black pepper, if desired. -
Step 5
Serve immediately.
Important Information
Nutrition Facts (Per Serving)
It is important to consider this information as approximate and not to use it as definitive health advice.
Allergy Information
Please check ingredients for potential allergens and consult a health professional if in doubt.

Leave a Comment