
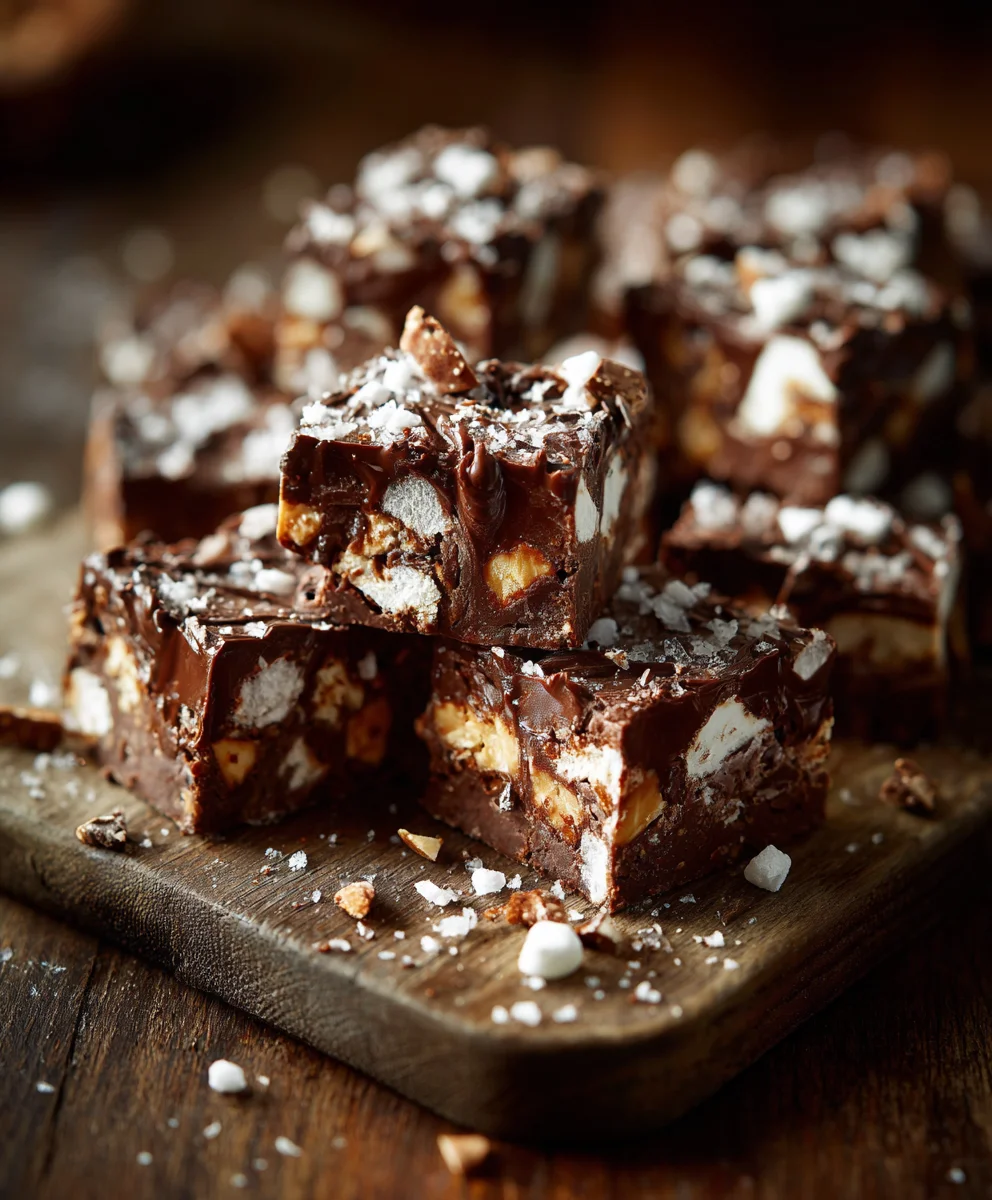
Rocky Road Candy! I am absolutely thrilled to share the ultimate guide to creating this beloved treat right in your kitchen. Imagine a symphony of rich, melted chocolate, fluffy marshmallows, and crunchy nuts, all coming together in a delightful, no-bake confection that promises to satisfy every sweet craving. This isn’t just a dessert; it’s a moment of pure, unadulterated joy, incredibly simple to prepare yet profoundly satisfying to taste.
This delightful dessert boasts a charming history, with its origins often traced back to 19th-century Australia. It’s said that resourceful confectioners created Rocky Road as a clever way to utilize unsold chocolates and other sweets, mixing them with local ingredients like nuts and marshmallows, and selling them to travellers. This practical ingenuity blossomed into a global favorite, proving that some of the best culinary creations come from unexpected places and humble beginnings.
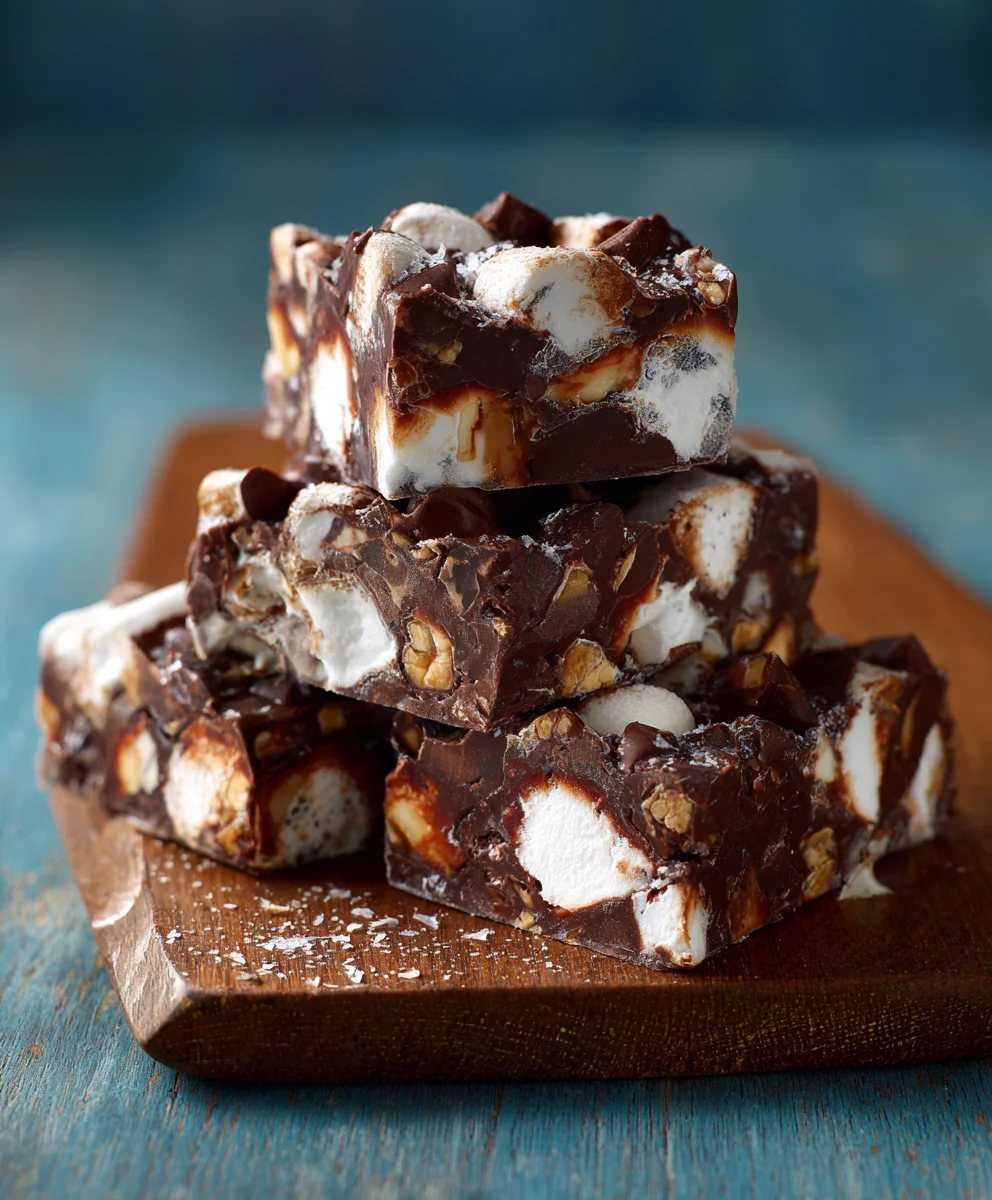
I find that people absolutely adore Rocky Road Candy for its incredible blend of textures and flavors. The contrast between the silky smooth chocolate, the soft, chewy marshmallows, and the satisfying crunch of nuts makes every bite an adventure. It’s remarkably convenient to make, requiring no oven, which makes it a perfect last-minute dessert or a fun, interactive activity with children. Whether you’re making it for a special occasion, a casual treat, or a thoughtful homemade gift, this recipe for Rocky Road Candy is sure to become a treasured favorite. Its irresistible charm and straightforward preparation solidify its place as a go-to dessert for anyone craving pure, delightful indulgence.

Ingredients:
- 1 pound (approximately 450g) Semi-Sweet Chocolate Chips or finely chopped Baking Chocolate: I personally find that a good quality chocolate makes all the difference in the final taste and texture of your Rocky Road Candy.
- 1 bag (approximately 10.5 ounces or 300g) Mini Marshmallows: These are essential for that classic soft, chewy texture. I usually opt for the mini size because they distribute more evenly throughout the candy.
- 1 cup (about 120g) Roasted Peanuts or other preferred nuts: Walnuts, pecans, or almonds are also fantastic choices. I like to lightly toast them myself for an extra layer of flavor, but pre-roasted works wonderfully too.
- 1/2 cup (about 113g) Unsalted Butter: This helps create a smooth, rich chocolate base that’s easy to work with and adds a lovely creaminess to your Rocky Road Candy.
- 1 teaspoon Pure Vanilla Extract: A touch of vanilla really enhances the chocolate flavor and adds a warm aroma.
- Pinch of Sea Salt (optional, but highly recommended): Just a tiny bit of salt can beautifully balance the sweetness and deepen the chocolate notes.
Equipment You’ll Need:
Having the right tools ready makes the process so much smoother!
- 9×13 inch baking pan: This size is perfect for creating a good thickness of Rocky Road Candy.
- Parchment paper or foil: Essential for easy removal of your finished candy.
- Large microwave-safe bowl or a double boiler setup: For melting the chocolate. I often use a large glass bowl for microwave melting, but a double boiler is fantastic for more precise control.
- Heat-proof spatula or wooden spoon: For stirring the chocolate and folding in your mix-ins.
- Measuring cups and spoons: For accurate ingredient quantities.
- Sharp knife: For cutting the chilled candy into beautiful squares.
Prepping Your Workspace:
- Prepare your baking pan: First things first, I always grab my 9×13 inch baking pan. I like to line it generously with parchment paper or aluminum foil, making sure to leave an overhang on the sides. This little trick is a lifesaver when it comes to lifting the cooled Rocky Road Candy out of the pan with ease. Trust me, you’ll thank yourself later when cleanup is a breeze! If you’re using foil, a light spray of non-stick cooking spray can help prevent sticking, though it’s often not strictly necessary with parchment.
- Gather and measure your ingredients: Before I even think about melting chocolate, I make sure all my ingredients are measured out and ready to go. This practice, often called “mise en place,” saves so much time and prevents any last-minute scrambling. I get my marshmallows, nuts, butter, and vanilla extract all within arm’s reach. For the nuts, if I’m using unroasted ones, I’ll quickly toast them in a dry pan over medium heat for about 5-7 minutes, stirring frequently, until they’re fragrant and slightly golden. This really amplifies their flavor in the final Rocky Road Candy.
Melting the Chocolate Base: The Heart of Your Rocky Road Candy
This step is crucial for achieving that smooth, glossy finish that makes homemade Rocky Road Candy so irresistible. You have a couple of excellent options for melting your chocolate and butter:
- Using a double boiler (my preferred method for ultimate control):
- I start by filling a medium saucepan with about an inch or two of water.
- Then, I place a heat-proof bowl (a glass or stainless steel bowl works best) over the saucepan, making sure the bottom of the bowl doesn’t touch the water. It’s the steam, not direct heat, that melts the chocolate here, providing a gentle and even melt.
- I add the chocolate chips (or finely chopped chocolate) and the unsalted butter to the bowl.
- I set the saucepan over medium-low heat and bring the water to a gentle simmer. As the steam warms the bowl, the chocolate and butter will slowly start to melt.
- I use a heat-proof spatula or wooden spoon to stir constantly, ensuring everything melts smoothly and evenly. This constant stirring is key to preventing any scorching and achieving a luxurious texture for your Rocky Road Candy.
- Once the mixture is about 80% melted, I remove the bowl from the heat. The residual heat will continue to melt the remaining chocolate as I keep stirring. This prevents overheating, which can cause the chocolate to become grainy or seize. I continue stirring until the mixture is completely smooth and wonderfully glossy.
- Using the microwave (a quicker option):
- If I’m in a bit of a hurry, the microwave is a perfectly fine alternative. I place the chocolate chips and unsalted butter into a large, microwave-safe bowl.
- I microwave on high power for 30-second intervals, stirring thoroughly after each interval. This is vital! Chocolate can burn very quickly in the microwave if not stirred frequently.
- Even when it looks like not much has happened, a good stir will reveal how much melting has occurred. I continue this process until the mixture is smooth and completely melted, typically taking about 1.5 to 3 minutes total, depending on your microwave’s wattage and the amount of chocolate. It’s important to not overcook it; a little unmelted chocolate that melts with residual heat is better than burnt chocolate.
- Incorporate the flavorings: Once the chocolate and butter mixture is beautifully smooth and melted using either method, I stir in the vanilla extract and that small pinch of sea salt. The vanilla adds an aromatic depth, and the salt really enhances the overall flavor profile of your Rocky Road Candy. I stir until these are fully incorporated.
- Cool slightly: It’s important that the chocolate mixture isn’t piping hot when you add your marshmallows, especially if you want them to retain their shape. I let the chocolate cool for about 5-10 minutes, stirring occasionally, until it’s warm but not excessively hot to the touch. This slight cooling helps prevent the marshmallows from completely melting into the chocolate, ensuring those distinct, pillowy pockets in your finished Rocky Road Candy.
Combining the Mix-ins: Creating Your Signature Rocky Road Candy
This is where your Rocky Road Candy truly comes to life! The combination of textures is what makes this treat so beloved.
- Add the marshmallows and nuts: Once your chocolate mixture has cooled slightly, I gently pour the mini marshmallows and the roasted peanuts (or your chosen nuts) into the bowl with the melted chocolate. At this stage, I try to work relatively quickly but also very carefully.
- Fold gently: Using my heat-proof spatula, I very gently fold the marshmallows and nuts into the chocolate mixture. The key here is to be gentle. I want to coat everything evenly without crushing the delicate marshmallows. If I’m too rough, the marshmallows will break apart and disappear into the chocolate, losing that lovely soft texture. I aim for an even distribution, ensuring every bite of your Rocky Road Candy has a good mix of flavors and textures. It’s a bit like a treasure hunt, making sure all those sweet and crunchy gems are spread throughout the rich chocolate.
- Work efficiently: While being gentle, I also work efficiently. The chocolate will start to set as it cools, so I want to get everything mixed and into the prepared pan before it becomes too thick to manage. The goal is a uniform mixture where marshmallows and nuts are well-coated and distinct.
- Consider additional mix-ins (optional): This is a great point to get creative! If you’re adding other elements like dried fruits (e.g., cranberries, raisins, chopped dried apricots), crushed cookies, or pretzel pieces for a salty crunch, I would add them now along with the marshmallows and nuts. Just remember to fold them in gently to maintain their integrity within the delicious chocolate matrix of your Rocky Road Candy.
Setting the Rocky Road Candy: The Waiting Game
Patience is a virtue, especially when it comes to allowing your delicious Rocky Road Candy to properly set. This step is crucial for achieving that firm, sliceable consistency.
- Transfer to the prepared pan: Once all your marshmallows and nuts are beautifully incorporated into the chocolate, I carefully spoon or pour the entire mixture into the parchment-lined 9×13 inch baking pan.
- Even out the surface: Using the back of my spatula or a spoon, I gently spread the mixture evenly across the pan. I try to make sure the surface is as flat and uniform as possible. This ensures that each piece of your finished Rocky Road Candy will have a consistent thickness and an appealing appearance. Don’t press too hard, just enough to level it out.
- Chill for setting: This is the most important part of the setting process. I place the pan into the refrigerator. It needs a good amount of time to firm up completely. I usually recommend a minimum of 2-3 hours. However, for the best results and the cleanest cuts, I often let it chill for at least 4 hours, or even better, overnight. Allowing ample chilling time is essential for a firm, non-sticky Rocky Road Candy that holds its shape beautifully. If you try to cut it too soon, it will be soft, sticky, and difficult to manage.
- Resist the urge to peek (too often): While it’s tempting to check on its progress, try to let it chill undisturbed. The cold air in the refrigerator works its magic, solidifying the chocolate and binding all those wonderful mix-ins together. This careful setting process ensures that when you finally slice into your creation, you’ll be met with perfect, ready-to-enjoy pieces of homemade Rocky Road Candy.
Cutting and Storing Your Rocky Road Candy: The Final Touches
After all that waiting, it’s finally time to enjoy the fruits of your labor! Getting clean cuts and storing your Rocky Road Candy properly will ensure it stays delicious.
- Remove from the pan: Once your Rocky Road Candy is completely firm and chilled through, I carefully lift it out of the baking pan using the parchment paper or foil overhangs. This is why that lining step is so important! I then transfer the entire slab onto a clean cutting board.
- Prepare for cutting: For the cleanest cuts, I find it helpful to use a large, sharp knife. You can even run your knife under hot water and wipe it dry between cuts for exceptionally smooth edges, especially if the chocolate is very firm.
- Cut into desired pieces: I typically start by trimming off any uneven edges to create a perfectly rectangular slab. Then, I cut the candy into squares or rectangles of your desired size. I usually aim for about 1.5 to 2-inch pieces, as Rocky Road Candy is quite rich and satisfying in smaller portions. Feel free to cut them into any shape you prefer!
- Serving suggestion: I often arrange the cut pieces on a platter for immediate serving. They look so inviting!
- Storing your Rocky Road Candy:
- At room temperature (short term): If you plan to enjoy your Rocky Road Candy within a day or two and your kitchen isn’t too warm, you can store it in an airtight container at cool room temperature. However, for best texture and to prevent softening, especially if it’s warm, I usually prefer refrigeration.
- In the refrigerator (recommended): For longer storage and to maintain its firm, chewy texture, I store my Rocky Road Candy in an airtight container in the refrigerator. This will keep it fresh and delicious for up to 2 weeks. If you’re layering pieces, you might want to place a piece of parchment paper between the layers to prevent them from sticking together.
- Freezing (for extended storage): Yes, you can freeze Rocky Road Candy! I place the cut pieces in a single layer on a baking sheet and freeze them until solid. Once frozen, I transfer them to a freezer-safe bag or airtight container, separated by parchment paper if layering. It can be stored in the freezer for up to 3 months. When you’re ready to enjoy, simply let it thaw at room temperature for about 15-30 minutes, or enjoy it straight from the freezer for a super chewy treat!
- Preventing sticking: If you find your pieces are sticking together in storage, a light dusting of powdered sugar over the cut surfaces or separating layers with parchment paper can help immensely.
Tips for Perfect Rocky Road Candy:
Achieving truly outstanding Rocky Road Candy isn’t just about following the steps; it’s also about understanding the nuances of the ingredients and process. Here are some of my go-to tips:
- Quality of Chocolate Matters Immensely: I cannot stress this enough – the type and quality of chocolate you use will directly impact the flavor and texture of your Rocky Road Candy. While chocolate chips work, investing in good quality baking chocolate (like a good semi-sweet bar, finely chopped) will yield a much richer, smoother, and more luxurious taste. It melts more uniformly and has a better mouthfeel. Avoid using waxy or overly sweet compound chocolates if you want a truly gourmet result.
- Mind the Heat when Melting: This is probably the most critical step. Chocolate is delicate. Whether you’re using a double boiler or a microwave, always use low heat and go slowly. Overheating chocolate can cause it to seize (become grainy and thick) or burn, rendering it unusable. If using a double boiler, ensure the water isn’t boiling vigorously and that the bowl doesn’t touch the water. If microwaving, stick to short bursts (30 seconds) and stir, stir, stir! The goal is a silky, pourable consistency.
- Don’t Rush the Cooling: After melting the chocolate, allowing it to cool slightly before adding the marshmallows is a game-changer. If the chocolate is too hot, your beautiful mini marshmallows will melt into a sticky, gooey mess, losing their distinct shape and chewiness. A few minutes of cooling (5-10 minutes) with occasional stirring will bring the chocolate to the perfect temperature – warm enough to coat, but cool enough to preserve the marshmallows.
- Gentle Folding is Key: When incorporating the marshmallows and nuts, remember to be gentle. Over-mixing or aggressive stirring can break apart the marshmallows, leaving you with a less desirable texture. You want those pockets of soft, pillowy marshmallow scattered throughout your Rocky Road Candy.
- Achieve Even Distribution: While gentle, make sure you fold enough to evenly distribute the marshmallows and nuts throughout the chocolate. Every bite should offer a delightful combination of textures.
- The Role of Salt: Don’t skip that pinch of sea salt! It’s a small addition that makes a huge difference. The salt doesn’t make your Rocky Road Candy salty; instead, it acts as a flavor enhancer, cutting through the sweetness and deepening the rich, complex notes of the chocolate.
- Patience During Chilling: This is a hard one, but resist the urge to cut your Rocky Road Candy before it’s fully set. Rushing this step will result in a sticky, messy, and difficult-to-cut product. A minimum of 2-3 hours in the refrigerator is good, but 4 hours or overnight is truly ideal for a firm, non-sticky slab that cuts cleanly.
- Experiment with Toasted Nuts: If your recipe calls for nuts, I highly recommend toasting them yourself, even if they’re pre-roasted. A quick toast in a dry pan or a low oven brings out their oils and intensifies their flavor, adding another layer of deliciousness to your Rocky Road Candy.
- Clean Cuts: For professional-looking pieces, use a sharp, warm knife. Running your knife under hot water and wiping it dry before each cut can make a significant difference in achieving smooth, clean edges.
Customizing Your Rocky Road Candy: Unleash Your Creativity!
One of the absolute best things about Rocky Road Candy is how incredibly adaptable it is. While the classic combination of chocolate, marshmallows, and nuts is divine, there’s a whole world of possibilities for customizing it to your personal taste or for different occasions. This is where I really love to play and experiment!
- Varying the Chocolate:
- Milk Chocolate: For a sweeter, creamier Rocky Road Candy, you can use all milk chocolate or a 50/50 blend of milk and semi-sweet.
- Dark Chocolate: If you prefer a less sweet, more intense chocolate flavor, opt for a darker chocolate (60-70% cacao). This creates a more sophisticated and less overtly sweet treat.
- White Chocolate: While less traditional, a white chocolate base can be incredibly delicious, especially when paired with tart dried cranberries and pistachios.
- Different Nuts:
- Almonds: Sliced, slivered, or whole blanched almonds add a delicate crunch.
- Pecans: Offer a buttery, rich flavor.
- Walnuts: Provide a slightly more robust, earthy note.
- Cashews: Have a softer crunch and creamy texture.
- Hazelnuts: Especially delicious when toasted and paired with dark chocolate.
- Salted Peanuts/Pretzels: For a delightful salty-sweet contrast, try using salted peanuts or even crushed pretzels.
- Dried Fruits: Adding dried fruits brings a wonderful chewiness and a burst of fruity flavor that complements the chocolate beautifully.
- Cranberries: Offer a tartness that cuts through the sweetness.
- Cherries: Dried tart cherries are fantastic with dark chocolate.
- Raisins/Golden Raisins: A classic addition for sweetness and chewiness.
- Apricots: Chopped dried apricots add a lovely golden color and tangy sweetness.
- Crystallized Ginger: For a spicy, aromatic kick, finely chop some crystallized ginger.
- Cookies and Biscuits: Introduce another layer of crunch and flavor.
- Crushed Graham Crackers: Evokes a s’mores vibe.
- Crushed Digestive Biscuits: A popular choice in many rocky road variations.
- Crushed Oreos: For a cookies-and-cream twist.
- Crushed Shortbread: Adds a buttery richness.
- Candy and Sweets:
- Toffee Bits: Adds a buttery, caramel crunch.
- Caramel Chunks: For gooey pockets of caramel.
- Mini Peanut Butter Cups: A dream for peanut butter lovers.
- M&M’s or other chocolate candies: Adds color and a different type of crunch.
- Gummy Bears or other soft candies: For a playful, chewy element.
- Flavor Extracts and Spices: Beyond vanilla, consider these additions to infuse different aromas.
- Peppermint Extract: For a festive, minty rocky road, especially around holidays.
- Almond Extract: Enhances nut flavors beautifully.
- Orange Zest or Extract: Chocolate and orange is a classic pairing.
- Chili Powder/Cayenne Pepper: A tiny pinch adds a subtle, intriguing warmth to dark chocolate Rocky Road Candy.
- Cinnamon: Great for a warmer, spiced flavor.
- Coconut: Toasted shredded coconut adds a tropical note and lovely texture.
- Marshmallow Swirls: Instead of just mini marshmallows, try adding a few larger marshmallows or even marshmallow fluff and gently swirl it into the chocolate mixture right before chilling for a dramatic effect.
When customizing, I usually aim for a total of 2-3 cups of mix-ins (marshmallows + other ingredients) to ensure the Rocky Road Candy is dense with goodies but still holds together well. Don’t be afraid to mix and match different elements to find your ultimate flavor combination! Your homemade Rocky Road Candy can be as unique as you are.
Troubleshooting Common Rocky Road Candy Issues:
Even seasoned bakers sometimes run into little snags. Don’t worry if something doesn’t go exactly as planned; many common Rocky Road Candy issues have simple solutions or preventative measures. Here’s how I typically troubleshoot:
- My Chocolate Seized and Became Grainy/Thick!
This is probably the most common and frustrating issue when melting chocolate. Seizing happens when even a tiny amount of water or steam gets into the chocolate, or if it’s overheated.
- Prevention: Always ensure your melting bowl and utensils are completely dry. If using a double boiler, make sure the water in the saucepan isn’t boiling so vigorously that steam splashes into the chocolate, and ensure the bowl doesn’t touch the water. Use low heat and melt slowly, stirring constantly.
- Fix (sometimes): If your chocolate has just slightly seized, you might be able to rescue it by stirring in a tablespoon or two of very hot, but not boiling, heavy cream, milk, or even a neutral oil (like vegetable or canola oil). Stir vigorously until it smooths out. However, if it’s very grainy and solid, it’s often best to start over. It’s a bitter pill, but better than a gritty Rocky Road Candy.
- My Marshmallows Melted Completely into the Chocolate!
This usually happens because the chocolate mixture was too hot when the marshmallows were added.
- Prevention: After melting your chocolate and butter, let the mixture cool for 5-10 minutes, stirring occasionally, before adding the marshmallows. It should still be warm and pourable, but not piping hot. This slight cooling period is essential for the marshmallows to retain their distinct shape and chewiness in your Rocky Road Candy.
- Fix: Unfortunately, if they’ve completely melted, there’s no way to un-melt them. Your candy will still taste good, but it will lack those classic marshmallow pockets. For your next batch, remember that cooling step!
- My Rocky Road Candy Isn’t Setting Properly / It’s Too Sticky!
This almost always points to insufficient chilling time or, less commonly, an issue with the ratio of ingredients (e.g., too much butter for the amount of chocolate, though this recipe is tested).
- Prevention: Ensure you chill the Rocky Road Candy for the recommended time – at least 2-3 hours, but ideally 4 hours or even overnight. Patience is key!
- Fix: Simply put it back in the refrigerator! Give it more time. Sometimes, if your refrigerator isn’t very cold or your kitchen is warm, it might just need an extra hour or two to firm up completely. If it remains very soft even after extended chilling, it might be due to an ingredient ratio issue, but usually, more chill time solves it.
- My Candy is Hard to Cut / It Cracks When I Cut It!
This can happen if the candy is too cold (straight from the freezer, for instance) or if your knife isn’t sharp enough.
- Prevention: Use a very sharp, large knife. For really clean cuts, run your knife under hot water, wipe it dry, and then make your cut. Repeat this process for each cut. If the candy is extremely hard (e.g., just pulled from the freezer), let it sit at room temperature for 5-10 minutes to take the extreme chill off before attempting to cut.
- Fix: If it cracks, it’s mostly cosmetic. The pieces are still perfectly edible. Next time, try the warm knife trick and ensure it’s not overly chilled.
- My Nuts (or other mix-ins) Sunk to the Bottom!
This usually occurs if the chocolate mixture was too thin/warm when the mix-ins were added, or if they were particularly heavy.
- Prevention: Make sure the chocolate has cooled slightly (as mentioned above for marshmallows). A slightly thicker, cooler chocolate will suspend the mix-ins better. Also, ensure you’re gently but thoroughly folding the mix-ins throughout the chocolate.
- Fix: If it’s already in the pan, there’s not much to do but enjoy the denser bottom layer! For future batches of Rocky Road Candy, a slightly cooler chocolate base and careful mixing will help keep everything evenly distributed.
Remember, cooking and baking are all about learning and refining. Each attempt brings you closer to perfection! Even with little hiccups, homemade Rocky Road Candy is always a delightful treat.
Conclusion:
And there you have it, my friends! We’ve journeyed through what I truly believe is one of the most delightful and effortlessly impressive treats you can whip up in your own kitchen. This isn’t just another recipe; it’s an invitation to experience pure joy, both in the making and, most certainly, in the eating. I can say with absolute confidence that once you try this particular method, it will quickly become your go-to whenever you need a quick, satisfying, and utterly delicious dessert that truly leaves an impression. It’s that perfect blend of creamy, chewy, and crunchy that hits all the right notes, making it an undeniable crowd-pleaser for any occasion, or even just for a quiet evening treat for yourself. The simplicity of the ingredients belies the incredible depth of flavor and texture that comes together in every single bite.
Why This Recipe Will Be Your New Favorite Indulgence:
What sets this recipe apart, in my opinion, is its magnificent blend of convenience and gourmet appeal. You’re not spending hours slaving over a hot stove or wrestling with complex techniques. Instead, you’re performing a few simple steps that culminate in a treat that tastes like it came straight from a high-end confectionery. The rich, velvety chocolate base, combined with the soft, pillowy marshmallows and the satisfying crunch of your chosen nuts, creates an unparalleled textural symphony. It’s a nostalgic nod to classic comfort, elevated with quality ingredients and a straightforward process that guarantees success every time. Trust me, the sheer delight of seeing these perfectly formed squares, glistening and ready to be devoured, is incredibly rewarding, and the ease with which you achieve such a decadent result is truly remarkable.
Unleash Your Creativity: Serving Suggestions & Variations:
One of the aspects I adore most about this recipe is its incredible versatility. While it’s absolutely perfect enjoyed on its own, sliced into generous squares and presented beautifully on a platter, there are so many ways to customize and serve your delightful creation. Imagine serving it slightly warmed alongside a scoop of vanilla bean ice cream, allowing the chocolate to soften just enough to create a heavenly drizzle. Or, for a truly decadent dessert experience, crumble a piece over a bowl of warm chocolate pudding, adding an irresistible textural contrast. It also makes for an exquisite homemade gift, beautifully wrapped in cellophane and tied with a ribbon, showing someone you care with a handmade touch.
But let’s talk about variations – this is where your culinary imagination can really take flight! While the classic combination is timeless, feel free to experiment with your favorite additions to make it uniquely yours. Consider swapping out the nuts for toasted pecans, cashews, or even macadamia nuts for a different crunch. For a delightful salty-sweet contrast, try adding crushed pretzels to the mixture. If you’re a fan of dried fruit, dried cranberries, cherries, or even chopped apricots can introduce a lovely tang and chewiness. For an extra layer of decadence, a swirl of caramel or peanut butter through the melting chocolate before adding the marshmallows can transform the entire flavor profile. During the festive season, a dash of peppermint extract or a sprinkle of crushed candy canes can turn this into a holiday sensation. You could also experiment with different types of chocolate – a blend of dark and milk chocolate, or even white chocolate for a lighter, sweeter base. The possibilities for personalizing this amazing
Rocky Road Candy
are genuinely endless, and each iteration is an exciting new adventure in taste.
Join Our Sweet Community! Your Turn to Create and Share:
Now that I’ve shared all my tips and tricks for creating this truly irresistible treat, it’s your turn to step into the kitchen and experience the magic for yourself. I genuinely hope you’ll give this recipe a try; I promise it will bring a smile to your face and to the faces of everyone you share it with. Don’t be afraid to experiment with your favorite add-ins and make it entirely your own – that’s part of the fun of homemade cooking! I am absolutely thrilled at the thought of you creating your own batch of this delightful dessert. Once you’ve made it, I would absolutely love to hear about your experience. Did you add any unique ingredients? Who did you share it with? Was it as easy as I promised? Your feedback and creative twists are what make our cooking community so vibrant and inspiring. So, go ahead, gather your ingredients, enjoy the simple process, and get ready to enjoy a truly spectacular treat. Happy cooking, and I can’t wait to hear all about your delicious creations!
Best Rocky Road Candy: Quick & Delicious No-Bake Dessert
A delightful no-bake dessert featuring rich chocolate, fluffy marshmallows, and crunchy nuts. Incredibly simple to prepare, profoundly satisfying to taste, and a perfect treat for any occasion.
Ingredients
-
1 lb (450g) Semi-Sweet Chocolate Chips
-
1 bag (10.5 oz / 300g) Mini Marshmallows
-
1 cup (120g) Roasted Peanuts
-
1/2 cup (113g) Unsalted Butter
-
1 tsp Vanilla Extract
-
Pinch of Sea Salt
Instructions
-
Step 1
Line a 9×13 inch baking pan with parchment paper or foil, leaving an overhang. Gather and measure all ingredients. (Optional: lightly toast unroasted nuts for 5-7 minutes.) -
Step 2
Using a double boiler or microwave (30-second intervals), melt chocolate chips and unsalted butter until smooth. Stir in vanilla extract and a pinch of sea salt. Let the mixture cool for 5-10 minutes, stirring occasionally. -
Step 3
Gently fold mini marshmallows and roasted peanuts into the slightly cooled chocolate mixture until evenly distributed. (Optional: add other mix-ins like dried fruits, crushed cookies, or candies.) -
Step 4
Transfer the mixture to the prepared pan and gently spread evenly. Refrigerate for a minimum of 2-3 hours, or ideally 4 hours to overnight, until completely firm. -
Step 5
Lift the firm candy from the pan and place on a cutting board. Use a sharp, warm knife to cut into 1.5-2 inch squares. Store in an airtight container in the refrigerator for up to 2 weeks, or freeze for up to 3 months.
Important Information
Nutrition Facts (Per Serving)
It is important to consider this information as approximate and not to use it as definitive health advice.
Allergy Information
Please check ingredients for potential allergens and consult a health professional if in doubt.


Leave a Comment