
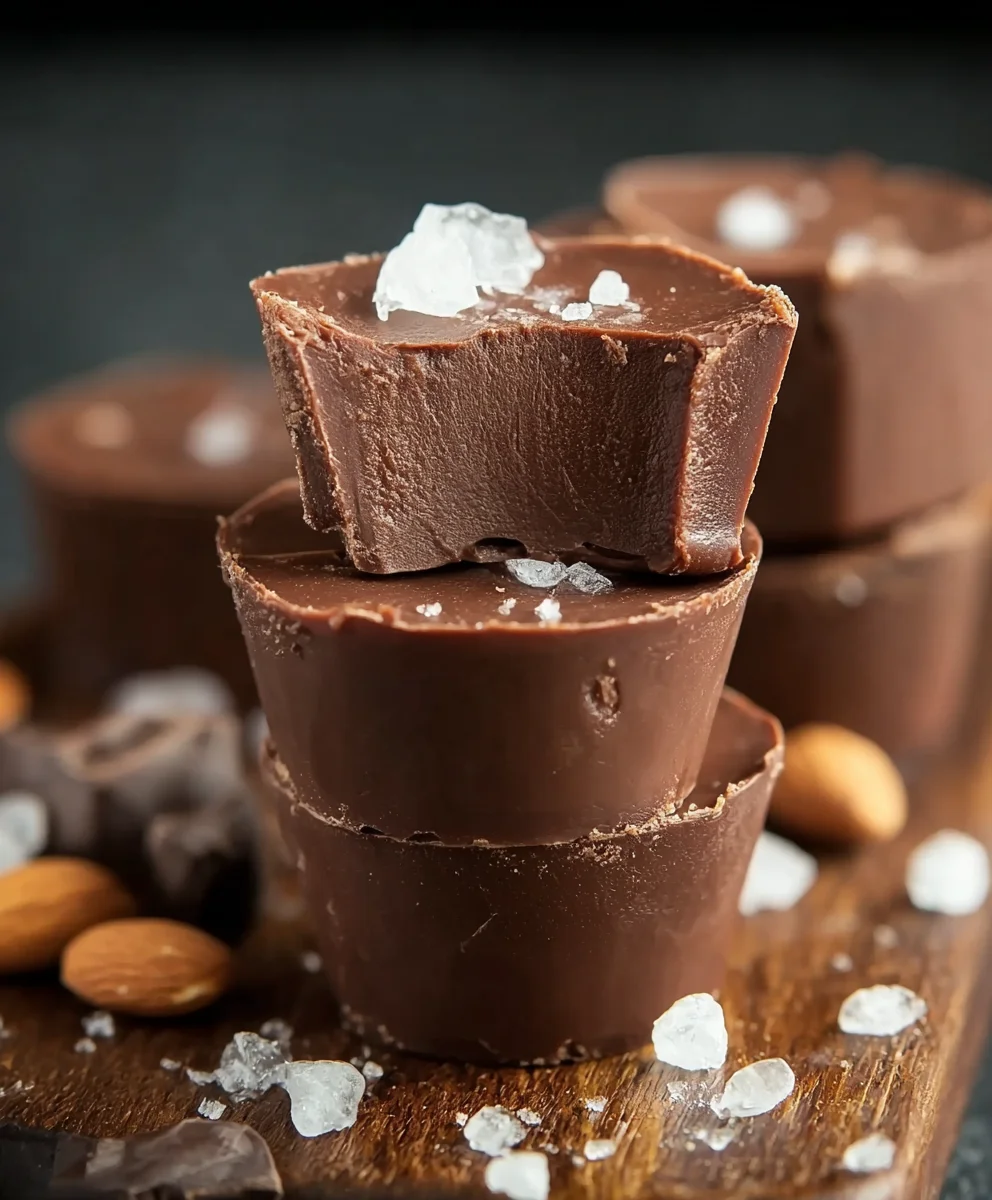
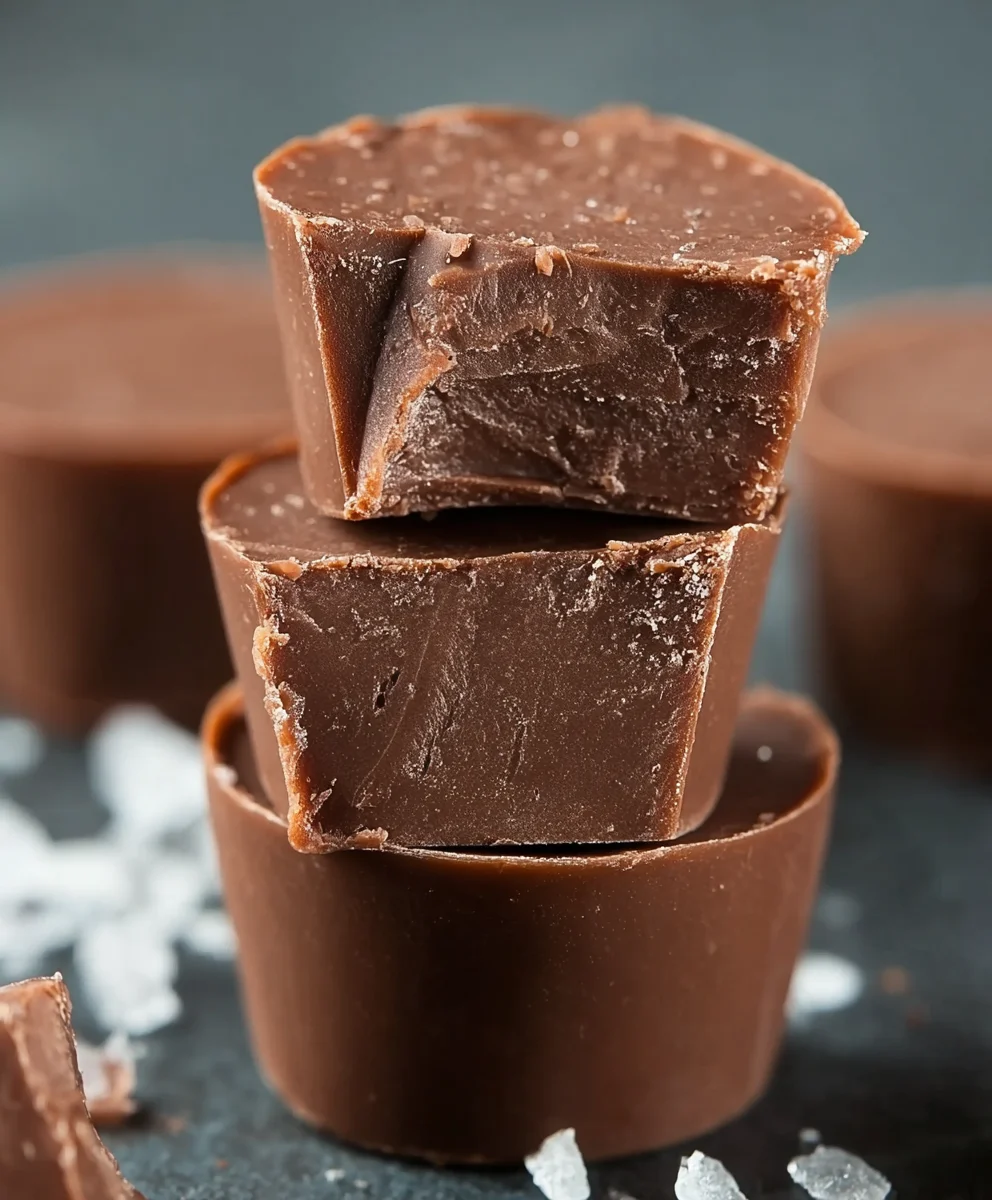
Sugar Free Fudge might sound like a contradiction to some, an impossible dream for those with a sweet tooth looking to cut down on sugar. But I am thrilled to share that it is not only possible but utterly delightful! Imagine sinking your teeth into a piece of rich, velvety smooth chocolate that melts in your mouth, delivering all the comforting indulgence you crave, yet without the added sugar. This isn’t just a compromise; it’s a revelation.
Fudge, a confection with a fascinating history, is often said to have originated from a “fudged” batch of caramels back in the late 19th century. Since then, it has evolved into a beloved treat, cherished for its dense, creamy texture and intense flavor. However, for many, the traditional sugar content makes it an occasional, perhaps guilt-ridden, pleasure. That’s precisely why this modern take on a classic is so revolutionary. People absolutely adore this dish because it brilliantly captures the essence of traditional fudge—its deep chocolate notes, its incredibly smooth mouthfeel, and its comforting richness—while offering a healthier alternative. It’s the perfect solution for managing dietary needs, satisfying cravings, or simply making a mindful choice without sacrificing an ounce of flavor or joy. Get ready to experience the pure, unadulterated pleasure of truly delicious Sugar Free Fudge that you’ll want to make again and again.

Ingredients:
- 1 cup (226g) Unsalted Butter: I always reach for good quality butter, as it forms the rich, creamy foundation of our Sugar Free Fudge. It helps create that melt-in-your-mouth texture we all crave. You can use salted butter if that’s all you have, but I’d recommend reducing any added salt slightly.
- 1 cup (240ml) Heavy Cream (or Full-Fat Coconut Cream for Dairy-Free): This is essential for the decadent creaminess. Full-fat heavy cream provides the necessary fat content and body. If you’re going dairy-free, a can of full-fat coconut cream (the thick, solid part from the top, not the liquid) works beautifully and lends a subtle, delightful flavor that complements our Sugar Free Fudge wonderfully.
- 1/2 cup (120ml) Water: Just plain water, acting as a medium to dissolve our sweetener and help create the initial syrup base for the fudge. It evaporates during cooking, leaving behind the concentrated sweetness and flavor.
- 1 1/2 cups Granulated Erythritol (or your preferred bulk sugar substitute like Allulose, Xylitol – use caution with pets for Xylitol): This is our star sweetener for making this truly Sugar Free Fudge! Erythritol provides sweetness without the sugar and has a very minimal impact on blood glucose. Allulose is another fantastic option as it caramelizes beautifully. Xylitol also works, but remember it’s highly toxic to dogs, so store your fudge safely! Adjust to your personal sweetness preference; I find 1 1/2 cups to be just right.
- 1/2 teaspoon Fine Sea Salt: A little bit of salt is crucial for balancing the sweetness and enhancing all the other flavors. It prevents the fudge from tasting flat and really makes the chocolate shine. Don’t skip this, it’s a game changer for any good Sugar Free Fudge.
- 1 teaspoon Pure Vanilla Extract: Use good quality vanilla! This adds a beautiful aromatic depth and warmth to our Sugar Free Fudge, making it taste incredibly gourmet. Mexican vanilla is a personal favorite for its rich flavor profile.
- 1 cup (170g) Unsweetened Cocoa Powder: For that rich, intense chocolate flavor! I prefer Dutch-processed cocoa powder because it’s less acidic, which results in a darker, mellower, and smoother chocolate flavor. It also mixes into liquids more easily, contributing to a wonderfully silky Sugar Free Fudge. Make sure it’s unsweetened, as we’re controlling the sweetness with our sugar substitute.
- Optional: 1/2 cup Chopped Nuts (Pecans, Walnuts, Almonds), Sugar-Free Chocolate Chips, or Coconut Flakes: These are fantastic for adding texture and extra flavor. I love the crunch of pecans in my Sugar Free Fudge, but you can get creative here! Just make sure any additions are also sugar-free to maintain the integrity of our recipe.
- Optional: 1/4 teaspoon Xantham Gum (for extra stability and creaminess): This is a secret ingredient I sometimes use, especially when working with sugar substitutes, as they can sometimes make fudge a bit softer than traditional recipes. A tiny pinch helps with emulsification and gives a slightly chewier, more stable texture to your Sugar Free Fudge without affecting the flavor.
Gathering Your Tools and Initial Preparation
- Prepare Your Baking Pan: First things first, let’s get our pan ready. I typically use an 8×8 inch square baking pan for this Sugar Free Fudge, but a 9×5 inch loaf pan will also work if you prefer thicker pieces. Line your chosen pan with parchment paper, leaving an overhang on two opposite sides. This “sling” will make it incredibly easy to lift the set fudge out of the pan later. For extra assurance and to prevent any sticking, you can lightly grease the parchment paper with a little butter or a non-stick cooking spray, though usually the parchment alone is sufficient for our Sugar Free Fudge.
- Assemble Your Equipment: Gather all your necessary kitchen tools before you begin. You’ll need a large, heavy-bottomed saucepan or pot (at least 3-4 quart capacity) to prevent scorching and accommodate the mixture as it cooks. A candy thermometer is absolutely crucial for achieving the correct consistency for your Sugar Free Fudge; don’t try to eyeball it, as precise temperature control is key with sugar substitutes. You’ll also need a sturdy whisk, a heat-resistant spatula, measuring cups and spoons, and a large mixing bowl (preferably heat-proof if you plan to cool it over an ice bath, though not strictly necessary for this method). Having everything ready at hand ensures a smooth and stress-free cooking process for our delectable Sugar Free Fudge.
- Measure All Ingredients: Before you even turn on the stove, precisely measure out all of your ingredients. This is called “mise en place” and it’s a professional chef’s best friend. Weighing ingredients like butter and cocoa powder, especially, can lead to more consistent results than volume measurements. Having everything pre-measured means you won’t be scrambling for an ingredient while your fudge mixture is cooking, which can quickly lead to burning or overcooking. This careful preparation is a fundamental step towards creating perfect Sugar Free Fudge.
Crafting the Perfect Sugar Free Fudge Base
- Combine Wet Ingredients and Sweetener: In your large, heavy-bottomed saucepan, combine the unsalted butter, heavy cream, water, and granulated erythritol (or your chosen bulk sugar substitute). Add the fine sea salt at this stage as well. I love seeing these ingredients come together, knowing they’re forming the delicious foundation for our Sugar Free Fudge. Give them a good stir with your heat-resistant spatula to ensure everything is well mixed before heating.
- Begin Heating the Mixture: Place the saucepan over medium-low heat. This slow and steady approach is vital to prevent the sugar substitute from crystallizing, which can result in a grainy fudge. Stir the mixture constantly with your spatula, ensuring that the butter melts completely and the erythritol fully dissolves into the liquids. Keep stirring until the mixture comes to a gentle simmer, with small bubbles forming around the edges of the pot. This initial gentle heat allows all the components to meld together seamlessly for a truly smooth Sugar Free Fudge.
- Introduce Cocoa Powder and Vanilla: Once the mixture has reached a gentle simmer and all the solids (butter and erythritol) appear dissolved, it’s time to add our flavor powerhouses. Take the saucepan off the heat for a moment. Gradually whisk in the unsweetened cocoa powder, a little at a time, until it is fully incorporated and no lumps remain. This step is crucial for achieving a consistently chocolatey and smooth Sugar Free Fudge. Lumps of cocoa can make the texture unpleasant. Once the cocoa is smooth, stir in the pure vanilla extract. At this point, the aroma alone should start to get your taste buds excited!
- Bring to a Rolling Boil and Reach Temperature: Return the saucepan to medium heat. Attach your candy thermometer to the side of the pot, making sure the tip doesn’t touch the bottom. Bring the mixture to a rolling boil, stirring frequently to prevent scorching on the bottom. The goal here is to cook the mixture until it reaches a specific temperature: 235-240°F (113-116°C) for a soft-ball stage. This precise temperature is absolutely critical for the texture of our Sugar Free Fudge. Cooking it too little will result in fudge that doesn’t set properly, while cooking it too much will yield dry, crumbly fudge. Be patient, continue stirring, and watch that thermometer diligently. This stage often takes 10-15 minutes, sometimes longer, depending on your stove and pan. The mixture will thicken and darken as it cooks, indicating that moisture is evaporating and the sugars (or sugar substitutes) are concentrating.
- Remove from Heat and Prepare for Cooling: As soon as the mixture reaches the desired temperature range (235-240°F), immediately remove the saucepan from the heat. Do not stir the mixture once it has reached temperature until it has cooled sufficiently. Stirring at this hot stage can encourage crystallization, leading to grainy fudge. Carefully detach the candy thermometer and set it aside. This hot, rich chocolate base is now ready for the next crucial step in creating our perfect Sugar Free Fudge.
Whipping and Setting Your Sugar Free Fudge
- Cooling the Fudge Mixture: This is a very important step for achieving a smooth, creamy texture in your Sugar Free Fudge. Allow the mixture to cool undisturbed in the saucepan to approximately 110-120°F (43-49°C). This can take anywhere from 30 minutes to an hour, depending on your kitchen’s temperature and the type of pot you used. For a faster cooling process, you can carefully place the bottom of the saucepan into a larger bowl filled with ice water, making sure no water splashes into the fudge mixture. Resist the urge to stir during this cooling period! The goal is to let the sugar substitute crystals form very small, uniform structures as it cools, which creates that desirable smooth texture when we begin whipping.
- Whipping for Creaminess: Once the mixture has cooled to the target temperature (110-120°F), it’s time for the magic to happen! You can either use a stand mixer with the paddle attachment, or a hand mixer with beaters. Begin beating the fudge mixture on medium speed. At first, it will look glossy and perhaps a bit liquid. As you continue to beat, the mixture will gradually lose its sheen, thicken, and become opaque. It will change from a dark, shiny liquid to a lighter, duller, and much thicker consistency. This whipping process is essential; it encourages the formation of tiny crystals, which gives fudge its characteristic smooth, firm, and yet melt-in-your-mouth texture. This usually takes about 5-10 minutes, but it can vary. Keep beating until the mixture holds its shape when dropped from a spoon and starts to look almost crumbly or very stiff – a good sign that your Sugar Free Fudge is ready to set!
- Adding Optional Mix-ins: If you’re incorporating nuts, sugar-free chocolate chips, or coconut flakes, now is the time to fold them in. Once the fudge mixture has thickened significantly during whipping, stop the mixer. Gently fold in your chosen mix-ins using a sturdy spatula. Work quickly but thoroughly, ensuring they are evenly distributed throughout the thick fudge base. Be careful not to overmix at this stage, as the fudge is already quite stiff and overworking it could affect the final texture of your Sugar Free Fudge.
- Pouring into the Prepared Pan: Once the fudge has reached the desired consistency and any mix-ins are incorporated, immediately transfer the mixture into your parchment-lined pan. Because the fudge sets quite quickly after whipping, you’ll need to work with a bit of urgency. Use your spatula to spread the fudge evenly into the pan, pressing it down firmly into the corners and smoothing out the top surface as best you can. You can use the back of a spoon or a small offset spatula dipped in a little hot water to help achieve a super smooth top for your Sugar Free Fudge.
Chilling and Enjoying Your Homemade Sugar Free Fudge
- Chilling to Perfection: This is arguably the easiest but most crucial step for setting your Sugar Free Fudge. Once the fudge is pressed into the pan, transfer it to the refrigerator. Allow it to chill undisturbed for at least 2-4 hours, or preferably overnight. Chilling allows the fudge to fully firm up and develop its final dense, yet creamy texture. Resist the temptation to cut into it too early, as it needs this time to properly set. A well-chilled Sugar Free Fudge will be much easier to cut and will hold its shape beautifully.
- Cutting and Serving: After your Sugar Free Fudge has thoroughly chilled and firmed up, it’s time to unleash its deliciousness! Use the parchment paper overhangs as handles to carefully lift the entire slab of fudge out of the pan and place it on a clean cutting board. Using a large, sharp knife, cut the fudge into desired squares or rectangles. For the cleanest cuts, you can warm your knife slightly under hot water and wipe it dry between cuts. I typically go for 1-inch squares, as this Sugar Free Fudge is quite rich and satisfying. Arrange the cut pieces on a serving platter and admire your handiwork!
- Storage Tips for Longevity: Your homemade Sugar Free Fudge stores remarkably well, allowing you to enjoy it for days to come. Store the fudge in an airtight container at room temperature for up to 5-7 days. If your kitchen is particularly warm, or if you prefer a firmer fudge, you can store it in the refrigerator for up to 2-3 weeks. For longer storage, this fudge freezes beautifully! Place the pieces in an airtight freezer-safe container, separating layers with parchment paper if stacking. It will keep in the freezer for up to 2-3 months. Just let it thaw at room temperature for about 15-30 minutes before enjoying. Now you have a perfectly delicious and guilt-free Sugar Free Fudge whenever the craving strikes!
- Enjoying Your Creation: Take a moment to savor the rich, decadent flavor of your homemade Sugar Free Fudge. The effort you put into balancing the ingredients and perfecting the cooking process will be evident in every smooth, chocolatey bite. This is not just a dessert; it’s a testament to how delicious and satisfying sugar-free treats can be. Share it with friends and family, or keep it all to yourself – I won’t tell! You’ve successfully made a truly wonderful batch of Sugar Free Fudge, and I hope you’re as proud of it as I am.
Conclusion:
Well, my friends, we’ve reached the end of our journey through this incredible recipe, and I truly hope you’re as excited as I am about what you’re about to create. I genuinely believe that this isn’t just another dessert recipe; it’s a revelation. What makes this recipe a true must-try is its remarkable simplicity paired with an absolutely decadent outcome. You get all the rich, creamy, melt-in-your-mouth goodness that you crave from traditional fudge, but without the guilt of added sugars. It’s a magical transformation, turning everyday ingredients into something truly extraordinary. Imagine biting into a square of pure, unadulterated chocolate bliss, with a texture that is both firm enough to hold its shape and soft enough to dissolve delightfully on your tongue. This recipe proves that you don’t have to compromise on flavor or satisfaction when making healthier choices. It’s perfect for those watching their sugar intake, catering to specific dietary needs, or simply anyone who appreciates a truly delicious treat. The ease of preparation means you can whip up a batch whenever a craving strikes, or even when unexpected guests arrive, making you look like a culinary genius with minimal effort. It’s a testament to the fact that healthy eating can be incredibly indulgent and deeply rewarding.
Now that you’ve mastered the art of making this delightful treat, let’s talk about how to truly savor it and make it your own. For serving, I absolutely love presenting small, perfectly portioned squares of this fudge with a strong cup of black coffee or a delicate herbal tea. The slight bitterness of the coffee perfectly complements the rich sweetness of the fudge, creating a harmonious balance. It also makes for a fantastic after-dinner treat, a sophisticated alternative to heavier desserts. Packaged beautifully in a small box or cellophane bag, these also make incredibly thoughtful homemade gifts for friends, family, or colleagues – especially those who appreciate a healthier indulgence. Imagine the joy on their faces when they realize they can enjoy something so luxurious without any of the usual sugar-related concerns!
Creative Variations to Explore:
This recipe is wonderfully adaptable, allowing you to unleash your inner pastry chef and customize it to your heart’s content. Here are a few ideas to get you started:
- Nutty Heaven: For an added crunch and depth of flavor, stir in a handful of chopped toasted walnuts, pecans, or almonds just before chilling. The earthy notes of the nuts provide a delightful contrast to the smooth fudge.
- Minty Freshness: Add a few drops of food-grade peppermint extract along with the vanilla for a refreshing twist. This makes it a perfect treat for the holiday season or whenever you’re craving that classic chocolate-mint combination.
- Zesty Brightness: Grate in a bit of orange or lemon zest for a subtle, aromatic lift. Citrus and chocolate are a match made in heaven, and this small addition can transform the flavor profile beautifully.
- Spicy Kick: If you’re feeling adventurous, a tiny pinch of cayenne pepper can add a warming, sophisticated heat that elevates the chocolate flavor in an unexpected way. Start small, as a little goes a long way!
- Coconut Dream: Fold in some unsweetened shredded coconut for a tropical flair and a pleasant chewiness. You could even toast the coconut beforehand for a deeper flavor.
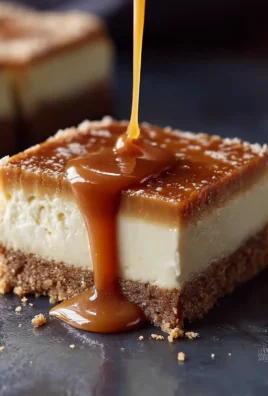
- Salted Caramel Infusion: Swirl in a spoonful of sugar-free caramel sauce (if you have a good recipe!) before chilling, and sprinkle with a touch of flaky sea salt for a sophisticated salty-sweet sensation. This is one of my personal favorites for an extra touch of gourmet elegance.
Seriously, my friends, I can’t emphasize this enough: this Sugar Free Fudge is a culinary masterpiece waiting to happen in your kitchen. It’s designed to be simple, satisfying, and utterly delicious, proving that healthy choices can be incredibly pleasurable. I truly believe that once you try this recipe, it will become a regular staple in your repertoire, a go-to for satisfying those sweet cravings without compromise. Don’t just read about it; dive in and experience the magic for yourself! Gather your ingredients, follow the steps, and prepare to be amazed by the rich, creamy texture and profound chocolate flavor that awaits you. This isn’t just about making a dessert; it’s about empowering yourself to enjoy life’s sweet moments, guilt-free.
Finally, I would absolutely love to hear about your experience! Did you stick to the original recipe, or did you venture into some of the exciting variations? What did you love most about it? Please, share your culinary adventures with me and our community. Your feedback, tips, and personal twists are incredibly valuable and inspiring. Tag me in your social media posts, leave a comment below, or even send me a picture of your finished product! Let’s celebrate the joy of delicious, healthy eating together. I’m truly excited to see what amazing Sugar Free Fudge creations you all come up with!
Best Sugar Free Fudge Ever! Simple, Healthy & Keto-Friendly
Imagine sinking your teeth into a piece of rich, velvety smooth chocolate that melts in your mouth, delivering all the comforting indulgence you crave, yet without the added sugar. This isn’t just a compromise; it’s a revelation; it’s the perfect solution for managing dietary needs, satisfying cravings, or simply making a mindful choice without sacrificing an ounce of flavor or joy.
Ingredients
-
1 cup (226g) Unsalted Butter
-
1 cup (240ml) Heavy Cream (or Full-Fat Coconut Cream for Dairy-Free)
-
1/2 cup (120ml) Water
-
1 1/2 cups Granulated Erythritol (or Allulose, Xylitol – caution with pets for Xylitol)
-
1/2 teaspoon Fine Sea Salt
-
1 teaspoon Pure Vanilla Extract
-
1 cup (170g) Unsweetened Cocoa Powder (Dutch-processed preferred)
-
Optional: 1/2 cup Chopped Nuts (Pecans, Walnuts, Almonds), Sugar-Free Chocolate Chips, or Coconut Flakes
-
Optional: 1/4 teaspoon Xantham Gum
Instructions
-
Step 1
Line an 8×8-inch (or 9×5-inch loaf) pan with parchment paper, leaving an overhang. Gather a large heavy-bottomed saucepan (3-4 quart), candy thermometer, whisk, heat-resistant spatula, and measuring tools. Precisely measure all ingredients. -
Step 2
In the saucepan, combine unsalted butter, heavy cream, water, granulated erythritol, and fine sea salt. Heat over medium-low, stirring constantly, until butter melts, erythritol fully dissolves, and the mixture reaches a gentle simmer with small bubbles. -
Step 3
Remove from heat. Gradually whisk in unsweetened cocoa powder until smooth and lump-free, then stir in pure vanilla extract. Return to medium heat. Attach candy thermometer (not touching bottom) and bring to a rolling boil, stirring frequently, until the mixture reaches 235-240°F (113-116°C) (soft-ball stage). Immediately remove from heat. Do not stir. -
Step 4
Allow the fudge mixture to cool undisturbed in the saucepan to 110-120°F (43-49°C) (approx. 30-60 minutes, or faster with an ice bath). Once cooled, beat the mixture on medium speed with a stand mixer (paddle attachment) or hand mixer until it loses its glossy sheen, thickens significantly, becomes opaque, and holds its shape (5-10 minutes). If using, stir in 1/4 tsp Xantham Gum during whipping for extra stability. -
Step 5
If desired, gently fold in chopped nuts, sugar-free chocolate chips, or coconut flakes into the thickened fudge mixture. Immediately transfer and spread the fudge evenly into the prepared pan, pressing it down firmly and smoothing the top surface. -
Step 6
Chill the fudge in the refrigerator for at least 2-4 hours, or preferably overnight, until fully firm. Use the parchment paper overhang to lift the fudge slab from the pan onto a cutting board. Cut into desired squares or rectangles using a sharp knife (warm knife for cleaner cuts). Serve and enjoy! -
Step 7
Store in an airtight container in the refrigerator for two weeks or longer. For longer storage, freeze for up to 3 months, separating layers with parchment paper. Thaw in the refrigerator overnight or at room temperature for 30 minutes before enjoying.
Important Information
Nutrition Facts (Per Serving)
It is important to consider this information as approximate and not to use it as definitive health advice.
Allergy Information
Please check ingredients for potential allergens and consult a health professional if in doubt.

Leave a Comment