
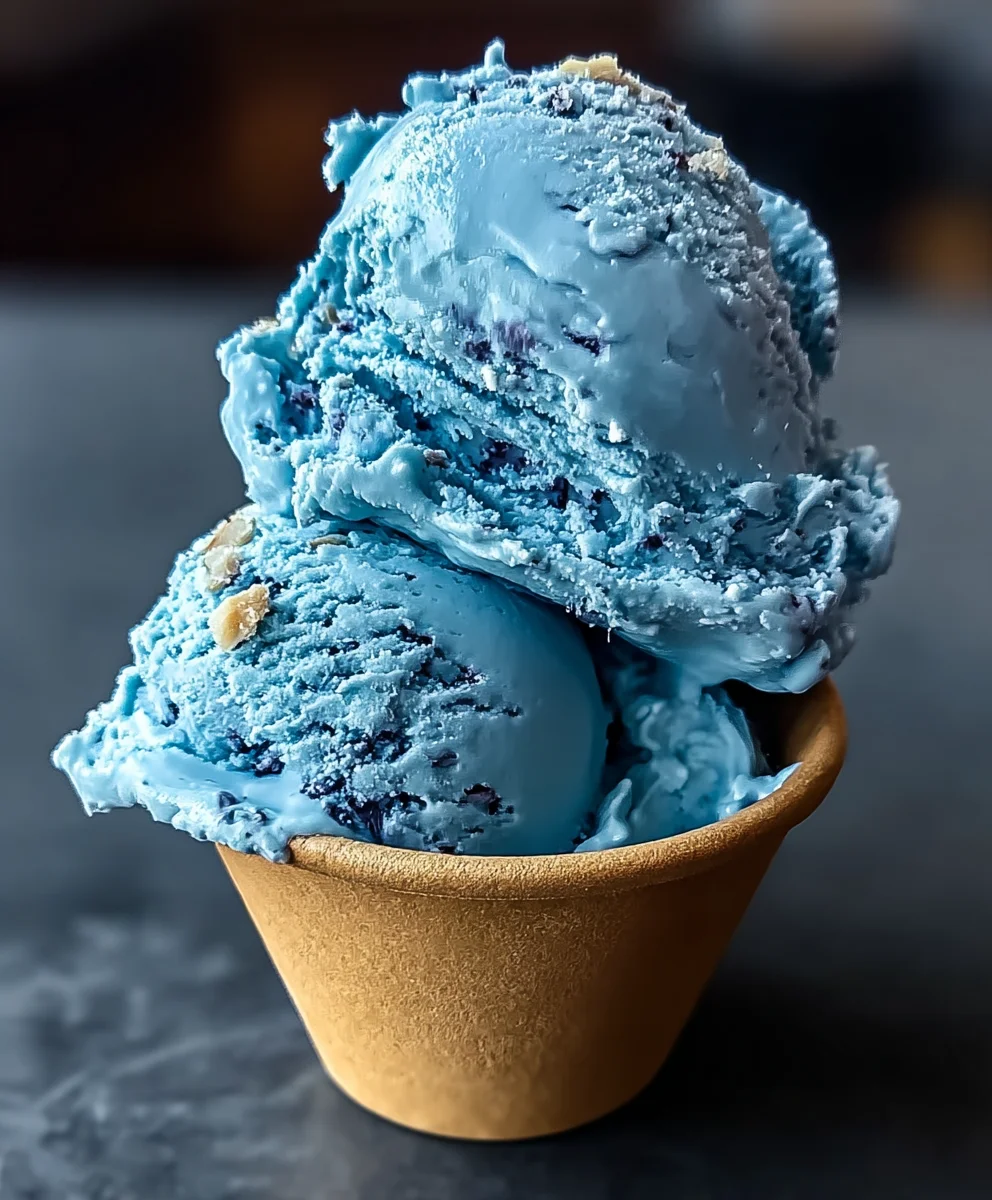
Blue Moon Ice Cream — just the name evokes a swirl of vibrant color and a delightful puzzle for the taste buds, doesn’t it? For many, this iconic, brightly hued dessert is more than just an ice cream flavor; it’s a cherished trip down memory lane, a taste of pure childhood wonder. Originating primarily in the American Midwest, Blue Moon Ice Cream has long captivated dessert lovers with its unmistakable robin’s egg blue hue and its famously elusive flavor profile. Is it almond? Fruity cereal? Citrus? The mystery is part of its undeniable charm, sparking debate and delight with every spoonful, making it a truly unique culinary experience.
I find that what truly makes this dessert universally adored is its unique blend of factors: the dazzling visual appeal that promises fun, the intriguing taste that’s both sweet and subtly complex, and of course, the incredibly creamy texture that melts perfectly in your mouth. There’s a certain magic to serving up a scoop of homemade Blue Moon Ice Cream; it instantly transforms any occasion into something special, bringing smiles and a touch of nostalgic joy to everyone, young and old. It’s a flavor that promises an experience, not just a dessert, and I’m thrilled to share how you can recreate that magic in your own kitchen.

Ingredients:
- Heavy Cream: 2 cups (approximately 480ml) – this is going to give our Blue Moon Ice Cream its wonderfully rich and creamy texture. Don’t skimp on the fat content here; it’s essential for a smooth, scoopable ice cream.
- Whole Milk: 1 cup (approximately 240ml) – balancing the heavy cream, whole milk helps to create the perfect consistency without making it overly dense. It’s the supporting act for our star cream.
- Granulated Sugar: 3/4 cup (approximately 150g) – for that classic sweet taste that makes Blue Moon Ice Cream so irresistible. We’ll dissolve this completely to avoid any grainy texture.
- Vanilla Extract: 1.5 teaspoons – a foundational flavor, vanilla extract provides a warm, aromatic base that complements the other distinctive notes of our Blue Moon Ice Cream.
- Almond Extract: 1 teaspoon – this is where the magic truly begins for that iconic Blue Moon Ice Cream flavor. Almond extract gives it a unique, slightly nutty and sweet complexity that is instantly recognizable and so beloved.
- Optional Brightness (choose one or both for nuanced flavor):
- Lemon Zest: from 1/2 a small lemon (finely grated) – if you like a subtle, bright tang that cuts through the sweetness, a touch of lemon zest can elevate the flavor profile, making your Blue Moon Ice Cream even more intriguing.
- Orange Extract: 1/4 teaspoon – some variations of Blue Moon Ice Cream include a whisper of citrus. Orange extract can add a delightful, zesty layer without overpowering the almond and vanilla.
- Gel Food Coloring: 1/2 to 1 teaspoon (or more, to achieve desired vibrant blue) – for that unmistakable, captivating blue hue that defines our Blue Moon Ice Cream. Gel coloring is recommended for its intensity and concentration, ensuring a vivid color without diluting the base.
- Pinch of Salt: 1/8 teaspoon – a tiny bit of salt goes a long way in enhancing all the sweet and creamy flavors, making them pop and ensuring our Blue Moon Ice Cream isn’t just sweet, but perfectly balanced.
Preparing the Blue Moon Ice Cream Base
- Combine Dairy and Sugar: In a medium saucepan, I like to gently whisk together my 2 cups of heavy cream and 1 cup of whole milk. To this creamy base, I’ll add the 3/4 cup of granulated sugar and that essential pinch of salt. It’s important to stir these ingredients well to begin the dissolving process even before we apply heat. This initial mix helps prevent the sugar from sticking to the bottom of the pan and scorching. We’re aiming for a perfectly smooth Blue Moon Ice Cream, and thorough sugar dissolution is key to that.
- Gently Heat the Mixture: Place the saucepan over medium-low heat. I constantly stir the mixture with a whisk, ensuring that the sugar dissolves completely into the liquids. It’s crucial not to bring this mixture to a boil. We’re simply warming it enough to help the sugar crystals disappear, creating a beautifully uniform base for our Blue Moon Ice Cream. You’ll know it’s ready when you can no longer feel any grittiness on the back of a spoon if you dip it in and rub a little mixture between your fingers. This gentle heating process usually takes about 5 to 8 minutes. Patience is a virtue here; we want warmth, not a simmer. If you rush this step, you might end up with a slightly grainy texture in your final frozen treat, and we certainly don’t want that for our luxurious Blue Moon Ice Cream. The goal is a velvety smooth base.
- Remove from Heat and Infuse Flavors: Once the sugar is fully dissolved and the mixture is warm, I immediately remove the saucepan from the heat. This is the moment to introduce the distinctive flavors that will define our Blue Moon Ice Cream. I stir in the 1.5 teaspoons of vanilla extract and, most importantly, the 1 teaspoon of almond extract. The almond extract is truly the star here, giving it that classic, almost nostalgic, flavor profile that makes Blue Moon Ice Cream so unique. If I’m using lemon zest or orange extract for that optional brightness, I’ll add it now too, allowing its subtle aromatics to infuse into the warm base. Give everything a good stir to ensure the extracts are evenly distributed throughout the creamy mixture.
- Achieving the Iconic Blue Hue: Now for the fun part – adding the color! This is where our Blue Moon Ice Cream truly gets its name. I start with about 1/2 teaspoon of gel food coloring and stir it in. Gel coloring is fantastic because it’s highly concentrated, meaning you don’t need much to achieve a vibrant color, and it won’t thin out your ice cream base. I like to add a little at a time, stirring thoroughly after each addition, until I reach that perfect, enchanting blue that reminds me of a clear night sky. Remember, the color will deepen slightly when frozen, so don’t be afraid to make it quite vivid now. It’s all about creating that signature visually stunning Blue Moon Ice Cream!
Chilling the Blue Moon Ice Cream Base
- Prepare for Chilling: Transfer the warm, beautifully blue ice cream base into a clean, airtight container. A glass bowl with a lid or a large measuring cup with a spout works perfectly. This step is absolutely critical for the success of your Blue Moon Ice Cream. If you churn a warm or even lukewarm base, your ice cream maker won’t be able to properly freeze it, resulting in a slushy, icy mess rather than the smooth, creamy consistency we’re aiming for.
- Rapid Chilling Method (Ice Bath – Recommended): For the quickest and most efficient chilling, I often opt for an ice bath. I place my container of Blue Moon Ice Cream base into a larger bowl filled with ice and a little cold water, making sure the water level doesn’t reach the rim of my ice cream base container. I stir the base frequently for about 20-30 minutes. This method rapidly brings down the temperature, usually preparing it for the freezer in under an hour. The colder the base, the better your Blue Moon Ice Cream will churn. This rapid cooling also helps prevent the formation of large ice crystals later, ensuring a smoother texture.
- Standard Chilling Method (Refrigerator): If I’m not in a rush, I’ll simply cover the container and place it in the refrigerator. This method requires a minimum of 4 hours, but I often find it’s best to let it chill overnight (8-12 hours). The longer and colder the base gets, the better the final texture of your Blue Moon Ice Cream will be. You want it to be as cold as possible without actually freezing. A well-chilled base ensures that your ice cream machine can work efficiently to incorporate air and create that wonderful, light yet creamy texture that is characteristic of a truly excellent Blue Moon Ice Cream.
Churning the Blue Moon Ice Cream
- Prepare Your Ice Cream Maker: Before pouring in your thoroughly chilled Blue Moon Ice Cream base, make sure your ice cream maker’s bowl has been in the freezer for the recommended time – usually 12-24 hours. A properly frozen bowl is paramount for successful churning. If your bowl isn’t cold enough, your ice cream won’t set, and you’ll be left with a very blue milkshake instead of a scoopable Blue Moon Ice Cream. I always double-check this step; there’s nothing more disappointing than a soft, unformed batch! Assemble your ice cream maker according to the manufacturer’s instructions.
- Pour in the Chilled Base: With the machine’s paddle running (this is important to prevent the base from freezing onto the sides of the bowl immediately), slowly pour the cold Blue Moon Ice Cream base into the frozen bowl. Watching the vibrant blue liquid begin to churn is always one of my favorite parts of making ice cream. The color looks so captivating as it swirls around!
- Churn Until Thickened: Allow the ice cream maker to churn for 20 to 30 minutes, or until the Blue Moon Ice Cream has reached the consistency of soft-serve ice cream. The exact time will depend on your specific machine and how cold your base was to begin with. During this process, the base will gradually thicken, expand slightly as air is incorporated, and solidify into a delightful, creamy consistency. I like to peek occasionally to witness the transformation from liquid to the familiar, scoopable texture of Blue Moon Ice Cream. It’s truly a magical process! You’ll notice the beautiful blue becoming more opaque and fluffy.
- Checking for Consistency: The perfect churned Blue Moon Ice Cream will be soft, much like a thick milkshake or frozen yogurt right out of the machine. It will hold its shape somewhat but won’t be hard. If it’s too runny, continue churning for a few more minutes. If it seems almost hard, it might be over-churned, though this is less common with most home machines. The goal is a consistency that is easy to scrape out of the bowl but not entirely liquid. This soft-serve stage is delicious on its own, but for a firmer scoop, we’ll need to move on to the next step.
Freezing and Serving Your Blue Moon Ice Cream
- Transfer to a Freezer-Safe Container: Once your Blue Moon Ice Cream has reached that wonderful soft-serve consistency directly from the churn, it’s time to transfer it to a freezer-safe container for its final firming stage. I prefer using a shallow, airtight container (like a loaf pan or a specialized ice cream storage container) because it allows the ice cream to freeze more evenly and quickly. Press a piece of parchment paper or plastic wrap directly onto the surface of the Blue Moon Ice Cream to prevent ice crystals from forming on top, which can detract from that smooth, creamy texture we’ve worked so hard to achieve.
- Final Freezing Period: Place the covered container in the coldest part of your freezer for at least 4 to 6 hours. For the best results and a truly firm, scoopable Blue Moon Ice Cream, I often let it freeze overnight. During this time, the ice cream will harden completely, developing its full texture and allowing the flavors to meld beautifully. This final freeze is crucial for transforming the soft-serve into the firm, delightful scoops you crave.
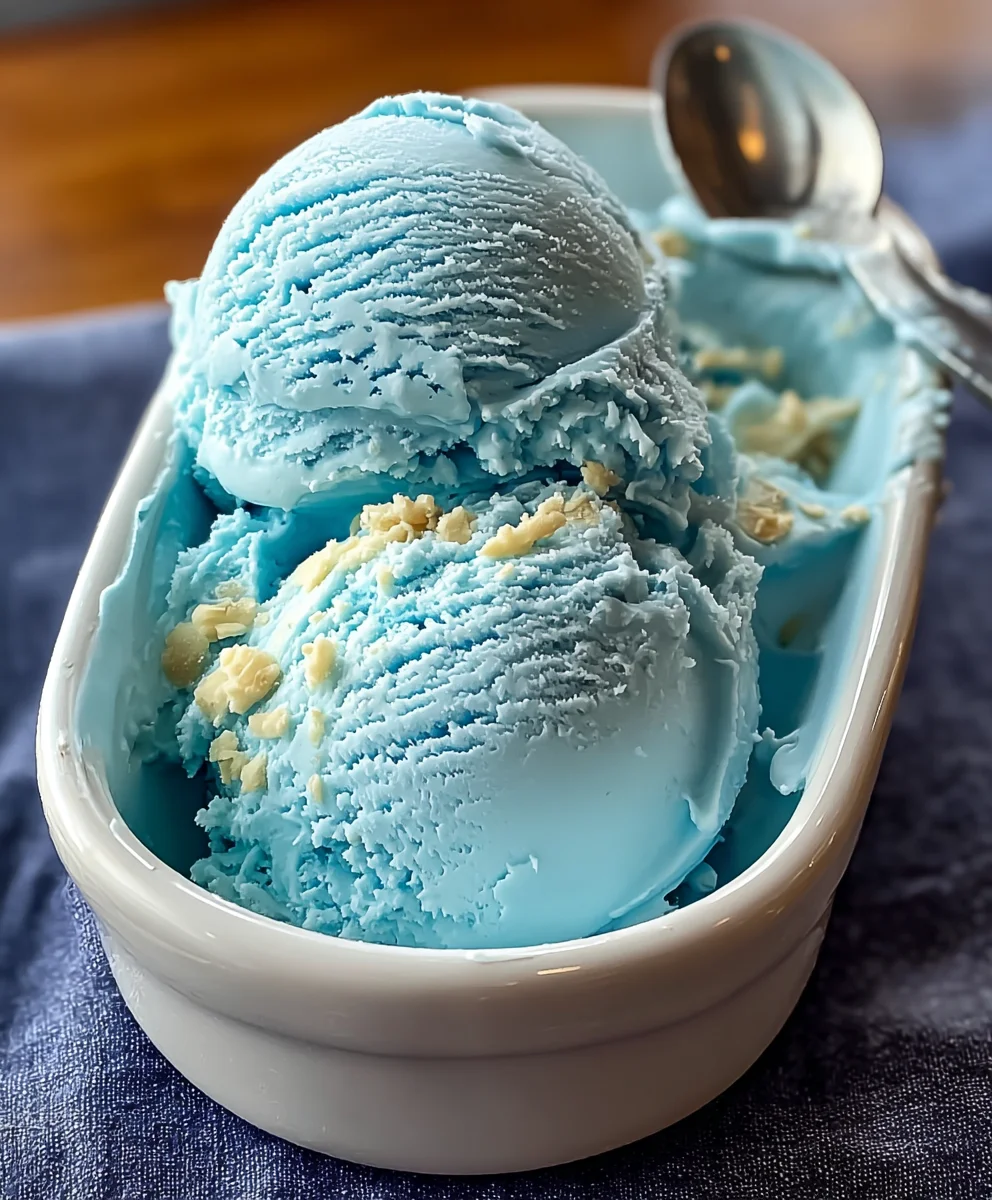
- Serving Your Homemade Blue Moon Ice Cream: When you’re ready to enjoy your magnificent Blue Moon Ice Cream, remove it from the freezer about 5-10 minutes before serving. This brief resting period allows it to soften just enough to make scooping a breeze, preventing bent spoons and frustration. I like to run my ice cream scoop under hot water for a few seconds before each scoop; this makes it glide through the creamy blue goodness effortlessly.
- Enjoying the Unique Flavor: Serve your homemade Blue Moon Ice Cream in bowls, cones, or as a fun addition to a dessert buffet. The vibrant blue color is always a conversation starter, and the unique, sweet, and slightly almond-vanilla flavor profile is simply irresistible. It’s often described as tasting like a “mystery” flavor, a delightful blend of different fruity and vanilla notes, with that distinct almond kick. Some people detect hints of Froot Loops, cotton candy, or even a subtle citrus. No matter what you perceive, it’s undeniably delicious and wonderfully nostalgic. This Blue Moon Ice Cream is perfect on its own, but you could also get creative with toppings like rainbow sprinkles, whipped cream, or even a contrasting fruit sauce if you’re feeling adventurous. The beauty of Blue Moon Ice Cream lies in its captivating allure and one-of-a-kind taste that truly brightens any day!
Conclusion:
Well, my friends, we’ve journeyed through the delightful process of creating something truly special, something that transcends a mere dessert to become an experience, a memory in the making. If you’ve been searching for a recipe that combines whimsy, unique flavor, and a touch of pure joy, then I can confidently tell you that this is it. This isn’t just another ice cream recipe; it’s an invitation to rediscover a playful side of yourself and those you share it with. The vibrant, almost otherworldly hue, the mysteriously delicious almond-vanilla profile that dances on your tongue – it all culminates in a dessert that is simply unforgettable. I honestly believe that once you try making this, it will become a cherished part of your culinary repertoire, a secret weapon in your dessert arsenal for impressing guests and delighting your family.
Why is this recipe an absolute must-try? For starters, it’s the conversation starter of all desserts. People are endlessly fascinated by its color and intrigued by its elusive taste. It’s a flavor that evokes childhood nostalgia for many, a taste that whispers of carnival days and simpler times, yet it feels entirely fresh and exciting when you craft it yourself from scratch. Beyond its captivating appearance and unique taste, the sense of accomplishment you’ll feel from churning out your own batch is incredibly rewarding. It’s a surprisingly straightforward process, requiring more patience than complex technique, making it accessible even for those new to homemade ice cream. Plus, the sheer delight on the faces of people when they take their first spoonful? Absolutely priceless. It’s truly a labor of love that pays off in spades of smiles and satisfied sighs, making every scoop a moment to savor.
Unleash Your Creativity: Serving Suggestions & Variations
Now that you’re armed with the knowledge to create this masterpiece, let’s talk about how to serve it and truly make it your own. Of course, the classic way to enjoy a scoop or two is in a crisp waffle cone or a simple bowl, perhaps with a scattering of rainbow sprinkles to amplify its playful aesthetic. But don’t stop there! Think bigger, think bolder. Imagine a towering ice cream sundae featuring a generous portion of this fantastic treat, topped with fluffy whipped cream, a maraschino cherry (or two!), and perhaps a drizzle of white chocolate sauce to complement its unique flavor without overpowering it. It also makes for an incredible milkshake – blend it with a splash of milk for a thick, dreamy concoction that’s out of this world, or even try adding a banana for a surprisingly delicious twist. For an adult twist, a dash of almond liqueur could elevate it to a sophisticated dessert cocktail, perfect for a special evening.
Feeling adventurous? Consider creating ice cream sandwiches using two soft, chewy sugar cookies, or even a couple of homemade shortbread biscuits, with a thick layer of our star ice cream nestled in between. For a truly show-stopping dessert presentation, serve a scoop alongside a warm slice of apple pie, where the crisp tartness of the apples provides a beautiful contrast to the sweet, creamy chill. Or, for a vibrant dessert plate, pair it with some fresh berries – blueberries or raspberries would provide a lovely counterpoint in both color and taste, and their natural sweetness enhances the ice cream’s profile. The possibilities are genuinely endless, limited only by your imagination, inviting you to experiment and discover your new favorite combinations.
But wait, there’s more! You can also personalize the flavor profile even further. Try adding a tiny pinch of edible glitter to the mixture before freezing for an extra magical shimmer that will truly stun, especially for birthday parties or festive occasions. For those who love a bit of crunch, consider folding in some crushed cookies – perhaps vanilla wafers or even some colorful candy bits – during the last few minutes of churning. If you’re feeling particularly daring, a subtle hint of citrus zest, like lemon or orange, can introduce an unexpected bright note that complements the almond beautifully, adding a layer of complexity. For a dairy-free option, experiment with full-fat coconut milk or a high-quality almond milk base; just be prepared for a slightly different texture and adjust sweetness as needed. The core charm of this Blue Moon Ice Cream remains, allowing for these wonderful variations and ensuring it can be enjoyed by everyone.
Your Culinary Journey Starts Now!
This is where your adventure truly begins. I’ve poured my heart into sharing this recipe, and now it’s your turn to bring it to life in your own kitchen. There’s something incredibly satisfying about creating delicious food from scratch, and even more so when that food brings such immediate joy and wonder to those who taste it. Don’t be shy; embrace the process, enjoy the vibrant colors, and savor the unique flavor. I promise you, the effort is well worth the reward, leading to moments of pure culinary bliss that you’ll want to relive again and again. It’s more than just a dessert; it’s an experience waiting to happen.
Once you’ve whipped up your very own batch, I absolutely cannot wait to hear about your experience! Did you stick to the classic recipe, or did you venture into some exciting variations? What was the reaction of your friends and family? Did it evoke a sense of nostalgia for you, or create brand new memories? Please, share your stories, your photos, and your triumphs! Let the community celebrate your success and inspire others with your creativity. Your feedback and personal touches inspire us all to keep exploring the wonderful world of homemade treats, pushing the boundaries of what’s possible in our kitchens. So, go forth, gather your ingredients, and prepare to make some magic. Happy churning!
Blue Moon Ice Cream Recipe: Sweet, Colorful & Easy to Make!
Blue moon ice cream brings a magical touch to homemade frozen treats with its distinctive color and mysterious flavor profile. The vibrant blue hue immediately captures attention, while the unique combination of vanilla and almond creates that elusive taste that has made this Midwest favorite so beloved. This version balances creamy richness with subtle flavor notes that dance on your tongue, creating an experience that feels both nostalgic and exciting with each spoonful.
Ingredients
-
2 cups Heavy Cream
-
1 cup Whole Milk
-
3/4 cup (150g) Granulated Sugar
-
1.5 teaspoons Vanilla Extract
-
1 teaspoon Almond Extract
-
1/2 small Lemon Zest (finely grated, optional)
-
1/4 teaspoon Orange Extract (optional)
-
1/2 to 1 teaspoon (or more) Gel Food Coloring
-
1/8 teaspoon Salt
Instructions
-
Step 1
In a medium saucepan, whisk together heavy cream, whole milk, granulated sugar, and salt. Heat over medium-low, stirring constantly, until sugar completely dissolves (5-8 minutes). Do not boil. Remove from heat. -
Step 2
Stir in vanilla extract, almond extract, and optional lemon zest or orange extract. Add gel food coloring, starting with 1/2 teaspoon, until desired vibrant blue hue is achieved, stirring thoroughly after each addition. -
Step 3
Transfer the base to an airtight container. Chill thoroughly using an ice bath (20-30 minutes, stirring frequently) or by refrigerating for 4-12 hours (overnight for best results) until very cold. -
Step 4
Ensure your ice cream maker’s bowl is frozen (12-24 hours). With the machine running, slowly pour the chilled base into the frozen bowl. Churn for 20-30 minutes, or until it reaches a soft-serve consistency. -
Step 5
Transfer churned ice cream to a shallow, freezer-safe container. Press parchment paper or plastic wrap directly onto the surface. Freeze for at least 4-6 hours, or overnight, until firm. Remove from freezer 5-10 minutes before serving for easier scooping. Enjoy!
Important Information
Nutrition Facts (Per Serving)
It is important to consider this information as approximate and not to use it as definitive health advice.
Allergy Information
Please check ingredients for potential allergens and consult a health professional if in doubt.


Leave a Comment