
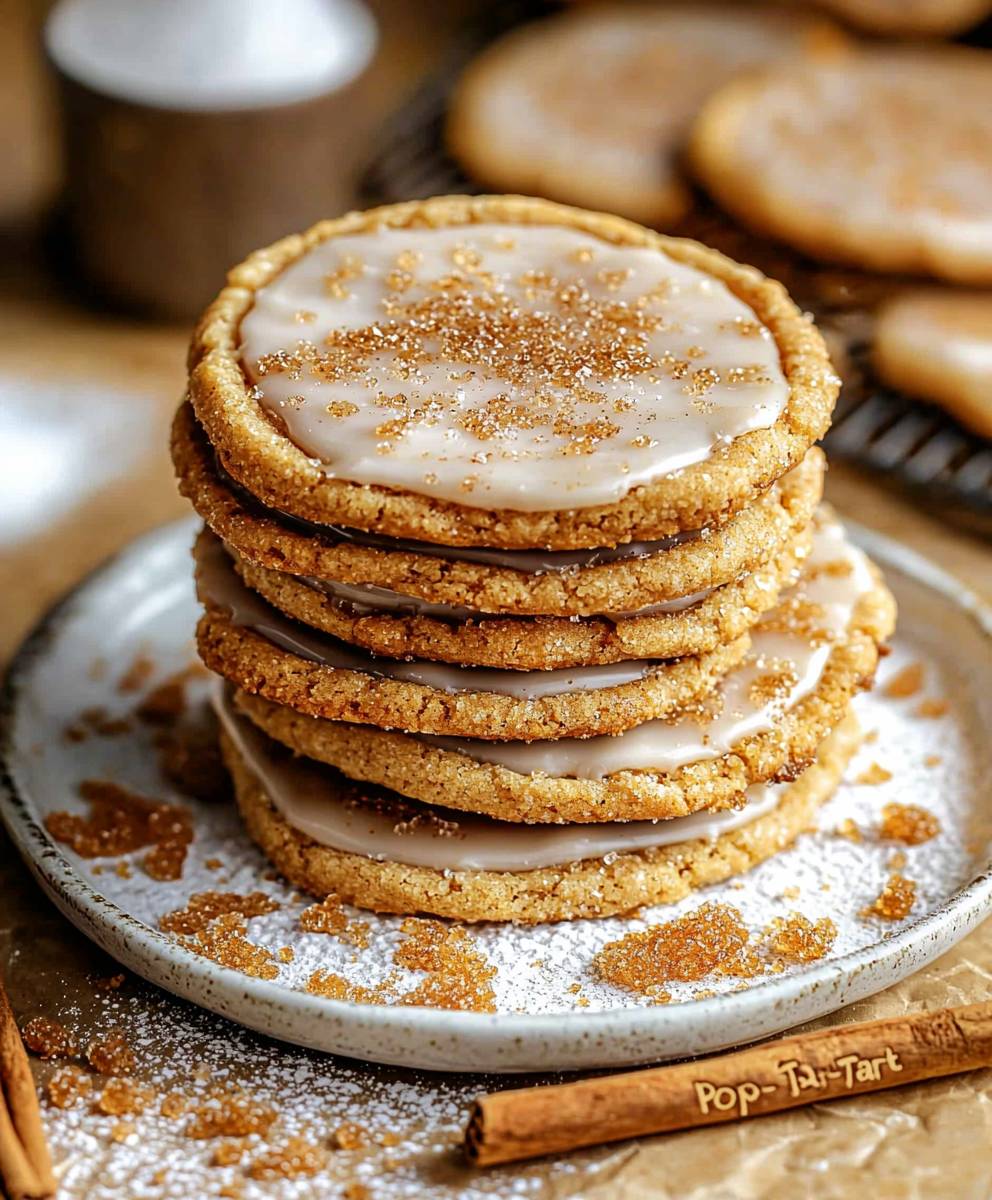
Brown Sugar Pop-Tart Cookies are a delightful twist on a classic treat that brings nostalgia and comfort to every bite. As a child, I remember eagerly unwrapping those colorful packages of Pop-Tarts, savoring the sweet, flaky pastry and the burst of flavor inside. This recipe pays homage to that beloved breakfast staple while adding a homemade touch that elevates it to a whole new level. The combination of rich brown sugar and buttery dough creates a cookie that is not only delicious but also has a delightful texture that keeps you coming back for more.
People adore Brown Sugar Pop-Tart Cookies for their perfect balance of sweetness and crunch, making them an ideal snack for any time of day. Whether youre enjoying them with a cup of coffee in the morning or as a late-night treat, these cookies are sure to satisfy your cravings. Plus, they are incredibly easy to make, allowing you to whip up a batch in no time. Join me in exploring this scrumptious recipe that captures the essence of childhood while delivering a homemade experience that everyone will love!

Ingredients:
- 1 cup unsalted butter, softened
- 1 cup brown sugar, packed
- 1/2 cup granulated sugar
- 2 large eggs
- 1 teaspoon vanilla extract
- 3 cups all-purpose flour
- 1 teaspoon baking soda
- 1/2 teaspoon salt
- 1 cup brown sugar frosting (store-bought or homemade)
- 1/2 cup sprinkles (optional)
- 1/2 cup fruit preserves (strawberry, raspberry, or your choice)
Preparing the Dough
- In a large mixing bowl, I start by creaming together the softened butter, packed brown sugar, and granulated sugar. I use an electric mixer on medium speed for about 2-3 minutes until the mixture is light and fluffy.
- Next, I add in the eggs, one at a time, mixing well after each addition. Then, I pour in the vanilla extract and continue to mix until everything is well combined.
- In a separate bowl, I whisk together the all-purpose flour, baking soda, and salt. This helps to evenly distribute the leavening agent and salt throughout the flour.
- Gradually, I add the dry ingredients to the wet mixture, mixing on low speed until just combined. I make sure not to overmix, as this can lead to tough cookies.
- Once the dough is formed, I cover the bowl with plastic wrap and refrigerate it for at least 30 minutes. This step is crucial as it helps the dough firm up, making it easier to handle later.
Shaping the Cookies
- After the dough has chilled, I preheat my oven to 350°F (175°C) and line two baking sheets with parchment paper.
- Using a cookie scoop or a tablespoon, I scoop out portions of dough and roll them into balls. I aim for about 1.5 inches in diameter for each cookie.
- Next, I place the dough balls on the prepared baking sheets, leaving about 2 inches of space between each one to allow for spreading during baking.
- To create the signature Pop-Tart shape, I gently flatten each dough ball with the palm of my hand, making them about 1/2 inch thick.
Baking the Cookies
- I pop the baking sheets into the preheated oven and bake the cookies for 10-12 minutes, or until the edges are lightly golden. The centers may look slightly underbaked, but they will continue to cook on the baking sheet after being removed from the oven.
- Once baked, I take the cookies out of the oven and let them cool on the baking sheets for about 5 minutes before transferring them to a wire rack to cool completely.
Assembling the Pop-Tart Cookies
- Once the cookies are completely cool, Im ready to assemble! I take one cookie and spread a generous layer of fruit preserves on the bottom side. I usually go for about a tablespoon, but you can adjust this based on your preference.
- Next, I take another cookie and place it on top of the one with the preserves, bottom side down, creating a sandwich. I gently press them together to ensure they stick.
- Now, its time to frost! I take the brown sugar frosting and spread a layer on top of the cookie sandwich. I like to be generous with the frosting, as it adds a delicious sweetness that complements the cookies perfectly.
- If Im feeling festive, I sprinkle some colorful sprinkles on top of the frosting for that extra pop of fun!
Storing the Cookies
- Once Ive assembled all my cookies, I store them in an airtight container at room temperature. They usually last about 3-5 days, but I can guarantee they wont last that long in my house!
- If I want to keep them longer, I can freeze the unassembled cookies. I simply freeze the baked cookies in a single layer on a baking sheet, then transfer them to a freezer-safe bag once frozen.
Conclusion:
In summary, these Brown Sugar Pop-Tart Cookies are an absolute must-try for anyone looking to indulge in a delightful treat that combines nostalgia with a modern twist. The rich, caramel-like flavor of brown sugar paired with the buttery, flaky texture of the cookies creates a mouthwatering experience that is simply irresistible. Plus, the vibrant filling options allow you to customize each batch to suit your tastewhether you prefer classic strawberry, tangy raspberry, or even a decadent chocolate filling, the possibilities are endless! For serving suggestions, I recommend pairing these cookies with a scoop of vanilla ice cream for an indulgent dessert or enjoying them with a warm cup of coffee or tea for a cozy afternoon snack. You can also experiment with different frostings or toppings, such as a drizzle of chocolate or a sprinkle of colorful sprinkles, to make them even more festive for special occasions. I truly encourage you to give this recipe a try and experience the joy of baking these Brown Sugar Pop-Tart Cookies in your own kitchen. Once you do, I would love to hear about your experience! Share your thoughts, variations, and any creative twists you come up with. Lets spread the love for these delicious cookies together! Happy baking! PrintBrown Sugar Pop-Tart Cookies: A Delicious Twist on a Classic Treat
Enjoy these soft and chewy Pop-Tart Cookies filled with your favorite fruit preserves and topped with sweet brown sugar frosting. Perfect for a fun dessert or special treat!
- Prep Time: 30 minutes
- Cook Time: 10-12 minutes
- Total Time: 60 minutes
- Yield: 24 cookies (12 assembled sandwiches) 1x
Ingredients
- 1 cup unsalted butter, softened
- 1 cup brown sugar, packed
- 1/2 cup granulated sugar
- 2 large eggs
- 1 teaspoon vanilla extract
- 3 cups all-purpose flour
- 1 teaspoon baking soda
- 1/2 teaspoon salt
- 1 cup brown sugar frosting (store-bought or homemade)
- 1/2 cup sprinkles (optional)
- 1/2 cup fruit preserves (strawberry, raspberry, or your choice)
Instructions
- In a large mixing bowl, cream together the softened butter, packed brown sugar, and granulated sugar using an electric mixer on medium speed for about 2-3 minutes until light and fluffy.
- Add the eggs, one at a time, mixing well after each addition. Pour in the vanilla extract and continue mixing until well combined.
- In a separate bowl, whisk together the all-purpose flour, baking soda, and salt.
- Gradually add the dry ingredients to the wet mixture, mixing on low speed until just combined. Avoid overmixing to prevent tough cookies.
- Cover the bowl with plastic wrap and refrigerate for at least 30 minutes.
- Preheat the oven to 350°F (175°C) and line two baking sheets with parchment paper.
- Using a cookie scoop or tablespoon, scoop out portions of dough and roll them into balls, aiming for about 1.5 inches in diameter.
- Place the dough balls on the prepared baking sheets, leaving about 2 inches of space between each.
- Gently flatten each dough ball with the palm of your hand to about 1/2 inch thick.
- Bake the cookies in the preheated oven for 10-12 minutes, or until the edges are lightly golden. The centers may look slightly underbaked.
- Let the cookies cool on the baking sheets for about 5 minutes before transferring them to a wire rack to cool completely.
- Once the cookies are completely cool, spread a generous layer of fruit preserves on the bottom side of one cookie.
- Place another cookie on top, bottom side down, creating a sandwich, and gently press them together.
- Spread a layer of brown sugar frosting on top of the cookie sandwich.
- If desired, sprinkle colorful sprinkles on top of the frosting for a festive touch.
- Store assembled cookies in an airtight container at room temperature for 3-5 days.
- For longer storage, freeze unassembled cookies by freezing them in a single layer on a baking sheet, then transferring to a freezer-safe bag once frozen.
Notes
- Feel free to customize the fruit preserves based on your preference.
- The cookies can be decorated with various toppings for different occasions.


Leave a Comment