
Taco Stuffed Shells are a culinary revelation, seamlessly blending two universally beloved comfort foods into one incredibly satisfying dish. As an avid home cook, I’m thrilled to guide you through preparing this ingenious creation that consistently earns rave reviews from my family and friends.
While this particular combination might not boast centuries of ancient history, its surging popularity speaks volumes about modern culinary innovation. This ingenious recipe emerged from a desire to capture the vibrant, zesty flavors of a classic taco night and infuse them into the familiar, comforting embrace of a cheesy pasta bake. It’s a brilliant testament to how creativity in the kitchen can elevate weeknight meals into something truly special and utterly unforgettable.
Why Everyone Loves This Flavorful Fusion
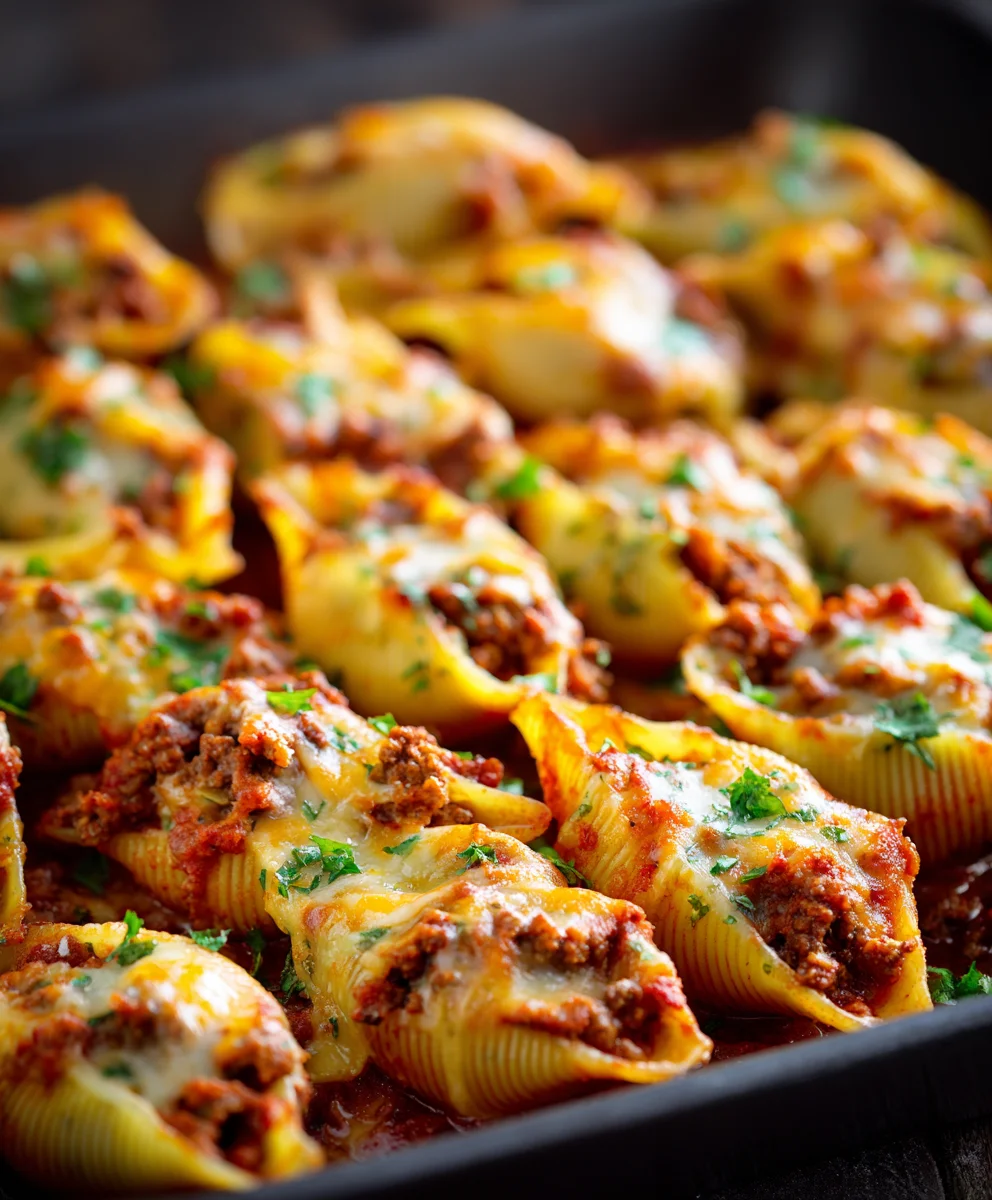
People adore this dish for countless reasons. Imagine tender, perfectly cooked pasta shells overflowing with richly seasoned taco meat, generously topped with an irresistible blend of melted cheeses, and baked until golden and bubbly. The textural contrast between the al dente pasta and the savory, juicy filling is simply divine. It’s the ultimate convenience food, offering all the delightful flavors of your favorite tacos without the mess of individual assembly, making it an absolute winner for busy weeknights or casual gatherings. These Taco Stuffed Shells deliver on taste, texture, and pure comfort, making them an instant family favorite you’ll want to make again and again.

Ingredients:
- For the Pasta Shells:
- 1 box (12 ounces) jumbo pasta shells (approximately 30-35 shells), uncooked
- 1 tablespoon olive oil (for cooking pasta)
- Salt, for pasta water
- For the Flavorful Taco Filling:
- 1.5 pounds lean ground beef (I prefer 80/20 for flavor, but ground turkey or chicken works wonderfully too!)
- 1 tablespoon olive oil (for browning meat)
- 1 medium yellow onion, finely diced
- 3-4 cloves garlic, minced
- 1 large packet (approx. 1 ounce, or 3-4 tablespoons) taco seasoning mix (your favorite brand, or homemade)
- 1 can (10 ounces) diced tomatoes with green chiles (like Rotel), undrained – this adds a fantastic kick!
- 1/4 cup chicken broth or water (optional, if mixture seems too dry)
- 8 ounces cream cheese, softened to room temperature (this is crucial for creaminess!)
- 1/2 cup sour cream
- 1.5 cups shredded Mexican blend cheese (or cheddar/Monterey Jack), divided – one cup for the filling, half a cup for topping
- Salt and freshly ground black pepper, to taste
- For Assembling and Topping:
- 1/2 cup mild or medium salsa, for the bottom of the baking dish
- 1/2 cup shredded Mexican blend cheese (the remaining from above, for sprinkling on top)
- For Garnishing (Optional, but highly recommended for the full Taco Stuffed Shells experience!):
- Fresh cilantro, chopped
- Green onions, thinly sliced
- Extra sour cream or plain Greek yogurt
- Guacamole or sliced avocado
- Salsa
- Sliced jalapeños (fresh or pickled)
- Black olives, sliced
Preparation and Cooking the Pasta Shells
This initial step is all about setting the foundation for your magnificent Taco Stuffed Shells. Getting the pasta just right is key, as it needs to be pliable enough for stuffing but robust enough to hold its shape.
- Bring Water to a Rolling Boil: Grab your largest pot and fill it about two-thirds full with water. Add a generous tablespoon of salt – I always say, “season your pasta water like the sea!” This is your first opportunity to infuse flavor into the shells, so don’t skimp. Bring the water to a rapid, rolling boil over high heat.
- Cook the Jumbo Shells: Carefully add the jumbo pasta shells to the boiling water, one by one, to prevent them from sticking together. Stir gently a few times during the first couple of minutes to ensure they don’t clump at the bottom of the pot. Cook according to package directions, but aim for a firm al dente – usually around 10-12 minutes. Why al dente? Because the shells will continue to cook a bit more in the oven. If they’re too soft now, they’ll become mushy later, and we want firm, toothsome shells that can proudly hold their delicious taco filling.
- Drain and Rinse with Cold Water: Once your shells have reached that perfect al dente stage, drain them immediately in a colander. Here’s a little trick I always use for stuffed shells: rinse them thoroughly under cold running water. This not only stops the cooking process dead in its tracks but also washes away excess starch, which helps prevent the shells from sticking to each other, making them much easier to handle when it’s time to stuff them.
- Cool and Prepare for Stuffing: Gently spread the rinsed shells out in a single layer on a baking sheet or a clean kitchen towel. A light drizzle of olive oil over them can also help prevent sticking, though the cold rinse usually does the trick. Let them cool completely. This cooling period is important because trying to stuff hot shells can be a bit challenging and can also affect the temperature of your filling. While they’re cooling, you can dive right into making that glorious taco filling!
Crafting the Flavorful Taco Filling
Now for the heart of our Taco Stuffed Shells – the irresistibly savory and creamy taco filling. This is where all the vibrant flavors come together to create that comforting, zesty taste we all love.
- Brown the Ground Meat: In a large skillet or Dutch oven, heat 1 tablespoon of olive oil over medium-high heat. Add your ground beef (or turkey, if you’re using it). Break it apart with a spoon and cook, stirring occasionally, until it’s completely browned and no pink remains. This typically takes about 7-9 minutes. Once browned, it’s crucial to drain off any excess fat. I like to tilt the pan and use a spoon or paper towels to soak up the fat, leaving behind only the flavorful meat. This step prevents your filling from becoming greasy.
- Sauté the Aromatics: Reduce the heat to medium. Add the finely diced yellow onion to the skillet with the browned meat. Cook, stirring occasionally, until the onion softens and becomes translucent, which should take about 5-7 minutes. Then, add the minced garlic and cook for just another minute until it becomes wonderfully fragrant. Be careful not to burn the garlic, as burnt garlic can taste bitter.
- Build the Taco Flavor Base: Sprinkle the taco seasoning mix evenly over the meat and onion mixture. Stir well to coat everything, and let it cook for about 1 minute. This short cooking time helps to “bloom” the spices, intensifying their flavors. Next, pour in the undrained can of diced tomatoes with green chiles. Stir everything together, bringing the mixture to a gentle simmer. Let it cook for about 3-5 minutes, allowing the flavors to meld beautifully and any excess liquid to reduce slightly. If the mixture seems overly dry at this point, you can stir in 1/4 cup of chicken broth or water to add a little moisture.
- Achieve Creamy Perfection: This is where the filling transforms from a simple taco meat to something truly special. Remove the skillet from the heat. Add the softened cream cheese and the sour cream to the meat mixture. Stir vigorously until the cream cheese is fully melted and completely incorporated, creating a rich, creamy sauce that coats every single bit of the meat. It should look incredibly inviting and smooth.
- Incorporate the Cheese: Now, stir in 1 cup of the shredded Mexican blend cheese into the filling. The residual heat from the meat will gently melt the cheese, making the filling even more cohesive and delicious. Stir until the cheese is just melted and fully mixed throughout.
- Taste and Adjust Seasoning: Before you declare your filling complete, always give it a taste! This is your moment to shine as a chef. Add salt and freshly ground black pepper to your preference. Remember, taco seasoning already contains salt, so add additional salt cautiously. You might find you don’t need much. This step ensures every bite of your Taco Stuffed Shells will be perfectly seasoned and bursting with flavor.
Assembling Your Taco Stuffed Shells
With your perfect pasta shells and glorious taco filling ready, it’s time for the fun part: assembly! This is where your individual components come together to form the complete, mouth-watering dish.
- Preheat Oven and Prep Baking Dish: First things first, preheat your oven to 375°F (190°C). While the oven heats, grab a 9×13-inch baking dish. Pour the 1/2 cup of salsa into the bottom of the dish and spread it evenly. This salsa base not only adds another layer of taco flavor but also helps prevent the shells from sticking and keeps them moist during baking.
- Stuff the Shells Generously: Now, for the main event! Take one cooled pasta shell and, using a small spoon or your clean fingers (I find using my hands is often the easiest and most efficient way), spoon a generous amount of the taco filling into the opening of each shell. Don’t be shy here – we want these shells plump and full! Each shell should hold a good tablespoon or two of filling, depending on its size.
- Arrange in the Baking Dish: As you stuff each shell, place it seam-side up in the prepared baking dish, nestling them closely together. Continue stuffing and arranging the shells until the entire dish is filled. You might find that you have a few shells left over, or you might use all of them, depending on how generously you stuff them. Aim for a single layer of shells to ensure even baking.
- Top with More Cheese: Once all the shells are neatly arranged in the dish, sprinkle the remaining 1/2 cup of shredded Mexican blend cheese evenly over the top of the stuffed shells. This cheese layer will melt into a delicious, golden-brown crust, adding another layer of texture and flavor that truly makes these Taco Stuffed Shells irresistible.
Baking to Golden Perfection
The final transformative step for our Taco Stuffed Shells is baking them in the oven. This process marries all the flavors, melts the cheese to gooey perfection, and ensures every bite is warm and inviting.
- Cover and Bake: Tightly cover the baking dish with aluminum foil. This is an important step as it traps the moisture, allowing the shells to heat through evenly without drying out, and ensures the cheese on top doesn’t brown too quickly. Place the covered dish into your preheated 375°F (190°C) oven and bake for 20 minutes. During this initial baking phase, the filling will become piping hot, and the flavors will deepen.
- Uncover and Continue Baking: After 20 minutes, carefully remove the foil. Be mindful of the steam that will escape! Return the uncovered dish to the oven and continue baking for another 10-15 minutes, or until the cheese on top is beautifully melted, bubbly, and slightly golden brown. If you like your cheese with a little extra crispness, you can even switch on the broiler for the last minute or two, but watch it very closely to prevent burning.
- Allow to Rest: Once out of the oven, don’t rush to serve immediately. Let the Taco Stuffed Shells rest on your counter for about 5-10 minutes. This resting period is not just for cooling; it allows the filling to set slightly, making the shells easier to serve and preventing them from falling apart. It also gives the flavors a moment to fully settle and deepen.
Serving Suggestions and Garnishes
Your magnificent Taco Stuffed Shells are ready! Now it’s time to elevate them with some fresh, vibrant garnishes and thoughtful serving suggestions, transforming a delicious meal into a truly memorable dining experience.
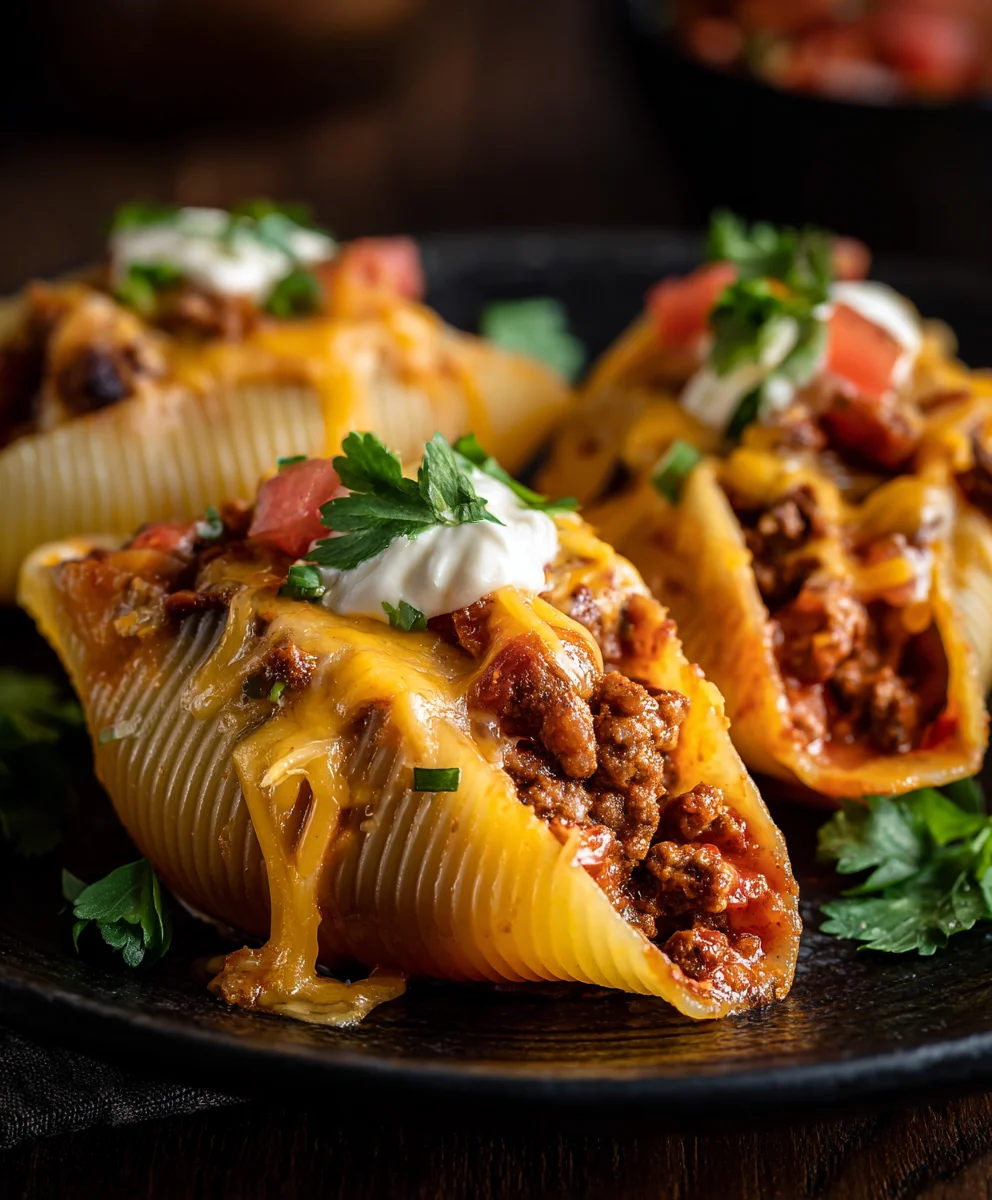
- Garnish with Freshness: This is where you can truly personalize your Taco Stuffed Shells and add that final burst of flavor and color. I always recommend a generous sprinkling of freshly chopped cilantro and thinly sliced green onions over the entire dish right before serving. These fresh herbs add a much-needed bright counterpoint to the rich, savory filling.
- Offer a Topping Bar: To make mealtime interactive and cater to everyone’s preferences, consider setting up a small “taco bar” of toppings on the side. Some of my absolute favorite options include:
- Extra Sour Cream or Plain Greek Yogurt: A dollop on each serving provides a cool, tangy contrast.
- Guacamole or Sliced Avocado: Adds healthy fats and a creamy, earthy flavor.
- More Salsa: For those who love an extra kick or simply want more fresh tomato flavor.
- Sliced Jalapeños: Whether fresh for a fiery crunch or pickled for a tangy heat, these are perfect for spice lovers.
- Black Olives, Sliced: For a briny, salty touch that complements the taco flavors beautifully.
- Crumbled Tortilla Chips: A fantastic textural addition for an extra crunch!
The beauty of these Taco Stuffed Shells is their versatility, allowing everyone to customize their plate just the way they like it.
- Serve with Complementary Sides: While these Taco Stuffed Shells are hearty enough to be a complete meal on their own, pairing them with a light side can round out the dinner perfectly. I often serve them alongside:
- A simple green salad with a zesty lime vinaigrette.
- Mexican rice or cilantro-lime rice.
- Black beans or refried beans.
- Steamed corn or a corn salsa.
However you choose to serve them, these Taco Stuffed Shells are sure to be a hit. They’re incredibly satisfying, packed with flavor, and a fantastic twist on traditional taco night. Enjoy your culinary creation!
Conclusion:
Well, there you have it! We’ve journeyed through the creation of what I truly believe will become a new staple in your culinary repertoire. This isn’t just another dinner recipe; it’s a brilliant fusion of beloved comfort foods, combining the hearty satisfaction of Italian pasta with the vibrant, zesty flavors of Mexican cuisine. The moment you pull these golden, bubbling wonders from the oven, filled with their savory, seasoned meat and melted cheese, you’ll understand why I’m so excited about them. They offer an unexpected twist on traditional taco night, transforming familiar ingredients into an exciting and incredibly satisfying dish that feels both innovative and wonderfully nostalgic all at once. My goal was to create something truly special, a dish that brings smiles to faces around the dinner table, and I genuinely feel these Taco Stuffed Shells deliver on that promise and so much more. They are, quite simply, an unforgettable experience that will delight your taste buds and earn you rave reviews from anyone lucky enough to try them. This dish truly shines as a fantastic option for a weeknight meal, a casual gathering, or even a potluck, guaranteeing a delicious success every single time you prepare it.
Now, let’s talk about making this dish truly your own. While it’s absolutely fantastic straight out of the oven, serving it with an array of fresh toppings really elevates the experience. Think beyond just a dollop of sour cream! A vibrant pico de gallo, a chunky homemade salsa, or even a creamy avocado lime dressing would be absolute game-changers. Don’t forget the crisp freshness of chopped cilantro, a sprinkle of cotija cheese, or a squeeze of fresh lime juice to brighten everything up. For a more substantial meal, these shells pair wonderfully with a side of refried beans, some fluffy Mexican rice, or a simple, crisp green salad dressed with a light vinaigrette. These additional elements don’t just add flavor; they add texture and color, transforming a simple plate into a feast for the senses.
But the fun doesn’t stop there. The beauty of this recipe lies in its incredible adaptability. Want to make it vegetarian? Swap the ground meat for a flavorful mixture of black beans, corn, bell peppers, and your favorite taco seasoning. You could even use plant-based ground “meat” alternatives for a similar texture and a delicious, guilt-free meal. For those who prefer chicken, shredded rotisserie chicken works beautifully, absorbing all those delicious taco spices and offering a lighter, yet equally satisfying, option. Feel free to experiment with different cheeses too – a Monterey Jack for extra meltiness, a sharp cheddar for a bolder flavor, or even a blend with a hint of smoky gouda or a spicy pepper jack for an extra kick. If you like a little heat, consider adding finely diced jalapeños (seeds removed for less spice, or left in for a fiery punch) to your filling, or a dash of your favorite hot sauce. You could even swap out some of the tomato sauce for a mild enchilada sauce for a slightly different, but equally delicious, saucy base, creating an entirely new flavor profile. The possibilities are truly endless, allowing you to tailor this incredible dish to your family’s specific tastes and preferences, making it a new favorite for everyone at your table.
I truly hope you’re feeling inspired to roll up your sleeves and give this recipe a go. I promise you, the effort is minimal, and the reward is absolutely huge. There’s something incredibly satisfying about creating a meal that surprises and delights, and these Taco Stuffed Shells do exactly that.
Seriously, don’t miss out on this culinary adventure!
Once you’ve made them, I would absolutely love to hear about your experience. Did you stick to the recipe, or did you put your own unique spin on it? What were your favorite toppings or variations that truly elevated your dish? Please, don’t hesitate to share your photos and stories in the comments below, or tag me on social media if you’re sharing there. Your insights and creativity not only inspire me but also help our growing community discover new ways to enjoy these fantastic dishes. Let’s make some delicious memories together, starting with these incredible Taco Stuffed Shells! I can’t wait to hear how much you love them, and I’m sure they’ll quickly become a cherished part of your family’s dinner rotation.
Cheesy Beef Taco Stuffed Shells – Quick Family Recipe
Taco Stuffed Shells are a culinary revelation, seamlessly blending two universally beloved comfort foods into one incredibly satisfying dish. This ingenious recipe captures the vibrant, zesty flavors of a classic taco night within the comforting embrace of a cheesy pasta bake, making it an instant family favorite.
Ingredients
-
1 box (12 ounces) jumbo pasta shells, uncooked
-
1 tablespoon olive oil (for cooking pasta)
-
Salt
-
1.5 pounds lean ground beef
-
1 tablespoon olive oil (for browning meat)
-
1 medium yellow onion, finely diced
-
3-4 cloves garlic, minced
-
1 large packet (1 ounce) taco seasoning mix
-
1 can (10 ounces) diced tomatoes with green chiles, undrained
-
1/4 cup chicken broth or water (optional)
-
8 ounces cream cheese, softened
-
1/2 cup sour cream
-
1.5 cups shredded Mexican blend cheese, divided
-
Salt and black pepper, to taste
-
1/2 cup salsa
-
Fresh cilantro, chopped (for garnish)
-
Green onions, thinly sliced (for garnish)
Instructions
-
Step 1
Bring a large pot of generously salted water to a rolling boil. Add jumbo pasta shells and cook according to package directions until al dente (approx. 10-12 minutes). Drain, rinse thoroughly with cold water to stop cooking and prevent sticking, then spread on a baking sheet to cool. -
Step 2
In a large skillet, heat 1 tbsp olive oil over medium-high heat. Add ground beef and cook, breaking it apart, until completely browned. Drain off any excess fat. -
Step 3
Reduce heat to medium. Add finely diced onion to the skillet and cook until softened (5-7 mins). Stir in minced garlic and cook for 1 minute until fragrant. Sprinkle taco seasoning over the meat, stir, and cook for 1 minute. Add undrained diced tomatoes with green chiles; simmer for 3-5 minutes, allowing flavors to meld. If mixture is too dry, add 1/4 cup chicken broth or water. -
Step 4
Remove skillet from heat. Stir in softened cream cheese and sour cream until fully incorporated and creamy. Add 1 cup of the shredded Mexican blend cheese and stir until just melted. Taste and adjust salt and pepper as needed. -
Step 5
Preheat oven to 375°F (190°C). Spread 1/2 cup salsa evenly on the bottom of a 9×13-inch baking dish. Generously stuff each cooled pasta shell with the taco filling and arrange them seam-side up in a single layer in the prepared dish. -
Step 6
Sprinkle the remaining 1/2 cup shredded Mexican blend cheese evenly over the stuffed shells. Cover the baking dish tightly with aluminum foil and bake for 20 minutes. Remove foil and bake for an additional 10-15 minutes, or until cheese is bubbly and lightly golden brown. -
Step 7
Let the dish rest for 5-10 minutes after removing from the oven to allow the filling to set. Garnish generously with fresh chopped cilantro and thinly sliced green onions. Serve with optional toppings like extra sour cream, guacamole, or salsa, and complement with a side salad or rice. Enjoy your culinary creation!
Important Information
Nutrition Facts (Per Serving)
It is important to consider this information as approximate and not to use it as definitive health advice.
Allergy Information
Please check ingredients for potential allergens and consult a health professional if in doubt.


Leave a Comment