
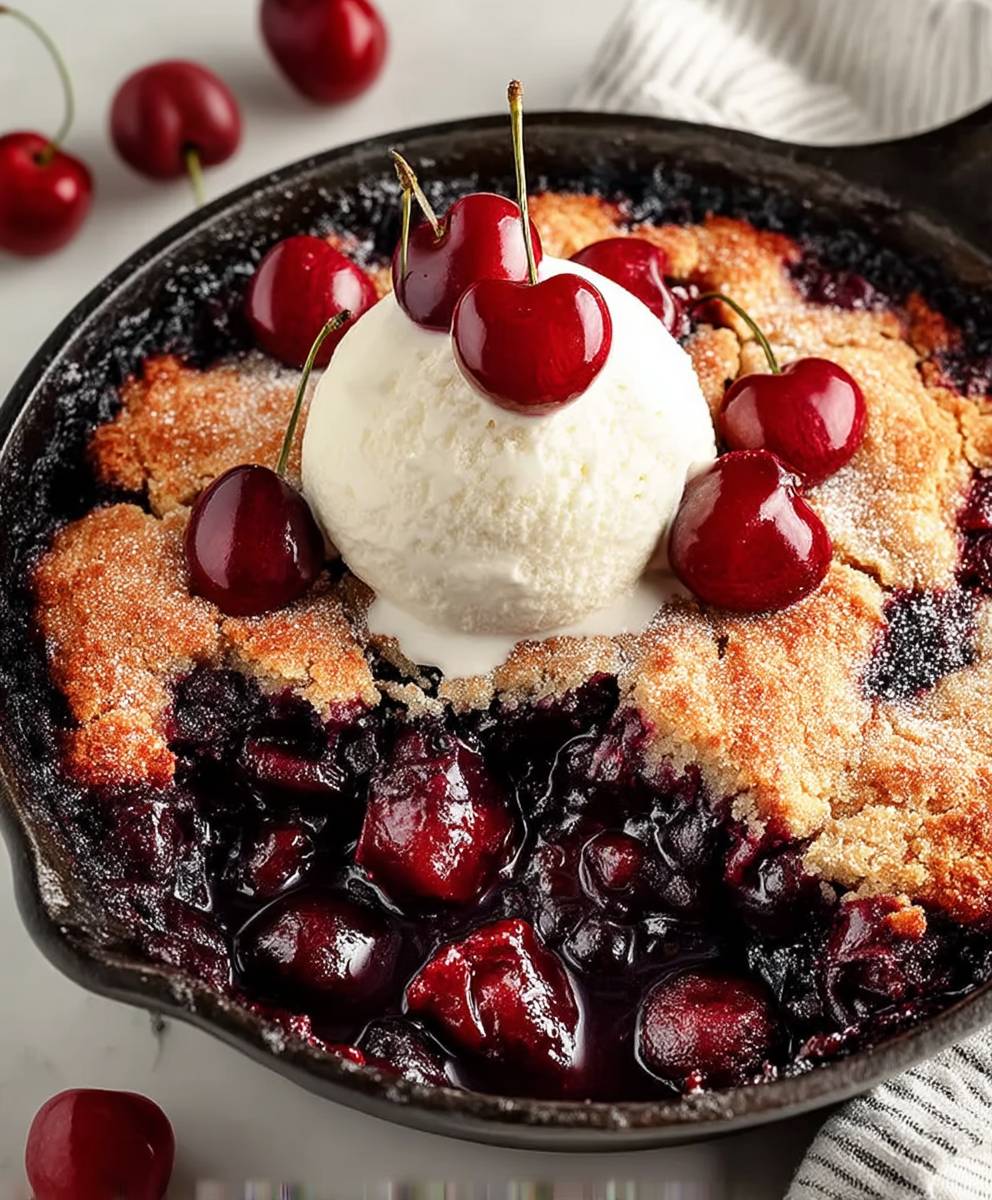
Cherry Cobbler, a dessert that whispers of warm summer evenings and grandma’s loving kitchen, is more than just a sweet treat; it’s a comforting hug in a bowl. Imagine sinking your spoon into a bubbly, crimson filling bursting with juicy cherries, all nestled beneath a golden-brown, biscuit-like topping. Is your mouth watering yet? Mine is!
While the exact origins are debated, cobblers, in general, are believed to have emerged from early American settlers attempting to recreate traditional English puddings with the ingredients they had readily available. Lacking the proper ingredients for a pie crust, they improvised with a simple biscuit dough, creating the charmingly rustic dessert we know and love today. The beauty of a cherry cobbler lies in its simplicity and adaptability.
People adore this dish for so many reasons. The sweet-tartness of the cherries perfectly complements the buttery, slightly crumbly topping. It’s incredibly easy to make, requiring minimal effort and readily available ingredients. Plus, the aroma that fills your kitchen as it bakes is simply divine! Whether you’re serving it warm with a scoop of vanilla ice cream or enjoying a slice the next day, cherry cobbler is guaranteed to bring a smile to your face. So, let’s get baking and create a little bit of happiness, one delicious bite at a time!

Ingredients:
- For the Cherry Filling:
- 6 cups fresh or frozen pitted cherries (if using frozen, do not thaw)
- ¾ cup granulated sugar (adjust to taste depending on cherry sweetness)
- 2 tablespoons cornstarch
- 1 tablespoon lemon juice
- ½ teaspoon almond extract (optional, but highly recommended!)
- Pinch of salt
- For the Cobbler Topping:
- 1 ½ cups all-purpose flour
- 2 tablespoons granulated sugar
- 1 ½ teaspoons baking powder
- ½ teaspoon salt
- ¾ cup milk (whole milk or 2% works best)
- 6 tablespoons (3 ounces) cold unsalted butter, cut into small cubes
- 2 tablespoons granulated sugar (for sprinkling on top)
- 2 tablespoons heavy cream or milk (for brushing on top, optional)
Preparing the Cherry Filling:
- In a large saucepan, combine the cherries, granulated sugar, cornstarch, lemon juice, almond extract (if using), and salt.
- Stir everything together well, ensuring the cornstarch is evenly distributed. This is important to prevent clumps in your filling.
- Place the saucepan over medium heat and bring the mixture to a simmer, stirring occasionally.
- Once simmering, continue to cook for about 5-7 minutes, or until the cherry filling has thickened. Stir frequently to prevent sticking and burning. You’ll notice the sauce becoming glossy and coating the back of a spoon.
- Remove the saucepan from the heat and set aside while you prepare the cobbler topping.
Making the Cobbler Topping:
- Preheat your oven to 375°F (190°C).
- In a large bowl, whisk together the all-purpose flour, sugar, baking powder, and salt. Make sure everything is well combined.
- Add the cold, cubed butter to the dry ingredients.
- Using a pastry blender or your fingertips, cut the butter into the flour mixture until it resembles coarse crumbs. The butter should be in small pieces, about the size of peas. This is crucial for creating a flaky and tender cobbler topping. Don’t overmix!
- Pour in the milk and stir gently until just combined. Be careful not to overmix the batter, as this will result in a tough cobbler. A few streaks of flour are okay.
Assembling and Baking the Cherry Cobbler:
- Pour the prepared cherry filling into a 9×13 inch baking dish. Make sure the filling is evenly distributed.
- Drop spoonfuls of the cobbler topping evenly over the cherry filling. You can use a spoon or a cookie scoop for this. Don’t worry about covering the entire surface; some of the cherry filling should still be visible. This creates those lovely, rustic pockets of bubbling cherry goodness.
- Sprinkle the remaining 2 tablespoons of granulated sugar evenly over the cobbler topping. This will help the topping brown beautifully and add a touch of extra sweetness.
- If desired, brush the top of the cobbler topping with heavy cream or milk. This will promote even browning and give the topping a slightly richer flavor. This step is optional, but I highly recommend it!
- Bake in the preheated oven for 30-40 minutes, or until the cobbler topping is golden brown and the cherry filling is bubbling. Keep an eye on it towards the end of the baking time to prevent the topping from burning. If the topping starts to brown too quickly, you can loosely tent the baking dish with aluminum foil.
- Remove the cherry cobbler from the oven and let it cool for at least 15-20 minutes before serving. This allows the filling to thicken slightly and prevents you from burning your mouth!
Serving Suggestions:
Cherry cobbler is delicious served warm, either on its own or with a scoop of vanilla ice cream, a dollop of whipped cream, or a drizzle of cream. It’s also fantastic with a sprinkle of chopped nuts, such as almonds or pecans. Leftovers can be stored in the refrigerator for up to 3 days. Reheat gently in the oven or microwave before serving.
Tips and Variations:
- Cherry Variety: You can use any type of cherries you like for this recipe. Sweet cherries will require less sugar than tart cherries.
- Frozen Cherries: If using frozen cherries, do not thaw them before using. This will help prevent the filling from becoming too watery.
- Almond Extract: The almond extract is optional, but it adds a lovely depth of flavor to the cherry filling. If you don’t have almond extract, you can substitute it with vanilla extract.
- Lemon Zest: For an extra burst of citrus flavor, add a teaspoon of lemon zest to the cherry filling.
- Spice it Up: Add a pinch of cinnamon or nutmeg to the cherry filling for a warm and comforting flavor.
- Cobbler Topping Variations: You can add a tablespoon of lemon zest or orange zest to the cobbler topping for a citrusy twist. You can also add a handful of chopped nuts to the topping for added texture and flavor.
- Biscuit Topping: For a more biscuit-like topping, use self-rising flour instead of all-purpose flour and omit the baking powder and salt.
- Individual Cobblers: You can bake this recipe in individual ramekins for a more elegant presentation. Reduce the baking time accordingly.
- Make Ahead: You can prepare the cherry filling ahead of time and store it in the refrigerator for up to 2 days. You can also prepare the cobbler topping ahead of time and store it in the refrigerator for up to 24 hours. Assemble and bake the cobbler just before serving.
- Gluten-Free Option: To make this recipe gluten-free, use a gluten-free all-purpose flour blend. Make sure to check that the baking powder is also gluten-free.
- Vegan Option: To make this recipe vegan, use plant-based milk and vegan butter.
Troubleshooting:
- Cobbler Topping is Too Dry: If your cobbler topping is too dry, add a little more milk, one tablespoon at a time, until the batter reaches the desired consistency.
- Cobbler Topping is Too Wet: If your cobbler topping is too wet, add a little more flour, one tablespoon at a time, until the batter reaches the desired consistency.
- Cherry Filling is Too Thin: If your cherry filling is too thin, cook it for a few more minutes, stirring constantly, until it thickens. You can also add a little more cornstarch, mixed with a tablespoon of cold water, to the filling.
- Cobbler Topping is Burning: If your cobbler topping is browning too quickly, loosely tent the baking dish with aluminum foil.
Enjoy your homemade Cherry Cobbler!
Conclusion:
This Cherry Cobbler recipe isn’t just another dessert; it’s a warm hug on a plate, a burst of summer in every bite, and a guaranteed crowd-pleaser. The combination of sweet, juicy cherries and the buttery, golden-brown biscuit topping is simply irresistible. It’s the kind of dessert that evokes memories of childhood, family gatherings, and pure, unadulterated joy. I truly believe that once you try this recipe, it will become a staple in your baking repertoire.
But what makes this particular Cherry Cobbler a must-try? It’s the simplicity! We’re talking about minimal ingredients, straightforward instructions, and a relatively short baking time. You don’t need to be a seasoned baker to achieve cobbler perfection. Even if you’re a beginner, I’m confident you can whip up this delightful treat with ease. Plus, the recipe is incredibly versatile. Feel free to use fresh, frozen, or even canned cherries, depending on what’s available and your personal preference.
Now, let’s talk about serving suggestions! While this Cherry Cobbler is absolutely divine on its own, a scoop of vanilla ice cream or a dollop of freshly whipped cream elevates it to a whole new level of indulgence. The cold creaminess perfectly complements the warm, fruity cobbler, creating a symphony of flavors and textures that will tantalize your taste buds. For a slightly different twist, try serving it with a sprinkle of cinnamon or a drizzle of maple syrup.
And the variations? Oh, the possibilities are endless! If you’re feeling adventurous, you can add a touch of almond extract to the cherry filling for a subtle nutty flavor. Or, for a more complex taste, try incorporating a hint of lemon zest or a splash of bourbon. You could even experiment with different types of fruit. Peaches, blueberries, or a mixed berry combination would all work beautifully in this recipe. Consider adding a streusel topping instead of the biscuit topping for a crunchier texture. Get creative and make it your own!
I’m so excited for you to try this recipe and experience the magic of homemade Cherry Cobbler. It’s the perfect dessert for any occasion, whether it’s a casual weeknight dinner or a special celebration. It’s also a wonderful way to use up those summer cherries before they disappear.
So, what are you waiting for? Gather your ingredients, preheat your oven, and get ready to bake! I promise you won’t be disappointed. And once you’ve created your masterpiece, I’d love to hear about it! Share your photos, your variations, and your overall experience in the comments below. Let me know what you thought of the recipe and if you made any modifications. Your feedback is invaluable and helps me to continue creating delicious and easy-to-follow recipes for you to enjoy. Happy baking! I can’t wait to see your beautiful Cherry Cobbler creations! Don’t forget to tag me in your photos on social media! Let’s spread the cobbler love!
Cherry Cobbler: The Ultimate Guide to Baking the Perfect Dessert
Warm and comforting Cherry Cobbler with a sweet and tangy cherry filling and a tender, golden-brown cobbler topping. Perfect for dessert!
Ingredients
- 6 cups fresh or frozen pitted cherries (if using frozen, do not thaw)
- ¾ cup granulated sugar (adjust to taste depending on cherry sweetness)
- 2 tablespoons cornstarch
- 1 tablespoon lemon juice
- ½ teaspoon almond extract (optional, but highly recommended!)
- Pinch of salt
- 1 ½ cups all-purpose flour
- 2 tablespoons granulated sugar
- 1 ½ teaspoons baking powder
- ½ teaspoon salt
- ¾ cup milk (whole milk or 2% works best)
- 6 tablespoons (3 ounces) cold unsalted butter, cut into small cubes
- 2 tablespoons granulated sugar (for sprinkling on top)
- 2 tablespoons heavy cream or milk (for brushing on top, optional)
Instructions
- Prepare the Cherry Filling: In a large saucepan, combine the cherries, granulated sugar, cornstarch, lemon juice, almond extract (if using), and salt. Stir well to distribute the cornstarch.
- Place the saucepan over medium heat and bring the mixture to a simmer, stirring occasionally.
- Simmer for 5-7 minutes, or until the cherry filling has thickened, stirring frequently to prevent sticking. Remove from heat and set aside.
- Make the Cobbler Topping: Preheat oven to 375°F (190°C).
- In a large bowl, whisk together the all-purpose flour, sugar, baking powder, and salt.
- Add the cold, cubed butter to the dry ingredients. Cut the butter into the flour mixture using a pastry blender or your fingertips until it resembles coarse crumbs.
- Pour in the milk and stir gently until just combined. Be careful not to overmix.
- Assemble and Bake: Pour the prepared cherry filling into a 9×13 inch baking dish.
- Drop spoonfuls of the cobbler topping evenly over the cherry filling.
- Sprinkle the remaining 2 tablespoons of granulated sugar evenly over the cobbler topping.
- If desired, brush the top of the cobbler topping with heavy cream or milk.
- Bake in the preheated oven for 30-40 minutes, or until the cobbler topping is golden brown and the cherry filling is bubbling. If the topping starts to brown too quickly, loosely tent the baking dish with aluminum foil.
- Remove from the oven and let cool for at least 15-20 minutes before serving.
Notes
- Serve warm, on its own or with vanilla ice cream, whipped cream, or a drizzle of cream.
- Leftovers can be stored in the refrigerator for up to 3 days. Reheat gently in the oven or microwave before serving.
- Cherry Variety: You can use any type of cherries you like for this recipe. Sweet cherries will require less sugar than tart cherries.
- Frozen Cherries: If using frozen cherries, do not thaw them before using. This will help prevent the filling from becoming too watery.
- Almond Extract: The almond extract is optional, but it adds a lovely depth of flavor to the cherry filling. If you don’t have almond extract, you can substitute it with vanilla extract.
- Lemon Zest: For an extra burst of citrus flavor, add a teaspoon of lemon zest to the cherry filling.
- Spice it Up: Add a pinch of cinnamon or nutmeg to the cherry filling for a warm and comforting flavor.
- Cobbler Topping Variations: You can add a tablespoon of lemon zest or orange zest to the cobbler topping for a citrusy twist. You can also add a handful of chopped nuts to the topping for added texture and flavor.
- Biscuit Topping: For a more biscuit-like topping, use self-rising flour instead of all-purpose flour and omit the baking powder and salt.
- Individual Cobblers: You can bake this recipe in individual ramekins for a more elegant presentation. Reduce the baking time accordingly.
- Make Ahead: You can prepare the cherry filling ahead of time and store it in the refrigerator for up to 2 days. You can also prepare the cobbler topping ahead of time and store it in the refrigerator for up to 24 hours. Assemble and bake the cobbler just before serving.
- Gluten-Free Option: To make this recipe gluten-free, use a gluten-free all-purpose flour blend. Make sure to check that the baking powder is also gluten-free.
- Vegan Option: To make this recipe vegan, use plant-based milk and vegan butter.
Leave a Comment