
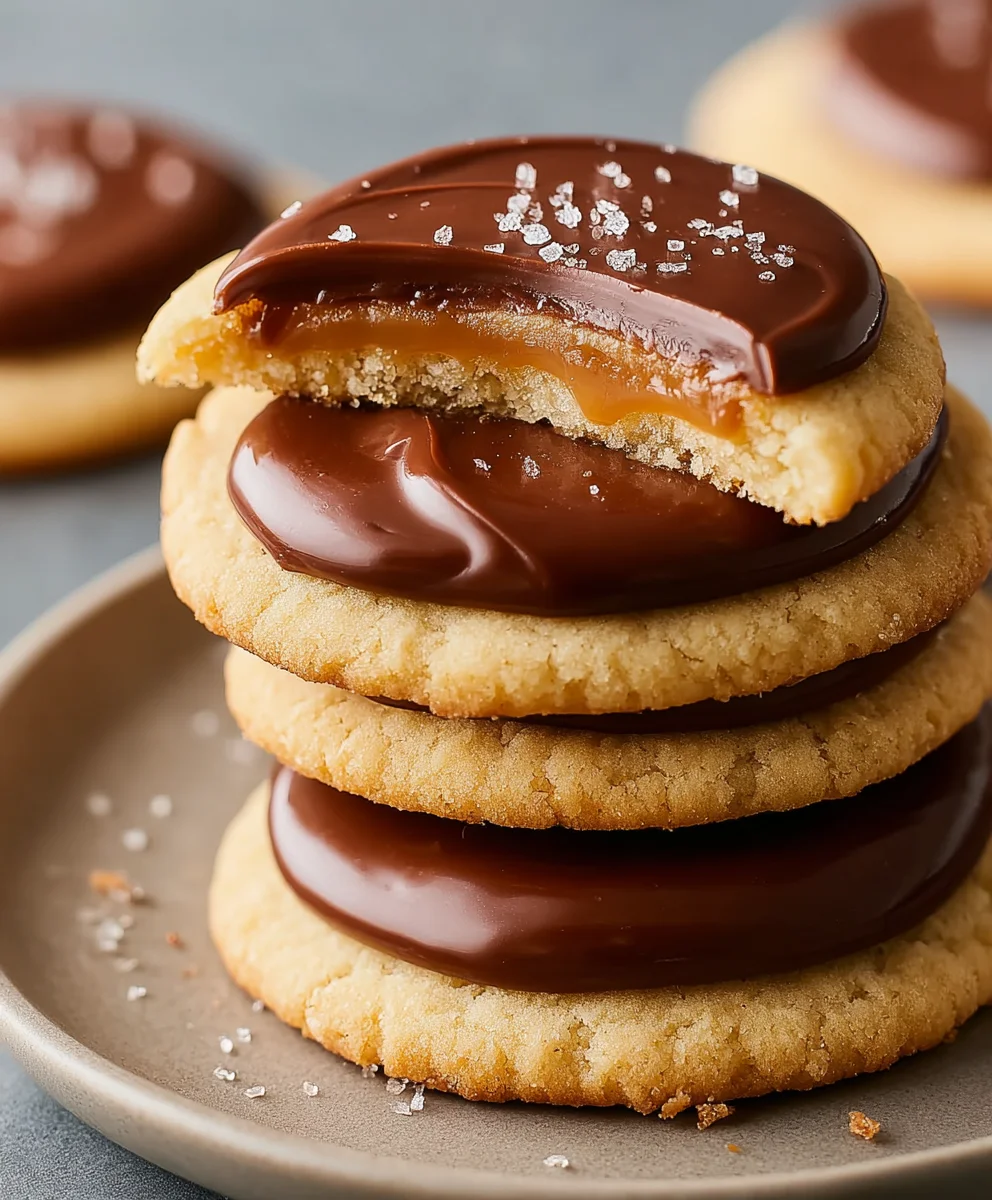
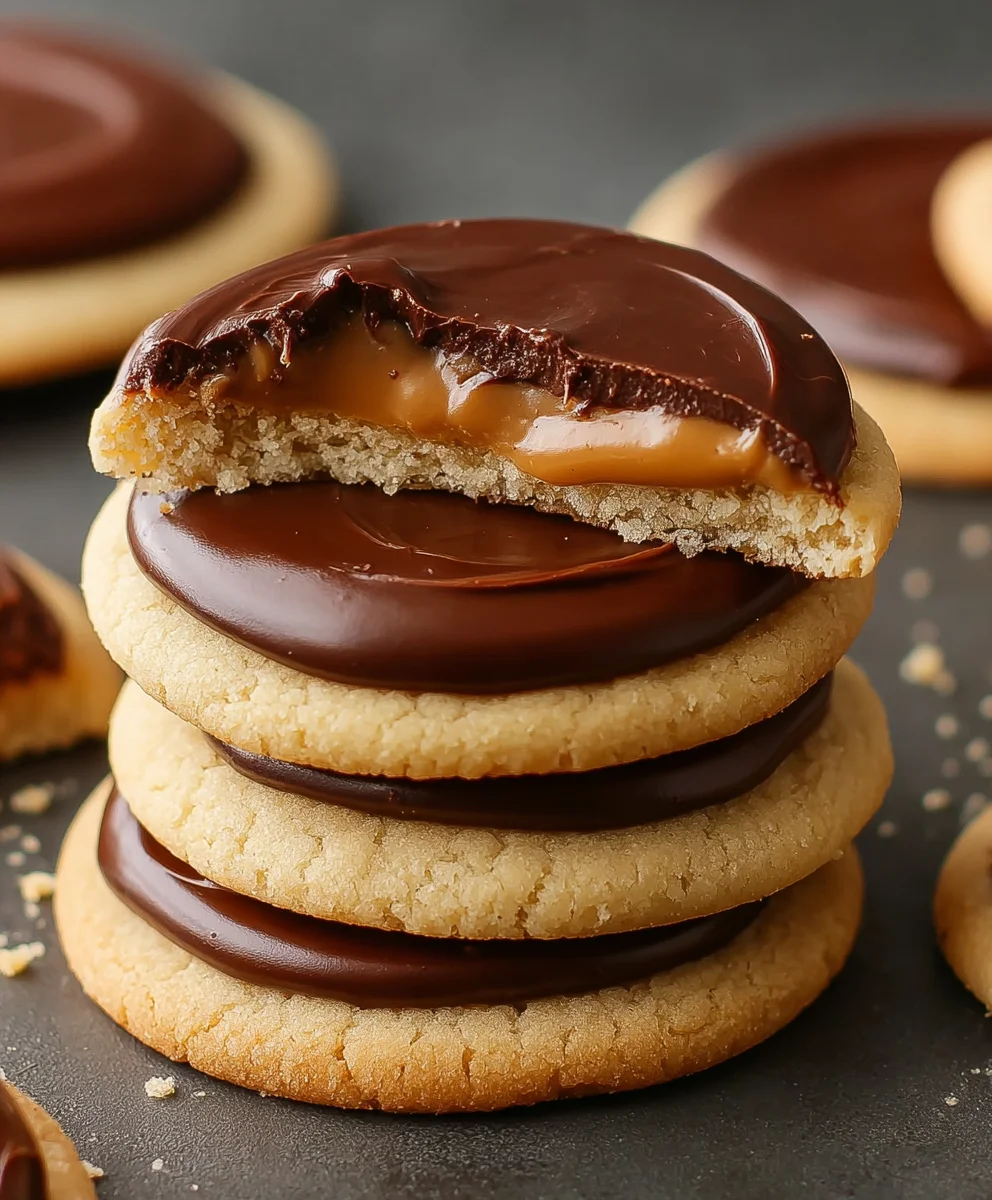
Twix Cookies are more than just a dessert; they’re a nostalgic journey in every bite. If you’ve ever craved that perfect harmony of crunchy shortbread, gooey caramel, and rich chocolate, then you’re in the right place. We all have those childhood treats that evoke a flood of happy memories, and for many, Twix bars hold a special spot. This recipe aims to capture that magic, transforming the beloved candy bar into an irresistible cookie form. What makes these Twix Cookies truly special is the meticulous layering and the dedication to replicating those iconic flavors and textures. We’re talking about a buttery, crumbly base that gives way to a lusciously sweet caramel, all enrobed in a smooth chocolate shell. Prepare to impress yourself and your loved ones with these delightful creations that are sure to become a new family favorite.

Ingredients:
- 1 box white cake mix (15.25 ounces)
- ¾ cup all-purpose flour
- 1 cup salted butter, softened
- 1 ¼ cups caramel bits
- 1 Tablespoon heavy cream
- 1 cup semi-sweet chocolate chips or mini semi-sweet chocolate chips
- ½ Tablespoon salted butter
Preparing the Cookie Dough
The foundation of these delightful Twix Cookies lies in a surprisingly simple yet effective cookie dough base. We’re going to leverage a white cake mix, which provides a wonderfully light and tender crumb, and enhance it with a few key additions for structure and flavor. In a large mixing bowl, combine the entire 15.25-ounce box of white cake mix with ¾ cup of all-purpose flour. Whisk these dry ingredients together thoroughly to ensure they are evenly distributed. This step is crucial for preventing dense pockets in your cookies and ensuring a consistent texture throughout. Next, add 1 cup of softened salted butter to the bowl. It’s important that your butter is truly softened – not melted, but pliable and easy to incorporate. This will help create a smooth and cohesive dough. Using an electric mixer (handheld or stand mixer with a paddle attachment) on medium speed, cream the butter into the dry ingredients until the mixture resembles coarse crumbs. This might take a few minutes, and you want to see that the butter is well incorporated. Don’t overmix at this stage; we’re just aiming for that crumbly texture.
Forming the Caramel Layer
Now, let’s create that signature chewy caramel layer that makes these Twix Cookies so irresistible. In a separate, microwave-safe bowl, combine 1 ¼ cups of caramel bits with 1 Tablespoon of heavy cream. The caramel bits are designed to melt smoothly and easily, and the heavy cream adds a touch of richness and ensures a wonderfully pliable caramel consistency that won’t be too stiff once it sets. Microwave these ingredients in 30-second intervals, stirring thoroughly after each interval, until the caramel bits are completely melted and the mixture is smooth and glossy. Be patient with this process; it’s better to melt it slowly and stir to prevent scorching. Once the caramel is smooth and fully melted, set it aside to cool slightly. You want it to be warm enough to pour or spread but not so hot that it will melt the cookie dough.
Assembling the Twix Cookies
This is where the magic happens and our Twix Cookies begin to take shape. Line two baking sheets with parchment paper. This will prevent sticking and make cleanup a breeze. Now, take spoonfuls of your cookie dough (about 1 tablespoon each) and roll them into balls. Place the dough balls onto the prepared baking sheets, spacing them about 2 inches apart. Once you have your dough balls formed, it’s time to create the indentation for our caramel. Gently flatten each dough ball with the palm of your hand, or the bottom of a glass, to create a disc about ½ inch thick. Then, using the back of a small spoon or your thumb, create a slight indentation in the center of each flattened cookie. This indentation will hold the caramel filling. Now, spoon about ½ to 1 teaspoon of the slightly cooled caramel mixture into the indentation of each cookie. Don’t overfill, as the caramel will spread slightly as the cookies bake.
Baking the Cookies
Preheat your oven to 350 degrees Fahrenheit (175 degrees Celsius). Place one baking sheet at a time into the preheated oven. Bake for 10 to 12 minutes, or until the edges of the cookies are lightly golden brown and the centers are set. Keep a close eye on them, as cake mix-based cookies can brown quickly. The caramel layer should be bubbly but not burnt. Once baked, remove the cookies from the oven and let them cool on the baking sheet for 5 minutes. This allows them to firm up slightly before you move them. After 5 minutes, carefully transfer the cookies to a wire rack to cool completely. It’s essential that the cookies are fully cooled before moving on to the chocolate coating, otherwise, the chocolate will melt off.
Adding the Chocolate Drizzle
The final touch to our Twix Cookies is the glorious chocolate coating. In a microwave-safe bowl, combine 1 cup of semi-sweet chocolate chips (or mini semi-sweet chocolate chips for a more delicate drizzle) with ½ Tablespoon of salted butter. The butter helps to create a smoother, more fluid chocolate for drizzling. Microwave in 30-second intervals, stirring between each, until the chocolate is melted and smooth. Alternatively, you can melt the chocolate using a double boiler. Once melted, let the chocolate cool for a few minutes until it’s still pourable but not piping hot. Now, using a spoon or a piping bag with a fine tip, drizzle the melted chocolate over the cooled cookies. You can create a zigzag pattern, a solid coating on the bottom, or simply drizzle artfully across the top. The goal is to mimic the classic Twix bar appearance. Allow the chocolate to set completely at room temperature or speed up the process by placing the cookies in the refrigerator for about 15-20 minutes.
Conclusion:
There you have it! A complete guide to creating delicious homemade Twix Cookies that are sure to impress. We’ve covered everything from selecting the perfect ingredients to mastering the layering technique that gives these cookies their signature crunch and chew. The satisfying crumble of the shortbread base, the gooey caramel center, and the rich chocolate coating all come together to create a truly irresistible treat. Don’t be intimidated by the steps; with a little patience and practice, you’ll be churning out batches of these delightful Twix Cookies in no time.
For serving, these cookies are fantastic on their own, but they also pair beautifully with a glass of cold milk or a hot cup of coffee. They make wonderful additions to cookie platters for parties or bake sales, and they’re a guaranteed hit as a homemade gift. Feel free to get creative with variations! You could sprinkle sea salt on top of the chocolate for a salted caramel effect, or add a touch of espresso powder to the shortbread for a mocha twist. Experiment with different types of chocolate for the coating, like dark or white chocolate, to suit your preference. The most important thing is to have fun and enjoy the process!
Frequently Asked Questions about Twix Cookies:
Q: How long do these Twix Cookies last?
A: Properly stored in an airtight container at room temperature, these Twix Cookies will stay fresh and delicious for up to 5 days. For longer storage, you can freeze them for up to 2 months, making them a great option for making ahead.
Q: Can I make the caramel filling from scratch?
A: Absolutely! While a good quality pre-made caramel works well, making your own caramel sauce from scratch will elevate these cookies even further. Ensure your homemade caramel is thick enough to hold its shape when dolloped onto the shortbread base.
Q: What’s the best way to get a clean chocolate coating?
A: To achieve a smooth and even chocolate coating, ensure your chocolate is fully melted and tempered correctly. Dipping the chilled shortbread base into the melted chocolate and allowing any excess to drip off before placing it on parchment paper will help create a cleaner finish. You can also use a fork to help spread the chocolate.
Chewy Twix Cookies
Homemade cookies that capture the delicious candy bar taste of Twix, featuring a chewy caramel layer and chocolate drizzle.
Ingredients
-
1 box white cake mix (15.25 ounces)
-
¾ cup all-purpose flour
-
1 cup salted butter, softened
-
1 ¼ cups caramel bits
-
1 Tablespoon heavy cream
-
1 cup semi-sweet chocolate chips
-
½ Tablespoon salted butter
Instructions
-
Step 1
In a large bowl, whisk together the white cake mix and all-purpose flour. Add the softened butter and mix with an electric mixer on medium speed until the mixture resembles coarse crumbs. -
Step 2
In a microwave-safe bowl, combine caramel bits and heavy cream. Microwave in 30-second intervals, stirring after each, until smooth and glossy. Set aside to cool slightly. -
Step 3
Line two baking sheets with parchment paper. Roll tablespoonfuls of cookie dough into balls, flatten them slightly, and create a small indentation in the center of each. Spoon ½ to 1 teaspoon of caramel into each indentation. -
Step 4
Preheat oven to 350°F (175°C). Bake cookies for 10-12 minutes, or until edges are golden brown and centers are set. Let cool on the baking sheet for 5 minutes before transferring to a wire rack to cool completely. -
Step 5
In a microwave-safe bowl, combine chocolate chips and ½ Tablespoon butter. Microwave in 30-second intervals, stirring until melted and smooth. Let cool slightly. -
Step 6
Drizzle the melted chocolate over the cooled cookies. Allow the chocolate to set completely at room temperature or in the refrigerator.
Important Information
Nutrition Facts (Per Serving)
It is important to consider this information as approximate and not to use it as definitive health advice.
Allergy Information
Please check ingredients for potential allergens and consult a health professional if in doubt.
Leave a Comment