
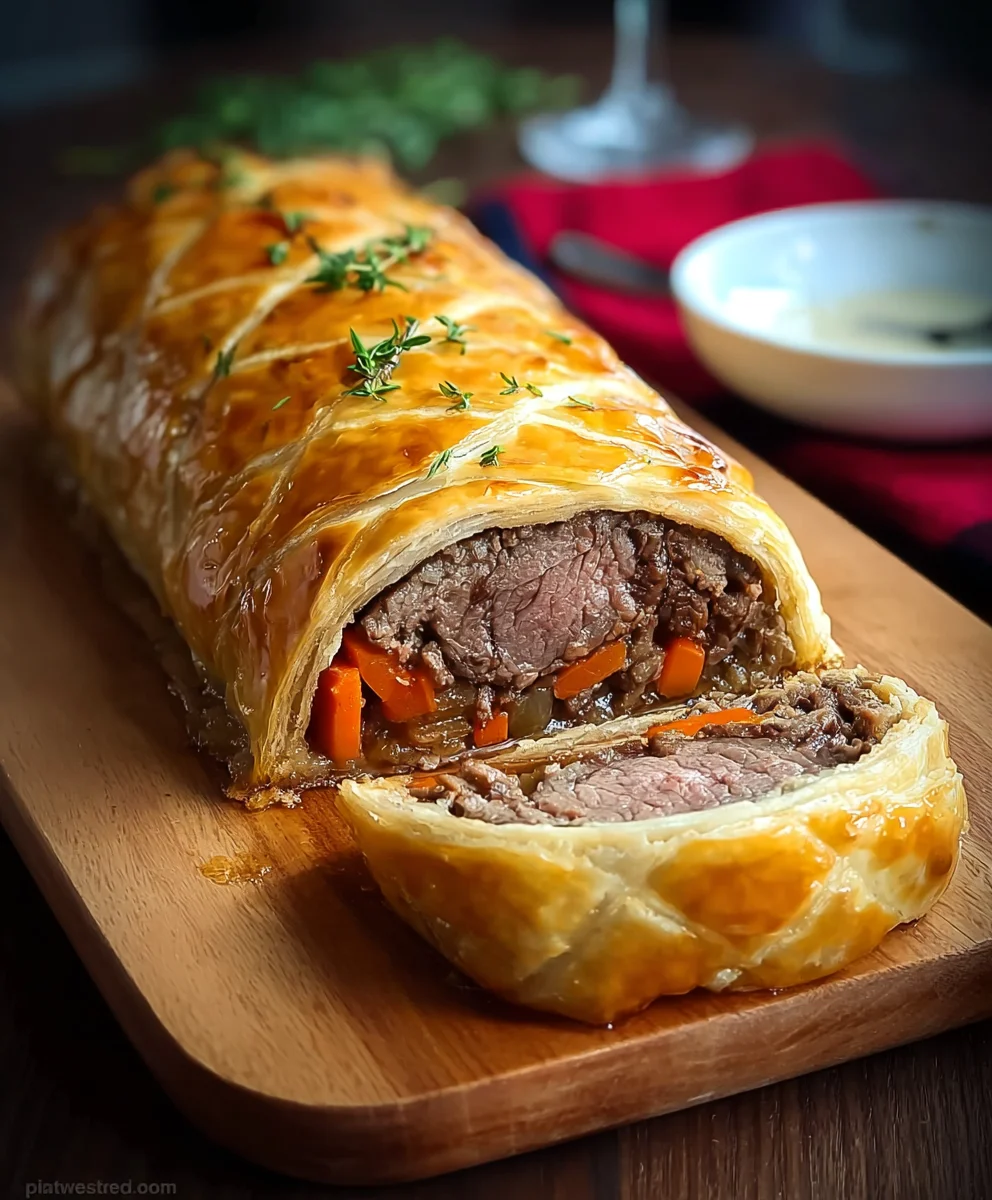
Beef Wellington is more than just a dish; it’s an experience. That glistening, golden pastry encasing a perfectly seared fillet, crowned with rich mushroom duxelles and a whisper of beef prosciutto – it’s a symphony of textures and flavors that has captured hearts and palates for generations. There’s something undeniably celebratory about this classic, a dish that whispers of grandeur and special occasions, yet can bring everyday meals to an extraordinary level. What makes Beef Wellington so beloved? It’s the exquisite balance: the tender, juicy beef that melts in your mouth, contrasted with the earthy, savory depth of the duxelles and the crisp, buttery puff pastry that yields with a satisfying crunch. It’s a culinary masterpiece that, while appearing formidable, is entirely achievable with a little patience and this detailed guide.
Unlock the secrets to your own show-stopping
Beef Wellington

Ingredients:
- 1 medium onion, finely chopped
- 1 carrot, finely chopped
- 1 stalk celery, finely chopped
- 1 medium potato, peeled and finely chopped
- 4 sprigs fresh rosemary, leaves picked and finely chopped
- 2 tablespoons olive oil
- 2 cloves garlic, minced
- 1 lb 1.6 oz minced beef (approximately 500 grams)
- 1 teaspoon salt
- 1 teaspoon black pepper
- 1 large egg, beaten (for egg wash)
- 1 lb 1.6 oz puff pastry (approximately 500 grams), thawed if frozen
Preparing the Beef and Duxelles
Sautéing the Mirepoix and Aromatics
Let’s begin extract by building the flavor base for our Beef Wellington. In a large skillet or Dutch oven, heat the 2 tablespoons of olive oil over medium heat. Once the oil is shimmering, add the finely chopped onion, carrot, and celery. This trio, known as mirepoix, will provide a wonderful depth of savory flavor. Cook, stirring occasionally, for about 8-10 minutes, or until the vegetables have softened and the onions are translucent. Don’t rush this step; allowing the vegetables to caramelize slightly will enhance their sweetness and complexity. Next, add the minced garlic and the chopped rosemary leaves to the skillet. Cook for another minute until the garlic is fragrant, being careful not to burn it. The rosemary will release its piney aroma, perfuming the entire mixture.
Cooking the Minced Beef and Creating the Duxelles
Now, it’s time to introduce the star of the show, the minced beef. Add the 1 lb 1.6 oz of minced beef to the skillet with the sautéed vegetables. Break up the meat with your spoon and cook, stirring frequently, until it’s thoroughly browned. Drain off any excess fat from the skillet. This is a crucial step to prevent a greasy duxelles, which could make your pastry soggy. Season the beef mixture generously with 1 teaspoon of salt and 1 teaspoon of black pepper. Continue to cook for a few more minutes, allowing the seasoning to meld with the beef and vegetables. Once the beef is cooked through and well-combined with the vegetables, this flavorful mixture is often referred to as a duxelles, the rich, savory filling for our Beef Wellington.
Assembling the Beef Wellington
Cooling and Shaping the Filling
Before we move on to assembling the Wellington, it’s important to let our beef and vegetable mixture cool completely. You can transfer it to a plate or a bowl and spread it out to speed up the cooling process. This prevents the heat from melting the puff pastry prematurely. Once cooled, you can lightly shape the filling into a rough log or an oval shape that will fit nicely within your pastry. This will make wrapping the pastry much neater.
Preparing the Puff Pastry
While the filling cools, let’s get our puff pastry ready. If your puff pastry is frozen, ensure it has thawed according to package directions. Puff pastry is very delicate, so handle it gently. Lightly flour your work surface and the rolling pin. Unroll or unfold the puff pastry. If you have a block, you’ll need to roll it out into a rectangle. The exact size will depend on the size of your beef filling, but aim for a rectangle that is large enough to completely encase the filling with some overlap for sealing. You want the pastry to be roughly 1/8 inch thick. If you’re using pre-rolled sheets, you might be able to use them as is, or gently unroll and join them to create a larger sheet.
Encasing the Filling
Now for the exciting part – wrapping our delicious filling in buttery puff pastry. Lay the rectangle of puff pastry on your lightly floured work surface. Place the cooled beef filling in the center of the pastry, orienting it to create a log-like shape. Now, carefully bring one long side of the puff pastry up and over the filling, tucking it in snugly. Then, bring the other long side up and over, ensuring it overlaps the first side. Gently press the seam to seal it. Trim any excess pastry from the ends, leaving enough to fold over and seal neatly. Fold the ends up and over the filling, pressing firmly to create a well-senon-alcoholic aled parcel. Ensure there are no gaps where the filling could escape during baking. You want to create a tight, compact package. For a really professional finish, you can crimp the edges with a fork to ensure a secure seal.
Baking the Beef Wellington
Egg Wash and Baking Preparation
Once your Beef Wellington is neatly encased in puff pastry, it’s time to prepare it for baking. Preheat your oven to 400°F (200°C). Line a baking sheet with parchment paper. This will prevent sticking and make cleanup a breeze. Place the assembled Beef Wellington seam-side down on the prepared baking sheet. Now, for that beautiful golden-brown crust, we’ll apply an egg wash. In a small bowl, whisk together the large egg. Using a pastry brush, generously brush the entire surface of the puff pastry with the beaten egg. This egg wash will give the pastry a glossy sheen and a lovely golden color as it bakes. You can also score the top of the pastry with a sharp knife in a decorative pattern if you wish, but be careful not to cut all the way through to the filling.
Baking to Perfection
Carefully transfer the baking sheet with your Beef Wellington into the preheated oven. Bake for approximately 30-40 minutes, or until the puff pastry is deeply golden brown, puffed up, and cooked through. The exact baking time will depend on your oven and the thickness of your Wellington. It’s a good idea to keep an eye on it during the last 10 minutes of baking to ensure it doesn’t over-brown. If it starts to get too dark too quickly, you can loosely tent it with aluminum foil. Once baked to perfection, remove the Beef Wellington from the oven and let it rest on the baking sheet for at least 10-15 minutes before slicing. This resting period is crucial for the juices to redistribute within the beef, ensuring a tender and moist result.
Conclusion:
And there you have it – your guide to creating a show-stopping Beef Wellington! We’ve walked through each step, from searing that beautiful cut of beef to wrapping it in delicate beef prosciutto and a rich duxelles, all encased in flaky puff pastry. The result is a culinary masterpiece that’s surprisingly achievable with careful preparation and attention to detail. This classic dish is perfect for special occasions, holiday dinners, or whenever you want to impress your guests (or just treat yourself!).
For serving suggestions, consider pairing your Beef Wellington with creamy mashed potatoes, roasted root vegetables, or a simple green salad tossed with a vinaigrette. A rich red grape juice sauce or a port grape juice reduction also complements the flavors beautifully. If you’re looking for variations, feel free to experiment with different mushroom varieties in your duxelles, or add a sprinkle of fresh herbs like thyme or rosemary. Don’t be afraid to make it your own!
We truly hope you enjoy making and savoring this iconic Beef Wellington. The satisfaction of pulling a perfectly golden, tender Wellington from your oven is immense. Happy cooking!
Frequently Asked Questions:
Can I make the Beef Wellington ahead of time?
Yes, you can! You can prepare the beef, duxelles, and wrap it inbeef prosciuttoiutto and pastry up to 24 hours in advance. Store it tightly wrapped in the refrigerator. When ready to bake, you might need to add a few extra minutes to the cooking time to ensure the center reaches your desired temperature.
What cut of beef is best for Beef Wellington?
The best cut for Beef Wellington is a center-cut beef tenderloin. This cut is incredibly tender and has a uniform shape, which makes it ideal for wrapping and achieving even cooking.
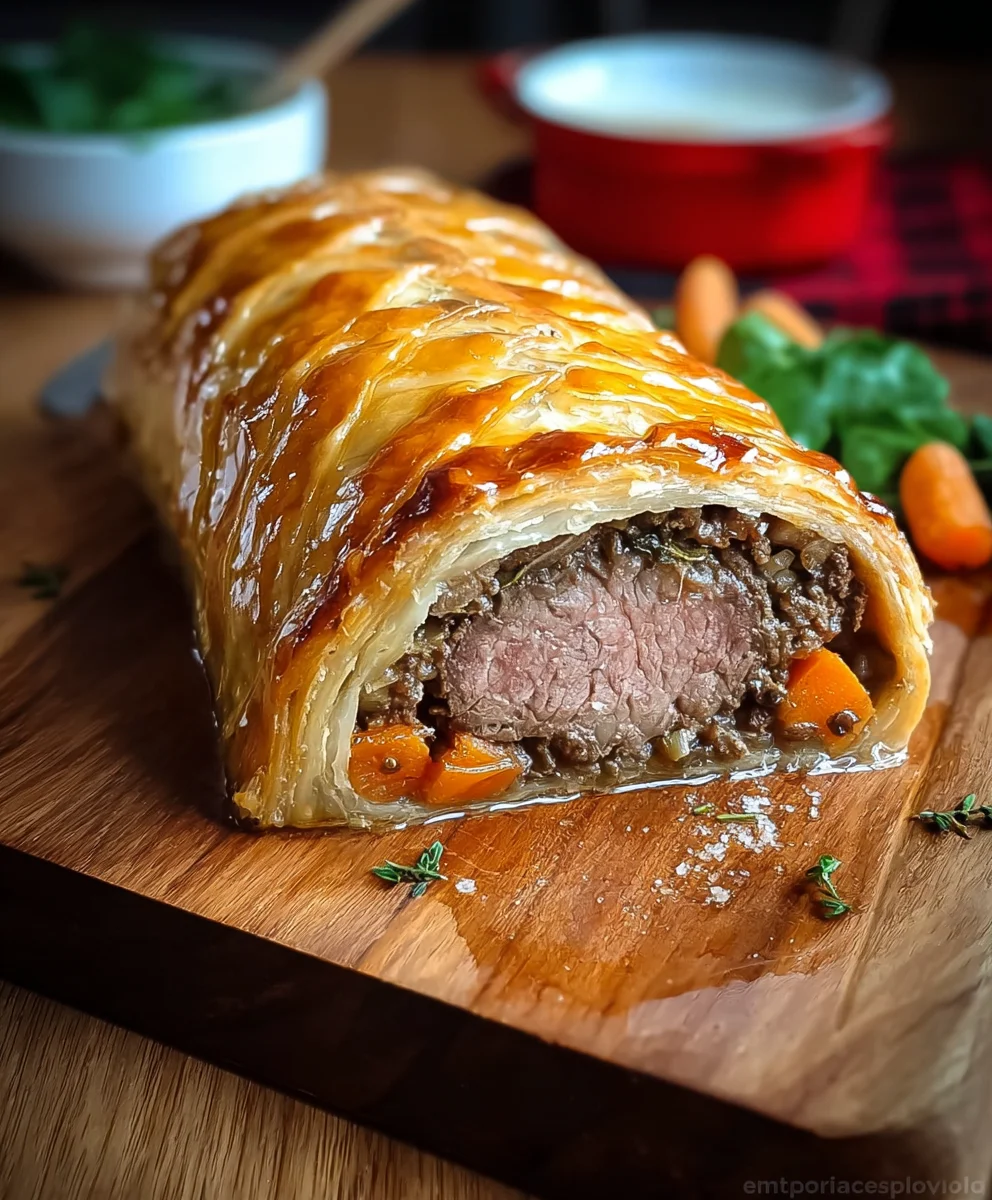
Classic Beef Wellington – A Decadent Feast
A classic Beef Wellington recipe featuring a rich minced beef and vegetable filling encased in golden puff pastry. This decadent dish is perfect for special occasions.
Ingredients
-
1 medium onion, finely chopped
-
1 carrot, finely chopped
-
1 stalk celery, finely chopped
-
1 medium potato, peeled and finely chopped
-
4 sprigs fresh rosemary, leaves picked and finely chopped
-
2 tablespoons olive oil
-
2 cloves garlic, minced
-
1 lb 1.6 oz minced beef
-
1 teaspoon salt
-
1 teaspoon black pepper
-
1 large egg, beaten
-
1 lb 1.6 oz puff pastry, thawed if frozen
Instructions
-
Step 1
Sauté the mirepoix: Heat olive oil in a large skillet over medium heat. Add chopped onion, carrot, and celery. Cook for 8-10 minutes until softened. Add minced garlic and chopped rosemary; cook for 1 minute more until fragrant. -
Step 2
Cook the beef: Add minced beef to the skillet. Break up the meat and cook until thoroughly browned. Drain excess fat. Season with salt and pepper. Cook for a few more minutes to meld flavors. -
Step 3
Assemble the Wellington: Let the beef mixture cool completely. Shape it into a log. Lay out puff pastry, large enough to encase the filling. Place the beef filling in the center and wrap the pastry around it, sealing the edges and ends firmly. Crimp edges with a fork. -
Step 4
Prepare for baking: Preheat oven to 400°F (200°C). Line a baking sheet with parchment paper. Place the assembled Beef Wellington seam-side down on the baking sheet. Brush the entire surface with beaten egg for an egg wash. -
Step 5
Bake the Wellington: Bake for 30-40 minutes, or until the puff pastry is deeply golden brown and puffed up. If it browns too quickly, tent loosely with foil. Let rest for 10-15 minutes before slicing.
Important Information
Nutrition Facts (Per Serving)
It is important to consider this information as approximate and not to use it as definitive health advice.
Allergy Information
Please check ingredients for potential allergens and consult a health professional if in doubt.


Leave a Comment