
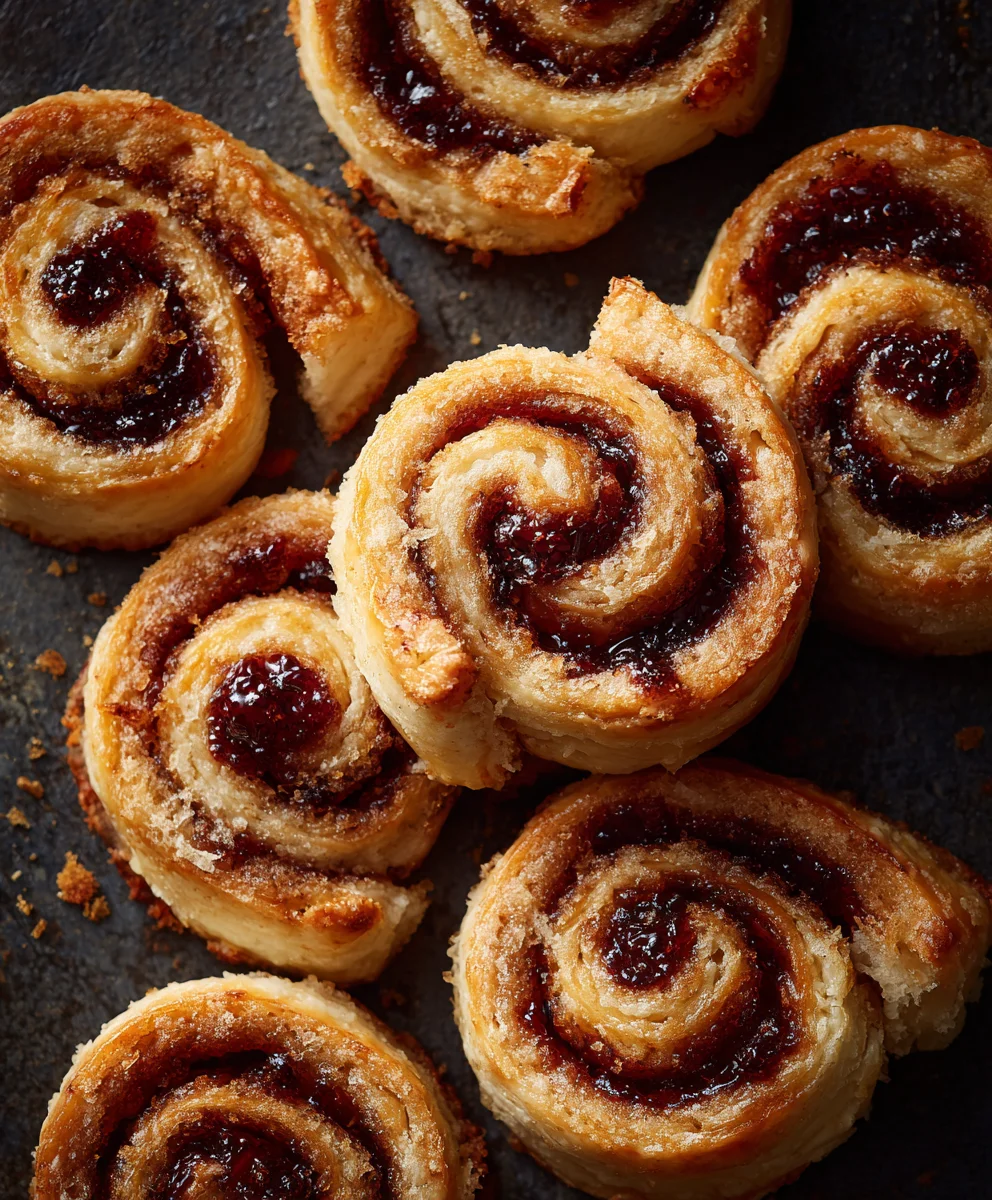
Cream Cheese Jam Pinwheels are truly a culinary delight that promises to brighten any day, from a simple morning coffee to an elaborate brunch gathering. Imagine a vibrant swirl of sweet, fruity jam peeking out from a luscious, tangy cream cheese filling, all encased within a golden, tender pastry. This irresistible combination creates a symphony of flavors and textures that is simply unforgettable. While the concept of rolled pastries with fillings has graced tables for centuries across various cultures, these delightful pinwheels have found their special place as a modern favorite, celebrated for their captivating appearance and incredible taste.
I find that people absolutely adore Cream Cheese Jam Pinwheels not only for their stunning visual appeal – those mesmerizing spirals of color and cream – but also for the exquisite balance of flavors. The slight tanginess of the cream cheese brilliantly cuts through the sweetness of your chosen fruit jam, creating a harmonious blend that tantalizes the taste buds. Furthermore, the flaky, buttery pastry provides the perfect tender contrast to the smooth, rich filling. They are surprisingly easy to prepare, making them an ideal choice for both experienced bakers and those new to the kitchen looking to impress. Whether served warm or at room temperature, they are a guaranteed crowd-pleaser and a perfect treat for any occasion.

Ingredients:
- For the Dough:
- 2 ½ cups (300g) all-purpose flour, plus more for dusting – I always opt for unbleached all-purpose flour for a slightly finer texture in my pastry dough.
- 1 teaspoon baking powder – This provides a little lift, making our pinwheels wonderfully tender.
- ¼ teaspoon salt – A crucial ingredient to balance the sweetness and enhance all the flavors.
- 1 cup (226g) unsalted butter, very cold and cut into ½-inch cubes – Using very cold butter is paramount for flaky pastry. I often pop my cut butter back into the freezer for 10-15 minutes before I start.
- 8 ounces (226g) full-fat cream cheese, very cold and cut into 1-inch pieces – Full-fat cream cheese is non-negotiable here; it contributes to the dough’s incredible richness and tenderness.
- ¼ cup (50g) granulated sugar – Just enough sweetness for the dough itself.
- 1 teaspoon pure vanilla extract – A lovely aromatic touch that complements the cream cheese beautifully.
- For the Filling:
- ¾ cup (225g) high-quality fruit jam – My personal favorites are raspberry or apricot, but feel free to choose your preferred flavor. Just make sure it’s a good quality jam, not a jelly, as we want that lovely fruit texture. Ensure it’s not too runny. If your jam seems thin, you can gently warm it and stir in a teaspoon of cornstarch mixed with a tablespoon of water, then cool it completely.
- For the Egg Wash:
- 1 large egg – This gives the pinwheels a beautiful golden-brown sheen.
- 1 tablespoon water or milk – To thin out the egg for an even wash.
- Optional Garnish:
- Powdered sugar for dusting – A delicate finish that adds a touch of elegance and extra sweetness.
Preparing the Cream Cheese Pastry Dough
Creating the perfect dough for these Cream Cheese Jam Pinwheels is where all the magic truly begins. This dough is incredibly forgiving and delivers an exceptional tender, slightly flaky result that perfectly complements the sweet jam filling. Follow these steps carefully, and you’ll be on your way to a delightful treat.
-
Combine Dry Ingredients: In a large mixing bowl, I like to whisk together the all-purpose flour, baking powder, and salt. This ensures all the dry ingredients are evenly distributed before we introduce the fats. A good whisk for about 30 seconds usually does the trick for me.
-
Cut in the Cold Butter: Now, for the critical step of incorporating the cold butter. You have a couple of options here, depending on your preferred method.
- Food Processor Method (My Go-To): If you have a food processor, this is by far the quickest and most efficient way. Add the flour mixture to the food processor bowl. Scatter the very cold, cubed unsalted butter over the flour. Pulse about 8-10 times, using 1-second bursts, until the mixture resembles coarse meal with some pea-sized pieces of butter still visible. It’s important not to over-process here; we want discernible butter pieces, as these are what create flakiness in the final pastry.
- Pastry Blender/Fingers Method: If you don’t have a food processor, simply add the butter to the flour mixture in your large bowl. Use a pastry blender or your fingertips to cut the butter into the flour. Work quickly to prevent the butter from warming too much. Continue until the mixture resembles coarse crumbs with varying sizes of butter pieces, again aiming for some pea-sized chunks.
-
Add Cold Cream Cheese: Next, add the very cold, cut-up cream cheese pieces to the butter-flour mixture. If using a food processor, pulse another 5-7 times until the cream cheese is mostly incorporated but still in small pieces. If mixing by hand, use your pastry blender or clean hands to work in the cream cheese until it’s distributed but not fully mixed in.
-
Introduce Sugar and Vanilla: Sprinkle the granulated sugar and drizzle the pure vanilla extract over the mixture. Continue to pulse in the food processor, or mix by hand, until the dough just begins to come together. My advice here is to stop as soon as it starts to clump. You really don’t want to overmix the dough, as this can develop the gluten too much and result in tough pinwheels.
-
Form and Chill the Dough: Carefully turn the dough out onto a lightly floured surface. Gather it into a cohesive ball or disc. You might notice it’s a bit shaggy, and that’s perfectly fine! Divide the dough in half and gently flatten each half into a disc about 1 inch thick. Wrap each disc tightly in plastic wrap. This chilling step is absolutely crucial. It allows the butter and cream cheese to firm up again, making the dough much easier to roll out, and it also gives the gluten a chance to relax, contributing to a more tender pastry. Refrigerate the dough for at least 2 hours, but preferably 4 hours or even overnight. I often make my dough the day before to save time.
Assembling the Cream Cheese Jam Pinwheels
Once your dough is perfectly chilled and ready, the assembly process is quite straightforward and a lot of fun! This is where you really start to see your delicious Cream Cheese Jam Pinwheels take shape.
-
Prepare Your Workspace and Preheat Oven: Lightly flour a clean work surface, your rolling pin, and a bench scraper (if you have one). Preheat your oven to 375°F (190°C). Line two large baking sheets with parchment paper or silicone baking mats. I always use parchment paper for easy cleanup and to prevent sticking.
-
Roll Out the First Dough Disc: Remove one disc of chilled dough from the refrigerator (keep the other one chilled until you’re ready for it). On your lightly floured surface, begin rolling out the dough. I find it easiest to roll from the center outwards, rotating the dough frequently and adding a touch more flour if it starts to stick. Aim for a rectangle approximately 12×15 inches and about ⅛ inch thick. It’s important to try and keep the thickness as even as possible for uniform baking.
-
Spread the Jam Filling: Once you have your rectangle, carefully spread half of your chosen fruit jam evenly over the entire surface of the dough, leaving a small ½-inch border along one of the longer edges. My pro tip here is to use an offset spatula for the smoothest application of jam; it really helps achieve an even layer without tearing the dough. Make sure your jam isn’t too cold, or it will be hard to spread, but also not too warm that it makes the dough sticky.
-
Roll Up the Dough: Starting from the long edge opposite the ½-inch border you left, carefully and tightly roll the dough into a log. The tighter you roll it, the neater your pinwheels will be. Once you reach the end, gently pinch the seam closed to seal the log. You can lightly dampen the border with a tiny bit of water if it’s not sealing easily, but usually, the dough has enough pliability.
-
Chill the Log (Again!): Wrap the jam-filled log tightly in plastic wrap. Repeat steps 7-9 with the second disc of dough and the remaining jam. Place both wrapped logs in the refrigerator to chill for at least 30-45 minutes. This second chilling period is incredibly important. It firms up the dough and the jam, making the logs much easier to slice cleanly without squishing, ensuring those beautiful pinwheel spirals. Don’t skip this step!
Baking and Finishing Your Pinwheels
The final steps bring these delightful Cream Cheese Jam Pinwheels to life, filling your kitchen with an irresistible aroma and delivering a treat that’s as beautiful to look at as it is delicious to eat. Get ready for some serious satisfaction!
-
Prepare for Slicing: Once the logs are thoroughly chilled, retrieve one log from the refrigerator. Remove the plastic wrap. Using a very sharp, un-serrated knife (a chef’s knife or thin-bladed utility knife works best for me), slice the log into ¾-inch thick rounds. A clean, decisive slice is key here to maintain the pinwheel shape. Avoid a sawing motion, which can distort the spirals.
-
Arrange on Baking Sheets: Place the sliced pinwheels about 1 inch apart on your prepared baking sheets. They will spread slightly, so adequate spacing is important to ensure even baking and to prevent them from sticking together.
-
Apply Egg Wash: In a small bowl, whisk together the large egg and 1 tablespoon of water or milk to create an egg wash. Lightly brush the tops of each pinwheel with this mixture. This egg wash is essential for giving your pinwheels that beautiful, glossy golden-brown finish that makes them look professionally baked.
-
Bake to Golden Perfection: Transfer the baking sheets to your preheated oven. Bake for 18-22 minutes, or until the edges are golden brown and the centers are lightly puffed and set. Keep a close eye on them during the last few minutes, as oven temperatures can vary. You’re looking for a lovely golden hue, but you don’t want them to get too dark. I usually rotate my baking sheets halfway through the baking time to ensure even browning.
-
Cool and Finish: Once baked, remove the pinwheels from the oven and let them cool on the baking sheets for 5 minutes before carefully transferring them to a wire rack to cool completely. Allowing them to cool entirely is important not only to prevent breakage but also to allow the jam filling to fully set, ensuring a perfect bite every time.
-
Optional Dusting: If desired, once the pinwheels are completely cool, gently dust them with powdered sugar using a fine-mesh sieve. This adds a beautiful, delicate finish and a touch of extra sweetness that perfectly complements the rich cream cheese pastry and vibrant jam. I often find this makes them look even more appealing for serving!
And there you have it! Your delightful Cream Cheese Jam Pinwheels are ready to be enjoyed. They’re absolutely perfect for breakfast, brunch, an afternoon tea, or simply as a sweet treat any time of day. I promise, the effort is well worth the incredible flavor and texture you achieve. Happy baking!
Conclusion:
And there you have it, my friends! We’ve reached the sweet end of our culinary journey together, but for you, it’s just the beginning of a truly delightful baking adventure. I honestly can’t emphasize enough why this particular recipe is an absolute game-changer in your kitchen repertoire. It’s not just a treat; it’s an experience. Imagine sinking your teeth into a perfectly golden, flaky exterior, giving way to a luscious, tangy-sweet cream cheese filling, all perfectly complemented by the vibrant burst of your favorite fruit jam. The symphony of textures and flavors is simply unparalleled, hitting all the right notes for comfort, indulgence, and sheer happiness.
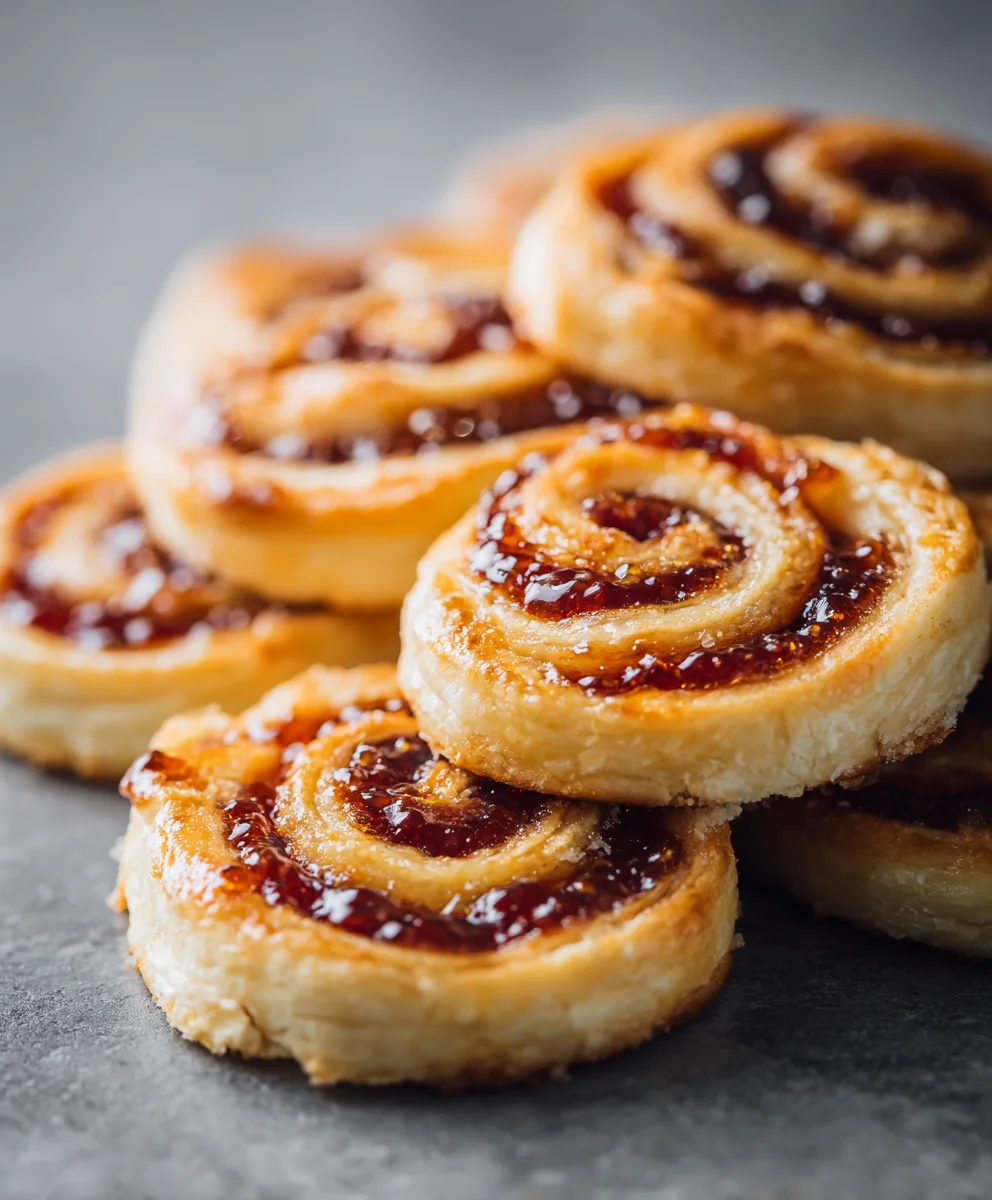
I know some baking projects can seem daunting, but let me assure you, this one is designed for success. It delivers maximum impact with surprisingly minimal effort, making you look like a seasoned pastry chef even if you’re just starting out. The visual appeal alone is enough to turn heads – those beautiful spirals of color and creamy white, dusted lightly with powdered sugar, look like they’ve come straight from a high-end bakery display. Yet, the secret is in its elegant simplicity. It’s the kind of recipe that brings joy not just in the eating, but in the making, filling your home with the most inviting aromas that promise something wonderful is on its way. It’s a guaranteed crowd-pleaser that will have everyone asking for the recipe.
Elevate Your Snacking: Serving Suggestions and Creative Variations
Now, let’s talk about making these beauties truly your own! While absolutely divine on their own, fresh out of the oven or at room temperature, these pinwheels are incredibly versatile. For a cozy morning, they are an ideal companion to a steaming cup of coffee or a fragrant tea, turning a simple breakfast into a special occasion. Imagine them as the star of your next brunch spread, nestled amongst fresh berries and a dollop of whipped cream, instantly elevating the entire table. They’re also perfect for an afternoon pick-me-up, a delightful after-dinner treat, or even as an impressive, yet easy, contribution to a potluck or party. Their convenient size makes them excellent finger foods, minimizing mess and maximizing enjoyment for your guests.
But why stop there? The beauty of this recipe lies in its adaptability. Don’t be afraid to experiment with the jam! While a classic strawberry or raspberry is always a winner, consider trying apricot for a more sophisticated, slightly tart note, or a blueberry jam for a burst of juicy sweetness. For those who love a bit of zest, a hint of orange or lemon zest folded into the cream cheese mixture can add an incredible brightness that truly sings. You could even explore a touch of almond extract instead of vanilla for a different aromatic profile, creating a more complex and intriguing flavor. If you’re feeling extra indulgent, a light drizzle of a simple glaze made from powdered sugar and a touch of milk, perhaps even flavored with a little orange blossom water, could take them to another level. Or, for a textural contrast, sprinkle some finely chopped toasted nuts – pecans or walnuts work wonderfully – over the jam layer before rolling, adding a delightful crunch to each bite.
Consider the dough, too. While I’m confident you’ll love the base we used, some home bakers might enjoy experimenting with different store-bought options like crescent roll dough for an even quicker assembly, or even a pre-made pie crust cut into a rectangle. Each will offer a slightly different texture, but the core magic of the cream cheese and jam combination will always shine through. The key is to have fun and make it yours. Think about seasonal jams, too – a fig jam in the autumn, or a peach jam in the summer, can infuse your pinwheels with the flavors of the season, making them a year-round delight. The possibilities are truly endless, allowing you to tailor this recipe to any taste or occasion.
Your Turn: Bake, Share, Inspire!
So, what are you waiting for? This is your official invitation to roll up your sleeves, preheat your oven, and dive into the wonderful world of baking these incredible Cream Cheese Jam Pinwheels. I promise you, the joy of creating something so delicious and beautiful with your own hands is immensely rewarding. The aroma that will fill your kitchen alone is worth the effort, but the taste? Oh, the taste is simply heavenly.
I am genuinely excited for you to experience this recipe. When you do try it, please, please don’t keep it a secret! I absolutely adore seeing your culinary creations. Share your triumphs, your clever variations, and your serving suggestions with me. Did you use a unique jam? Did you add a special spice? How did your family and friends react to these delightful treats? Your insights and experiences are not just valuable to me, but they also inspire other home bakers in our community to try new things and push their own creative boundaries. Let’s build a delicious conversation around these irresistible bites. Happy baking, everyone! I can’t wait to hear all about your pinwheel adventures and see the amazing results you achieve!
Cream Cheese Jam Pinwheels: Sweet & Easy Appetizer Bites!
Cream Cheese Jam Pinwheels are a delightful treat featuring a vibrant swirl of sweet, fruity jam peeking out from a luscious, tangy cream cheese filling, all encased within a golden, tender pastry. This irresistible combination creates a symphony of flavors and textures, perfect for any occasion.
Ingredients
-
2 ½ cups (300g) all-purpose flour
-
1 teaspoon baking powder
-
¼ teaspoon salt
-
1 cup (226g) unsalted butter, very cold and cubed
-
8 ounces (226g) full-fat cream cheese, very cold and cubed
-
¼ cup (50g) granulated sugar
-
1 teaspoon pure vanilla extract
-
¾ cup (225g) high-quality fruit jam (e.g., raspberry, apricot)
-
1 large egg
-
1 tablespoon water or milk
-
Powdered sugar for dusting (optional)
Instructions
-
Step 1
In a large bowl, whisk together the all-purpose flour, baking powder, and salt. -
Step 2
Using a food processor or pastry blender, cut in the very cold, cubed unsalted butter until the mixture resembles coarse meal with some pea-sized pieces of butter still visible. Add the very cold, cubed cream cheese and pulse/mix until mostly incorporated but still in small pieces. -
Step 3
Sprinkle the granulated sugar and drizzle the pure vanilla extract over the mixture. Continue to pulse/mix until the dough just begins to clump together, being careful not to overmix. -
Step 4
Turn the dough out onto a lightly floured surface, gather it, and divide in half. Gently flatten each half into a disc about 1 inch thick. Wrap each disc tightly in plastic wrap and refrigerate for at least 2 hours, or preferably 4 hours or overnight. -
Step 5
Lightly flour a clean work surface and rolling pin. Preheat your oven to 375°F (190°C). Line two large baking sheets with parchment paper or silicone baking mats. -
Step 6
Remove one disc of chilled dough. On the lightly floured surface, roll it out into a rectangle approximately 12×15 inches and about ⅛ inch thick. Carefully spread half of the fruit jam evenly over the entire surface of the dough, leaving a small ½-inch border along one of the longer edges. -
Step 7
Starting from the long edge opposite the ½-inch border, carefully and tightly roll the dough into a log. Gently pinch the seam closed to seal. Wrap the jam-filled log tightly in plastic wrap. Repeat with the second disc of dough and the remaining jam. Place both wrapped logs in the refrigerator to chill for at least 30-45 minutes. -
Step 8
Once logs are thoroughly chilled, remove one from plastic wrap. Using a very sharp, un-serrated knife, slice the log into ¾-inch thick rounds. Place the sliced pinwheels about 1 inch apart on your prepared baking sheets. -
Step 9
In a small bowl, whisk together the large egg and 1 tablespoon of water or milk to create an egg wash. Lightly brush the tops of each pinwheel with this mixture. -
Step 10
Transfer the baking sheets to your preheated oven. Bake for 18-22 minutes, or until the edges are golden brown and the centers are lightly puffed and set. Rotate baking sheets halfway through for even browning. -
Step 11
Remove pinwheels from the oven and let them cool on the baking sheets for 5 minutes before carefully transferring them to a wire rack to cool completely. If desired, once completely cool, gently dust them with powdered sugar using a fine-mesh sieve before serving.
Important Information
Nutrition Facts (Per Serving)
It is important to consider this information as approximate and not to use it as definitive health advice.
Allergy Information
Please check ingredients for potential allergens and consult a health professional if in doubt.


Leave a Comment