
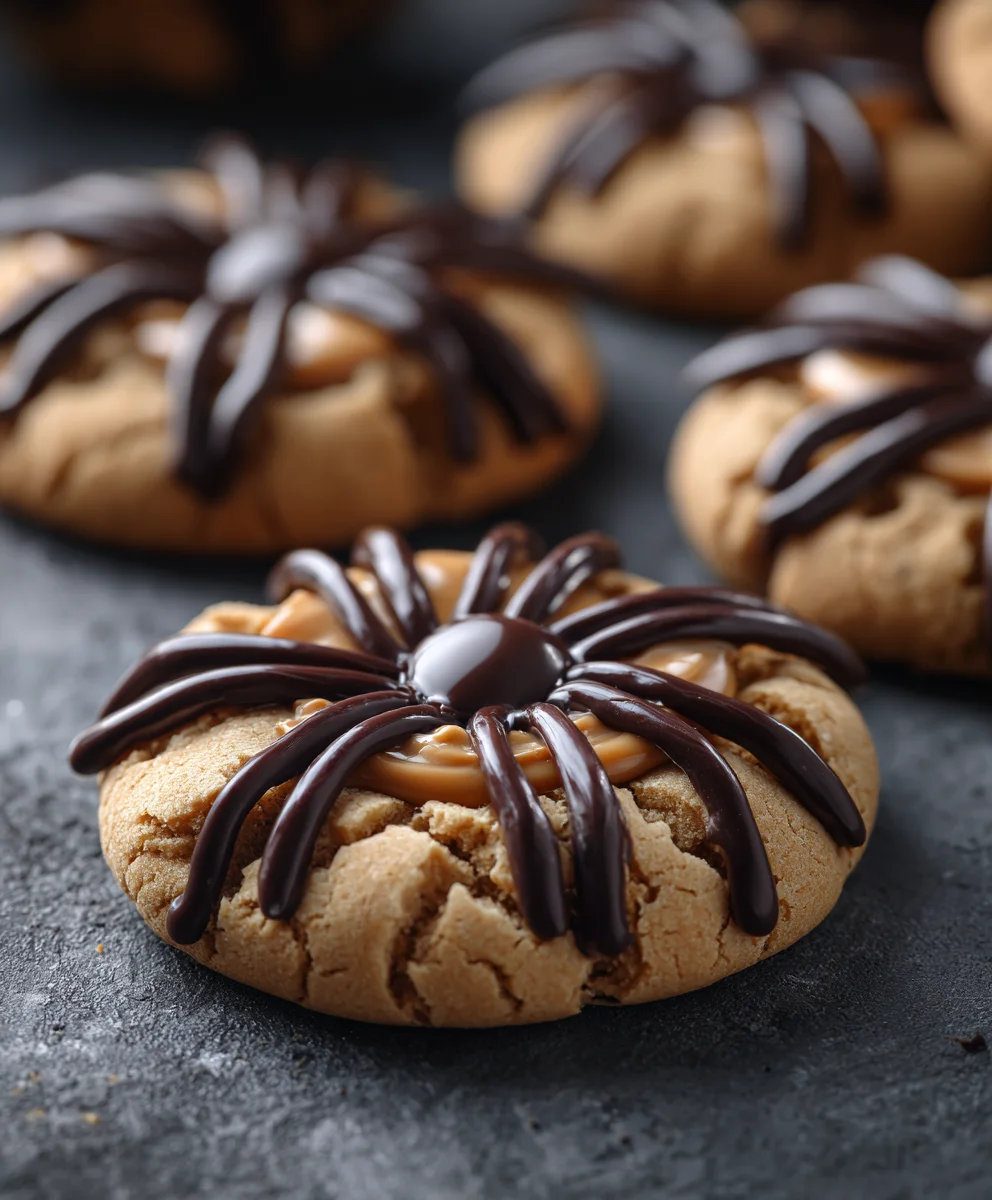
Peanut Butter Spider Cookies Halloween brings a delightful blend of spooky fun and irresistible flavor to your festive celebrations. As the air chills and autumn leaves fall, our thoughts inevitably turn to the enchantment of Halloween – a time for costumes, carved pumpkins, and, most deliciously, themed treats. I find myself particularly drawn to recipes that not only taste fantastic but also capture the whimsical spirit of the holiday, and these cookies do just that, perfectly embodying the festive atmosphere.
There’s an undeniable magic in creating homemade treats for Halloween, transforming simple ingredients into something both delicious and visually engaging. While the tradition of trick-or-treating for store-bought candy is timeless, the joy of sharing handcrafted delights adds a truly personal touch to the festivities. These unique cookies pay homage to that spirit, offering a playful take on a beloved flavor combination.
Why do people absolutely adore this dessert?
It’s simple: the perfect marriage of rich, creamy peanut butter and luscious chocolate. Each bite offers a satisfying blend of sweet and savory, wrapped in a soft, chewy cookie texture that melts in your mouth. Beyond the fantastic taste, the charm of these cookies lies in their adorable, spooky appearance, making them an instant hit at any Halloween party or classroom treat exchange. They are wonderfully interactive to decorate, too, providing a fantastic activity for families and friends to enjoy together. Preparing these Peanut Butter Spider Cookies Halloween style isn’t just baking; it’s crafting edible joy that will surely be the star of your dessert table.

Ingredients:
- 1 cup (2 sticks) unsalted butter, softened to room temperature. This is crucial for a smooth, creamy dough. If it’s too cold, it won’t cream properly; if too warm, it can make your cookies greasy.
- 1 cup granulated sugar. This provides sweetness and helps with the spread and texture of our cookies, giving them that classic chew.
- 1 cup packed light brown sugar. The brown sugar adds a wonderful molasses-like flavor and contributes to the chewiness and moisture of the cookies, which is exactly what we want for our “Peanut Butter Spider Cookies Halloween” base.
- 2 large eggs. Eggs bind everything together, add richness, and help with leavening. Make sure they are also at room temperature for better emulsification.
- 1 teaspoon pure vanilla extract. A touch of vanilla always enhances the overall flavor profile, complementing the peanut butter beautifully.
- 1 ½ cups creamy peanut butter. For the best results, use a standard, processed creamy peanut butter (like Jif or Skippy), not natural peanut butter, as the oils in natural varieties can separate and affect the cookie’s texture. This is the star ingredient for our Peanut Butter Spider Cookies Halloween edition!
- 2 ½ cups all-purpose flour. The backbone of our cookie dough, providing structure. Make sure to measure it correctly, either by weight or by spooning it into your measuring cup and leveling off.
- 1 teaspoon baking soda. This is our leavening agent, helping the cookies rise and achieve that soft, pillowy texture.
- ½ teaspoon salt. A pinch of salt balances the sweetness and brings out all the other flavors.
- 1 cup semi-sweet chocolate chips or melting wafers. For creating the spider bodies. Chocolate chips work well if melted carefully, but melting wafers or candy melts will give you a smoother, easier-to-work-with consistency.
- Small candy eyes. These are absolutely essential for bringing our adorable (or spooky!) spiders to life! You can find these in most baking aisles or craft stores, especially around Halloween.
- Mini pretzel sticks or thin pretzel rods. These will serve as our spider legs. They add a nice salty crunch and are perfectly shaped for an eight-legged friend.
Equipment You’ll Need:
Having the right tools on hand makes the baking process much smoother and more enjoyable. For these Peanut Butter Spider Cookies Halloween treats, you’ll want:
- Stand mixer or hand mixer with a large bowl: Essential for creaming butter and sugars, and mixing the dough efficiently. While you can do it by hand, a mixer makes the process significantly easier and ensures everything is well combined.
- Measuring cups and spoons: Accuracy in baking is key, so good quality measuring tools are a must.
- Rubber spatula: For scraping down the sides of the bowl to ensure all ingredients are fully incorporated.
- Baking sheets: You’ll need at least two, possibly three, to bake your batches of cookies.
- Parchment paper or silicone baking mats: These prevent sticking, ensure even baking, and make cleanup a breeze. I always recommend parchment paper for cookies.
- Small cookie scoop (about 1.5-2 tablespoons): This helps create uniform cookies, which bake evenly and look professional.
- Cooling racks: Important for allowing your cookies to cool completely and prevent them from getting soggy on the bottom.
- Small microwave-safe bowl or double boiler: For melting the chocolate for the spider bodies.
- Spoon or small offset spatula: For spreading the melted chocolate on top of the cookies.
Preparing the Peanut Butter Cookie Dough:
- Preheat your oven and prepare your baking sheets: First things first, let’s get that oven ready! Preheat your oven to 375°F (190°C). Line two large baking sheets with parchment paper or silicone baking mats. This step is crucial for preventing sticking and ensuring even baking, especially for our “Peanut Butter Spider Cookies Halloween” bases.
- Cream the butter and sugars: In the bowl of your stand mixer, fitted with the paddle attachment, or with a large bowl and a hand mixer, combine the softened unsalted butter, granulated sugar, and packed light brown sugar. Beat on medium speed for about 3-5 minutes, or until the mixture is light, fluffy, and pale in color. This creaming step is vital as it incorporates air into the butter and sugar, which contributes to the cookies’ texture. You’ll notice a significant change in volume and lightness – don’t skimp on this time! Scrape down the sides of the bowl occasionally to ensure everything is thoroughly combined.
- Incorporate the eggs and vanilla: With the mixer on low speed, add the large eggs one at a time, beating well after each addition until fully incorporated. Then, stir in the pure vanilla extract. Continue to mix until the mixture is smooth and homogenous, scraping down the bowl as needed. It’s important to add the eggs one at a time to allow them to emulsify properly with the butter and sugar mixture.
- Add the peanut butter: Now for the star flavor! Add the creamy peanut butter to the wet ingredients. Beat on medium-low speed until it’s completely smooth and evenly distributed throughout the mixture. This ensures every bite of our Peanut Butter Spider Cookies Halloween treats will be bursting with that delicious peanut butter taste. Again, remember to scrape down the sides of the bowl to catch any unincorporated peanut butter.
- Combine dry ingredients: In a separate medium bowl, whisk together the all-purpose flour, baking soda, and salt. Whisking them together ensures they are evenly distributed, which is important for the cookie’s rise and flavor.
- Gradually add dry ingredients to wet: With the mixer on the lowest speed, slowly add the dry ingredients to the wet ingredients, a third at a time. Mix only until just combined. Be careful not to overmix! Overmixing develops the gluten in the flour too much, which can lead to tough cookies. As soon as you see no more streaks of flour, stop the mixer. A few small flour patches are fine; you can gently fold them in with a rubber spatula if necessary. The dough will be soft but shouldn’t be overly sticky.
- Optional: Chill the dough: While not strictly necessary for this recipe, chilling the dough for at least 30 minutes (or even an hour) can make it easier to handle and can result in a slightly chewier cookie with less spread. If you have the time, cover the bowl with plastic wrap and pop it in the fridge. This is especially helpful if your kitchen is warm or if your butter was particularly soft.
Baking the Perfect Cookie Base:
- Scoop and shape the dough: Using a small cookie scoop (about 1.5-2 tablespoons), scoop out even balls of dough. Roll them gently between your palms to form smooth spheres. Place the dough balls about 2 inches apart on your prepared baking sheets. Remember, these will spread a bit, so give them space. Uniform size is key for even baking!
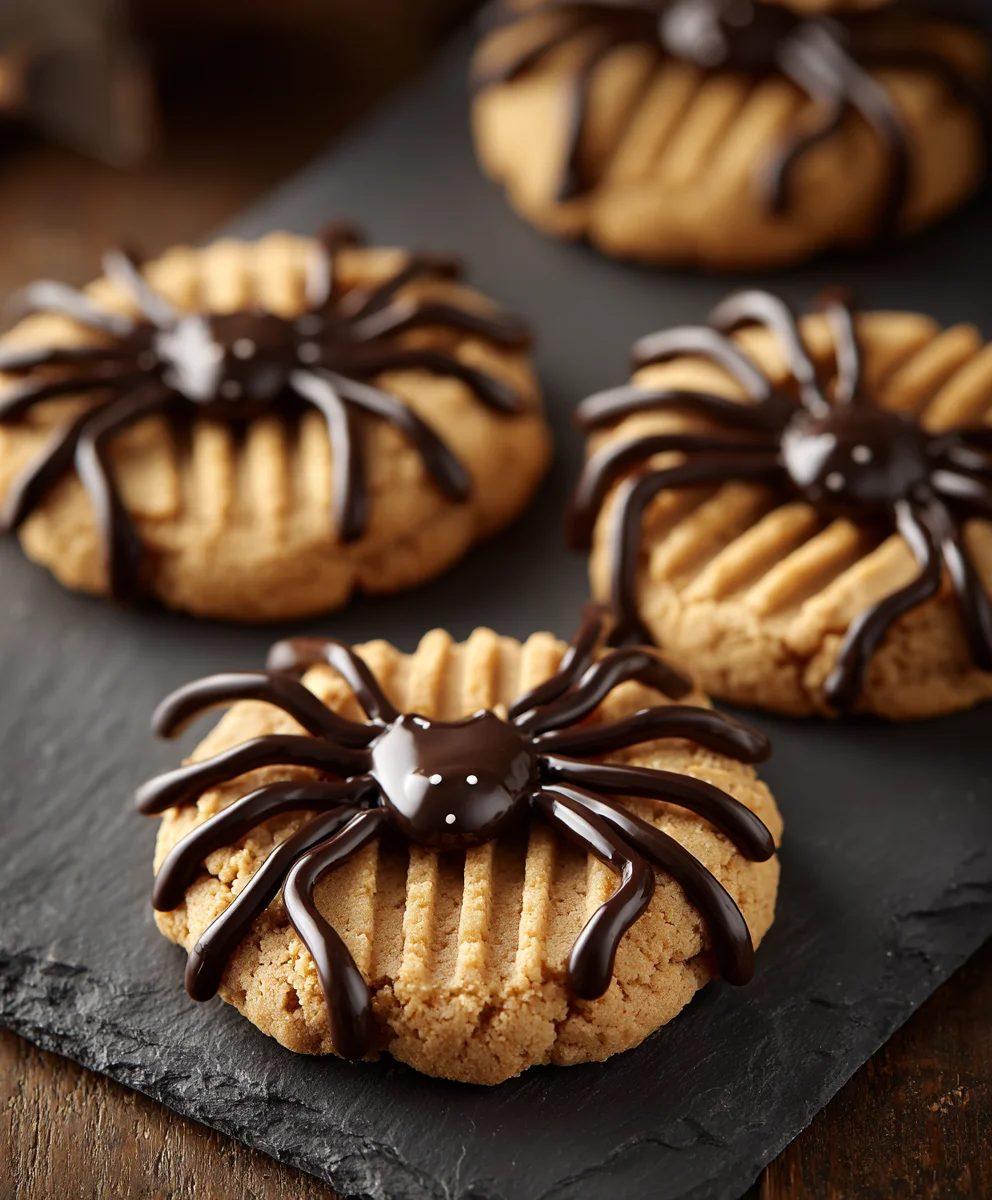
- Create the classic peanut butter cookie pattern: This is a signature look for peanut butter cookies, and it helps the cookies bake evenly while providing a nice surface for our spider bodies. Take a fork and gently press down on each dough ball to create a crisscross pattern. Press once, then rotate the fork 90 degrees and press again. Don’t press all the way through; just enough to flatten the dough slightly. This also gives our “Peanut Butter Spider Cookies Halloween” a little extra texture.
- Bake the cookies: Place one baking sheet at a time in the preheated oven. Bake for 9-12 minutes, or until the edges are lightly golden brown and the centers are just set. The cookies may still look a little soft in the very center, but they will firm up as they cool. Do not overbake! Overbaked peanut butter cookies can become dry and crumbly, and we want these to be soft and delightful for our Halloween creation.
- Cool on the baking sheet: Once baked, remove the baking sheets from the oven. Let the cookies cool on the baking sheet for about 5 minutes. They are quite delicate when hot, and this cooling time allows them to set up properly, making them easier to transfer.
- Transfer to a wire rack: After 5 minutes, carefully transfer the warm cookies to a wire cooling rack to cool completely. This is a critical step, as the wire rack allows air to circulate around the cookies, preventing them from becoming soggy on the bottom. We need them completely cool before adding the chocolate and decorations for our Peanut Butter Spider Cookies Halloween design.
Creating the Spooky Spider Topping:
Now for the fun part – transforming these delicious peanut butter cookies into adorable (or spooky, depending on your preference!) spiders! This is where the magic of “Peanut Butter Spider Cookies Halloween” really comes alive.
- Melt the chocolate: In a small microwave-safe bowl, melt the semi-sweet chocolate chips or melting wafers. Heat in 20-30 second intervals, stirring well after each interval, until the chocolate is completely smooth and melted. Be careful not to overheat the chocolate, as it can seize up and become unusable. Alternatively, you can use a double boiler on the stovetop for a more controlled melting process. If using a double boiler, stir frequently until smooth.
- Prepare the pretzel legs: While the chocolate is melting or cooling slightly, prepare your spider legs. Break the mini pretzel sticks or thin pretzel rods into smaller pieces. You’ll need 8 small pieces for each cookie – four for each side of the spider. Aim for pieces that are about 1 to 1.5 inches long. This part can be a bit fiddly but is essential for that classic spider look.
Assembling Your Peanut Butter Spider Cookies Halloween Edition:
Now, let’s bring these charmingly spooky treats to life! This is where your creativity for “Peanut Butter Spider Cookies Halloween” truly shines.
- Add the chocolate spider body: Once your cookies are completely cool, take a spoonful of melted chocolate and dollop it onto the center of each peanut butter cookie. Use the back of the spoon or a small offset spatula to gently spread the chocolate into a circle, creating the body of your spider. Aim for a circle about 1.5 to 2 inches in diameter, depending on the size of your cookies. You don’t want to spread it too thin, as you need enough chocolate to hold the candy eyes and pretzel legs.
- Place the candy eyes: Immediately after spreading the chocolate, while it’s still wet, carefully place two small candy eyes onto the chocolate circle, near the top, to form the spider’s face. Press them down gently so they adhere firmly to the chocolate. The wet chocolate acts as the “glue.” If the chocolate starts to set too quickly, you can use a tiny dab of additional melted chocolate on the back of the eyes to help them stick.
- Attach the pretzel legs: This is the most delicate but fun part! Before the chocolate fully sets, carefully insert four of your broken pretzel pieces into the chocolate on each side of the spider body, creating the illusion of legs. You want them to stick out from the sides, curving slightly if possible, to give that eight-legged appearance. If the chocolate is setting too fast, you can dip the end of each pretzel piece into a tiny bit of melted chocolate before inserting it into the spider body. The pretzels should be secure enough to stay in place once the chocolate hardens.
- Allow the chocolate to set: Once all your spiders are assembled, allow the chocolate to fully set. You can leave them out at room temperature for an hour or two, or if you’re in a hurry, you can place the baking sheets in the refrigerator for about 15-20 minutes to speed up the setting process. Make sure the chocolate is firm to the touch before handling or stacking the cookies. This ensures your Peanut Butter Spider Cookies Halloween creations stay intact and look their best!
- Admire your spooky creations! There you have it – a batch of festive and delicious Peanut Butter Spider Cookies perfect for Halloween! Each one is a little edible masterpiece, ready to delight both kids and adults.
Storage and Serving Tips for Your Halloween Treats:
You’ve put in all this effort to create these fantastic “Peanut Butter Spider Cookies Halloween” treats, so let’s make sure they stay fresh and delicious for as long as possible!
- Proper Storage: Once the chocolate has fully set and your adorable (or creepy, depending on your mood!) spiders are complete, store the cookies in an airtight container at room temperature. They will maintain their freshness and delightful texture for up to 3-5 days. For best results, I like to place a piece of parchment paper between layers of cookies if I’m stacking them, just to ensure the chocolate spider bodies and pretzel legs don’t get damaged or stick together.
- Freezing for Longer Storage: If you’ve made a huge batch for a big Halloween party or just want to get a head start, these “Peanut Butter Spider Cookies Halloween” freeze beautifully. Once fully assembled and the chocolate is completely hardened, arrange the cookies in a single layer on a baking sheet and freeze for about an hour. This step, called “flash freezing,” prevents them from sticking together. Once firm, transfer them to a freezer-safe airtight container or a heavy-duty freezer bag. They can be frozen for up to 2-3 months. When you’re ready to enjoy them, simply take them out of the freezer and let them thaw at room temperature for a couple of hours. The texture will remain wonderfully chewy, and the flavors will be just as vibrant.
- Serving Suggestions: These cookies are, of course, a star on their own! They are perfect for Halloween parties, school bake sales, or simply as a fun, festive treat for your family. Arrange them on a platter with other Halloween goodies like ghost brownies or witch finger pretzels for a truly spectacular spread. You could even use them as edible decorations for a larger Halloween cake or cupcake tower. Kids absolutely adore these! The combination of soft, rich peanut butter cookie, smooth chocolate, and crunchy pretzel legs is simply irresistible. Don’t be surprised if they disappear quickly!
- Pairing Recommendations: For an extra special treat, serve these “Peanut Butter Spider Cookies Halloween” with a tall glass of cold milk, a warm cup of apple cider, or even a mug of hot cocoa. The classic flavors marry perfectly with these beverages, making for a truly comforting and festive experience. They also make a fantastic addition to a trick-or-treat snack station for parents or older kids visiting your home.
- Troubleshooting Tips:
- If your chocolate seems too thick: You can add about ½ teaspoon of vegetable oil or coconut oil (melted) to thin it out slightly, stirring until smooth. This makes it easier to spread.
- If your pretzels keep breaking: Use thin pretzel rods rather than traditional mini pretzels, as they tend to snap more cleanly. Also, a gentle hand is key when inserting them!
- If the candy eyes aren’t sticking: Ensure the chocolate is wet enough. If it’s starting to set, dab a tiny bit of fresh melted chocolate on the back of the eyes before placing them.
Remember, baking should be fun! Don’t stress too much about perfection; a little homemade charm makes these Peanut Butter Spider Cookies Halloween treats even more special. Enjoy the process of creating these delightfully spooky and delicious cookies!
Conclusion:
So, there you have it! My absolute favorite recipe for a treat that is guaranteed to bring smiles and a touch of spooky fun to any gathering. What makes these cookies truly a must-try, you ask? Well, it’s the magical trifecta of a perfectly chewy, rich peanut butter cookie base, generously topped with a decadent chocolate ‘body,’ and then brought to life with those playful candy eyes and spindly chocolate legs. It’s not just a cookie; it’s a delightful experience that engages all your senses. Imagine the aroma filling your kitchen, the joy of decorating each unique spider, and that first bite into a symphony of sweet and salty. These cookies are incredibly easy to make, even for novice bakers, yet they present a show-stopping finish that looks far more complicated than it actually is. They perfectly embody the spirit of the season – a little spooky, a lot sweet, and utterly charming. Trust me, once you make them, they will become an instant classic in your Halloween repertoire. The combination of classic comfort and festive fun is simply unbeatable.
When it comes to serving these adorable arachnids, the possibilities are as endless as your imagination. My personal favorite way to enjoy them is alongside a tall, cold glass of milk, especially after a day of trick-or-treating or a festive fall activity. They also make a fantastic addition to any Halloween dessert platter, mingling playfully with ghost meringues, pumpkin pie slices, and candied apples. Consider packing them in lunchboxes for a special spooky surprise that will make any child’s day, or bringing them to school parties – they are always a massive hit with kids and adults alike! For a more grown-up affair, they pair wonderfully with a robust cup of freshly brewed coffee, a warm mug of hot cocoa, or even a festive spiced chai latte. They are surprisingly versatile and always a crowd-pleaser.
But don’t stop there! I wholeheartedly encourage you to get creative with your ‘spiders’ and make them truly your own. For the eyes, feel free to swap out the classic candy eyes for mini M&M’s in spooky colors, Reese’s Pieces, or even small dollops of white icing with a dot of black gel for a more hand-drawn look. Want to change up the flavor profile of the chocolate ‘body’? Try using rich dark chocolate for a more intense flavor, creamy white chocolate for a sweeter contrast, or even a swirl of both for a marbled effect. You could even add a tiny pinch of cayenne pepper or chili powder to the peanut butter dough for a subtle, unexpected kick that adult palates will absolutely adore. If you’re feeling extra festive, sprinkle some Halloween-themed sprinkles – think bats, ghosts, or pumpkins – over the chocolate while it’s still wet for an extra pop of color and texture. For those with nut allergies in mind, you could experiment with a sunflower seed butter base, though the flavor profile will naturally change and might require some adjustments to consistency. And for a truly unique twist, why not make mini versions for bite-sized delights, perfect for smaller hands or for adding to a charcuterie-style dessert board at your next Halloween gathering?
So, what are you waiting for? I genuinely hope you feel inspired to whip up a batch of these enchanting cookies this season. They are not just a treat; they are a delightful way to celebrate the magic of autumn and the whimsical fun of Halloween. This recipe for Peanut Butter Spider Cookies Halloween is designed to be approachable, enjoyable, and utterly delicious, making it perfect for creating cherished memories in the kitchen, whether you’re baking solo or with little helpers.
I promise you, the joy of seeing these little edible creatures come to life is incredibly rewarding.
Please, when you make them, don’t keep the fun to yourself! I would absolutely love to hear about your experience. Did you try any fun variations? What was your favorite part of making them? Did they disappear in record time from your dessert table? Share your baking adventures with me and other readers. Your feedback and creativity inspire us all to keep baking and exploring new flavors. Happy baking, and happy Halloween!
Creepy Crawly Peanut Butter Spider Cookies for Halloween
Fun and delicious Peanut Butter Spider Cookies, perfect for Halloween. These adorable cookies feature a soft, chewy peanut butter base, topped with melted chocolate for the spider body, candy eyes, and crunchy pretzel legs. Easy to make and decorate, they’re a delightful and spooky treat for all ages.
Ingredients
-
1 cup (2 sticks) unsalted butter, softened
-
1 cup granulated sugar
-
1 cup packed light brown sugar
-
2 large eggs, room temperature
-
1 teaspoon pure vanilla extract
-
1 ½ cups creamy peanut butter
-
2 ½ cups all-purpose flour
-
1 teaspoon baking soda
-
½ teaspoon salt
-
1 cup semi-sweet chocolate chips or melting wafers
-
Small candy eyes
-
Mini pretzel sticks or thin pretzel rods
Instructions
-
Step 1
Preheat oven to 375°F (190°C). Line two large baking sheets with parchment paper or silicone mats. -
Step 2
In a stand mixer or with a hand mixer, cream together the softened unsalted butter, granulated sugar, and light brown sugar on medium speed for 3-5 minutes until light and fluffy. Scrape down the sides of the bowl as needed. -
Step 3
Beat in the large eggs one at a time, ensuring each is fully incorporated before adding the next. Stir in the pure vanilla extract until the mixture is smooth. -
Step 4
Add the creamy peanut butter to the wet ingredients. Beat on medium-low speed until completely smooth and evenly distributed throughout the mixture. -
Step 5
In a separate medium bowl, whisk together the all-purpose flour, baking soda, and salt until well combined. -
Step 6
With the mixer on the lowest speed, gradually add the dry ingredients to the wet ingredients in thirds. Mix only until just combined, being careful not to overmix. -
Step 7
(Optional) For easier handling and slightly chewier cookies, cover the dough and chill in the refrigerator for at least 30 minutes, or up to an hour. -
Step 8
Using a small cookie scoop (about 1.5-2 tablespoons), scoop out even balls of dough. Roll them gently between your palms to form smooth spheres and place them about 2 inches apart on the prepared baking sheets. -
Step 9
Take a fork and gently press down on each dough ball to create a crisscross pattern. Press once, then rotate the fork 90 degrees and press again. -
Step 10
Bake for 9-12 minutes, or until the edges are lightly golden brown and the centers are just set. Do not overbake. -
Step 11
Remove from oven and let the cookies cool on the baking sheets for about 5 minutes. Then, carefully transfer them to a wire cooling rack to cool completely. -
Step 12
Once cookies are completely cool, melt the semi-sweet chocolate chips or melting wafers in a small microwave-safe bowl (heating in 20-30 second intervals and stirring) or using a double boiler until completely smooth. -
Step 13
Prepare your spider legs by breaking the mini pretzel sticks or thin pretzel rods into smaller pieces, about 1 to 1.5 inches long. You will need 8 pieces for each cookie. -
Step 14
Spoon a dollop of melted chocolate onto the center of each cool peanut butter cookie. Use the back of the spoon or a small offset spatula to gently spread the chocolate into a circle, about 1.5 to 2 inches in diameter, to form the spider’s body. -
Step 15
Immediately after spreading the chocolate, while it’s still wet, carefully place two small candy eyes onto the chocolate circle, near the top, to form the spider’s face. Press them down gently to adhere. -
Step 16
Before the chocolate fully sets, carefully insert four of your broken pretzel pieces into the chocolate on each side of the spider body, creating the illusion of eight legs. -
Step 17
Allow the chocolate to fully set. This can be done at room temperature for an hour or two, or by placing the baking sheets in the refrigerator for about 15-20 minutes to speed up the setting process.
Important Information
Nutrition Facts (Per Serving)
It is important to consider this information as approximate and not to use it as definitive health advice.
Allergy Information
Please check ingredients for potential allergens and consult a health professional if in doubt.


Leave a Comment