
Pumpkin Brownies. Ah, the very name evokes images of crisp autumn days, cozy evenings, and the irresistible scent of spices filling your home. But what if I told you there’s a way to elevate the classic brownie experience, infusing it with seasonal warmth and a delightful moistness that’s utterly unparalleled? I know you’re curious, and I’m thrilled to share how.
While the humble brownie traces its origins back to late 19th-century America, evolving from a happy accident into a beloved dessert, the combination with pumpkin is a more recent, yet equally cherished, innovation. It beautifully marries the wholesome goodness of autumn’s quintessential squash with the indulgent decadence of chocolate, creating a treat that perfectly encapsulates the spirit of fall celebrations and cozy gatherings. This delightful fusion has quickly become a seasonal staple for good reason.
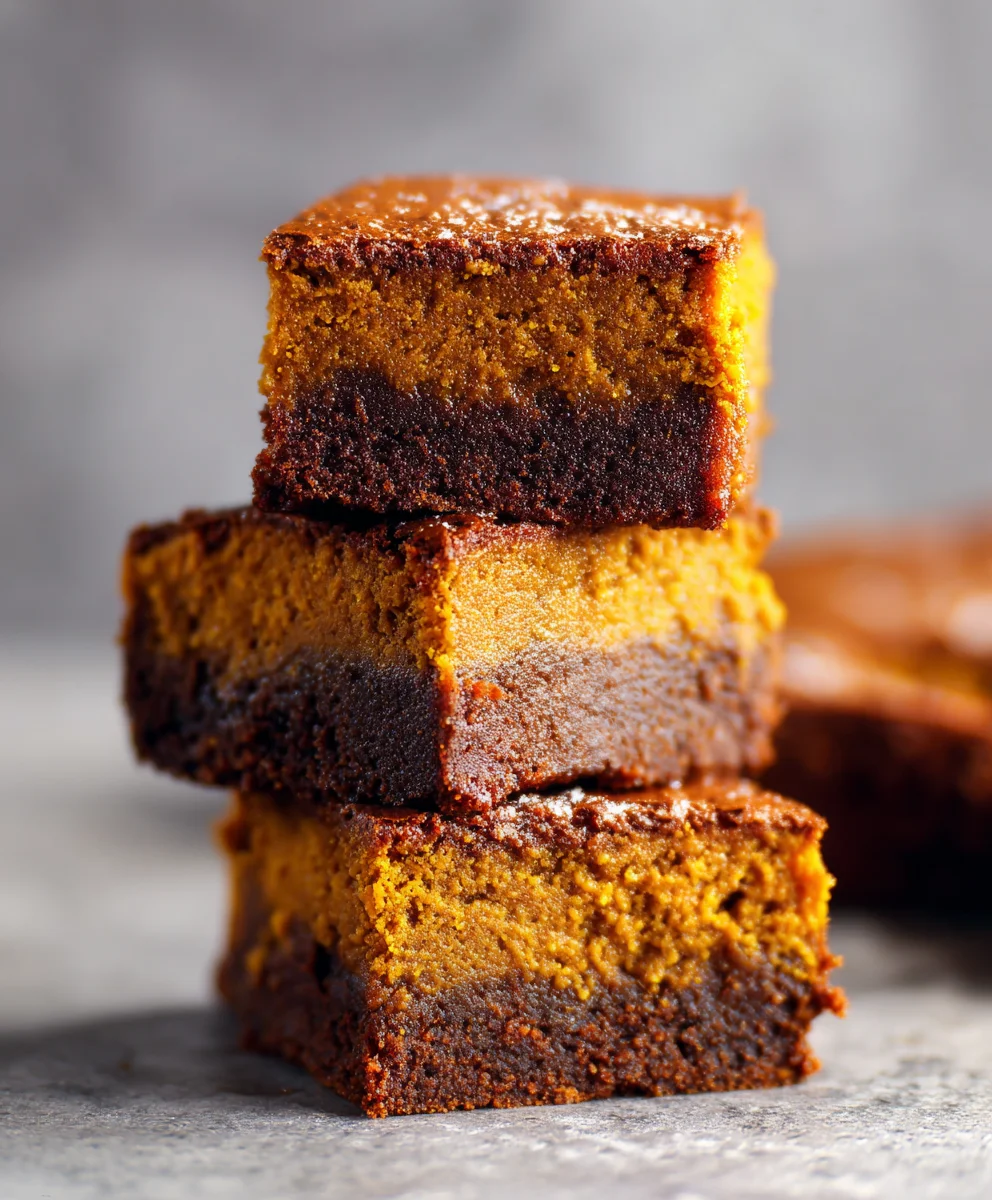
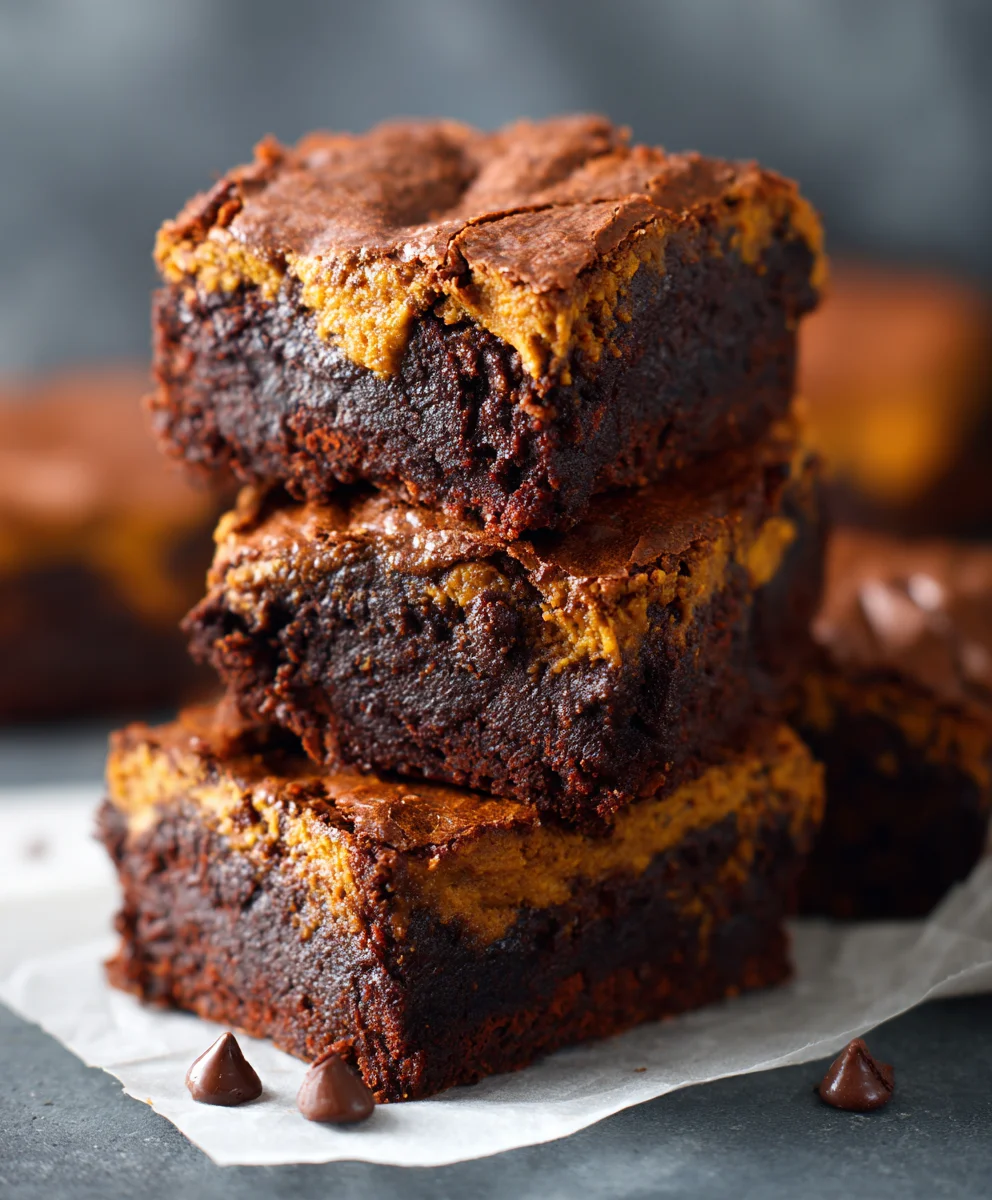
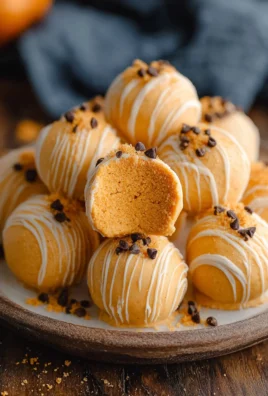
People absolutely adore these brownies not just for their stunning flavor profile—a harmonious blend of deep cocoa notes, comforting cinnamon and nutmeg, and the subtle sweetness of pumpkin—but also for their incredibly fudgy, dense, and moist texture. The pumpkin purée acts as a secret ingredient, ensuring each bite is melt-in-your-mouth tender, preventing dryness often found in less-perfect brownies. They are the ultimate crowd-pleaser, perfect for potlucks, family desserts, or simply a comforting treat with your afternoon coffee. If you’ve been searching for a dessert that marries wholesome ingredients with ultimate indulgence, then these Pumpkin Brownies are precisely what you need in your baking repertoire. I promise, you won’t be disappointed.

<h2>Ingredients:</h2>
<ul>
<li><strong>For the Rich Chocolate Brownie Base:</strong>
<ul>
<li><strong>1 cup (2 sticks or 226g) Unsalted Butter:</strong> I always use unsalted butter for baking so I can control the salt content precisely. Make sure it’s at room temperature, or slightly softened, for easy melting.</li>
<li><strong>8 ounces (about 1.5 cups) High-Quality Bittersweet or Semisweet Chocolate:</strong> Choose a chocolate you genuinely enjoy eating on its own, as its flavor will be front and center in your <strong>Pumpkin Brownies</strong>. I prefer a bar that I can chop myself over chocolate chips, as chips often contain stabilizers that can affect the texture. A cocoa percentage between 60-70% is ideal for a deep chocolate flavor without being overly bitter.</li>
<li><strong>1 ¾ cups (350g) Granulated Sugar:</strong> This provides the perfect balance of sweetness and contributes to that shiny, crackly brownie top.</li>
<li><strong>4 Large Eggs:</strong> Room temperature eggs incorporate better into the batter, creating a smoother, more emulsified mixture. Take them out of the fridge at least 30 minutes before you start baking.</li>
<li><strong>1 teaspoon Pure Vanilla Extract:</strong> Don’t skimp on good quality vanilla; it really enhances the chocolate flavor. I find that pure extract offers a far superior taste compared to imitation.</li>
<li><strong>1 cup (120g) All-Purpose Flour:</strong> Measure this by spooning the flour into your measuring cup and then leveling it off with a straight edge for accuracy. Too much flour can make your brownies dry.</li>
<li><strong>¾ cup (65g) Unsweetened Cocoa Powder:</strong> For an intensely rich chocolate flavor, I recommend using Dutch-processed cocoa powder. It’s less acidic and provides a darker color and smoother flavor. If you only have natural cocoa, that will work too, but the final flavor profile will be slightly different.</li>
<li><strong>½ teaspoon Baking Powder:</strong> Just a touch to give our brownies a slight lift without making them cakey. We want fudgy <strong>Pumpkin Brownies</strong>!</li>
<li><strong>½ teaspoon Salt:</strong> Essential for balancing the sweetness and intensifying the chocolate flavor. I always use fine sea salt.</li>
</ul>
</li>
<li><strong>For the Velvety Pumpkin Swirl:</strong>
<ul>
<li><strong>1 cup (225g) Canned Pumpkin Puree:</strong> Make sure you’re using 100% pure pumpkin puree, not pumpkin pie filling, which already contains spices and sugar. I always check the label carefully.</li>
<li><strong>¼ cup (50g) Granulated Sugar:</strong> A small amount to sweeten the pumpkin layer just enough.</li>
<li><strong>1 Large Egg Yolk:</strong> This adds richness and helps bind the pumpkin mixture, giving it a lovely creamy texture. Separate it carefully from the egg white.</li>
<li><strong>1 tablespoon All-Purpose Flour:</strong> A small amount to thicken the pumpkin mixture slightly and prevent it from being too watery.</li>
<li><strong>1 teaspoon Pumpkin Pie Spice:</strong> This aromatic blend typically includes cinnamon, nutmeg, ginger, and cloves, and is absolutely essential for that quintessential autumn flavor in our <strong>Pumpkin Brownies</strong>. If you don’t have it, you can make your own with ½ tsp cinnamon, ¼ tsp ginger, ⅛ tsp nutmeg, and a pinch of cloves.</li>
<li><strong>½ teaspoon Pure Vanilla Extract:</strong> Again, a touch of vanilla elevates the other flavors.</li>
<li><strong>Pinch of Salt:</strong> Just like in the brownie base, a little salt brings out the best in the pumpkin and spices.</li>
</ul>
</li>
</ul>
<h3>Getting Started: Preparing for Your <strong>Pumpkin Brownies</strong></h3>
<ol>
<li>
<h4>Preheat and Prepare Your Pan:</h4>
Before you even think about mixing, <strong>preheat your oven to 350°F (175°C)</strong>. This ensures your oven is at a consistent temperature when the brownies go in, which is crucial for even baking. Next, take a 9×13-inch baking pan and line it with parchment paper, leaving an overhang on the two longer sides. This parchment paper sling will be your best friend later for easy removal of the entire batch of <strong>Pumpkin Brownies</strong> from the pan. Lightly grease the exposed sides of the pan with a little butter or non-stick spray, just to be sure nothing sticks.
</li>
</ol>
<h3>Crafting the Rich Chocolate Brownie Base:</h3>
<ol>
<li>
<h4>Melt the Butter and Chocolate:</h4>
In a medium-sized, microwave-safe bowl, combine your unsalted butter and chopped bittersweet chocolate. Heat this mixture in the microwave in 30-second intervals, stirring well after each interval, until the chocolate is fully melted and the mixture is smooth and glossy. This usually takes about 1-2 minutes total, depending on your microwave’s power. <strong>Be careful not to overheat the chocolate</strong>, as it can seize. Alternatively, you can melt this over a double boiler on the stovetop, stirring constantly until smooth. Once melted, set it aside to cool slightly while you prepare the next steps. It doesn’t need to be cold, just not piping hot.
</li>
<li>
<h4>Combine Wet Ingredients:</h4>
In a large mixing bowl, whisk together the granulated sugar and the four large eggs until they are well combined and a pale yellow. I like to whisk for a good 2-3 minutes, until the mixture becomes slightly aerated and ribbons form when you lift the whisk. This aeration contributes to the desirable chewy texture and shiny crust of your <strong>Pumpkin Brownies</strong>. Stir in the pure vanilla extract.
</li>
<li>
<h4>Integrate Chocolate Mixture:</h4>
<strong>Slowly pour the slightly cooled melted chocolate and butter mixture into the egg and sugar mixture</strong>, whisking continuously until everything is thoroughly combined and uniform in color. Make sure there are no streaks of unmixed egg or chocolate. The mixture should look luxurious and thick.
</li>
<li>
<h4>Sift Dry Ingredients:</h4>
In a separate medium bowl, whisk together the all-purpose flour, unsweetened cocoa powder, baking powder, and salt. <strong>Sifting these ingredients together is a step I never skip</strong> because it breaks up any lumps in the flour and cocoa, ensuring a smooth, lump-free brownie batter, and evenly distributes the leavening agent. This also incorporates a bit of air, making the dry ingredients lighter.
</li>
<li>
<h4>Fold in Dry Ingredients:</h4>
Add the sifted dry ingredients to the wet chocolate mixture. Using a rubber spatula, <strong>gently fold the dry into the wet until just combined</strong>. It’s incredibly important here not to overmix! Overmixing develops the gluten in the flour, which can lead to tough, cakey brownies rather than the fudgy <strong>Pumpkin Brownies</strong> we’re aiming for. Stop folding as soon as you no longer see streaks of dry flour. A few small lumps are perfectly fine.
</li>
<li>
<h4>Pour into Pan:</h4>
Pour about two-thirds of this decadent brownie batter into your prepared 9×13-inch baking pan. Use your spatula to spread it evenly into a flat layer. <strong>Reserve the remaining one-third of the brownie batter</strong> for layering later.
</li>
</ol>
<h3>Preparing the Velvety Pumpkin Swirl:</h3>
<ol>
<li>
<h4>Combine Pumpkin Swirl Ingredients:</h4>
In a clean, small mixing bowl, combine the pumpkin puree, granulated sugar, egg yolk, all-purpose flour, pumpkin pie spice, pure vanilla extract, and a pinch of salt. <strong>Whisk everything together until the mixture is completely smooth and well-combined</strong>. The color should be a beautiful, uniform orange. Taste a tiny bit – it should be sweet and vibrantly spiced.
</li>
</ol>
<h3>Assembling and Baking Your Perfect <strong>Pumpkin Brownies</strong>:</h3>
<ol>
<li>
<h4>Layer the Pumpkin Swirl:</h4>
Carefully dollop the entire pumpkin mixture over the brownie batter already in the pan. Use your spatula or the back of a spoon to gently spread the pumpkin layer evenly over the chocolate base. <strong>Be gentle here</strong>; you don’t want to mix the layers too much at this stage, just create a distinct layer.
</li>
<li>
<h4>Add the Remaining Brownie Batter:</h4>
Now, take the remaining one-third of the brownie batter you reserved earlier. <strong>Dollop small spoonfuls of this remaining brownie batter over the pumpkin layer</strong>. Don’t try to spread it completely smooth; we want distinct pockets for the swirl effect.
</li>
<li>
<h4>Create the Iconic Swirl:</h4>
This is where the magic happens and your <strong>Pumpkin Brownies</strong> get their signature look! Take a butter knife or a wooden skewer and <strong>gently swirl through the layers</strong>. Make S-shapes, figure-eights, or random zig-zags, ensuring you go through both the top brownie dollops and the pumpkin layer beneath, but try not to scrape the very bottom of the pan. <strong>Don’t over-swirl!</strong> A few elegant passes are all you need to create beautiful marbling without muddying the colors. You want to see distinct ribbons of both chocolate and pumpkin.
</li&lI>
<li>
<h4>Bake to Perfection:</h4>
Place the pan into your preheated 350°F (175°C) oven. <strong>Bake for 30-35 minutes</strong>. Every oven is different, so start checking around the 30-minute mark. You’ll know your <strong>Pumpkin Brownies</strong> are done when the edges are set and a toothpick inserted into the center of the brownie (not a pumpkin swirl section, as pumpkin will remain softer) comes out with moist crumbs attached, but not wet batter. If the toothpick comes out completely clean, you might have overbaked them slightly, resulting in a less fudgy texture. The surface should look set and slightly puffed, perhaps with that lovely crackly top forming.
</li>
</ol>
<h3>Cooling and Serving Tips for Your Decadent <strong>Pumpkin Brownies</strong>:</h3>
<ol>
<li>
<h4>The Importance of Cooling:</h4>
Once baked, <strong>resist the urge to cut into your <strong>Pumpkin Brownies</strong> immediately</strong>! This is perhaps the most crucial step for achieving perfect, neat squares and that ideal fudgy consistency. Let the brownies cool completely in the pan on a wire rack. This process allows the brownies to finish setting up, firming their structure, and concentrating their flavors. <strong>Trust me, patience is a virtue here</strong>. If you cut them warm, they will likely crumble, and the gooey centers will smear, making for messy, rather than elegant, slices. This cooling period usually takes at least 2-3 hours, or even longer if your kitchen is warm. For the absolute cleanest cuts, I often chill them in the refrigerator for an hour or two once they’ve reached room temperature.
</li>
<li>
<h4>Cutting Your <strong>Pumpkin Brownies</strong> Neatly:</h4>
Once completely cool (or chilled), use the parchment paper overhang to carefully lift the entire slab of <strong>Pumpkin Brownies</strong> out of the pan and onto a cutting board. For super clean cuts, use a large, sharp chef’s knife. <strong>Run the knife under hot water and wipe it clean between each cut</strong>. This simple trick prevents chocolate from sticking to the blade and dragging, ensuring each slice is picture-perfect. You can cut them into 12 generous squares, or smaller bite-sized pieces for a party platter.
</li>
<li>
<h4>Serving Suggestions:</h4>
These <strong>Pumpkin Brownies</strong> are absolutely divine on their own, offering a perfect blend of rich chocolate and warm pumpkin spice. However, if you’re feeling extra indulgent, they are fantastic served slightly warm (a quick 10-15 seconds in the microwave) with a scoop of vanilla bean ice cream or a dollop of freshly whipped cream. A light dusting of powdered sugar just before serving also adds a touch of elegance and visual appeal, highlighting the beautiful swirl. <strong>They make an unforgettable dessert for any autumn gathering or simply a cozy treat for yourself!</strong>
</li>
<li>
<h4>Storage:</h4>
Store any leftover <strong>Pumpkin Brownies</strong> in an airtight container at room temperature for up to 3-4 days. If you prefer, you can also store them in the refrigerator for up to a week, which can sometimes enhance their fudgy texture even more. For longer storage, you can individually wrap slices in plastic wrap and then aluminum foil and freeze them for up to 2-3 months. Thaw them at room temperature or warm gently in the microwave when a craving strikes.
</li>
</ol>
Conclusion:
So, there you have it – my absolute favorite recipe for what I truly believe are the most delightful brownies you’ll ever bake. I’m talking about a dessert that transcends the ordinary, a treat that marries the fudgy, rich decadence of a classic brownie with the warm, comforting embrace of autumn’s most beloved squash. This isn’t just another brownie recipe; it’s an experience, a little slice of heaven that I am so excited for you to discover. The moment you take that first bite, you’ll understand exactly what I mean. The texture is simply divine – incredibly fudgy, almost melt-in-your-mouth, with that perfect crinkly top that all great brownies boast. But then, the magic happens: a subtle yet distinct pumpkin flavor, enhanced by those warming spices, weaves its way through the chocolate. It’s a sophisticated twist that elevates a humble brownie into something truly special, making these Pumpkin Brownies an absolute must-try for any occasion, especially as the leaves begin to turn and the air gets crisp. Trust me when I say, once you’ve tried them, your standard brownie recipe might just get a seasonal upgrade forever.
I’ve found that these brownies are incredibly versatile, fitting perfectly into so many different moments. Straight out of the oven, still warm and slightly gooey, they are pure bliss. A simple sprinkle of flaky sea salt on top before serving really enhances the chocolate notes and provides a delightful textural contrast. But don’t stop there! Imagine serving a warm square of these with a scoop of creamy vanilla bean ice cream, allowing it to melt just slightly over the edges – it’s a symphony of warm and cold, rich and sweet, that will undoubtedly impress anyone lucky enough to share them with you. For an extra autumnal touch, a dollop of cinnamon or even pecan praline ice cream would be an incredible pairing. Or, if you prefer something lighter, a cloud of freshly whipped cream, perhaps infused with a hint of maple syrup or a dash of bourbon, can elevate these brownies into a truly elegant dessert, perfect for a dinner party finale. They are also fantastic simply chilled, offering a denser, chewier texture that some prefer, making them an excellent candidate for make-ahead treats.
Beyond the classic ice cream or whipped cream accompaniments, think about how these could fit into a larger dessert spread. Cut into smaller squares, they make a fantastic addition to a holiday platter alongside cookies and other confections, bringing a festive touch. They are equally delightful with a strong cup of coffee in the morning (I won’t judge you!) or a cozy mug of spiced chai tea in the afternoon, making for the ultimate comfort food pairing. And for those of you who love to experiment, the possibilities for variations are endless. Feel free to fold in a handful of toasted pecans or walnuts into the batter for an added crunch and nutty depth, which complements the pumpkin beautifully. White chocolate chips would provide a beautiful contrast to the dark chocolate and pumpkin, both visually and in flavor, while a swirl of cream cheese mixture (just a simple blend of softened cream cheese, a little sugar, and an egg yolk) marbled through the top before baking would transform them into an even more decadent treat, akin to a cheesecake brownie hybrid. You could also play with the spices, adding a pinch of ginger or cloves for a more pronounced “pumpkin pie spice” flavor, or even a tiny dash of cayenne pepper for a subtle, intriguing warmth that lingers on the palate, adding a sophisticated kick.
This recipe is truly more than just a set of instructions; it’s an invitation to create something truly delicious and memorable in your own kitchen. I genuinely hope you’ll take the plunge and give these fantastic brownies a try. Don’t be shy about making them your own, whether it’s through those serving suggestions or by adding your personal touch with variations. There’s an immense satisfaction that comes from baking something so wonderfully comforting and sharing it with loved ones. Once you’ve pulled them from the oven, inhaled that incredible aroma, and savored that first bite, I would absolutely love to hear about your experience. Please, come back and leave a comment, or better yet, share a photo of your beautiful creations on social media! Tag me, tell me what you loved, what variations you tried, and who you shared them with. Your feedback and stories inspire me endlessly, and I can’t wait to see how these brownies become a new favorite in your home, bringing smiles and warmth to everyone who tastes them. Happy baking, my friends – I promise, you won’t regret making these fudgy, flavorful beauties!
Decadent Pumpkin Brownies: Your New Favorite Fall Treat!
Elevate your classic brownie experience with these Pumpkin Brownies, a delightful fusion of rich chocolate and warm pumpkin spice. Incredibly fudgy, dense, and moist, they are the ultimate crowd-pleaser for autumn gatherings.
Ingredients
-
1 cup (2 sticks or 226g) Unsalted Butter
-
8 ounces (about 1.5 cups) High-Quality Bittersweet or Semisweet Chocolate (60-70% cocoa)
-
1 ¾ cups (350g) Granulated Sugar
-
4 Large Eggs, room temperature
-
1 teaspoon Non-Alcoholic Pure Vanilla Extract
-
1 cup (120g) All-Purpose Flour
-
¾ cup (65g) Unsweetened Cocoa Powder (Dutch-processed recommended)
-
½ teaspoon Baking Powder
-
½ teaspoon Salt (fine sea salt)
-
1 cup (225g) Canned Pumpkin Puree (100% pure)
-
¼ cup (50g) Granulated Sugar
-
1 Large Egg Yolk
-
1 tablespoon All-Purpose Flour
-
1 teaspoon Pumpkin Pie Spice (or ½ tsp cinnamon, ¼ tsp ginger, ⅛ tsp nutmeg, pinch cloves)
-
½ teaspoon Non-Alcoholic Pure Vanilla Extract
-
Pinch of Salt
Instructions
-
Step 1
Preheat oven to 350°F (175°C). Line a 9×13-inch baking pan with parchment paper, leaving an overhang. Lightly grease exposed sides. -
Step 2
In a microwave-safe bowl, combine butter and chopped chocolate. Melt in 30-second intervals, stirring until smooth. Set aside to cool slightly. -
Step 3
In a large mixing bowl, whisk granulated sugar and 4 large eggs for 2-3 minutes until pale and aerated. Stir in 1 teaspoon non-alcoholic vanilla extract. -
Step 4
Slowly pour the slightly cooled melted chocolate and butter mixture into the egg and sugar mixture, whisking until thoroughly combined. -
Step 5
In a separate medium bowl, whisk together 1 cup all-purpose flour, ¾ cup unsweetened cocoa powder, ½ teaspoon baking powder, and ½ teaspoon salt. -
Step 6
Add the sifted dry ingredients to the wet chocolate mixture. Using a rubber spatula, gently fold until just combined. Do not overmix. -
Step 7
Pour two-thirds of the brownie batter into the prepared pan and spread evenly. Reserve the remaining one-third. -
Step 8
In a clean, small mixing bowl, combine 1 cup pumpkin puree, ¼ cup granulated sugar, 1 large egg yolk, 1 tablespoon all-purpose flour, 1 teaspoon pumpkin pie spice, ½ teaspoon non-alcoholic vanilla extract, and a pinch of salt. Whisk until smooth. -
Step 9
Carefully dollop and gently spread the entire pumpkin mixture evenly over the chocolate base in the pan. -
Step 10
Dollop small spoonfuls of the reserved one-third brownie batter over the pumpkin layer. -
Step 11
Take a butter knife or skewer and gently swirl through the layers to create marbling, going through both top brownie dollops and the pumpkin layer beneath. Do not over-swirl. -
Step 12
Place the pan into your preheated 350°F (175°C) oven. Bake for 30-35 minutes. Brownies are done when edges are set and a toothpick inserted into the center (not pumpkin swirl) comes out with moist crumbs attached. -
Step 13
Let brownies cool completely in the pan on a wire rack for at least 2-3 hours. For the cleanest cuts, chill in the refrigerator for an hour or two once at room temperature. -
Step 14
Once cool, use the parchment paper overhang to lift the slab onto a cutting board. Use a large, sharp knife, run under hot water and wiped clean between each cut, to slice into 12 generous squares. Serve as is, or warm with vanilla bean ice cream or whipped cream. A dusting of powdered sugar adds elegance. -
Step 15
Store leftover brownies in an airtight container at room temperature for 3-4 days, or in the refrigerator for up to a week. For longer storage, freeze individually wrapped slices for up to 2-3 months.
Important Information
Nutrition Facts (Per Serving)
It is important to consider this information as approximate and not to use it as definitive health advice.
Allergy Information
Please check ingredients for potential allergens and consult a health professional if in doubt.
Leave a Comment