
Dinner Potato Rolls, those soft, pillowy clouds of carbohydrate perfection, are more than just a side dish; they’re a warm hug on a plate. Have you ever walked into a bakery and been instantly drawn in by the sweet, comforting aroma of freshly baked bread? That’s the magic of potato rolls! These aren’t your average, everyday rolls; they possess a unique tenderness and subtle sweetness that elevates any meal.
While the exact origins are debated, potato bread, the ancestor of our beloved rolls, has roots in 18th-century Europe, where resourceful bakers incorporated mashed potatoes into their dough to extend flour supplies and enhance texture. This ingenious technique resulted in a bread that was incredibly moist and flavorful, a tradition that has been lovingly passed down through generations.
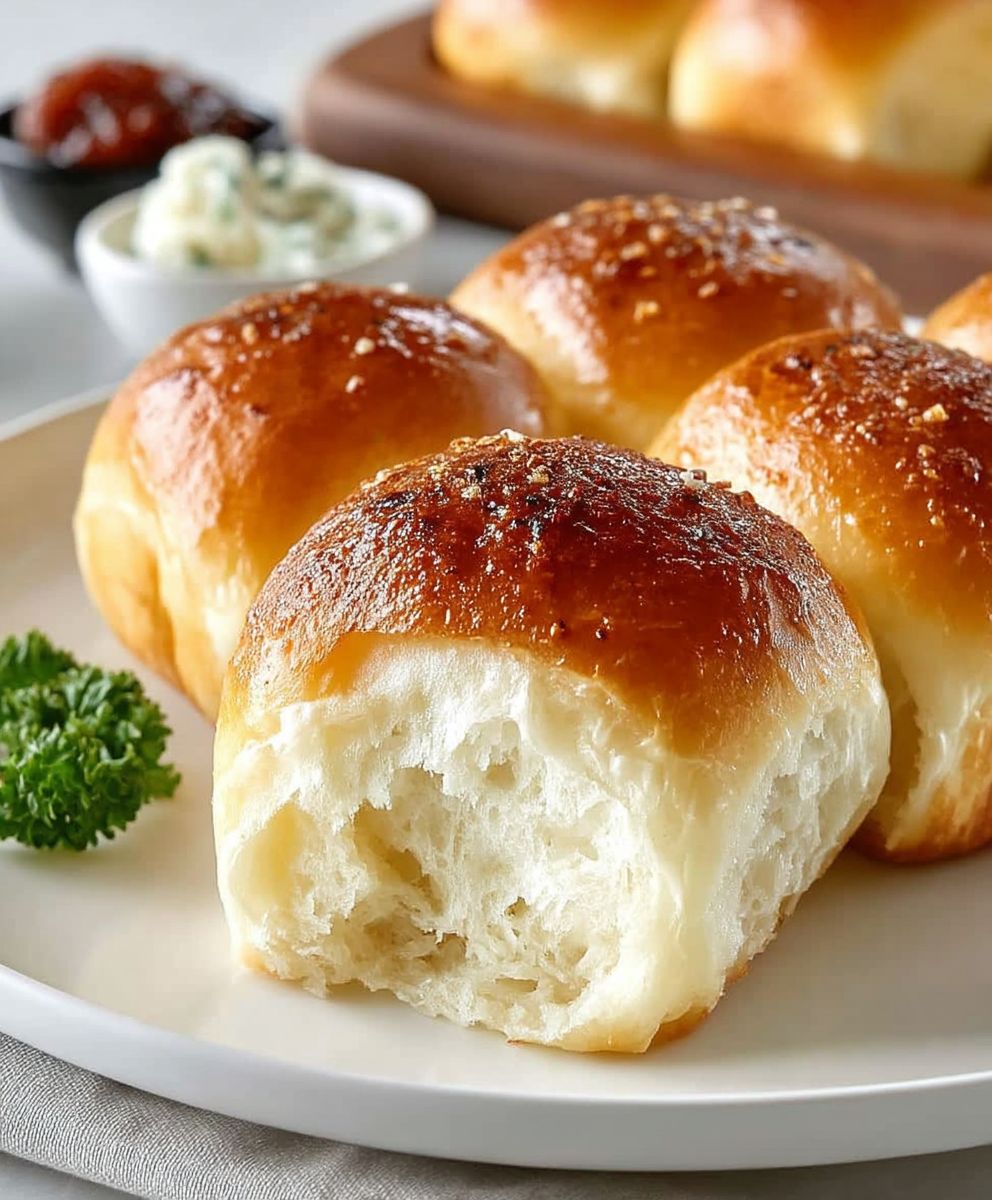
What makes dinner potato rolls so irresistible? It’s a combination of factors. Their incredibly soft and slightly chewy texture is simply divine. The subtle sweetness from the potatoes complements both savory and sweet dishes beautifully. Plus, they’re incredibly versatile! Serve them alongside a hearty stew, use them for mini sandwiches, or simply slather them with butter and enjoy them warm from the oven. Their comforting nature and ease of preparation make them a family favorite, perfect for weeknight dinners or special occasions. Get ready to experience the joy of baking these delightful rolls yourself!

Ingredients:
- For the Sponge:
- 1 cup (240ml) warm milk (105-115°F)
- 1 tablespoon (7g) active dry yeast
- 1 tablespoon (12g) granulated sugar
- 1 1/2 cups (180g) all-purpose flour
- For the Dough:
- 1/2 cup (120ml) mashed potatoes (cooked and cooled, no skins)
- 1/4 cup (57g) unsalted butter, softened
- 1/4 cup (50g) granulated sugar
- 1 large egg
- 1 teaspoon salt
- 2 1/2 – 3 cups (300-360g) all-purpose flour, plus more for dusting
- For the Egg Wash:
- 1 large egg
- 1 tablespoon milk or water
- Optional Topping:
- Melted butter
- Flaky sea salt
Preparing the Sponge:
Okay, let’s get started with the sponge! This is a crucial step for creating those light and airy rolls we all crave. The sponge allows the yeast to get a head start, resulting in a better rise and a more flavorful dough.
- Warm the Milk: First, gently warm the milk to between 105-115°F (40-46°C). This temperature is ideal for activating the yeast. If the milk is too hot, it can kill the yeast, and if it’s too cold, the yeast won’t activate properly. I usually use a microwave for about 30-45 seconds, but you can also warm it on the stovetop. Just be sure to monitor the temperature closely!
- Combine Ingredients: In a large bowl (I prefer using a stand mixer bowl for convenience later), combine the warm milk, active dry yeast, and granulated sugar. Give it a gentle stir to dissolve the sugar and yeast.
- Let it Bloom: Now, let the mixture sit for about 5-10 minutes, or until it becomes foamy and bubbly. This indicates that the yeast is active and ready to work its magic. If it doesn’t foam, your yeast might be old or inactive, and you’ll need to start with fresh yeast.
- Add Flour: Once the yeast mixture is foamy, add the 1 1/2 cups of all-purpose flour. Stir until just combined. The mixture will be quite thick and sticky that’s perfectly normal!
- Rest the Sponge: Cover the bowl with plastic wrap or a clean kitchen towel and let it rest in a warm place for about 30 minutes. This allows the yeast to further develop and create a flavorful base for our rolls. You’ll notice the sponge will have risen and become even more bubbly.
Making the Dough:
Now that our sponge is ready, we can move on to making the main dough. This is where the mashed potatoes come in, adding moisture and a subtle sweetness to the rolls. Don’t skip the mashed potatoes they’re the secret ingredient!
- Add Remaining Ingredients: To the sponge, add the mashed potatoes, softened butter, granulated sugar, egg, and salt. Make sure your butter is softened but not melted, as melted butter can affect the dough’s texture.
- Mix Well: Using a stand mixer fitted with a dough hook (or mixing by hand), mix the ingredients until well combined. The mixture will still be quite sticky at this point.
- Gradually Add Flour: Gradually add the remaining 2 1/2 – 3 cups of all-purpose flour, 1/2 cup at a time, mixing well after each addition. The amount of flour you need will depend on the humidity and the moisture content of your mashed potatoes. You’re looking for a dough that is soft and slightly sticky but not so sticky that it’s unmanageable.
- Knead the Dough: Once the dough comes together, knead it for about 5-7 minutes in the stand mixer (or 8-10 minutes by hand) until it becomes smooth and elastic. The dough should pull away from the sides of the bowl but still be slightly tacky to the touch. If the dough is too sticky, add a little more flour, 1 tablespoon at a time.
- First Rise: Place the dough in a lightly oiled bowl, turning to coat all sides. Cover the bowl with plastic wrap or a clean kitchen towel and let it rise in a warm place for about 1-1.5 hours, or until doubled in size. This is a crucial step for developing the flavor and texture of the rolls.
Shaping and Second Rise:
After the first rise, it’s time to shape our rolls! This is where you get to decide how big you want them to be. I usually aim for about 12-15 rolls, but you can make them smaller or larger depending on your preference.
- Punch Down the Dough: Gently punch down the dough to release the air. This helps to redistribute the yeast and create a more even texture.
- Divide the Dough: Turn the dough out onto a lightly floured surface. Divide the dough into equal portions. I find it easiest to use a kitchen scale to ensure that each roll is the same size, but you can also eyeball it.
- Shape the Rolls: Shape each portion of dough into a smooth ball. To do this, gently stretch the top of the dough down and around to the bottom, pinching the edges together to create a smooth surface. Then, roll the ball gently on the counter to smooth out any imperfections.
- Arrange on Baking Sheet: Place the shaped rolls on a baking sheet lined with parchment paper or a silicone baking mat. Leave about 1-2 inches of space between each roll to allow them to expand during the second rise.
- Second Rise: Cover the baking sheet with plastic wrap or a clean kitchen towel and let the rolls rise in a warm place for about 30-45 minutes, or until they have almost doubled in size. This second rise is important for creating those soft and fluffy rolls.
Baking the Rolls:
We’re almost there! Now it’s time to bake our beautiful rolls. The egg wash is optional, but it gives the rolls a lovely golden-brown color and a slightly shiny finish. And who can resist a little melted butter and flaky sea salt on top?
- Preheat Oven: Preheat your oven to 375°F (190°C). Make sure your oven is properly preheated before baking the rolls, as this will ensure even cooking.
- Prepare Egg Wash: In a small bowl, whisk together the egg and milk (or water) to create the egg wash.
- Brush with Egg Wash: Gently brush the tops of the risen rolls with the egg wash. Be careful not to deflate the rolls.
- Bake: Bake the rolls for 15-20 minutes, or until they are golden brown on top. The baking time will depend on the size of your rolls and your oven.
- Optional Topping: While the rolls are still warm, brush them with melted butter and sprinkle with flaky sea salt, if desired. This adds a delicious flavor and a beautiful finish.
- Cool and Serve: Let the rolls cool on the baking sheet for a few minutes before transferring them to a wire rack to cool completely. Serve warm and enjoy!
Tips for Success:
- Use a Thermometer: Using a thermometer to check the temperature of the milk is crucial for activating the yeast properly.
- Don’t Overmix: Overmixing the dough can result in tough rolls. Mix until just combined and then knead until smooth and elastic.
- Warm Place for Rising: A warm place is essential for the dough to rise properly. You can place the dough in a slightly warmed oven (turned off) or in a sunny spot.
- Don’t Overbake: Overbaking the rolls can make them dry. Bake until golden brown and cooked through.
- Storage: Store leftover rolls in an airtight container at room temperature for up to 2 days or in the freezer for up to 2 months.
Enjoy your homemade Dinner Potato Rolls!
Conclusion:
And there you have it! These Dinner Potato Rolls are more than just a side; they’re a warm, comforting hug on a plate, ready to elevate any meal. I truly believe this recipe is a must-try for anyone who appreciates the simple pleasure of homemade bread. The soft, slightly sweet flavor, combined with that perfect golden-brown crust, is simply irresistible. Forget store-bought rolls that are often dry and bland; these are in a league of their own.
What makes these rolls so special? It’s the potato! The mashed potato adds a subtle sweetness and incredible moisture, resulting in a texture that’s unbelievably soft and fluffy. They practically melt in your mouth! Plus, the potato helps to keep them fresh for longer, which is always a bonus.
But don’t just take my word for it. You absolutely need to experience the joy of baking and tasting these rolls for yourself. Imagine the aroma filling your kitchen as they bake, the anticipation building with each passing minute. And then, finally, the moment you pull them out of the oven, golden brown and perfectly puffed.
Serving Suggestions and Variations:
These Dinner Potato Rolls are incredibly versatile. Of course, they’re fantastic served warm with butter alongside any dinner think roasted chicken, hearty stews, or even a simple salad. But don’t limit yourself!
* Sandwich Rolls: Slice them in half and use them for mini sandwiches or sliders. They’re perfect for leftover turkey or ham.
* Breakfast Rolls: Warm them up and serve with jam or honey for a delightful breakfast treat.
* Garlic Rolls: Brush them with garlic butter after baking for an extra layer of flavor.
* Herb Rolls: Add a tablespoon of dried herbs, such as rosemary or thyme, to the dough for a savory twist.
* Sweet Rolls: For a sweeter version, add a bit more sugar to the dough and brush the tops with melted butter and sprinkle with cinnamon sugar after baking.
Experiment and have fun!
The possibilities are endless. Feel free to adjust the recipe to your liking. If you prefer a slightly tangier flavor, you can add a tablespoon of sourdough starter to the dough. If you want a richer flavor, use milk instead of water.
I’m confident that once you try this recipe, these Dinner Potato Rolls will become a staple in your kitchen. They’re perfect for special occasions, holiday gatherings, or simply a cozy weeknight meal. They’re also a wonderful way to impress your family and friends with your baking skills.
So, what are you waiting for? Gather your ingredients, preheat your oven, and get ready to bake some magic! I’m so excited for you to try this recipe and experience the joy of homemade bread.
And most importantly, I’d love to hear about your experience! Did you make any variations? What did you serve them with? Share your photos and comments below. Let’s create a community of Dinner Potato Roll enthusiasts! Happy baking!
Dinner Potato Rolls: The Ultimate Guide to Baking Soft & Fluffy Rolls
Soft, fluffy homemade potato dinner rolls, subtly sweet and perfect for any occasion. A family favorite!
Ingredients
- 1 cup (240ml) warm milk (105-115°F)
- 1 tablespoon (7g) active dry yeast
- 1 tablespoon (12g) granulated sugar
- 1 1/2 cups (180g) all-purpose flour
- 1/2 cup (120ml) mashed potatoes (cooked and cooled, no skins)
- 1/4 cup (57g) unsalted butter, softened
- 1/4 cup (50g) granulated sugar
- 1 large egg
- 1 teaspoon salt
- 2 1/2 – 3 cups (300-360g) all-purpose flour, plus more for dusting
- 1 large egg
- 1 tablespoon milk or water
- Melted butter
- Flaky sea salt
Instructions
- Prepare the Sponge: Warm milk to 105-115°F. In a large bowl, combine warm milk, active dry yeast, and granulated sugar. Stir gently and let sit for 5-10 minutes until foamy. Add 1 1/2 cups all-purpose flour and stir until just combined. Cover and let rest in a warm place for 30 minutes.
- Make the Dough: To the sponge, add mashed potatoes, softened butter, granulated sugar, egg, and salt. Mix well. Gradually add 2 1/2 – 3 cups all-purpose flour, 1/2 cup at a time, until the dough is soft and slightly sticky.
- Knead the Dough: Knead the dough for 5-7 minutes in a stand mixer (or 8-10 minutes by hand) until smooth and elastic.
- First Rise: Place the dough in a lightly oiled bowl, turning to coat. Cover and let rise in a warm place for 1-1.5 hours, or until doubled in size.
- Shape the Rolls: Gently punch down the dough. Turn out onto a lightly floured surface and divide into equal portions (12-15 rolls). Shape each portion into a smooth ball.
- Second Rise: Place the shaped rolls on a baking sheet lined with parchment paper, leaving space between each roll. Cover and let rise in a warm place for 30-45 minutes, or until almost doubled in size.
- Bake the Rolls: Preheat oven to 375°F (190°C). In a small bowl, whisk together the egg and milk (or water) to create the egg wash. Gently brush the tops of the risen rolls with the egg wash. Bake for 15-20 minutes, or until golden brown on top.
- Optional Topping: While the rolls are still warm, brush them with melted butter and sprinkle with flaky sea salt, if desired.
- Cool and Serve: Let the rolls cool on the baking sheet for a few minutes before transferring them to a wire rack to cool completely. Serve warm and enjoy!
Notes
- Use a thermometer to check the temperature of the milk.
- Don’t overmix the dough.
- A warm place is essential for the dough to rise properly.
- Don’t overbake the rolls.
- Store leftover rolls in an airtight container at room temperature for up to 2 days or in the freezer for up to 2 months.


Leave a Comment