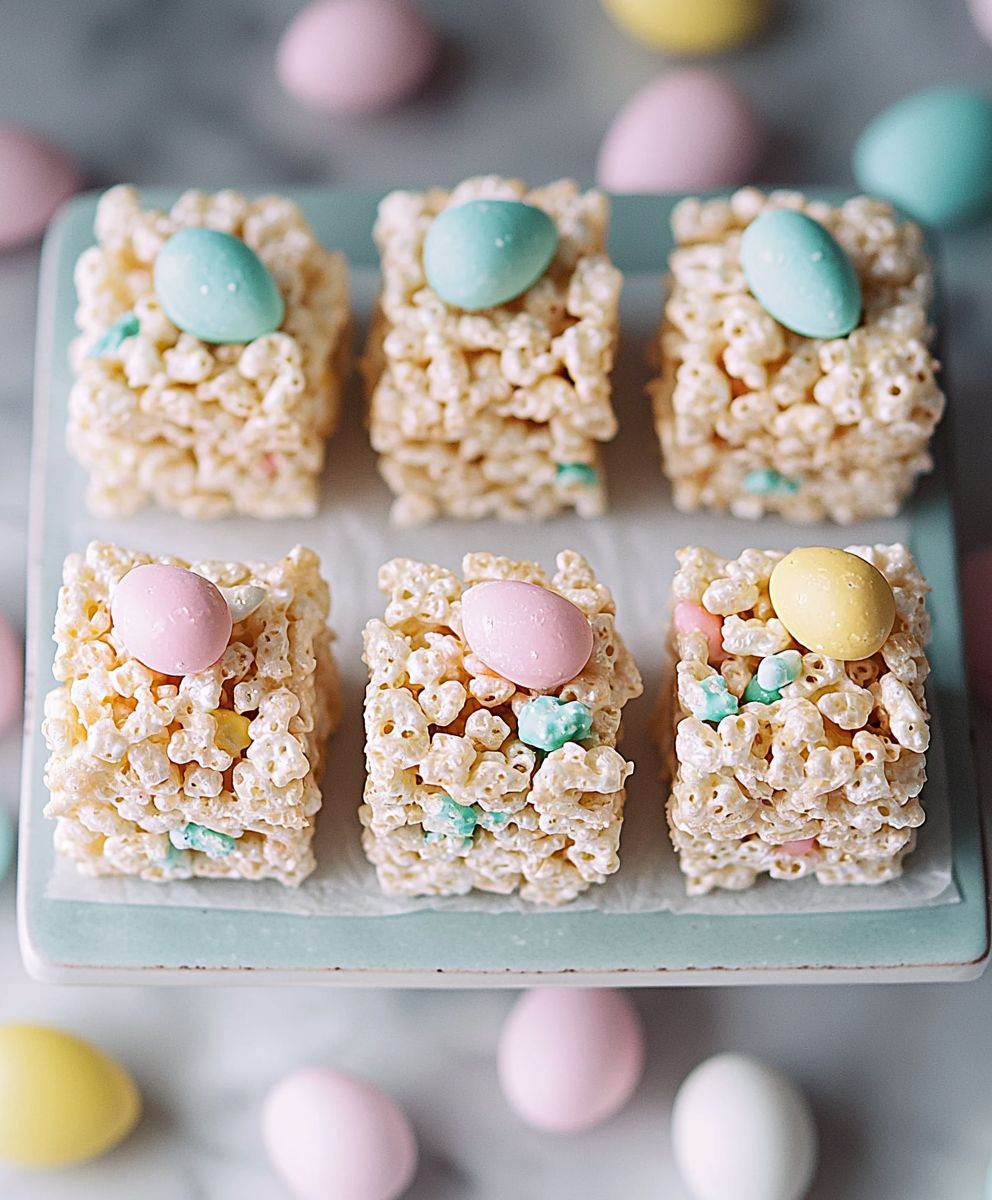
Easter Rice Krispie Treats: Prepare to hop into spring with a dessert that’s as delightful to make as it is to eat! Forget those complicated Easter desserts; we’re bringing back the fun and simplicity with a festive twist on a classic favorite. Imagine biting into a chewy, marshmallowy square, bursting with the familiar crunch of Rice Krispies, all dressed up in pastel colors and adorable Easter shapes.
While Rice Krispie Treats themselves don’t have a long, storied history, their invention in the 1930s by Kellogg’s employees marked the beginning of a beloved treat enjoyed by generations. This Easter version simply elevates the original, transforming it into a holiday centerpiece. We’re talking pastel sprinkles, candy eggs nestled within, and maybe even a drizzle of white chocolate to truly capture the spirit of the season.
What’s not to love? Easter Rice Krispie Treats are incredibly easy to make, requiring minimal ingredients and no baking! Their soft, chewy texture combined with the satisfying crunch of the cereal is a winning combination. Plus, they’re endlessly customizable, making them a perfect activity to enjoy with kids. Get ready to create some sweet memories this Easter with a treat that’s guaranteed to be a crowd-pleaser!
Ingredients:
- 1/4 cup (1/2 stick) unsalted butter
- 5 cups miniature marshmallows
- 6 cups Rice Krispies cereal
- 1 teaspoon vanilla extract
- 1/4 teaspoon salt
- Easter-themed sprinkles (optional, but highly recommended!)
- Pastel-colored candy melts (pink, yellow, blue, green)
- Vegetable shortening (for thinning candy melts, if needed)
- Easter-themed candies (e.g., jelly beans, chocolate eggs, Peeps)
Preparing the Rice Krispie Treat Base:
Okay, let’s get started! First, we’re going to make the classic Rice Krispie treat base. This is the foundation for all the Easter fun we’re about to have.
- Melt the Butter: In a large saucepan, melt the butter over low heat. Make sure you keep an eye on it so it doesn’t burn. We want it nice and smooth, not browned.
- Add the Marshmallows: Once the butter is melted, add the miniature marshmallows to the saucepan. Stir constantly until the marshmallows are completely melted and smooth. This might take a few minutes, so be patient and keep stirring! You don’t want any lumps.
- Stir in Vanilla and Salt: Remove the saucepan from the heat. Stir in the vanilla extract and salt. The vanilla adds a lovely flavor, and the salt helps to balance the sweetness.
- Add the Rice Krispies: Now for the fun part! Add the Rice Krispies cereal to the melted marshmallow mixture. Gently fold the cereal into the marshmallow mixture until it’s evenly coated. Be careful not to crush the cereal. We want those little Krispies to stay nice and crunchy.
- Press into Pan: Lightly grease a 9×13 inch baking pan with butter or cooking spray. This will prevent the Rice Krispie treats from sticking. Pour the Rice Krispie mixture into the prepared pan. Using a spatula or your fingers (lightly greased!), gently press the mixture evenly into the pan. Don’t press too hard, or the treats will be dense. We want them to be nice and chewy.
- Cool Completely: Let the Rice Krispie treats cool completely in the pan before cutting. This usually takes about 30 minutes to an hour. This is a crucial step! If you try to cut them while they’re still warm, they’ll be sticky and messy.
Decorating with Candy Melts:
Now comes the really fun part decorating! We’re going to use candy melts to create a beautiful Easter-themed topping for our Rice Krispie treats.
- Melt the Candy Melts: In separate microwave-safe bowls, melt each color of candy melts according to the package directions. I usually microwave them in 30-second intervals, stirring in between, until they’re smooth and melted. Be careful not to overheat them, or they’ll seize up. If the candy melts are too thick, you can add a small amount of vegetable shortening (about 1/2 teaspoon at a time) to thin them out.
- Drizzle the Candy Melts: Once the Rice Krispie treats are completely cooled, drizzle the melted candy melts over the top. You can create any design you like! I like to do a random drizzle of different colors for a fun and festive look.
- Add Sprinkles: While the candy melts are still wet, sprinkle the Easter-themed sprinkles over the top. This will add some extra sparkle and color to your treats.
- Add Easter Candies: Now, let’s add some Easter candies! Gently press jelly beans, chocolate eggs, or Peeps into the melted candy melts. Get creative and have fun with it!
- Let Set: Let the candy melts set completely before cutting the Rice Krispie treats. This usually takes about 30 minutes to an hour. You can speed up the process by placing the pan in the refrigerator for a few minutes.
Cutting and Serving:
Almost there! Now it’s time to cut and serve our delicious Easter Rice Krispie treats.
- Cut into Squares or Shapes: Once the candy melts are set, cut the Rice Krispie treats into squares or shapes. You can use a sharp knife or cookie cutters to create fun Easter shapes like eggs, bunnies, or chicks.
- Serve and Enjoy!: Serve the Easter Rice Krispie treats immediately, or store them in an airtight container at room temperature for up to 3 days. They’re best enjoyed fresh!
Tips and Variations:
Here are a few extra tips and variations to make your Easter Rice Krispie treats even more special:
- Use Different Cereals: You can substitute other cereals for Rice Krispies, such as Cocoa Krispies or Fruity Pebbles. This will change the flavor and color of the treats.
- Add Food Coloring: You can add a few drops of food coloring to the melted marshmallow mixture to create colorful Rice Krispie treats.
- Use Different Extracts: You can substitute other extracts for vanilla extract, such as almond extract or lemon extract.
- Make Rice Krispie Treat Pops: Insert lollipop sticks into the Rice Krispie treats before the candy melts set to make Rice Krispie treat pops.
- Add Peanut Butter: Stir in 1/2 cup of peanut butter to the melted marshmallow mixture for a peanut butter flavor.
- Make a Chocolate Drizzle: Melt some chocolate chips and drizzle them over the top of the Rice Krispie treats for a chocolatey treat.
- Use Different Sprinkles: Experiment with different types of sprinkles to create unique and festive designs.
- Add Dried Fruit or Nuts: Stir in dried fruit or nuts to the Rice Krispie mixture for added texture and flavor.
- Make Mini Rice Krispie Treats: Use a mini muffin tin to make individual mini Rice Krispie treats.
- Use a Different Pan Size: If you want thicker Rice Krispie treats, use a smaller pan. If you want thinner Rice Krispie treats, use a larger pan.
Troubleshooting:
Sometimes things don’t go exactly as planned. Here are a few common problems and how to fix them:
- Rice Krispie Treats are Too Hard: This usually happens when you press the Rice Krispie mixture too firmly into the pan. Be gentle when pressing the mixture into the pan.
- Rice Krispie Treats are Too Sticky: This usually happens when you don’t let the Rice Krispie treats cool completely before cutting them. Make sure to let them cool completely before cutting.
- Candy Melts are Too Thick: Add a small amount of vegetable shortening (about 1/2 teaspoon at a time) to thin them out.
- Candy Melts are Seized Up: This usually happens when you overheat the candy melts. Be careful not to overheat them. If they seize up, try adding a small amount of vegetable shortening and stirring vigorously.
- Sprinkles Won’t Stick: Make sure the candy melts are still wet when you add the sprinkles. If the candy melts have already set, you can lightly brush them with melted candy melts before adding the sprinkles.
Storage Instructions:
To keep your Easter Rice Krispie treats fresh and delicious, store them in an airtight container at room temperature for up to 3 days. They’re best enjoyed fresh!
Nutritional Information (Approximate):
Please note that the nutritional information is approximate and will vary depending on the specific ingredients you use.
- Calories: Approximately 200-250 per serving
- Fat: Approximately 8-12 grams per serving
- Sugar: Approximately 20-25 grams per serving
Enjoy Your Easter Rice Krispie Treats!
I hope you enjoy making and eating these delicious Easter Rice Krispie treats! They’re a fun and festive treat that’s perfect for celebrating Easter with family and friends. Happy Easter!
Conclusion:
And there you have it! These Easter Rice Krispie Treats are more than just a simple dessert; they’re a delightful explosion of spring flavors and colors, guaranteed to bring a smile to everyone’s face. I truly believe this recipe is a must-try for several reasons. First, the sheer simplicity of it makes it accessible to bakers of all skill levels. Whether you’re a seasoned pro or just starting out in the kitchen, you can whip up a batch of these treats in no time. Second, the customization options are endless! You can tailor the colors, sprinkles, and even the cereal itself to perfectly match your Easter theme or personal preferences. But beyond the ease and versatility, these treats are simply delicious. The classic combination of crispy rice cereal, melted marshmallows, and butter is a timeless winner, and the addition of Easter-themed candies and sprinkles elevates them to a whole new level of festive fun. The chewy texture, the sweet flavor, and the vibrant colors all come together to create a truly irresistible treat that both kids and adults will adore. Looking for serving suggestions? These Easter Rice Krispie Treats are perfect for Easter brunch, dessert tables, or even as a fun and festive snack for the kids. You can cut them into squares, use cookie cutters to create Easter-themed shapes like bunnies and eggs, or even dip them in melted chocolate for an extra touch of indulgence. For a fun variation, try adding a layer of peanut butter between the Rice Krispies and the marshmallow mixture for a salty-sweet twist. Or, consider using different flavored marshmallows, like strawberry or vanilla, to add a unique flavor profile. You could even incorporate chopped nuts, dried fruit, or mini chocolate chips into the mixture for added texture and flavor. Another fun idea is to create Rice Krispie Treat pops by inserting lollipop sticks into the treats before they set. These are perfect for little hands and make for a delightful presentation. Don’t be afraid to get creative and experiment with different ingredients and decorations to make these treats your own. The possibilities are truly endless! I encourage you to give this recipe a try and experience the joy of creating these adorable and delicious Easter Rice Krispie Treats for yourself. I promise you won’t be disappointed. Once you’ve made them, I would absolutely love to hear about your experience! Did you try any fun variations? What were your favorite decorations? Did your family and friends enjoy them as much as I do? Please share your photos and stories in the comments below. I’m always eager to see your creations and learn from your experiences. Happy baking, and Happy Easter! I hope these treats bring a little extra sweetness and joy to your holiday celebration. Remember, the best part of baking is sharing your creations with loved ones, so gather your family and friends, whip up a batch of these treats, and create some lasting memories together. I can’t wait to hear all about it! PrintEaster Rice Krispie Treats: Easy Recipe & Fun Variations
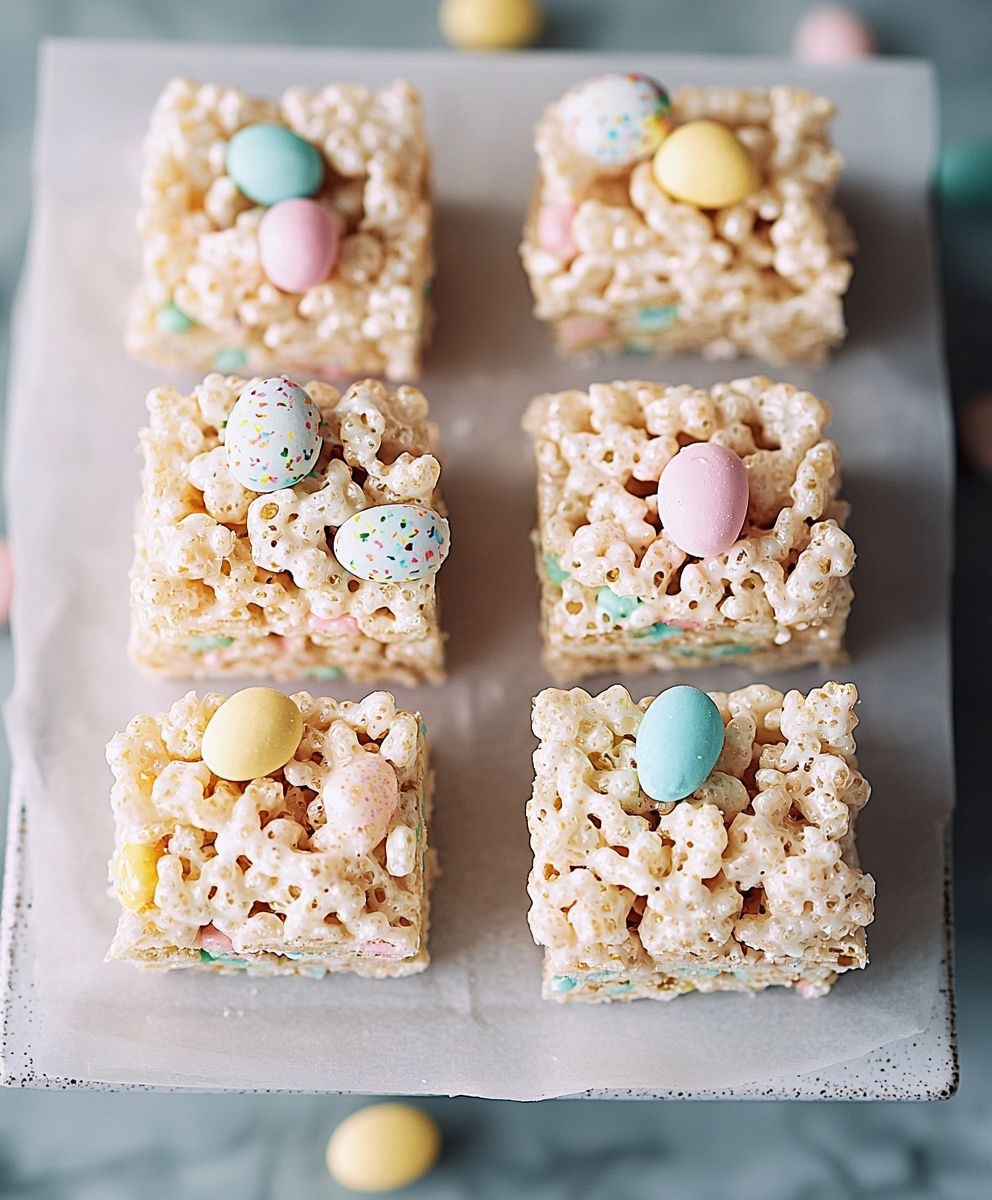
Festive Easter Rice Krispie treats decorated with colorful candy melts, sprinkles, and Easter candies. A fun and easy treat for the holiday!
- Prep Time: 15 minutes
- Cook Time: 5 minutes
- Total Time: 90 minutes
- Yield: 24 squares 1x
Ingredients
- 1/4 cup (1/2 stick) unsalted butter
- 5 cups miniature marshmallows
- 6 cups Rice Krispies cereal
- 1 teaspoon vanilla extract
- 1/4 teaspoon salt
- Easter-themed sprinkles (optional, but highly recommended!)
- Pastel-colored candy melts (pink, yellow, blue, green)
- Vegetable shortening (for thinning candy melts, if needed)
- Easter-themed candies (e.g., jelly beans, chocolate eggs, Peeps)
Instructions
- In a large saucepan, melt the butter over low heat until smooth.
- Add the miniature marshmallows to the saucepan. Stir constantly until the marshmallows are completely melted and smooth.
- Remove the saucepan from the heat. Stir in the vanilla extract and salt.
- Add the Rice Krispies cereal to the melted marshmallow mixture. Gently fold the cereal into the marshmallow mixture until it’s evenly coated.
- Lightly grease a 9×13 inch baking pan with butter or cooking spray. Pour the Rice Krispie mixture into the prepared pan. Using a spatula or your fingers (lightly greased!), gently press the mixture evenly into the pan.
- Let the Rice Krispie treats cool completely in the pan before cutting (about 30 minutes to an hour).
- In separate microwave-safe bowls, melt each color of candy melts according to the package directions (usually in 30-second intervals, stirring in between). If the candy melts are too thick, add a small amount of vegetable shortening (about 1/2 teaspoon at a time) to thin them out.
- Once the Rice Krispie treats are completely cooled, drizzle the melted candy melts over the top.
- While the candy melts are still wet, sprinkle the Easter-themed sprinkles over the top.
- Gently press jelly beans, chocolate eggs, or Peeps into the melted candy melts.
- Let the candy melts set completely before cutting the Rice Krispie treats (about 30 minutes to an hour). You can speed up the process by placing the pan in the refrigerator for a few minutes.
- Once the candy melts are set, cut the Rice Krispie treats into squares or shapes.
- Serve the Easter Rice Krispie treats immediately, or store them in an airtight container at room temperature for up to 3 days.
Notes
- Use Different Cereals: You can substitute other cereals for Rice Krispies, such as Cocoa Krispies or Fruity Pebbles.
- Add Food Coloring: You can add a few drops of food coloring to the melted marshmallow mixture to create colorful Rice Krispie treats.
- Use Different Extracts: You can substitute other extracts for vanilla extract, such as almond extract or lemon extract.
- Make Rice Krispie Treat Pops: Insert lollipop sticks into the Rice Krispie treats before the candy melts set to make Rice Krispie treat pops.
- Add Peanut Butter: Stir in 1/2 cup of peanut butter to the melted marshmallow mixture for a peanut butter flavor.
- Make a Chocolate Drizzle: Melt some chocolate chips and drizzle them over the top of the Rice Krispie treats for a chocolatey treat.
- Use Different Sprinkles: Experiment with different types of sprinkles to create unique and festive designs.
- Add Dried Fruit or Nuts: Stir in dried fruit or nuts to the Rice Krispie mixture for added texture and flavor.
- Make Mini Rice Krispie Treats: Use a mini muffin tin to make individual mini Rice Krispie treats.
- Use a Different Pan Size: If you want thicker Rice Krispie treats, use a smaller pan. If you want thinner Rice Krispie treats, use a larger pan.




Leave a Comment