
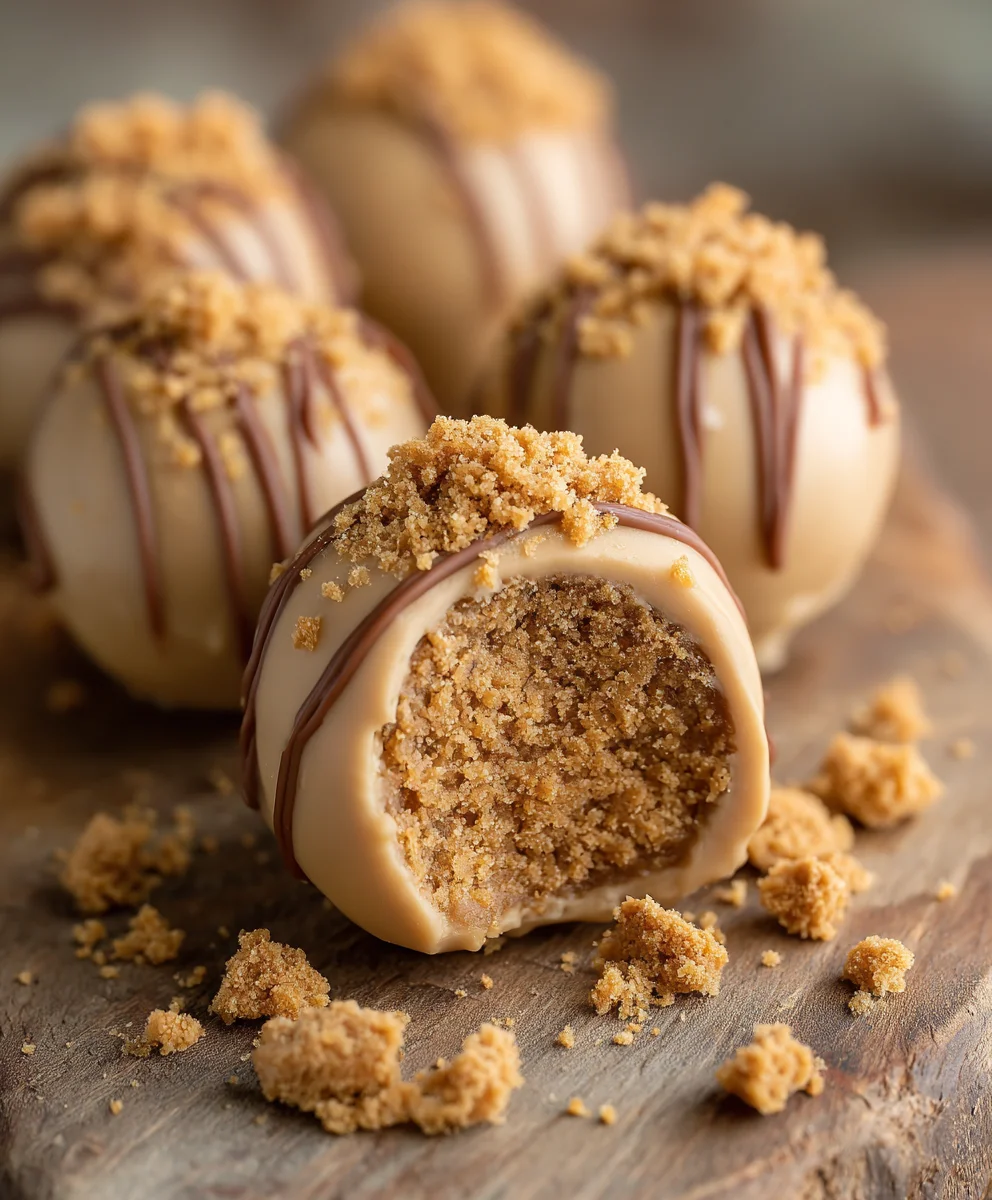
Biscoff Truffles are an absolute dream come true for anyone who adores the distinctive, caramelized crunch of Lotus Biscoff cookies. Imagine sinking your teeth into a rich, creamy, and wonderfully spiced bite-sized confection that requires absolutely no baking! I am truly delighted to share with you a recipe that transforms these iconic biscuits into an irresistible treat, perfect for any occasion or simply as a delightful indulgence for yourself.
The beloved Biscoff cookie, originating from Belgium as a speculoos biscuit, has charmed palates worldwide with its unique caramel and subtly spiced flavor profile, traditionally enjoyed with coffee. Its journey from a humble tea-time companion to a global sensation is remarkable. It’s no wonder that creative minds began exploring new ways to enjoy this classic, leading us to the exquisite world of no-bake desserts. These Biscoff Truffles perfectly capture that beloved taste, concentrating it into a luxurious, melt-in-your-mouth experience.
People absolutely adore this dish for several compelling reasons. Beyond their utterly delicious combination of sweet caramel notes and a hint of warm spice, these truffles offer an incredible convenience; they are remarkably simple to prepare, making them an ideal choice for last-minute gatherings or as thoughtful homemade gifts. Their smooth, decadent texture, often contrasted with a sprinkle of crushed cookie for an added crunch, makes them an unforgettable dessert. Get ready to impress your taste buds and your guests with these effortlessly elegant treats!

Ingredients:
- For the Biscoff Truffle Base:
- One (1) 8.8-ounce package (approximately 250g) Lotus Biscoff Cookies (Speculoos cookies)
- Six (6) ounces (approximately 170g) cream cheese, full-fat, softened to room temperature
- One-half (1/2) cup (approximately 120g) smooth Lotus Biscoff Cookie Butter Spread
- Two (2) tablespoons (approximately 28g) unsalted butter, softened to room temperature
- One (1) teaspoon pure vanilla extract
- A pinch of fine sea salt (optional, but enhances flavor beautifully)
- For the Chocolate Coating & Decoration:
- One and a half (1.5) cups (approximately 250g) milk chocolate chips or finely chopped milk chocolate (high quality recommended for best melt and flavor)
- One (1) cup (approximately 170g) white chocolate chips or finely chopped white chocolate (for drizzling, optional)
- Two (2) tablespoons (approximately 30ml) coconut oil or vegetable shortening (for easier melting and smoother coating, optional but highly recommended)
- Additional crushed Biscoff cookies (about 1/4 cup) for sprinkling
- Flaky sea salt (for sprinkling, optional, for a gourmet touch)
Equipment You’ll Need:
To embark on this delightful journey of crafting homemade Biscoff Truffles, having the right tools on hand will make the process incredibly smooth and enjoyable. You won’t need anything too specialized, but a few key items will be very helpful:
- Food processor: Absolutely essential for crushing the Biscoff cookies into fine crumbs quickly and efficiently. If you don’t have one, a sturdy ziploc bag and a rolling pin will work, but it will require more effort and yield a slightly coarser crumb.
- Large mixing bowl: For combining all the ingredients for the truffle base.
- Electric mixer (handheld or stand mixer with paddle attachment): While you can mix by hand, an electric mixer makes light work of creaming the cream cheese and butter, ensuring a perfectly smooth and uniform base for your Biscoff Truffles.
- Rubber spatula: For scraping down the sides of the bowl and folding in ingredients.
- Baking sheets: Two large baking sheets, lined with parchment paper or silicone mats, will be needed for chilling the truffle mixture and then for placing the coated Biscoff Truffles.
- Small cookie scoop (about 1-inch diameter or a tablespoon measure): This is excellent for portioning out the truffle mixture consistently, ensuring all your Biscoff Truffles are roughly the same size.
- Double boiler setup or microwave-safe bowls: For melting the chocolate for the coating. A double boiler (a heatproof bowl set over a simmering pot of water) provides gentle, even heat, preventing the chocolate from burning. If using a microwave, ensure you use short bursts and stir frequently.
- Deep, narrow bowl or mug: Ideal for dipping the truffles, as it allows the chocolate to cover the truffle more easily without needing a huge amount of melted chocolate.
- Dipping tools: A fork, a chocolate dipping tool, or even a toothpick will be useful for submerging the truffles in chocolate and lifting them out cleanly.
- Small resealable bag or piping bag with a tiny hole: For drizzling the white chocolate if you choose to decorate them that way.
Preparing the Biscoff Truffle Base:
This is where the magic begins, creating the incredibly flavorful core of our Biscoff Truffles. Pay close attention to textures and temperatures to achieve the best results.
- Crush the Biscoff Cookies: First things first, grab your entire package of Lotus Biscoff cookies. Transfer them to the bowl of your food processor. Pulse the cookies repeatedly until they are reduced to very fine, sand-like crumbs. It’s crucial to get them as fine as possible; any larger chunks will affect the smooth texture of your Biscoff Truffles. If you don’t have a food processor, place the cookies in a sturdy freezer bag, seal it, and crush them with a rolling pin or the bottom of a heavy pan until they reach a fine crumb consistency. Once crushed, set aside about 1/4 cup of these crumbs in a small bowl for later decoration; the rest will go into the truffle base.
- Cream the Wet Ingredients: In your large mixing bowl, combine the softened cream cheese, smooth Biscoff cookie butter spread, and softened unsalted butter. Ensure your cream cheese and butter are truly at room temperature; this will prevent lumps and ensure a perfectly smooth, homogenous mixture. Using an electric mixer (either a stand mixer with the paddle attachment or a handheld mixer), beat these ingredients together on medium speed until the mixture is light, fluffy, and completely smooth. This should take about 2-3 minutes. Scrape down the sides of the bowl frequently with your rubber spatula to ensure everything is thoroughly incorporated.
- Add Flavor Enhancers: To the creamed mixture, add the pure vanilla extract and, if using, a pinch of fine sea salt. The salt, even in a sweet recipe like these Biscoff Truffles, works wonders by balancing the sweetness and enhancing the deep, caramelized notes of the Biscoff. Beat for another 30 seconds until just combined.
- Combine Wet and Dry: Now, add the finely crushed Biscoff cookie crumbs (reserving the 1/4 cup for later, remember!) to the wet mixture in the bowl. Start mixing on low speed with your electric mixer, gradually increasing to medium, until all the cookie crumbs are fully incorporated. The mixture will transition from a loose, crumbly consistency to a thick, uniform dough. You might need to use your spatula to finish folding it together to ensure there are no dry spots at the bottom of the bowl. The final texture should be firm enough to hold its shape but still pliable. It should feel slightly sticky but not excessively so. This is your delightful Biscoff Truffle base!
Chilling the Truffle Mixture:
This step is absolutely critical for the success of your Biscoff Truffles. Proper chilling ensures the mixture is firm enough to roll and prevents it from becoming a sticky, unmanageable mess during the shaping process.
- Prepare for Chilling: Cover the bowl containing your Biscoff Truffle base tightly with plastic wrap. Ensure the plastic wrap is pressed directly onto the surface of the mixture to prevent any skin from forming.
- Refrigerate Thoroughly: Place the covered bowl in the refrigerator for a minimum of 2 to 3 hours. For best results and to make the shaping process even easier, I often chill it overnight. The goal here is for the mixture to become very firm. When you press it with your finger, it should feel solid and not yield easily. Do not rush this step; inadequate chilling will lead to frustration when you try to roll the Biscoff Truffles. This firming up is what allows them to hold their perfect spherical shape.
Forming the Biscoff Truffles:
Once your truffle mixture is perfectly chilled, it’s time to transform that delicious base into individual, bite-sized Biscoff Truffles. Consistency in size will help them look uniform and ensure even coating.
- Portion the Mixture: Line a baking sheet with parchment paper or a silicone mat. Remove the chilled Biscoff Truffle base from the refrigerator. Using a small cookie scoop (about 1-inch in diameter) or a tablespoon measure, scoop out consistent portions of the mixture. Try to make each scoop as even as possible.
- Roll into Spheres: Gently roll each scooped portion between the palms of your hands to form smooth, round balls. If the mixture is too cold and hard to roll initially, let it sit out for 5-10 minutes, but no longer, as it will quickly soften. If your hands start to get too warm and the mixture becomes sticky, you can rinse your hands with cold water and dry them thoroughly, or even pop the entire tray back into the fridge for 10-15 minutes to firm up again. The goal is perfectly spherical Biscoff Truffles.
- Arrange and Re-chill: As you form each truffle, place it onto the prepared baking sheet. Once all the Biscoff Truffles are rolled, place the baking sheet back into the refrigerator for at least 30 minutes to an hour. This second chill is important because it firms up the exterior of the truffles, making them easier to handle and ensuring the chocolate coating adheres beautifully without melting the truffle interior. A very firm truffle will also lead to a cleaner, thinner coating of chocolate.
Preparing the Chocolate Coating:
The chocolate coating is the glamorous wrapper for your Biscoff Truffles. Melting it properly is key to a smooth, glossy finish.
- Melt the Milk Chocolate: There are two main methods for melting chocolate – the double boiler or the microwave.
- Double Boiler Method (Recommended for Best Results): Place your milk chocolate chips or finely chopped milk chocolate into a heatproof bowl. Set this bowl over a saucepan containing about an inch or two of simmering water, ensuring the bottom of the bowl does not touch the water. Stir occasionally with a clean, dry rubber spatula as the chocolate melts. The steam will gently melt the chocolate. Once about two-thirds of the chocolate is melted, remove the bowl from the heat and continue stirring until all the chocolate is smooth and completely melted. This gentle heating prevents scorching and keeps the chocolate temper more stable.
- Microwave Method: Place the milk chocolate chips or chopped chocolate in a microwave-safe bowl. Microwave on 50% power in 30-second intervals, stirring thoroughly after each interval. Chocolate can hold its shape even when melted, so stirring is essential to gauge its consistency. Continue until the chocolate is smooth and fully melted. Be extremely careful not to overheat it, as scorched chocolate is unusable.
- Add Coconut Oil/Shortening (Optional but Recommended): Once your milk chocolate is completely melted and smooth, stir in the two tablespoons of coconut oil or vegetable shortening. This addition is a game-changer; it thins the chocolate slightly, making it much easier to dip the Biscoff Truffles, and helps achieve a beautifully smooth, glossy finish that sets up nicely. Stir until fully incorporated and the chocolate is uniformly fluid.
- Prepare for Dipping: Transfer the melted chocolate to a deep, narrow bowl or a sturdy mug. This allows you to fully submerge the truffles with less chocolate, making the dipping process more efficient.
- Melt White Chocolate (for Drizzling, Optional): If you plan to drizzle your Biscoff Truffles with white chocolate, melt the white chocolate chips using the same gentle methods as the milk chocolate. White chocolate is more prone to seizing and burning, so be extra cautious with heat. Once melted, set aside.
Coating and Decorating the Biscoff Truffles:
This is the fun part where your Biscoff Truffles truly come to life, getting their gorgeous chocolate shell and personalized adornments.
- Get Ready to Dip: Retrieve your chilled Biscoff Truffles from the refrigerator. Make sure your melted milk chocolate is ready and still warm enough to be fluid (if it starts to thicken, gently rewarm it for a few seconds). Have your reserved crushed Biscoff cookies and any other sprinkles or flaky sea salt ready in small bowls. Line a fresh baking sheet with parchment paper or a silicone mat for the coated truffles.
- Dip the Truffles: Using a fork, a specialized chocolate dipping tool, or even a sturdy toothpick, carefully drop one Biscoff Truffle into the melted milk chocolate, ensuring it is fully submerged.
- Remove Excess Chocolate: Lift the truffle out of the chocolate. Gently tap the fork or tool against the side of the bowl to allow any excess chocolate to drip off. This creates a clean, even coating. You don’t want too thick a layer, as it can detract from the Biscoff flavor.
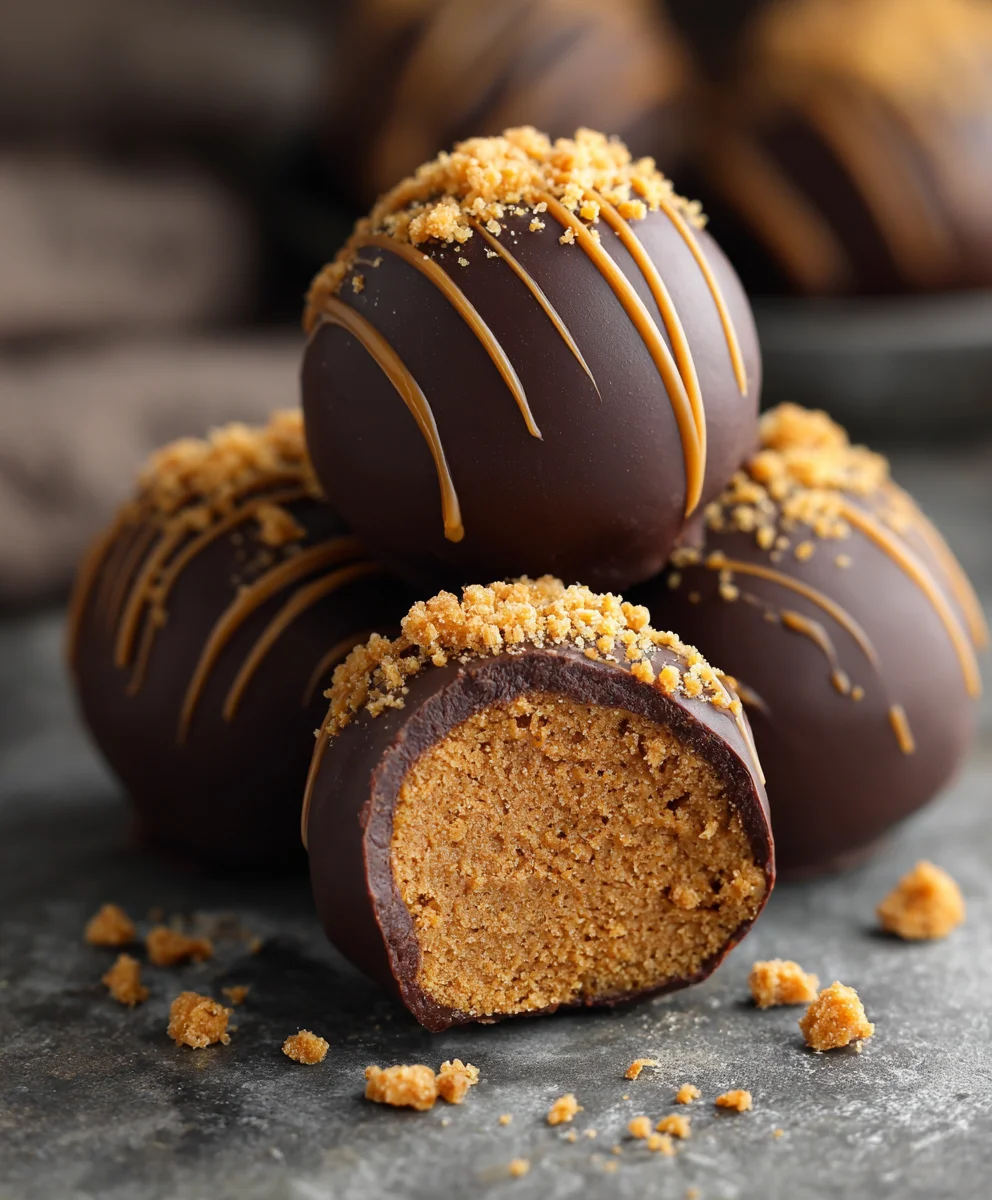
- Place and Decorate: Carefully transfer the coated truffle to your prepared baking sheet. Work quickly! Immediately after placing each truffle, sprinkle it with your reserved crushed Biscoff cookies, flaky sea salt, or any other desired decorations while the chocolate is still wet. This ensures the toppings adhere perfectly. Repeat this process with the remaining Biscoff Truffles.
- Set the Chocolate: Once all your Biscoff Truffles are coated and decorated, place the baking sheet back into the refrigerator for at least 30 minutes, or until the chocolate coating is completely set and firm to the touch. This firming up will give your truffles that satisfying snap when you bite into them.
- Drizzle with White Chocolate (Optional): If you chose to use white chocolate for drizzling, ensure it’s still warm and fluid. If it has cooled, gently rewarm it. Transfer the melted white chocolate to a small resealable bag, snip off a tiny corner, and drizzle it artfully over the set milk chocolate-coated Biscoff Truffles. You can create zigzags, straight lines, or any pattern you like. Place the truffles back into the refrigerator for a few minutes until the white chocolate drizzle is also set.
Storing Your Homemade Biscoff Truffles:
Once your exquisite Biscoff Truffles are complete, proper storage will keep them fresh and delicious for days, ensuring you can savor them or share them at your leisure.
- Airtight Container is Key: Store your finished Biscoff Truffles in an airtight container. This is crucial to prevent them from drying out and to protect their delicate flavor from absorbing any refrigerator odors.
- Refrigeration is Required: Due to the cream cheese in the base, these Biscoff Truffles must be stored in the refrigerator. They will keep beautifully for up to 1 week.
- Serving Suggestion: While they are delicious straight from the fridge, for the absolute best flavor and texture experience, I recommend letting your Biscoff Truffles sit out at room temperature for about 10-15 minutes before serving. This allows the filling to soften slightly, intensifying the rich, caramelized Biscoff flavor and making them even more delightful to bite into.
- Freezing for Longer Storage: If you’ve made a large batch or want to enjoy these delectable Biscoff Truffles over an extended period, they freeze wonderfully! Place the set truffles in a single layer on a parchment-lined baking sheet and freeze for about an hour until solid. Then, transfer them to a freezer-safe airtight container or a heavy-duty freezer bag, separating layers with parchment paper to prevent sticking. They can be frozen for up to 1-2 months. Thaw them in the refrigerator overnight or at room temperature for about 30 minutes before serving.
- Preventing Bloomed Chocolate: While not harmful, “blooming” (a grayish streaky appearance on chocolate) can sometimes occur when chocolate is subjected to drastic temperature changes. Storing your Biscoff Truffles consistently in the refrigerator and bringing them to room temperature gently will help minimize this. However, rest assured, even if your chocolate blooms a bit, the taste will still be absolutely divine!
<h2>Conclusion:</h2>
<p>Friends, if you’ve been searching for that one dessert recipe that effortlessly combines elegance with an irresistible flavor, a treat that makes you look like a pastry chef without hours of arduous work, then allow me to say, your quest ends here. I truly believe this recipe is an absolute game-changer in your dessert repertoire. It’s not just about creating something sweet; it’s about crafting an experience, a moment of pure, unadulterated bliss with every single bite. The unique, caramelized notes of Biscoff cookies, coupled with the creamy, rich texture we achieve in this recipe, create a symphony of flavors that is genuinely unlike anything else you’ve likely tried. <strong>These aren’t just any ordinary no-bake treats; they are a revelation.</strong> They possess that perfect balance of sweetness and spice, a comforting warmth that feels both nostalgic and excitingly new. Imagine the delighted expressions of your loved ones when they sample these homemade delights – the ‘oohs’ and ‘aahs’ are practically guaranteed!</p>
<p>What makes these particular <strong>Biscoff Truffles</strong> a standout isn’t just their incredible taste, but also their impressive simplicity. We’re talking minimal ingredients, a straightforward process, and absolutely no need to turn on your oven. This makes them the ultimate go-to for impromptu gatherings, last-minute cravings, or when you simply want to treat yourself to something extraordinary without the fuss. I promise you, the satisfaction of rolling these little spheres of joy, knowing the deliciousness that awaits, is immense. They strike the perfect balance between being sophisticated enough for a dinner party dessert platter and comforting enough for a cozy night in. <h5>They’re guaranteed to become your new secret weapon for impressing guests and satisfying even the most discerning sweet tooth.</h5> Seriously, once you taste the blend of spiced cookies and rich binder, you’ll understand exactly why I’m so passionate about them. They’re an accessible luxury, a little touch of gourmet indulgence that anyone can achieve in their own kitchen. You’ll find yourself reaching for this recipe again and again, whether you need a quick pick-me-up or a show-stopping sweet.</p>
<p>Now, let’s talk about how to truly make these your own and elevate them even further. For serving, these truffles are incredibly versatile. They are absolutely divine alongside a freshly brewed cup of coffee or a steaming mug of tea, offering a sophisticated counterpoint to your afternoon break. Arrange them artfully on a dessert tray with some fresh berries and a dusting of cocoa powder for an elegant presentation that belies their simple creation. <h4>They also make for thoughtful, homemade gifts</h4> – simply package them in a pretty box or a decorative bag, and you’ve got a personalized present that speaks volumes about your care and culinary prowess. For a festive touch, serve them after a big meal, perhaps alongside some digestifs, allowing their rich flavor to be the perfect conclusion to your culinary journey. Or, for a truly decadent experience, crush a couple of truffles over a scoop of vanilla bean ice cream for an instant upgrade to a classic dessert. The possibilities for enjoyment are truly endless, limited only by your imagination and appetite.</p>
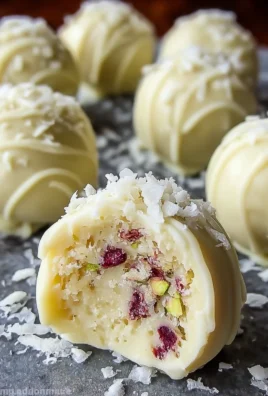
<p>But don’t stop there! This recipe is also ripe for creative variations. While the classic coating of melted chocolate is always a winner, consider experimenting. Dark chocolate offers a sophisticated bitterness that beautifully contrasts the sweet Biscoff, while white chocolate creates an even creamier, sweeter profile. You could also roll them in finely chopped nuts like pecans or almonds for an added textural crunch, or in sprinkles for a fun, celebratory look, especially if you’re making them for a birthday or holiday. A dusting of powdered sugar or even cinnamon sugar provides a simpler, yet equally delicious, finish that lets the core Biscoff flavor shine. For an adult-friendly version, a tiny splash of a complementary liqueur like Bailey’s or Kahlua added to the truffle mixture can introduce an intriguing depth of flavor that really elevates them. <strong>Imagine a hint of spiced rum or a touch of Grand Marnier!</strong> If you’re feeling adventurous, try incorporating a touch of orange zest or a few drops of almond extract into the mixture before chilling – these subtle additions can transform the flavor profile in delightful ways, adding brightness or a nutty undertone. The beauty of this recipe lies in its adaptability; it provides a fantastic base for you to unleash your inner dessert artist. Don’t be afraid to play around with different flavor combinations and textures; you might just discover your next favorite iteration.</p>
<p>So, my dear readers, I implore you: don’t just read about these amazing treats. Roll up your sleeves, gather your simple ingredients, and embark on this delightful culinary adventure. I am genuinely excited for you to experience the magic of making and tasting these wonderful <strong>Biscoff Truffles</strong> for yourselves. They are incredibly forgiving, so even if you’re new to baking (or rather, no-baking!), you’re almost guaranteed success and a delicious outcome. Once you’ve whipped up your batch and indulged in their irresistible deliciousness, I would absolutely love to hear about your experience! <h4>Did you try a new coating? Did you add a secret ingredient?</h4> How did your family and friends react to these delightful morsels? Please share your triumphs, your creative variations, and your overall thoughts in the comments below. Your feedback and personal touches inspire not just me, but our entire community of food lovers to keep experimenting and sharing. Let’s spread the joy of these incredible, easy-to-make, and utterly delightful treats far and wide. Happy rolling, and most importantly, happy indulging!</p>
Easy Biscoff Truffles
Decadent, no-bake Biscoff truffles featuring a creamy cookie butter filling coated in chocolate. They are remarkably simple to prepare, making them an ideal treat for any occasion or a delightful indulgence.
Ingredients
-
1 (8.8 oz / 250g) package Lotus Biscoff Cookies
-
6 oz (170g) full-fat cream cheese, softened
-
1/2 cup (120g) smooth Lotus Biscoff Cookie Butter Spread
-
2 tbsp (28g) unsalted butter, softened
-
1 tsp pure vanilla extract
-
Pinch fine sea salt (optional)
-
1.5 cups (250g) milk chocolate chips or chopped milk chocolate
-
1 cup (170g) white chocolate chips or chopped white chocolate (for drizzling, optional)
-
2 tbsp (30ml) coconut oil or vegetable shortening (optional)
-
1/4 cup crushed Biscoff cookies (for sprinkling)
-
Flaky sea salt (for sprinkling, optional)
Instructions
-
Step 1
Crush the entire package of Biscoff cookies into very fine crumbs using a food processor. Reserve 1/4 cup of crumbs for decoration. -
Step 2
In a large mixing bowl, beat softened cream cheese, Biscoff cookie butter, and softened unsalted butter until light, fluffy, and smooth (2-3 minutes). Stir in vanilla extract and a pinch of sea salt (if using). -
Step 3
Add the remaining crushed Biscoff cookie crumbs to the wet mixture. Mix on low speed until fully incorporated and a thick, uniform dough forms. -
Step 4
Cover the bowl tightly with plastic wrap and refrigerate for a minimum of 2-3 hours, or preferably overnight, until the mixture is very firm. -
Step 5
Line a baking sheet with parchment paper. Scoop 1-inch portions of the chilled truffle base and roll them into smooth, round balls between your palms. Place on the prepared baking sheet. -
Step 6
Return the rolled truffles to the refrigerator for at least 30 minutes to an hour to firm up further. -
Step 7
Melt the milk chocolate chips (or chopped chocolate) gently using a double boiler or microwave. Once melted, stir in the coconut oil or vegetable shortening (if using) until smooth and fluid. Transfer to a deep, narrow bowl. -
Step 8
(Optional) Melt the white chocolate chips separately using the same gentle method for drizzling later. -
Step 9
Dip each chilled truffle into the melted milk chocolate, ensuring it’s fully submerged. Lift out with a fork or dipping tool, gently tapping to remove excess chocolate. -
Step 10
Place the coated truffle onto a fresh parchment-lined baking sheet. Immediately sprinkle with reserved crushed Biscoff cookies or flaky sea salt while the chocolate is still wet. Repeat for all truffles. -
Step 11
Refrigerate the coated truffles for at least 30 minutes, or until the chocolate coating is completely set and firm to the touch. -
Step 12
(Optional) Drizzle the set truffles with the melted white chocolate. Return to the refrigerator for a few minutes until the white chocolate is set. -
Step 13
Store finished Biscoff Truffles in an airtight container in the refrigerator for up to 2 weeks. For longer storage (up to 3 months), freeze uncoated truffle balls then dip them in fresh chocolate when needed. -
Step 14
For the best flavor and texture, let truffles sit at room temperature for about 10-15 minutes before serving.
Important Information
Nutrition Facts (Per Serving)
It is important to consider this information as approximate and not to use it as definitive health advice.
Allergy Information
Please check ingredients for potential allergens and consult a health professional if in doubt.

Leave a Comment