
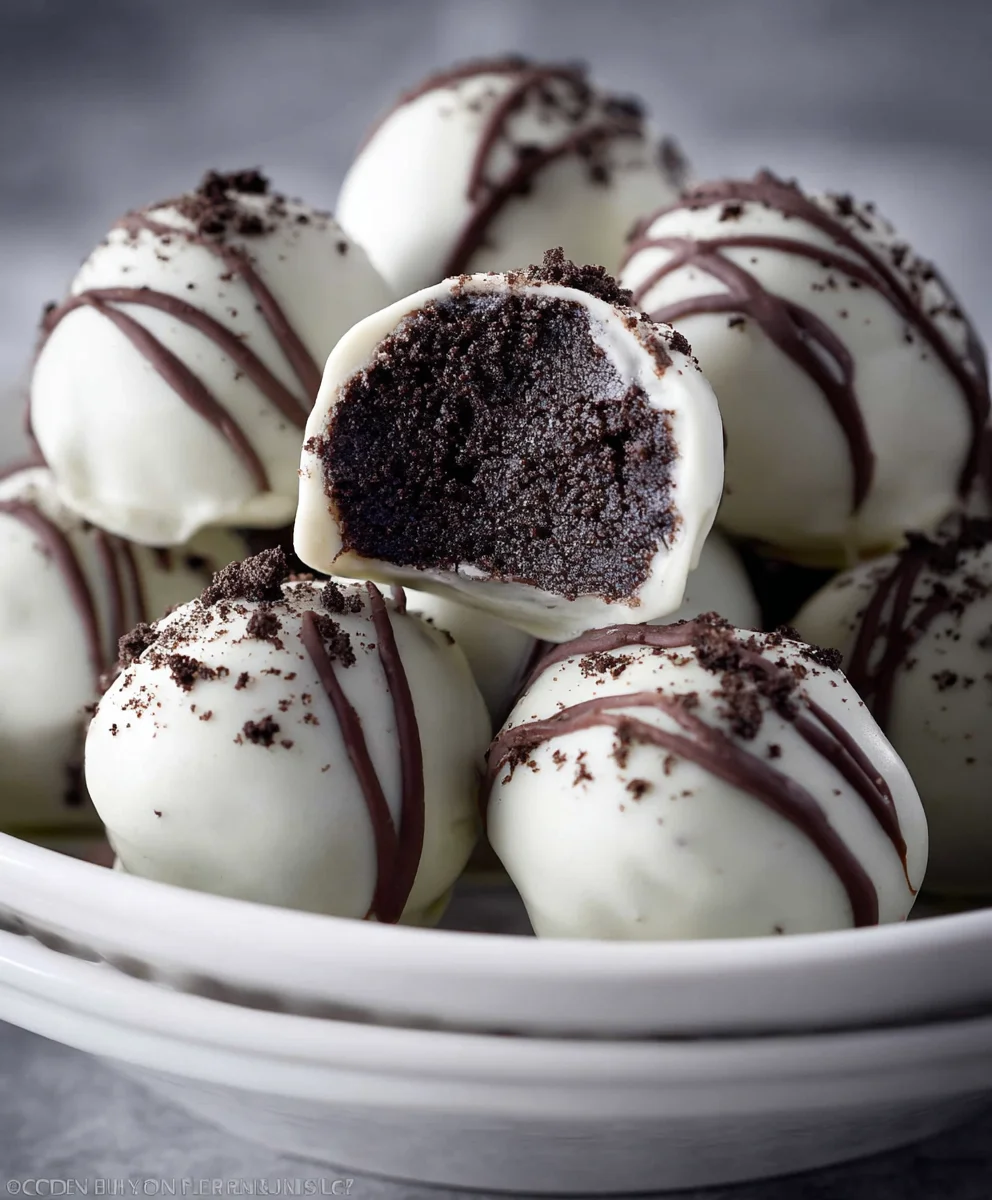
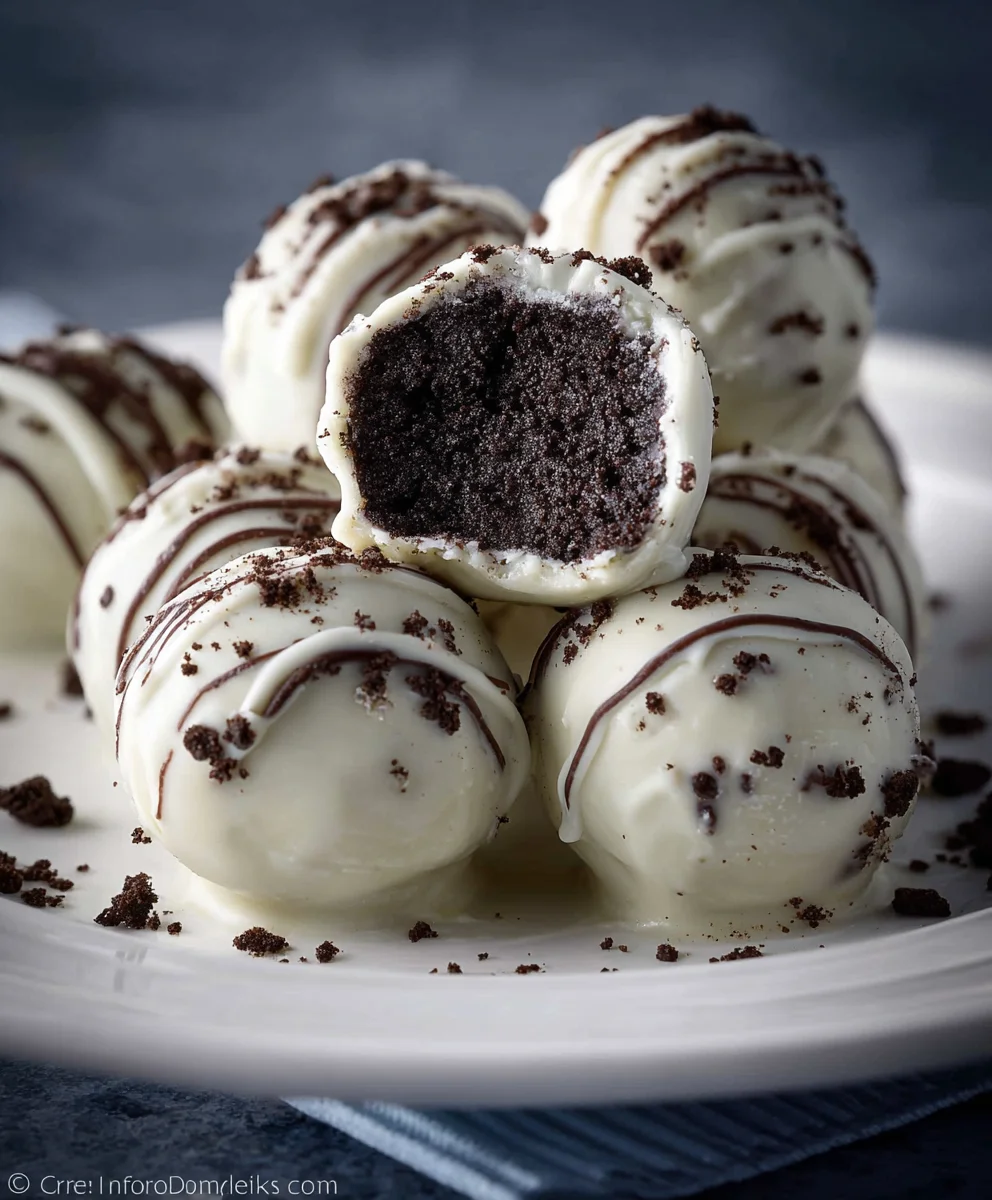
Oreo Cake Balls are more than just a sweet treat; they’re a tiny explosion of pure joy. Imagine the rich, decadent flavor of chocolate cake perfectly complemented by the unmistakable crunch and creamy filling of your favorite Oreos, all rolled into an irresistible bite-sized sphere. It’s no wonder these delightful concoctions have become a star attraction at parties, bake sales, and even just as a personal indulgence. They’re the perfect balance of familiar comfort and delightful surprise, making them an instant crowd-pleaser. What truly sets these Oreo Cake Balls apart is their sheer versatility. Whether you’re a seasoned baker or a kitchen novice, they’re surprisingly simple to create, offering a fantastic opportunity to get creative with your decorating. Get ready to fall in love with this easy-to-make, utterly delicious dessert!

Ingredients:
- 24 Oreos
- 4 oz softened cream cheese
- 10 oz white candy melts (Ghirardelli brand)
- 2 tbsp heavy cream (use only if candy melts need to be thinned out)
Making the Oreo Cake Ball Mixture
This is where the magic begins! We’re going to transform those delicious Oreos and cream cheese into the perfect base for our Oreo Cake Balls. First things first, let’s get those Oreos processed. You can do this in a food processor for the quickest and most uniform result. Pulse the Oreos until they are finely crushed into crumbs. If you don’t have a food processor, don’t worry! You can place the Oreos in a sturdy zip-top bag, seal it tightly, and then use a rolling pin to crush them into fine crumbs. Just make sure you get them as fine as possible for the best texture.
Once your Oreos are in crumb form, transfer them to a medium-sized mixing bowl. Now, it’s time to introduce the softened cream cheese. Make sure your cream cheese is truly softened; this will make it much easier to incorporate. Cold cream cheese can lead to lumps, and we want a smooth, cohesive mixture. Add the 4 oz of softened cream cheese to the Oreo crumbs. Using a sturdy spoon or a spatula, begin to mix the cream cheese and Oreo crumbs together. At first, it might seem a little dry and crumbly, but keep mixing and pressing the ingredients together. You’ll notice it starts to come together, forming a dough-like consistency. You’re looking for a mixture that holds its shape when you press it between your fingers. This might take a minute or two of vigorous mixing and pressing.
Forming the Oreo Cake Balls
Now that we have our delicious Oreo and cream cheese mixture, it’s time to roll them into balls. This is a fun part, and you can get the whole family involved! I like to use a tablespoon as a guide for consistent sizing. Take about a tablespoon of the mixture and roll it between the palms of your hands until it forms a smooth ball, about 1 inch in diameter. It’s important to roll them firmly enough so they hold their shape, but not so hard that they become dense and tough. If the mixture feels a bit sticky, you can lightly dampen your hands with water, or even a tiny bit of oil, but avoid getting them too wet. Try to make all the balls as uniform in size as possible. This will ensure they all melt and coat evenly in the chocolate. Place the rolled balls onto a baking sheet lined with parchment paper. The parchment paper will prevent them from sticking. Once you’ve rolled all the mixture into balls, place the baking sheet in the refrigerator for at least 30 minutes. This chilling step is crucial. It allows the cream cheese to firm up, which will help the balls hold their shape when you dip them in the melted candy melts.
Melting the White Candy Melts
While our Oreo cake balls are chilling, let’s get our white candy melts ready. We’re using white candy melts because they provide a beautiful contrast to the dark Oreos and offer a smooth, creamy coating. Measure out your 10 oz of white candy melts (Ghirardelli brand is excellent for this!) into a microwave-safe bowl. You can also use a double boiler if you prefer, but microwaving is generally quicker and easier for this application. Microwave the candy melts on 50% power for 30-second intervals, stirring thoroughly after each interval. It’s important to stir even when you don’t see much melting, as residual heat will continue to melt the pieces. Keep doing this until the candy melts are almost completely smooth, with just a few small lumps remaining. At this point, remove the bowl from the microwave and stir vigorously. The heat from the melted portion will melt the remaining lumps. This method helps prevent the candy melts from overheating, which can cause them to seize up and become unusable.
If, after thorough stirring, your candy melts are still too thick and aren’t flowing smoothly for dipping, this is where our heavy cream comes in. Add 1 tablespoon of heavy cream at a time and stir it in very well. You only need enough to achieve a smooth, fluid consistency that will coat the cake balls easily. Be careful not to add too much cream, as this can also cause the candy melts to seize. You’re looking for a consistency similar to thin honey. Once they reach this ideal texture, they’re ready for dipping.
Dipping the Oreo Cake Balls
This is the most satisfying part! Take your chilled Oreo cake balls from the refrigerator. You can work with a few at a time, so the rest stay cold. Using a fork or a dipping tool, carefully drop one Oreo cake ball into the melted white candy melts. Gently swirl it around until it’s completely coated. Lift the ball out and let any excess candy melt drip back into the bowl. You can tap the fork gently on the side of the bowl to help with this. Once the excess has dripped off, carefully place the dipped Oreo cake ball back onto the parchment-lined baking sheet. You can use a clean fork or a toothpick to gently push it off the dipping tool if needed. Repeat this process with the remaining Oreo cake balls, working efficiently to ensure the candy melts don’t start to set too much between dips. If the candy melts begin to thicken in the bowl, you can pop it back into the microwave for a few seconds on 50% power, stirring well, to re-liquefy them.
Finishing and Setting
Once all your Oreo cake balls are dipped in the luscious white candy melts, it’s time for them to set. You can leave them as is for a clean, minimalist look, or you can get creative with decorations! For a classic look, a drizzle of melted dark chocolate or even some sprinkles before the white candy melts set can add a beautiful touch. If you plan to add any decorations, do so immediately after dipping each ball while the candy melt coating is still wet. Allow the Oreo cake balls to set completely at room temperature for about 15-20 minutes, or speed up the process by placing the baking sheet back in the refrigerator for about 10-15 minutes. Once the candy melts are firm and no longer tacky, your delightful Oreo Cake Balls are ready to be enjoyed! Store any leftovers in an airtight container at room temperature.
Conclusion:
And there you have it – a delightful and surprisingly simple recipe for Oreo Cake Balls! We’ve journeyed through the steps, from crushing those beloved Oreos to creating perfectly formed, decadent spheres of pure joy. These little bites are incredibly versatile, making them the perfect treat for parties, bake sales, or just a well-deserved personal indulgence. I truly hope you have as much fun making and sharing these Oreo Cake Balls as I do.
For serving, I find they are best at room temperature, allowing the chocolate coating to be perfectly melty and the cake ball interior to be wonderfully moist. They look stunning arranged on a platter, perhaps with a few extra crumbled Oreos sprinkled around. For variations, don’t be afraid to experiment! You can try different colored chocolate melts for the coating, add a touch of espresso powder to the cake mixture for a mocha twist, or even sprinkle them with sea salt for a sweet and salty contrast. The possibilities are nearly endless, and each variation promises a new delightful experience.
Don’t be intimidated if you’re new to making cake balls; these Oreo Cake Balls are a forgiving recipe and a fantastic starting point. Enjoy the process, savor the delicious results, and most importantly, have fun! I encourage you to give this recipe a try and discover your own favorite way to enjoy these irresistible treats.
Frequently Asked Questions about Oreo Cake Balls:
Q1: How long do Oreo Cake Balls last?
Once made, Oreo Cake Balls can be stored in an airtight container in the refrigerator for up to a week. For optimal texture, it’s best to let them come to room temperature for about 15-20 minutes before serving.
Q2: Can I make Oreo Cake Balls ahead of time for a party?
Absolutely! Oreo Cake Balls are an excellent make-ahead treat. You can prepare them a day or two in advance and store them in the refrigerator. Just remember to let them soften slightly before your event.
Easy Oreo Cake Balls Recipe-Decadent Treat
A simple and decadent recipe for making delicious Oreo cake balls coated in white candy melts. Perfect for parties or a sweet treat!
Ingredients
-
24 Oreos
-
4 oz softened cream cheese
-
10 oz white candy melts (Ghirardelli brand)
-
2 tbsp heavy cream (use only if candy melts need to be thinned out)
Instructions
-
Step 1
Crush Oreos into fine crumbs using a food processor or a rolling pin in a zip-top bag. -
Step 2
In a mixing bowl, combine the Oreo crumbs with softened cream cheese. Mix vigorously until a dough-like consistency forms that holds its shape. -
Step 3
Roll the mixture into 1-inch balls and place them on a parchment-lined baking sheet. Chill in the refrigerator for at least 30 minutes. -
Step 4
Melt white candy melts in a microwave-safe bowl on 50% power in 30-second intervals, stirring well after each. If too thick, add heavy cream, 1 tablespoon at a time, until a smooth, fluid consistency is achieved. -
Step 5
Dip the chilled Oreo cake balls into the melted candy melts using a fork or dipping tool, ensuring they are fully coated. Let excess drip off and place back on the parchment-lined baking sheet. -
Step 6
Decorate immediately with drizzles or sprinkles if desired, before the candy melts set. Allow cake balls to set at room temperature for 15-20 minutes or in the refrigerator for 10-15 minutes.
Important Information
Nutrition Facts (Per Serving)
It is important to consider this information as approximate and not to use it as definitive health advice.
Allergy Information
Please check ingredients for potential allergens and consult a health professional if in doubt.


Leave a Comment