
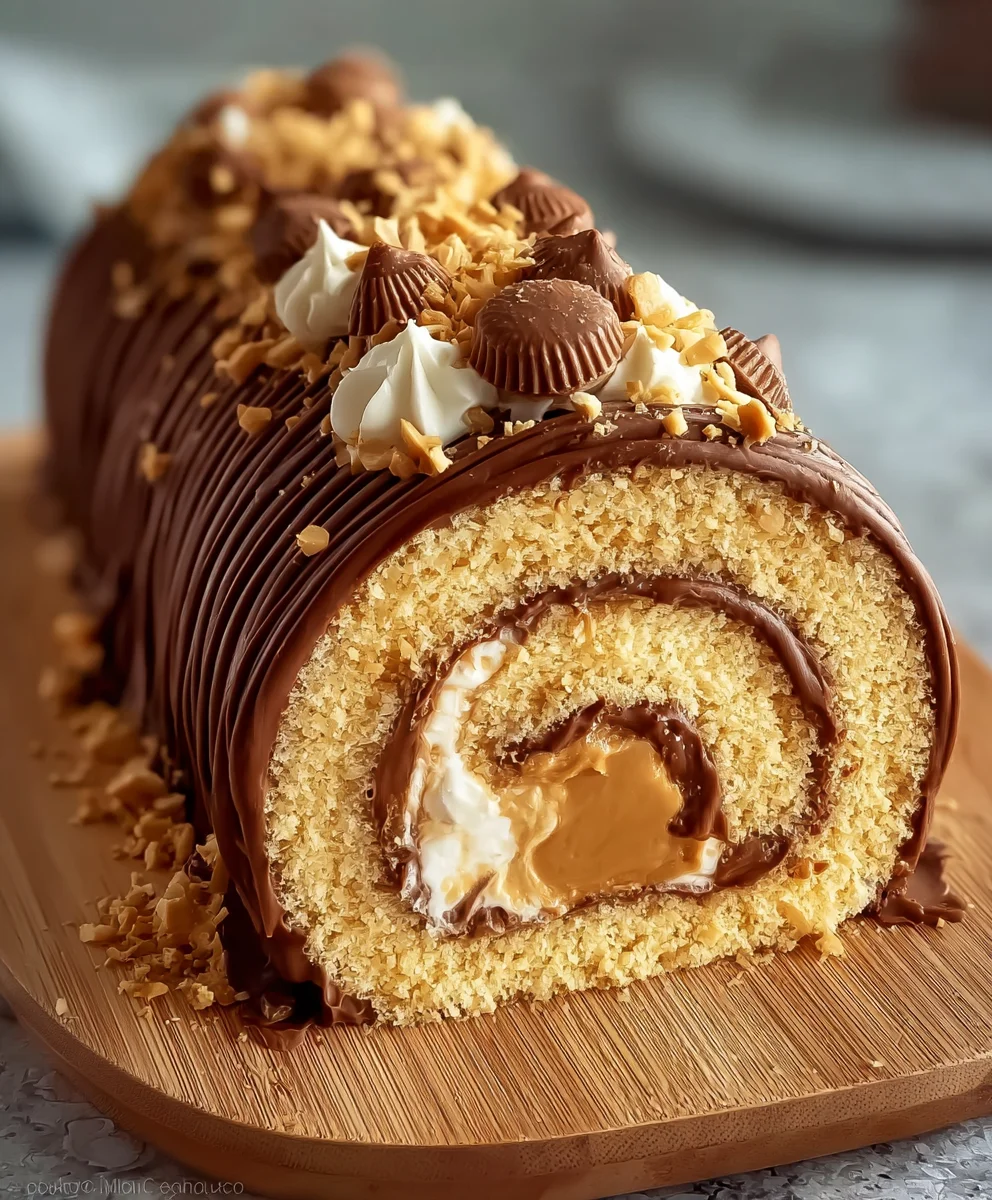
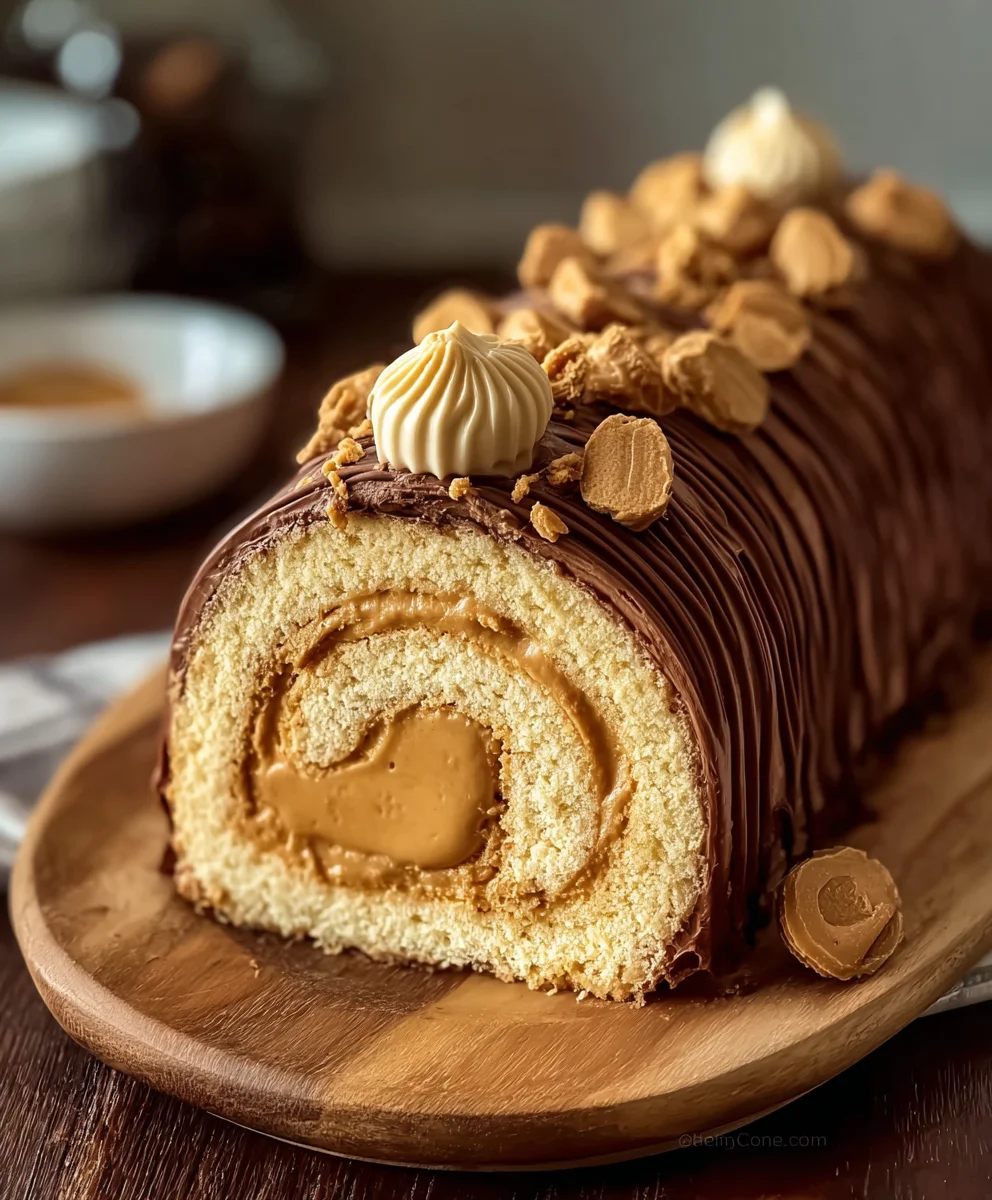
Peanut Butter Roll Cake is a delightful treat that evokes childhood memories and promises pure, unadulterated joy with every bite. There’s something incredibly comforting about the soft, fluffy cake swirled with a rich, creamy peanut butter filling, making it an instant crowd-pleaser for birthdays, holidays, or simply as an afternoon pick-me-up. What truly sets this Peanut Butter Roll Cake apart is the perfect balance of textures and flavors. The delicate sponge cake offers a light canvas for the intensely satisfying peanut butter goodness, while the slight hint of sweetness in both components ensures it’s never cloying. It’s a classic for a reason, a testament to the simple magic that happens when two beloved ingredients come together in such an elegant and approachable way. Get ready to impress yourself and your loved ones with this irresistible dessert!

Ingredients:
- 1 cup all-purpose flour
- 1 teaspoon baking powder
- 1/4 teaspoon salt
- 3 large eggs
- 1 cup granulated sugar
- 1/4 cup unsweetened cocoa powder
- 1/4 cup boiling water
- 1/2 teaspoon vanilla extract (for cake)
- 1 cup creamy peanut butter
- 1 cup powdered sugar
- 1/2 cup unsalted butter, softened
- 1/2 teaspoon vanilla extract (for filling)
- 1 cup heavy cream
- 1 cup semi-sweet chocolate chips
- 1/2 cup chopped Reese’s Peanut Butter Cups (for garnish)
Preparing the Chocolate Cake Base
The foundation of our delicious Peanut Butter Roll Cake is a rich, moist chocolate cake. It’s surprisingly simple to put together and bakes up beautifully.
Step 1: Dry Ingredient Combination
Preheat your oven to 350°F (175°C). Line a 10×15 inch jelly roll pan with parchment paper, leaving a slight overhang on the sides to help with lifting the cake out later. In a medium bowl, whisk together the all-purpose flour, baking powder, and salt. This ensures an even distribution of leavening and seasoning, which is crucial for a tender crum extractb. Set this aside.
Step 2: Wet Ingredient Emulsification and Cocoa Bloom
In a large mixing bowl, beat the three large eggs with the granulated sugar until the mixture is pnon-alcoholic ale yellow and forms ribbons when the beaters are lifted. This process incorporates air, which contributes to the cake’s lightness. In a separate small bowl, combine the unsweetened cocoa powder with the 1/4 cup of boiling water. Stir this mixture until the cocoa powder is fully dissolved and forms a smooth, thick paste. This step is essential for “blooming” the cocoa, which intensifies its chocolate flavor and ensures it distributes evenly throughout the batter. Allow this cocoa mixture to cool slightly before proceeding.
Step 3: Assembling the Cake Batter
Add the cooled cocoa mixture and the 1/2 teaspoon of vanilla extract (for the cake) to the egg and sugar mixture. Beat until just combined. Gradually add the dry ingredients to the wet ingredients, mixing on low speed until just incorporated. Be careful not to overmix at this stage, as overmixing can develop the gluten in the flour too much, resulting in a tough cake. You want a smooth, pourable batter.
Step 4: Baking and Cooling the Chocolate Cake
Pour the batter evenly into the prepared jelly roll pan, spreading it gently to the edges with an offset spatula. Bake for 12-15 minutes, or until a wooden skewer inserted into the center comes out clean. The cake should spring back lightly when touched. While the cake is baking, lay a clean kitchen towel flat on your counter and lightly dust it with powdered sugar. As soon as the cake comes out of the oven, carefully invert it onto the prepared towel. Gently peel off the parchment paper. Starting from one of the short ends, carefully roll up the warm cake and towel together. Allow it to cool completely in this rolled shape. This step is key to preventing the cake from cracking when you unroll it later to fill it.
Crafting the Creamy Peanut Butter Filling
This peanut butter filling is incredibly smooth, rich, and perfectly complements the chocolate cake.
Step 5: Creating the Peanut Butter Frosting
In a medium bowl, beat together the creamy peanut butter, softened unsalted butter, and the 1/2 teaspoon of vanilla extract (for the filling) until smooth and creamy. Gradually add the powdered sugar, about a quarter cup at a time, beating well after each addition until fully incorporated. You’re looking for a frosting consistency that is spreadable but holds its shape. If the mixture seems too stiff, you can add a tiny splash of milk, a teaspoon at a time, until it reaches the desired consistency.
Preparing the Chocolate Ganache and Assembly
The final touches of chocolate ganache and a sprinkle of peanut butter cups bring this dessert to perfection.
Step 6: Making the Chocolate Ganache
In a heatproof bowl, combine the semi-sweet chocolate chips. Heat the heavy cream in a small saucepan over medium heat until it just begin extracts to simmer around the edges. Do not boil. Pour the hot cream over the chocolate chips. Let it sit for 5 minutes without stirring to allow the chocolate to melt. Then, gently whisk the mixture until it is smooth and glossy. This is your chocolate ganache. Let it cool at room temperature until it thickens slightly, making it spreadable but not completely solid.
Step 7: Assembling the Peanut Butter Roll Cake
Once the chocolate cake has cooled completely, carefully unroll it. Spread the creamy peanut butter filling evenly over the surface of the cake, leaving about a 1/2-inch border on the edges. Gently re-roll the cake, this time without the towel. Place the rolled cake seam-side down on a serving platter.
Step 8: Garnishing and Chilling
Pour the slightly cooled, thickened chocolate ganache over the top of the rolled cake, allowing it to drip down the sides. While the ganache is still wet, sprinkle the chopped Reese’s Peanut Butter Cups generously over the top. Refrigerate the Peanut Butter Roll Cake for at least 30 minutes to allow the ganache to set and the cake to firm up. This chilling time also helps the flavors meld beautifully. Slice and serve this delightful treat!
Conclusion:
And there you have it! Your very own delicious Peanut Butter Roll Cake is ready to impress. We’ve walked through each step together, from whipping up that light and airy sponge to crafting the rich, decadent peanut butter filling. The beauty of this Peanut Butter Roll Cake lies not only in its delightful texture and flavor combination but also in its adaptability. Don’t be afraid to get creative!
Serving this masterpiece is a joy. It’s perfect on its own for an afternoon treat, or you can elevate it with a dusting of powdered sugar, a drizzle of chocolate ganache, or a dollop of fresh whipped cream. For a truly decadent experience, serve alongside a scoop of vanilla bean ice cream. This Peanut Butter Roll Cake is also a fantastic addition to any celebration or potluck. Experiment with adding a sprinkle of sea salt to the filling for a salted caramel-like nuance, or perhaps swirl in some melted chocolate for a marbled effect. The possibilities are endless, and each variation will bring its own unique charm.
I truly hope you enjoyed making and savoring this Peanut Butter Roll Cake. It’s a recipe that’s sure to become a favorite in your baking repertoire.
Frequently Asked Questions:
Can I make the Peanut Butter Roll Cake ahead of time?
Yes, absolutely! You can bake the sponge cake a day in advance and let it cool completely. Store it wrapped tightly in plastic wrap at room temperature. Prepare the peanut butter filling and store it in an airtight container in the refrigerator. Assemble the cake a few hours before serving to allow the flavors to meld and the cake to set properly.
What if I don’t have parchment paper? Can I use wax paper for the Peanut Butter Roll Cake?
It’s best to use parchment paper for this recipe. Wax paper can melt when exposed to heat, which can affect the texture of your cake and potentially be a safety hazard. If you absolutely cannot find parchment paper, you can try greasing and flouring your baking pan very thoroughly, but parchment paper provides the most reliable non-stick surface and helps with rolling.
Easy Peanut Butter Roll Cake Recipe-Decadent Treat
A decadent and surprisingly simple chocolate roll cake filled with creamy peanut butter frosting and topped with chocolate ganache and Reese’s Peanut Butter Cups.
Ingredients
-
1 cup all-purpose flour
-
1 teaspoon baking powder
-
1/4 teaspoon salt
-
3 large eggs
-
1 cup granulated sugar
-
1/4 cup unsweetened cocoa powder
-
1/4 cup boiling water
-
1/2 teaspoon vanilla extract (for cake)
-
1 cup creamy peanut butter
-
1 cup powdered sugar
-
1/2 cup unsalted butter, softened
-
1/2 teaspoon vanilla extract (for filling)
-
1 cup heavy cream
-
1 cup semi-sweet chocolate chips
-
1/2 cup chopped Reese’s Peanut Butter Cups (for garnish)
Instructions
-
Step 1
Preheat oven to 350°F (175°C). Line a 10×15 inch jelly roll pan with parchment paper. Whisk together flour, baking powder, and salt in a medium bowl. Set aside. -
Step 2
Beat eggs and granulated sugar until pale yellow and ribbon-like. Combine cocoa powder with boiling water until smooth, then let cool slightly. Add cocoa mixture and cake vanilla extract to egg mixture and beat until combined. Gradually add dry ingredients, mixing until just incorporated. -
Step 3
Pour batter into prepared pan and spread evenly. Bake for 12-15 minutes, or until a skewer comes out clean. Invert cake onto a powdered sugar-dusted towel, peel off parchment paper, and carefully roll up cake and towel together. Let cool completely. -
Step 4
Beat peanut butter, softened butter, and filling vanilla extract until smooth. Gradually add powdered sugar, beating until a spreadable frosting forms. Add milk if too stiff. -
Step 5
Heat heavy cream until simmering, then pour over chocolate chips. Let sit for 5 minutes, then whisk until smooth ganache forms. Let cool until slightly thickened. -
Step 6
Unroll cooled cake and spread peanut butter filling evenly, leaving a border. Re-roll cake without the towel. Place seam-side down on a platter. -
Step 7
Pour ganache over the cake, allowing it to drip. Sprinkle with chopped Reese’s Peanut Butter Cups. Refrigerate for at least 30 minutes before slicing and serving.
Important Information
Nutrition Facts (Per Serving)
It is important to consider this information as approximate and not to use it as definitive health advice.
Allergy Information
Please check ingredients for potential allergens and consult a health professional if in doubt.
Leave a Comment