
Rice Krispie Wreaths are more than just a holiday treat; they’re a nostalgic portal to festive cheer, a crunchy, chewy hug from Christmases past. Imagine the delight of little hands (and big ones too!) forming these iconic shapes, the sweet aroma of toasted marshmallows filling the kitchen, and the satisfying snap as you take your first bite. What is it about these simple, delightful creations that captures our hearts year after year? It’s the effortless magic they embody – a perfect balance of sweet, buttery, and delightfully crisp, all shaped into a symbol of togetherness and celebration. They are incredibly easy to make, making them an ideal activity for families, and their adaptability is truly special. Whether you adorn them with vibrant sprinkles, rich chocolate, or a dusting of powdered sugar ‘snow,’ Rice Krispie Wreaths are guaranteed to bring smiles and festive spirit to any gathering.

Ingredients:
- 3 tbsp butter
- 10 oz marshmallows (about 40 large marshmallows)
- 6 cups Rice Krispies cereal
- Green food coloring
- Red & green M&Ms (or similar candies)
- Cooking spray or butter (for greasing hands)
Preparing Your Workspace and Ingredients
Before we dive into creating these festive Rice Krispie Wreaths, it’s crucial to get everything ready. This will make the process much smoother and prevent your mixture from hardening before you can shape it. First, find a large mixing bowl that can comfortably hold all your ingredients. It’s also helpful to have a baking sheet or a large piece of parchment paper ready to place the wreaths on as they cool. Grease this surface lightly with cooking spray or butter; this will prevent the sticky wreaths from adhering.
Now, let’s talk about the star of our Rice Krispie Wreaths: the Rice Krispies cereal. Measure out your 6 cups and have it ready to go. The marshmallows are next. You’ll need 10 ounces, which typically translates to about 40 large marshmallows. If you’re using mini marshmallows, you’ll need less volume, so it’s best to weigh them out if possible for accuracy. Having them measured and ready will save precious time when the hot, melted marshmallow mixture is waiting.
The fun part begins with the color! For our Rice Krispie Wreaths, we want a festive green hue. Have your green food coloring at hand. You’ll likely need a few drops to achieve a vibrant green, but it’s best to add it gradually and stir until you reach your desired shade. Finally, gather your red and green M&Ms (or similar festive candies). These will be used for decoration to give our wreaths that classic holiday look. Having them separated into their colors will make decorating quick and easy. Don’t forget your cooking spray or a little extra butter for your hands – this is absolutely essential for handling the sticky marshmallow mixture.
Melting the Marshmallow Mixture
The foundation of our Rice Krispie Wreaths is a perfectly melted marshmallow mixture. In your large mixing bowl, add the 3 tablespoons of butter. Place this bowl over a pot of simmering water (a double boiler setup) or carefully melt the butter in the microwave in 30-second intervals, stirring between each. The goal is to melt the butter completely without scorching it. Once the butter is liquid, add the 10 ounces of marshmallows to the bowl.
Now, stir the marshmallows constantly until they are completely melted and smooth. This is where the double boiler method really shines, as it provides gentle, even heat. If you’re using the microwave, continue melting in short bursts, stirring well after each to ensure even melting. Be cautious not to overheat the marshmallows, as this can make them tough and difficult to work with. Once you have a smooth, gooey, and fully melted marshmallow mixture, remove it from the heat source. This is the critical moment to incorporate the green food coloring. Add a few drops of green food coloring and stir vigorously until the color is evenly distributed throughout the marshmallow mixture. Continue adding drops and stirring until you achieve a vibrant, festive green. Remember, the color will lighten slightly once the cereal is added.
Combining Cereal and Marshmallow
With your beautifully colored, melted marshmallow mixture ready, it’s time to add the Rice Krispies cereal. Working quickly but carefully, add the 6 cups of Rice Krispies cereal to the bowl with the marshmallow mixture. Using a sturdy spoon or spatula, gently but thoroughly mix the cereal into the marshmallow until it is evenly coated. You want every crispy puff to be enrobed in the gooey green marshmallow. This step requires a bit of effort as the mixture will start to become quite sticky and thick. Ensure you scrape the sides and bottom of the bowl to incorporate all the cereal.
It’s important to work efficiently here. As the mixture cools, it will become harder to shape. If you find the mixture becoming too stiff, you can briefly return the bowl to a very low heat or microwave for a few seconds, stirring constantly, to loosen it up. However, be very careful not to remelt it too much, as this can lead to a less desirable texture. The goal is a cohesive mixture where the cereal is well-bound by the marshmallow.
Shaping the Rice Krispie Wreaths
Now comes the fun and slightly sticky part: shaping your Rice Krispie Wreaths! This is where greasing your hands is absolutely essential. Take a generous amount of cooking spray or butter and rub it all over your palms and fingers. This will prevent the incredibly sticky mixture from clinging to you. Scoop out a portion of the Rice Krispie mixture, about a golf ball-sized amount for a smaller wreath, or a slightly larger portion for a more substantial one.
Gently form the mixture into a ball in your greased hands. Then, using your thumb or finger, create a hole in the center. Continue to shape the mixture, pressing and rotating it to form a ring, or wreath shape. Aim for a thickness that is sturdy enough to hold its shape but not so thick that it’s difficult to eat. Don’t worry about perfect symmetry; the rustic charm is part of the appeal! As you finish each wreath, carefully place it onto your prepared greased baking sheet or parchment paper. Repeat this process, re-greasing your hands as needed, until you have used up all the Rice Krispie mixture.
Decorating Your Festive Wreaths
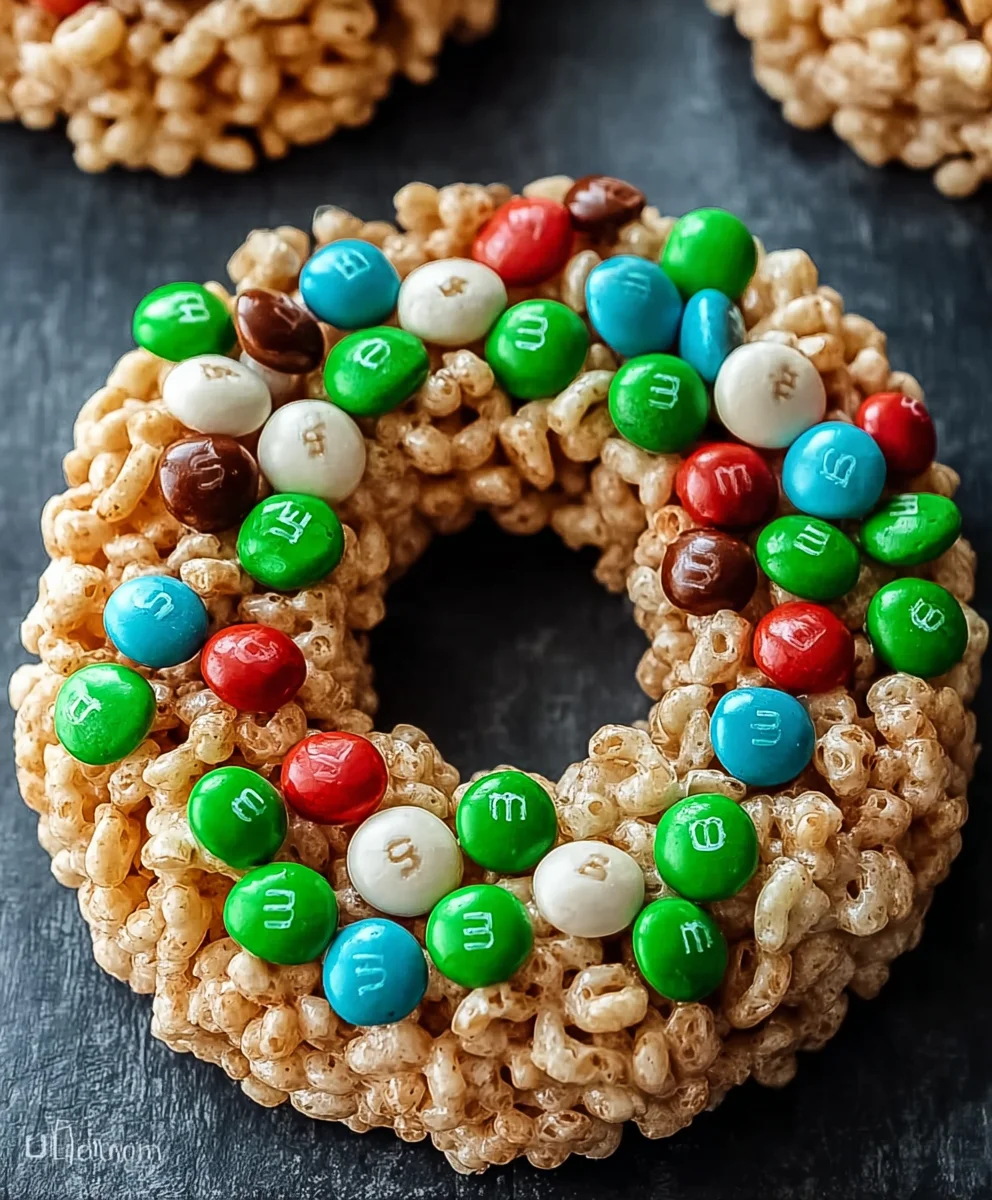
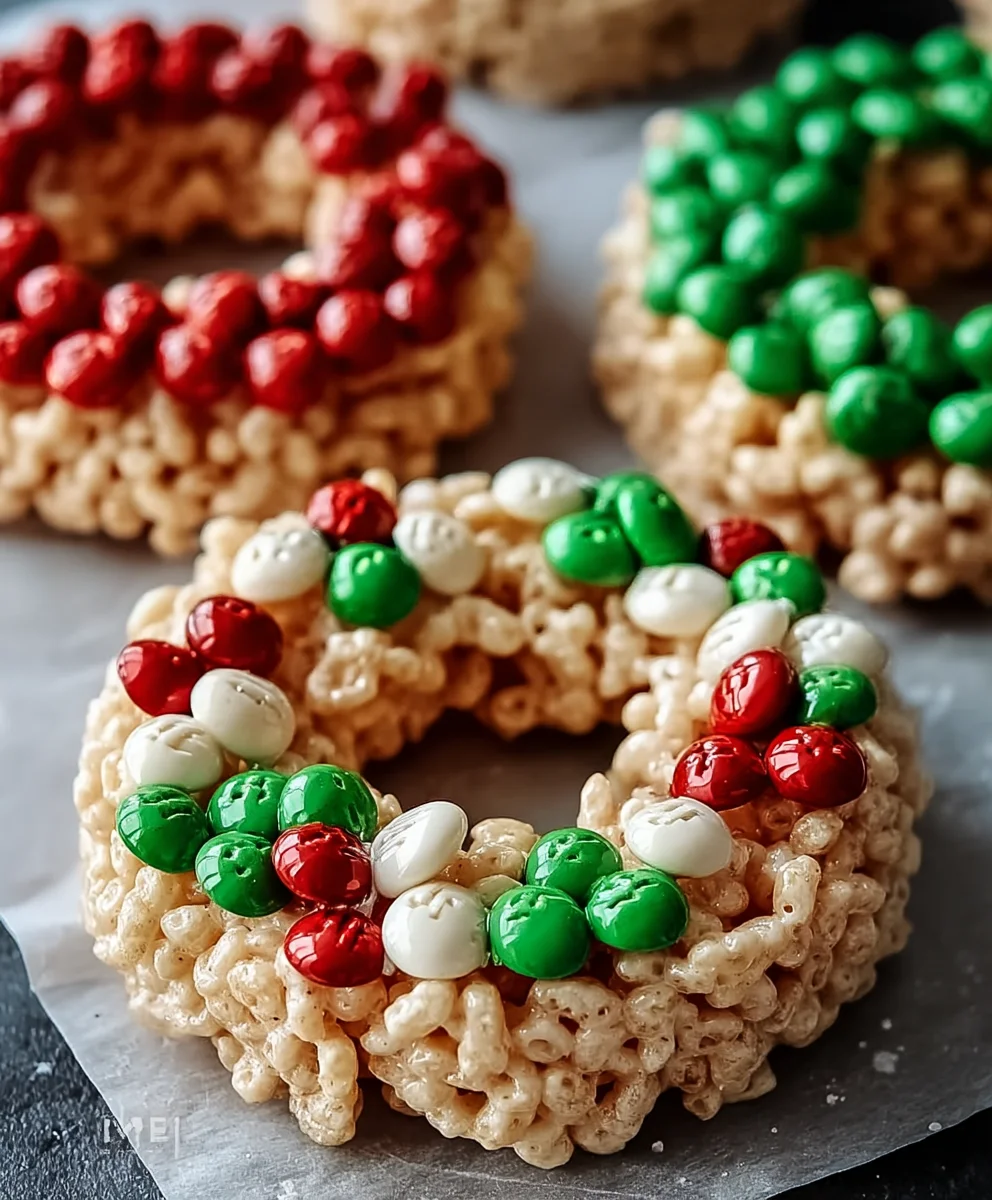
The final flourish for your Rice Krispie Wreaths is the decoration! This is where you can let your creativity shine and add that festive holiday flair. While the wreaths are still slightly warm and pliable, it’s the easiest time to attach the decorations. Take your separated red and green M&Ms (or similar candies) and press them gently into the surface of the wreaths. You can arrange them in a pattern, scatter them randomly, or create a bow-like effect with some of the red candies.
If you want a more “frosty” look, you could also lightly dust the finished wreaths with a bit of edible glitter or powdered sugar once they have cooled completely. For an extra touch of sparkle and shine, you can even drizzle a little melted white chocolate over the wreaths after they’ve set and before adding the M&Ms. This step is entirely optional, but it really elevates the festive appearance of your Rice Krispie Wreaths, making them perfect for holiday parties or as a sweet treat for Santa! Allow the decorations to set, and your delicious Rice Krispie Wreaths are ready to be enjoyed!
Conclusion:
And there you have it – your very own batch of delightful Rice Krispie Wreaths! I truly hope you enjoy making and sharing these festive treats as much as I do. They are surprisingly simple to whip up, making them a perfect activity for a holiday baking session with the family or even a last-minute edible gift. The sweet, chewy texture combined with the festive shape is always a crowd-pleaser. I love seeing the creativity that goes into decorating them; some are adorned with sprinkles, others with colorful icing to mimic ornaments. Whether you’re serving them at a holiday party, as a sweet ending to a festive meal, or simply enjoying a quiet moment with a cup of cocoa, these Rice Krispie Wreaths are sure to bring a smile. Don’t be afraid to experiment with different food colorings or add-ins for unique flavor profiles. The possibilities are endless!
Frequently Asked Questions:
How can I make my Rice Krispie Wreaths extra festive?
You can elevate your Rice Krispie Wreaths by using various food colorings to tint the marshmallow mixture before adding the cereal, creating a colorful base. Once formed, get creative with decorating! Edible glitter, colored icing drizzle, festive sprinkles shaped like stars or snowflakes, and even small candies can be used to mimic Christmas ornaments. For a touch of elegance, a white chocolate drizzle can be quite striking.
Can I make Rice Krispie Wreaths ahead of time?
Absolutely! Rice Krispie Wreaths can be made a day or two in advance. Store them in an airtight container at room temperature. If decorating with icing, it’s best to let the wreaths fully set before stacking them or storing them tightly, to prevent smudging.
Easy Rice Krispie Wreath Holiday Treats
Festive and easy-to-make Rice Krispie treats shaped into holiday wreaths, perfect for parties and sharing.
Ingredients
-
3 tbsp butter
-
10 oz marshmallows (about 40 large marshmallows)
-
6 cups Rice Krispies cereal
-
Green food coloring
-
Red & green M&Ms (or similar candies)
-
Cooking spray or butter (for greasing hands)
Instructions
-
Step 1
Prepare your workspace by greasing a baking sheet or parchment paper and gathering all ingredients. Measure out cereal and marshmallows. -
Step 2
Melt butter in a large bowl over simmering water or in the microwave. Add marshmallows and stir until completely melted and smooth. Add green food coloring gradually and stir until desired vibrant green is achieved. -
Step 3
Quickly add the 6 cups of Rice Krispies cereal to the melted marshmallow mixture. Gently but thoroughly mix until all cereal is evenly coated. Work efficiently as the mixture will cool and become sticky. -
Step 4
Grease your hands generously with cooking spray or butter. Scoop about a golf ball-sized portion of the mixture and gently form into a ball. Create a hole in the center and shape into a wreath. Place on the prepared baking sheet. -
Step 5
While the wreaths are still slightly warm, gently press red and green M&Ms into the surface for decoration. Arrange in patterns or scatter randomly. -
Step 6
Allow the decorations to set. Optionally, dust with edible glitter or powdered sugar once completely cooled. The treats are ready to be enjoyed!
Important Information
Nutrition Facts (Per Serving)
It is important to consider this information as approximate and not to use it as definitive health advice.
Allergy Information
Please check ingredients for potential allergens and consult a health professional if in doubt.


Leave a Comment