
Easy Thanksgiving Pumpkin Pie Recipe is here to transform your holiday dessert table! As the leaves turn golden and the air grows crisp, there’s one dessert that truly embodies the spirit of autumn and the warmth of gathering with loved ones: pumpkin pie. I’m absolutely delighted to share with you a rendition of this classic that promises not only an incredible taste but also remarkable simplicity. This iconic dessert holds a cherished place in American culinary traditions, symbolizing the bountiful harvest and the joy of shared meals during Thanksgiving. Its roots trace back to early American settlers, evolving into the quintessential sweet finale we know and love.
What makes a pumpkin pie truly unforgettable? It’s that perfect balance of a rich, creamy pumpkin filling, infused with aromatic spices like cinnamon, nutmeg, and ginger, all nestled within a flaky, buttery crust. People adore this dish not just for its comforting flavor and velvety texture, but for the cherished memories it evokes – the very essence of home and togetherness. This particular Easy Thanksgiving Pumpkin Pie Recipe ensures that even if you’re a novice baker, you can confidently create a show-stopping dessert that will earn rave reviews. Prepare to delight your family and friends with a slice of pure holiday bliss!

Ingredients:
- For the Pie Crust:
- 1 unbaked 9-inch pie crust. You can use a store-bought crust for ultimate ease, or if you’re feeling ambitious and want to make this Easy Thanksgiving Pumpkin Pie Recipe truly from scratch, a homemade all-butter or shortening pie crust works wonderfully. I often opt for store-bought to save time, especially during busy Thanksgiving preparations!
- For the Pumpkin Filling:
- 1 can (15 ounces) pure pumpkin puree. Please ensure this is 100% pure pumpkin, not pumpkin pie filling, which already contains spices and sugar. I always double-check the label to avoid any mix-ups!
- 1 cup (200g) granulated sugar. This provides the primary sweetness for our pie.
- ½ cup (110g) firmly packed light brown sugar. The brown sugar adds a lovely molasses note and a deeper, richer flavor that truly complements the pumpkin.
- 2 large eggs, lightly beaten. These act as the binder for our filling, giving it that classic smooth, custardy texture.
- 1 can (12 fluid ounces) evaporated milk. This is my secret weapon for a creamy, rich filling. Heavy cream can be substituted, but evaporated milk gives a unique depth.
- 1 teaspoon ground cinnamon. The cornerstone spice of any great pumpkin pie!
- ½ teaspoon ground ginger. Adds a subtle warmth and zing that brightens the flavor.
- ¼ teaspoon ground nutmeg. Essential for that classic, comforting pumpkin pie aroma.
- ⅛ teaspoon ground cloves. Just a touch adds a complex, aromatic note. You can also use a pinch of allspice if you prefer.
- ½ teaspoon salt. Don’t skip the salt! It balances the sweetness and enhances all the other flavors beautifully.
- 1 teaspoon pure vanilla extract. Vanilla rounds out the flavors and adds a hint of sweet fragrance.
- For Serving (Optional):
- Freshly whipped cream or a dollop of vanilla ice cream. Because what’s pumpkin pie without a little something extra?
- A dusting of extra cinnamon or nutmeg.
Preparing Your Pie Crust: The Foundation of Your Easy Thanksgiving Pumpkin Pie
- Preheating Your Oven and Preparing Your Crust: First things first, let’s get that oven ready! I always preheat my oven to a robust 425°F (220°C) to ensure it’s at the perfect temperature when the pie is ready to go in. While the oven heats, if you’re using a store-bought unbaked pie crust, take it out of the refrigerator and let it sit at room temperature for about 10-15 minutes. This makes it more pliable and less likely to crack when you handle it. If you’re using a homemade crust, make sure it’s chilled and ready to be worked with.
- Getting the Crust Ready for Filling: Carefully unroll or place your unbaked 9-inch pie crust into your pie plate. I like to gently press it into the bottom and up the sides to ensure it fits snugly. If you’re using a pie plate with fluted edges, use your fingers to create a decorative crimped edge. If your pie plate is smooth, you can make a simple, rustic edge by pressing around the perimeter with the tines of a fork. This isn’t just for looks; it helps to contain the filling!
- The Importance of Pricking and Blind Baking (Optional but Recommended): To prevent the crust from puffing up excessively and to help achieve a beautifully crisp bottom for your Easy Thanksgiving Pumpkin Pie, I highly recommend pricking the bottom and sides of the pie crust all over with a fork. This creates small vents for steam to escape. For an even crisper, non-soggy crust, especially crucial for a custard-based pie like this, I often blind bake the crust for a short period. To do this, line the unpricked crust with parchment paper or foil, and fill it with pie weights, dried beans, or uncooked rice. Bake in your preheated 425°F (220°C) oven for about 10-12 minutes. Then, carefully remove the weights and parchment/foil, and bake for another 5 minutes or until the crust is lightly golden. This step helps set the crust before the wet filling goes in, making a world of difference. After blind baking, reduce the oven temperature to 350°F (175°C). If you skip blind baking, simply keep the oven at 425°F (220°C) as initially instructed for the first phase of baking the filled pie.
Crafting the Delicious Pumpkin Filling: The Heart of Your Easy Thanksgiving Pumpkin Pie Recipe
- Gathering and Measuring Your Ingredients: Before I start mixing, I always take a moment to gather all my filling ingredients and measure them out. This “mise en place” approach makes the process much smoother and ensures I don’t forget anything crucial. Having everything ready to go means less stress and more enjoyment in the kitchen. Make sure your pumpkin puree is indeed pure pumpkin and not the pre-spiced pie filling!
- Combining the Dry Spices and Sugars: In a separate, medium-sized mixing bowl, I like to whisk together all of my dry ingredients. This includes the granulated sugar, the firmly packed light brown sugar, my warming ground cinnamon, spicy ground ginger, fragrant ground nutmeg, and just a pinch of ground cloves. The salt also goes in here. Whisking these thoroughly ensures that all of those wonderful spices and the sweetness are evenly distributed throughout the filling. We don’t want a bite that’s bland and then another that’s overwhelmingly spicy, do we? This initial step, though simple, is crucial for a perfectly balanced flavor profile in our Easy Thanksgiving Pumpkin Pie Recipe.
- Preparing the Wet Ingredients: In a large mixing bowl – I usually opt for my largest one to prevent spills – I gently whisk my two large eggs until they are just lightly beaten. They don’t need to be frothy, just broken up and combined. Then, I add the star of the show, the pure pumpkin puree. After that, I pour in the evaporated milk, which will contribute so much to the pie’s creamy texture, and finally, the pure vanilla extract. Give these wet ingredients a good whisk until they are well combined and smooth.
- Bringing It All Together: Now for the magic! Gradually add the dry spice and sugar mixture from the smaller bowl into the large bowl with the wet pumpkin mixture. I do this slowly, whisking continuously as I add it, to prevent lumps and ensure everything is thoroughly incorporated. The goal here is to mix until the filling is smooth and uniform in color, but be careful not to overmix. Overmixing can incorporate too much air, which can lead to cracks in your pie as it bakes and cools. A gentle, steady whisk is all you need for this Easy Thanksgiving Pumpkin Pie Recipe. The mixture should be a beautiful, rich orange color and have a smooth, custardy consistency.
Baking Your Easy Thanksgiving Pumpkin Pie: The Moment of Truth
- Pouring the Filling into the Crust: Carefully pour the prepared pumpkin filling into your unbaked (or blind-baked, if you chose that route) pie crust. I like to do this on a flat surface, like a baking sheet, before transferring it to the oven. This makes it easier to handle and catch any potential spills. Fill it almost to the very top, leaving just a tiny bit of room for any slight expansion during baking.
- The Initial High-Heat Bake: Transfer the pie, still on its baking sheet, to your preheated 425°F (220°C) oven. Bake for the first 15 minutes at this higher temperature. This initial blast of heat helps to set the crust and begin the cooking process for the filling, creating a stable foundation for the rest of the bake.
- Reducing Heat for the Long Bake: After the initial 15 minutes, reduce the oven temperature to 350°F (175°C). Do NOT open the oven door during this temperature reduction; simply adjust the dial. Continue to bake for another 40-50 minutes, or until the pie is set.
- Checking for Doneness: How do you know when your Easy Thanksgiving Pumpkin Pie is perfectly baked? I look for a few tell-tale signs. The edges of the filling should appear set and slightly puffed, while the very center of the pie should still have a slight jiggle to it when you gently shake the pie plate. It should look like a very soft-set custard. If the center is completely firm, it’s likely overcooked, which can lead to cracking. Another reliable method is to insert a knife about one inch from the edge of the pie; if it comes out clean, your pie is ready. A thermometer inserted into the center should read 175°F (80°C).
- Preventing Over-Browning: If you notice the crust or the top of the filling starting to brown too much before the center is set, don’t worry! This is a common occurrence. I simply create a “foil tent” by loosely covering the edges of the pie with aluminum foil. You can also buy a pie shield for this purpose. This protects the edges from burning while the center finishes cooking.
- Removing from the Oven: Once your pumpkin pie is perfectly baked according to the doneness tests, carefully remove the baking sheet with the pie from the oven. It will be very hot, so use oven mitts!
Cooling and Serving Your Perfect Pumpkin Pie: The Final Touches for an Easy Thanksgiving Pumpkin Pie
- The Crucial Cooling Process: This is arguably the most important step for a perfect, crack-free Easy Thanksgiving Pumpkin Pie. Immediately transfer the hot pie from the baking sheet to a wire cooling rack. It is absolutely essential to allow the pie to cool completely, and I mean completely, before slicing into it. This process can take anywhere from 2 to 4 hours, or even longer at room temperature. As the pie cools, the center will continue to set and firm up, transforming from that wobbly custard to a perfectly sliceable, rich dessert. Patience here is key! If you cut into it too soon, the filling might be runny and the slices won’t hold their shape.
- Storing Your Leftovers: If by some miracle you have any leftovers from your delicious Easy Thanksgiving Pumpkin Pie (which is rare in my house!), they should be stored in the refrigerator. Once cooled, cover the pie loosely with plastic wrap or aluminum foil. It will keep well in the fridge for up to 3-4 days. While it’s best enjoyed within a day or two, it still tastes fantastic later in the week.
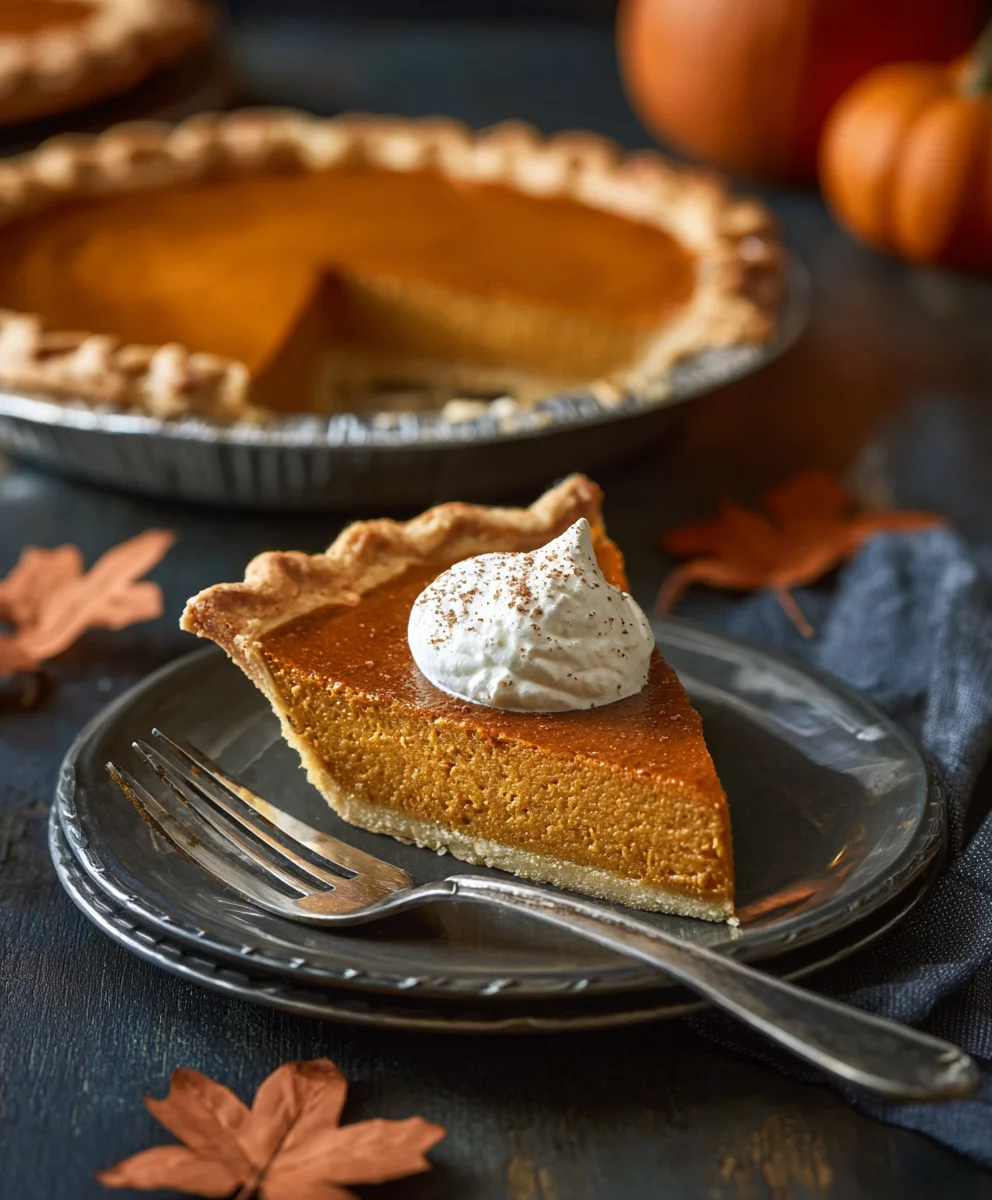
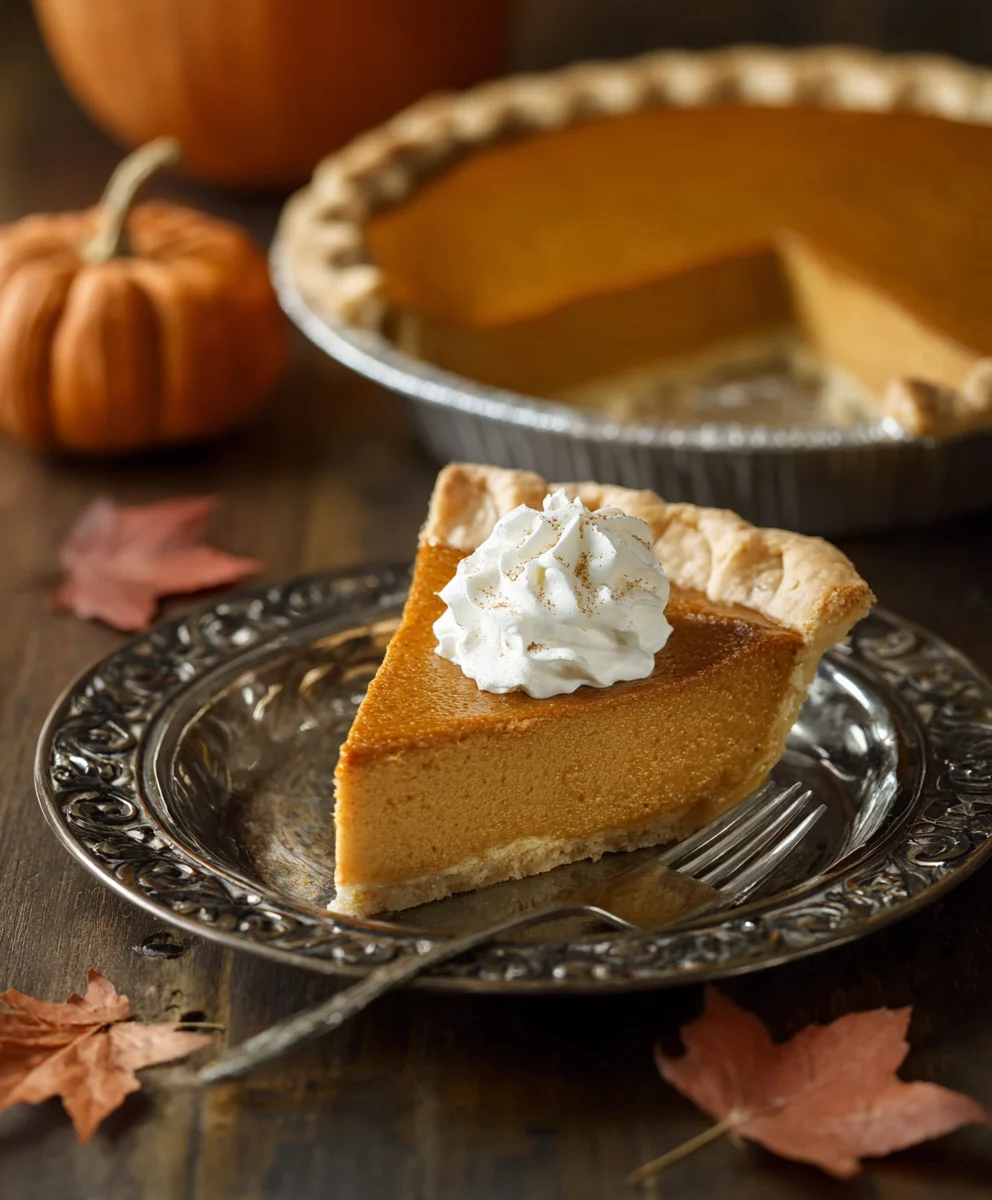
- Serving Suggestions: When it’s finally time to serve, slice your perfectly cooled Easy Thanksgiving Pumpkin Pie into wedges. For an extra special touch, I love to serve each slice with a generous dollop of freshly whipped cream. You can even add a sprinkle of extra cinnamon or nutmeg on top of the cream for added aroma and visual appeal. A scoop of good quality vanilla bean ice cream also makes a fantastic accompaniment, especially when the pie is still slightly cool. This recipe is truly a crowd-pleaser and a staple for any Thanksgiving table. Enjoy the fruits of your labor!
Easy Thanksgiving Pumpkin Pie Recipe
Easy Thanksgiving Pumpkin Pie Recipe to create a show-stopping holiday dessert. This simple recipe yields a rich, creamy pumpkin filling infused with aromatic spices in a flaky crust, perfect for any baker.
Ingredients
-
1 can (15 oz) pure pumpkin puree
-
3/4 cup granulated sugar
-
1/2 teaspoon salt
-
1 teaspoon ground cinnamon
-
1/2 teaspoon ground ginger
-
1/4 teaspoon ground cloves
-
2 large eggs
-
1 can (12 fl oz) evaporated milk
-
1 unbaked 9-inch pie shell
Instructions
-
Step 1
Preheat oven to 425°F (220°C). Place unbaked 9-inch pie crust in a pie plate and crimp edges. Prick crust bottom and sides with a fork. (Optional for crisp crust: Line with parchment/foil, fill with pie weights. Bake at 425°F for 10-12 minutes. Remove weights; bake 5 minutes more until lightly golden. Reduce oven to 350°F.) -
Step 2
In a medium bowl, whisk together 3/4 cup granulated sugar, 1/2 tsp salt, 1 tsp ground cinnamon, 1/2 tsp ground ginger, and 1/4 tsp ground cloves. -
Step 3
In a large bowl, lightly beat 2 large eggs, then whisk in 1 can (15 oz) pure pumpkin puree and 1 can (12 fl oz) evaporated milk. -
Step 4
Gradually add the dry spice mixture to the wet pumpkin mixture, whisking until smooth and uniform. Do not overmix. -
Step 5
Pour the filling into the prepared pie crust. Place the pie on a baking sheet. Bake at 425°F (220°C) for the first 15 minutes. -
Step 6
Reduce oven temperature to 350°F (175°C) and continue baking for 40-50 minutes, or until edges are set and the center has a slight jiggle. (If crust browns too quickly, cover edges loosely with aluminum foil.) -
Step 7
Remove pie from oven and transfer to a wire cooling rack. Cool completely for 2-4 hours before slicing. This is crucial for a perfectly set pie. -
Step 8
Serve slices with whipped cream or vanilla ice cream, if desired. Store any leftovers, covered, in the refrigerator for up to 3-4 days.
Important Information
Nutrition Facts (Per Serving)
It is important to consider this information as approximate and not to use it as definitive health advice.
Allergy Information
Please check ingredients for potential allergens and consult a health professional if in doubt.

Leave a Comment