
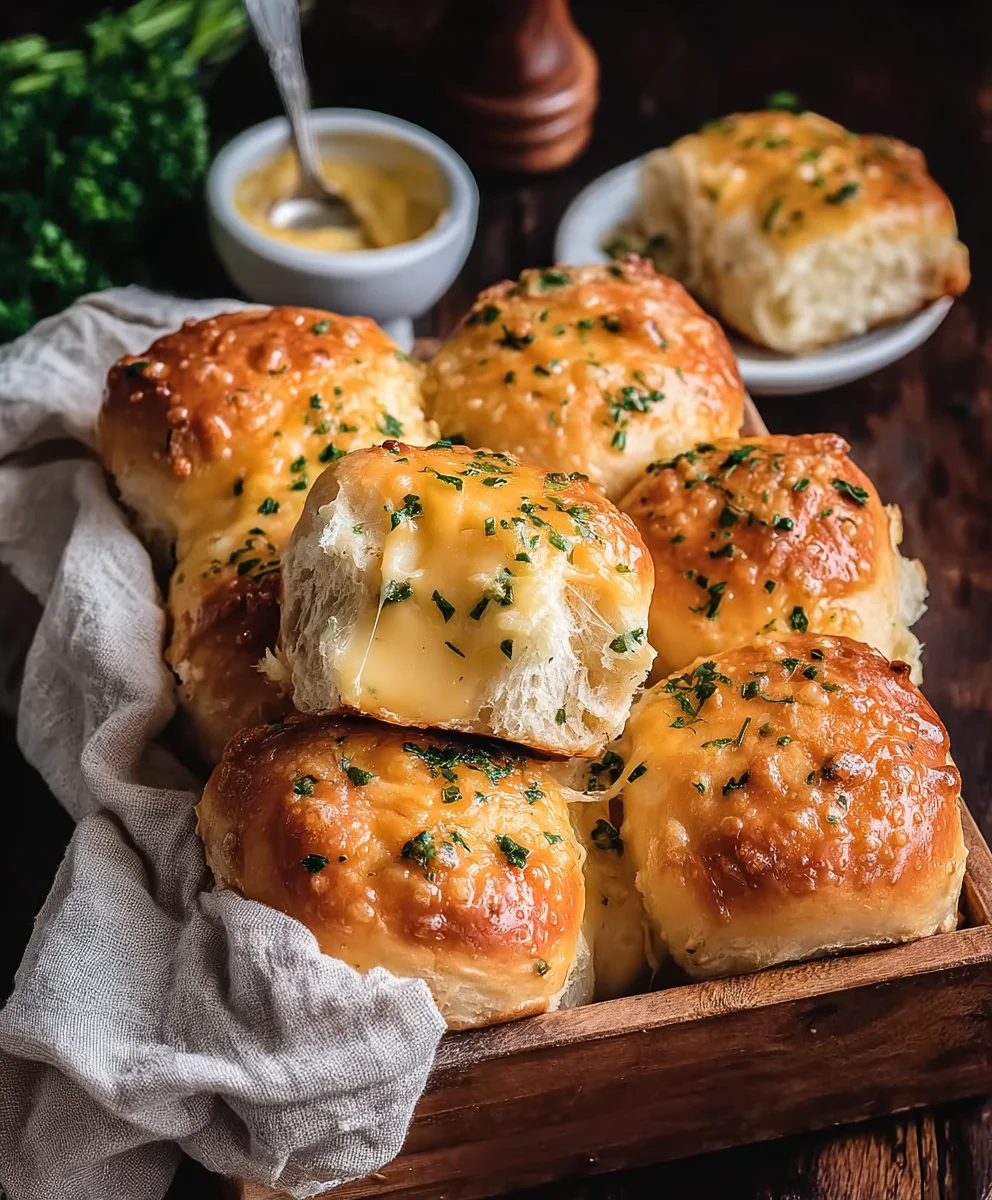
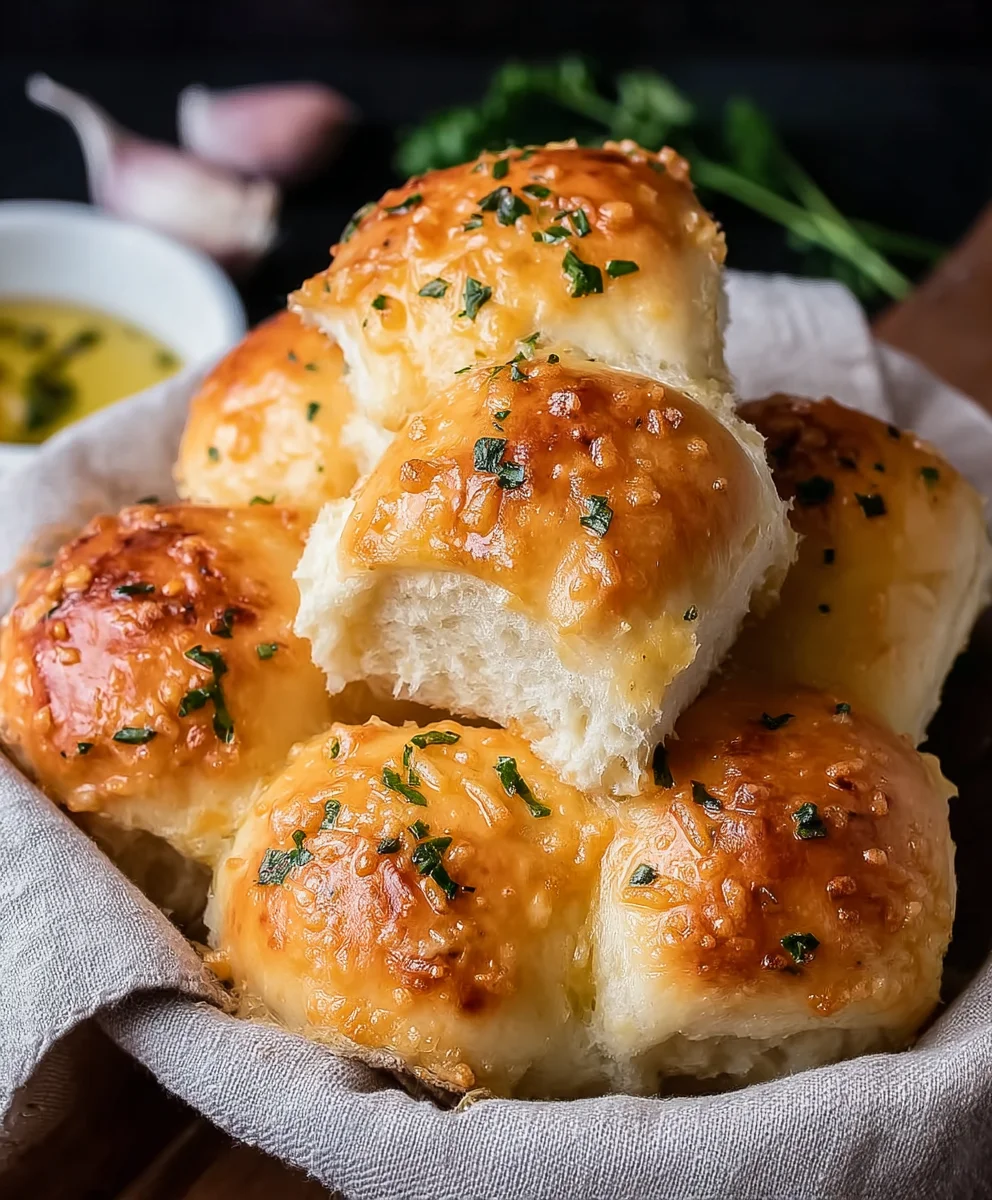
Cheesy Garlic Dinner Rolls are not just a side dish; they are an invitation to pure comfort and an irresistible aroma that promises to transform any meal into a special occasion. Imagine pulling apart a warm, golden-brown roll, revealing a fluffy interior generously studded with melted, gooey cheese and infused with the tantalizing zest of fresh garlic. It’s a sensory experience that instantly elevates a simple dinner into a memorable feast, making these rolls a truly beloved addition to any table.
While the precise historical roots of a dish like these particular Cheesy Garlic Dinner Rolls might be part of a broader culinary evolution, they undoubtedly spring from the universal love for garlic bread and cheese-infused baked goods – staples that have brought joy and flavor to gatherings across various cultures for generations. People adore this dish for its incredible versatility and its utterly delightful combination of textures and tastes: the slight crispness of the crust, the pillowy softness of the bread, and the rich, savory explosion of garlic and melted cheese that makes every bite a moment to savor. They are the ultimate crowd-pleaser, perfect for soaking up delicious sauces, complementing hearty main courses, or simply enjoying as a standalone snack.
I understand the desire for that perfect, homemade experience, and I’m thrilled to share a recipe that guarantees flawless results every time. Get ready to bake a batch of these extraordinary Cheesy Garlic Dinner Rolls that will have everyone reaching for just one more.

Ingredients:
- For the Dough:
- 1 cup (240ml) warm milk (between 105-115°F / 40-46°C)
- 2 teaspoons (7g) active dry yeast
- 1 tablespoon (12g) granulated sugar
- 3 cups (360g) all-purpose flour, plus more for dusting
- 1 teaspoon (6g) fine sea salt
- 1/4 cup (56g) unsalted butter, melted and cooled slightly
- 1 large egg, at room temperature (for egg wash)
- For the Garlic Herb Filling:
- 1/2 cup (112g) unsalted butter, melted
- 6-8 cloves garlic, minced very finely (about 2 tablespoons)
- 1/4 cup (4g) fresh parsley, finely chopped
- 2 tablespoons (1g) fresh chives, finely chopped
- 1/2 teaspoon fine sea salt
- 1/4 teaspoon freshly ground black pepper
- For the Cheesy Layer:
- 1 cup (113g) shredded low-moisture mozzarella cheese
- 1/2 cup (56g) grated Parmesan cheese
- For Finishing (Optional but Recommended):
- 2 tablespoons (28g) unsalted butter, melted
- 1 clove garlic, minced
- 1 tablespoon fresh parsley, chopped
Preparing the Dough for Our Cheesy Garlic Dinner Rolls
Creating the perfect base for our Cheesy Garlic Dinner Rolls is the first and most crucial step. A soft, tender dough is what makes these rolls so incredibly irresistible. Let’s get started!
-
Activate the Yeast:
In a large mixing bowl, or the bowl of a stand mixer fitted with the dough hook attachment, pour in your warm milk. It’s really important that the milk is not too hot (which can kill the yeast) and not too cold (which won’t activate it). Aim for that sweet spot between 105-115°F (40-46°C). Sprinkle the granulated sugar and active dry yeast over the warm milk. Give it a gentle stir and let it sit for 5-10 minutes. You’re looking for a foamy, bubbly mixture on the surface; this tells you your yeast is alive and ready to make some magic! If it doesn’t foam, your yeast might be old, or your milk temperature was off, and it’s best to start again.
-
Combine Wet Ingredients:
Once your yeast is happily activated, add the slightly cooled melted butter to the milk mixture. Make sure your butter isn’t hot, as that could also harm the yeast. Give it another quick stir to combine.
-
Add Dry Ingredients:
To the wet mixture, gradually add 3 cups of all-purpose flour and the fine sea salt. I like to add about half the flour first, mix it in a bit, and then add the rest. This helps prevent a sudden cloud of flour dust in your kitchen! The salt is essential not just for flavor, but it also helps to control yeast activity and strengthen the gluten in your dough.
-
Mix and Knead the Dough:
If you’re using a stand mixer, attach the dough hook and mix on low speed for about 2 minutes until the ingredients are just combined and form a shaggy dough. Then, increase the speed to medium-low and knead for about 7-10 minutes. This kneading process is vital for developing the gluten, which gives our Cheesy Garlic Dinner Rolls their lovely chewy yet tender texture. The dough should become smooth, elastic, and pull away from the sides of the bowl. If you’re kneading by hand, turn the dough out onto a lightly floured surface and knead vigorously for 10-15 minutes until it reaches that smooth, elastic consistency. You’ll feel the dough transform under your hands, becoming less sticky and more pliable.
-
First Rise (Bulk Fermentation):
Lightly grease a clean large bowl with a little oil or non-stick spray. Place the kneaded dough into the bowl, turning it once to coat the entire surface with oil. This prevents it from drying out. Cover the bowl tightly with plastic wrap or a clean kitchen towel. Now, find a warm, draft-free spot in your kitchen. A slightly warm oven (turned off, but perhaps preheated to its lowest setting for a few minutes and then turned off completely), or simply on top of your refrigerator, are great spots. Let the dough rise for 1 to 1.5 hours, or until it has doubled in size. This first rise is critical for flavor development and achieving that light, airy texture for our magnificent Cheesy Garlic Dinner Rolls.
Shaping and Filling the Cheesy Garlic Dinner Rolls
Now comes the fun part: infusing our dough with glorious garlic, herbs, and cheese! This is where our ordinary dough transforms into truly extraordinary Cheesy Garlic Dinner Rolls.
-
Prepare the Garlic Herb Filling:
While your dough is on its first rise, let’s get our incredibly aromatic filling ready. In a small bowl, combine the 1/2 cup of melted unsalted butter with the finely minced garlic, chopped fresh parsley, chopped fresh chives, 1/2 teaspoon salt, and 1/4 teaspoon black pepper. Stir everything together until well combined. The aroma alone is enough to get your mouth watering! Using fresh herbs truly makes a difference here, providing a vibrant freshness that complements the rich garlic and butter perfectly.
-
Prepare the Cheesy Layer:
In another small bowl, gently toss together the shredded mozzarella cheese and grated Parmesan cheese. This blend offers both the stretchy, melty goodness of mozzarella and the sharp, savory depth of Parmesan. You can use other cheeses if you like, but this combination is a classic for a reason when it comes to amazing Cheesy Garlic Dinner Rolls.
-
Punch Down and Roll Out the Dough:
Once your dough has gloriously doubled in size, gently punch it down to release the air. Turn the dough out onto a lightly floured surface. Using a rolling pin, roll the dough into a large rectangle, aiming for approximately 18×12 inches (45×30 cm) and about 1/4 inch (6mm) thick. Try to get the edges as straight as possible, as this will help when cutting our individual rolls.
-
Spread the Filling:
Evenly spread the prepared garlic herb butter mixture over the entire surface of the rolled-out dough, leaving about a 1/2-inch border clean on one of the longer sides. Make sure to get it right to the edges on the other three sides. Don’t be shy; we want every bite of these Cheesy Garlic Dinner Rolls to burst with flavor!
-
Sprinkle the Cheese:
Now, generously sprinkle the mixed mozzarella and Parmesan cheese over the garlic herb butter layer. Again, distribute it as evenly as possible to ensure every roll gets its fair share of cheesy delight. This layer is what truly elevates these from simple garlic rolls to divine Cheesy Garlic Dinner Rolls!
-
Cut the Dough:
Using a pizza cutter or a sharp knife, cut the dough rectangle lengthwise into three equal strips. Then, cut each of these strips crosswise into approximately 6-8 squares. You’ll end up with around 18-24 individual dough squares, depending on how large you make them. These don’t need to be perfectly uniform, but try to keep them relatively similar in size for even baking.
-
Arrange in Baking Dish:
Lightly grease a 9×13 inch (23×33 cm) baking dish or a 9-inch (23 cm) round baking dish with butter or non-stick spray. Take each dough square and arrange them snugly, but not overly tightly, in the prepared baking dish. You can stack them slightly or just arrange them side-by-side. I often like to stand them on their sides, alternating the direction, to create a wonderful pull-apart effect once they’re baked. This method makes them incredibly easy and fun to serve, perfect for sharing! Ensure the cheesy garlic layers are somewhat exposed or visible.
-
Second Rise (Proofing):
Cover the baking dish loosely with plastic wrap or a clean kitchen towel. Place it back in that warm, draft-free spot you used before. Let the rolls rise for another 30-45 minutes, or until they look visibly puffy and have increased in size. They don’t need to double this time, just look plump and ready for the oven. This final rise ensures our Cheesy Garlic Dinner Rolls are light and airy, not dense.
Baking Our Delicious Cheesy Garlic Dinner Rolls
The moment of truth! Baking these rolls will fill your home with the most incredible aroma. Get ready to enjoy the fruits of your labor!
-
Preheat Oven and Prepare Egg Wash:
About 15 minutes before the second rise is complete, preheat your oven to 375°F (190°C). In a small bowl, whisk the remaining large egg with 1 tablespoon of water. This egg wash will give our Cheesy Garlic Dinner Rolls a beautiful golden-brown crust and a lovely sheen.
-
Apply Egg Wash:
Once the rolls have finished their second rise, gently brush the tops of the rolls with the egg wash. Be careful not to deflate them, as they are very delicate at this stage.
-
Bake the Rolls:
Place the baking dish in the preheated oven and bake for 25-30 minutes, or until the tops are gloriously golden brown and the internal temperature reaches around 200-205°F (93-96°C). You’ll see the cheese bubbling and the garlic aroma filling your entire kitchen. Keep an eye on them; ovens can vary, and we want perfectly baked rolls, not burnt ones!
-
Optional Finishing Touch (Highly Recommended!):
While the rolls are baking, prepare the optional finishing butter. In a small microwave-safe bowl, combine the 2 tablespoons of melted butter, 1 minced garlic clove, and 1 tablespoon of chopped fresh parsley. As soon as the Cheesy Garlic Dinner Rolls come out of the oven, immediately brush this mixture generously over the hot rolls. The residual heat will really bring out the fresh garlic and parsley flavors, adding another layer of irresistible deliciousness. This step makes all the difference, trust me!
-
Cool Slightly and Serve:
Let the rolls cool in the baking dish for about 5-10 minutes before serving. This brief cooling period allows the cheese to set slightly and makes them easier to pull apart without tearing. Plus, they will still be wonderfully warm and gooey, which is exactly how we want our Cheesy Garlic Dinner Rolls.
Serving Suggestions for Your Cheesy Garlic Dinner Rolls
These magnificent Cheesy Garlic Dinner Rolls are incredibly versatile and perfect for a variety of meals.
- As a Side Dish: They are a stellar accompaniment to any Italian-inspired meal, like lasagna, spaghetti and meatballs, or chicken alfredo. The garlicky, cheesy goodness perfectly soaks up any delicious sauce left on your plate.
- With Soups and Stews: There’s nothing quite like dipping a warm, cheesy roll into a hearty bowl of soup or stew on a cold day. Tomato soup, minestrone, or a rich beef stew all pair beautifully.
- For a Crowd: Because they’re designed as pull-apart rolls, they’re fantastic for potlucks, family gatherings, or game day spreads. Just place the dish in the center, and watch them disappear!
- As a Snack: Honestly, these are so good, they often don’t even make it to the dinner table. They’re an excellent standalone snack, especially when fresh from the oven.
No matter how you choose to enjoy them, these homemade Cheesy Garlic Dinner Rolls are guaranteed to be a crowd-pleaser and a truly satisfying treat. Enjoy every garlicky, cheesy, buttery bite!
Conclusion:
And there you have it, my friends! We’ve journeyed through the simple steps to create something truly spectacular in your very own kitchen. I truly believe that these aren’t just any rolls; they are a celebration in carb form, a symphony of flavors that will undoubtedly steal the show at any meal. What makes this recipe a non-negotiable must-try? It’s the irresistible combination of golden-brown perfection on the outside, a fluffy, tender crumb on the inside, and that incredible burst of garlicky, herby goodness mingling with gooey, melted cheese in every single bite. The aroma alone as they bake is enough to make your mouth water and draw everyone in your household to the kitchen, eager for a taste. They are deceptively easy to make, yet yield results that taste like they came straight from a gourmet bakery. Trust me when I say, once you try these, there’s no going back to plain dinner rolls.
Serving Suggestions That Elevate Any Meal
The beauty of these delightful creations lies in their incredible versatility. While they are utterly divine eaten warm straight from the oven, perhaps slathered with a little extra butter (because why not?), their potential extends far beyond that. Imagine them alongside a robust pasta dish, perfectly sopping up every last drop of a rich marinara or a creamy Alfredo sauce. They are the ideal companion for a hearty bowl of soup or a slow-cooked stew on a chilly evening, offering that comforting, textural contrast you crave. Planning a family roast chicken or a succulent steak dinner? These rolls will be the star side dish, adding a touch of rustic elegance and an explosion of flavor. Don’t limit them to dinner, either! They make a fantastic addition to brunch spreads, especially if you’re serving egg dishes, or even as a unique appetizer for your next gathering. I’ve even seen them quickly disappear at potlucks, proving their universal appeal. Their rich flavor profile means they pair beautifully with virtually any savory main course, making them a go-to for weeknight dinners and holiday feasts alike.
Endless Possibilities: Your Creative Variations Await!
While the classic recipe for these
Cheesy Garlic Dinner Rolls
is undeniably perfect, I always encourage you to let your culinary imagination run wild and make them your own. The base is so forgiving and adaptable, inviting all sorts of delicious modifications. Consider swapping out the cheddar for a blend of sharp provolone and creamy mozzarella for an even stretchier, more complex cheesy experience. A sprinkle of freshly grated Parmesan on top before baking adds a lovely salty, nutty crust. For those who love a bit of a kick, a pinch of red pepper flakes mixed into the garlic butter can add a delightful warmth. Experiment with different herbs beyond parsley; a touch of fresh rosemary or thyme can introduce an entirely new aromatic dimension. If you’re feeling adventurous, you could even add some finely chopped sun-dried tomatoes or caramelized onions to the dough for an extra layer of savory depth. For a sweet and savory twist, try brushing the baked rolls with a honey-garlic butter – it’s unexpectedly delicious! Or, instead of individual rolls, press the dough into a baking dish to create a magnificent pull-apart bread, perfect for sharing. The possibilities are truly as boundless as your creativity.
Now, It’s Your Turn to Bake and Share!
So, what are you waiting for? Arm yourself with this recipe, gather your ingredients, and set aside some time to experience the sheer joy of baking these incredible rolls. I promise you, the effort is minimal, and the rewards are absolutely immense. There’s something profoundly satisfying about pulling a tray of golden, fragrant rolls from your oven, knowing you’ve created something so utterly delicious from scratch. I’m incredibly excited for you to try this recipe, and I genuinely cannot wait to hear about your experiences. Please, don’t be shy! Once you’ve baked your batch, I’d love for you to share your thoughts, your successes, and especially any unique variations you come up with. Did you serve them with a specific dish that was a knockout? Did you manage to resist eating half the batch before dinner? Snap a photo, drop a comment, or simply tell me how much your family devoured them. Your feedback and creativity inspire me, and they help our growing community of home bakers discover new favorites. Happy baking, everyone, and get ready to fall head over heels for these sensational Cheesy Garlic Dinner Rolls!
Flavorful Cheesy Garlic Dinner Rolls
Warm, golden-brown dinner rolls with a fluffy interior, generously filled with melted mozzarella and Parmesan cheese, and infused with fresh garlic and herbs. These pull-apart rolls are perfect for any meal or as a standalone snack.
Ingredients
-
1 cup (240ml) warm milk (105-115°F / 40-46°C)
-
2 teaspoons (7g) active dry yeast
-
1 tablespoon (12g) granulated sugar
-
3.5 cups (420g) all-purpose flour (3 cups initially + 1/2 cup for kneading)
-
1 teaspoon (6g) fine sea salt
-
1/4 cup (56g) unsalted butter, melted and cooled slightly (for dough)
-
1 large egg, at room temperature (for dough)
-
1 large egg, at room temperature (for egg wash)
-
1/2 cup (112g) unsalted butter, melted (for garlic herb filling)
-
6-8 cloves garlic, minced (about 2 tablespoons) (for garlic herb filling)
-
1/4 cup (4g) fresh parsley, finely chopped (for garlic herb filling)
-
2 tablespoons (1g) fresh chives, finely chopped (for garlic herb filling)
-
1/2 teaspoon fine sea salt (for garlic herb filling)
-
1/4 teaspoon freshly ground black pepper (for garlic herb filling)
-
1 cup (113g) shredded low-moisture mozzarella cheese (for cheesy layer)
-
1/2 cup (56g) grated Parmesan cheese (for cheesy layer)
-
2 tablespoons (28g) unsalted butter, melted (for finishing)
-
1 clove garlic, minced (for finishing)
-
1 tablespoon fresh parsley, chopped (for finishing)
Instructions
-
Step 1
In a large bowl or stand mixer bowl, combine 1 cup warm milk (105-115°F), 1 tablespoon granulated sugar, and 2 teaspoons active dry yeast. Stir gently and let sit for 5-10 minutes until foamy. -
Step 2
Add 1/4 cup melted butter and 1 room temperature egg to the yeast mixture. With a dough hook, add 3 cups all-purpose flour and 1 teaspoon salt. Mix on low speed for 2 minutes. Add the remaining 1/2 cup flour and knead on medium-low speed for 7-10 minutes (or 10-15 minutes by hand) until the dough is smooth and elastic. -
Step 3
Lightly grease a clean bowl, place dough, and turn to coat. Cover tightly and let rise in a warm, draft-free spot for 1 to 1.5 hours, or until doubled in size. -
Step 4
While dough rises, prepare the garlic herb filling: In a small bowl, combine 1/2 cup melted butter, 6-8 minced garlic cloves, 1/4 cup chopped fresh parsley, 2 tablespoons chopped fresh chives, 1/2 teaspoon salt, and 1/4 teaspoon black pepper. In another small bowl, mix 1 cup shredded mozzarella and 1/2 cup grated Parmesan cheese. -
Step 5
Punch down risen dough and turn onto a lightly floured surface. Roll into an 18×12 inch (45×30 cm) rectangle, about 1/4 inch (6mm) thick. Evenly spread the garlic herb butter mixture over the dough, leaving a 1/2-inch border on one long side. Generously sprinkle the mixed cheeses over the butter layer. -
Step 6
Using a pizza cutter or sharp knife, cut the dough lengthwise into three equal strips, then cut each strip crosswise into 6-8 squares (totaling 18-24 rolls). Lightly grease a 9×13 inch (23×33 cm) baking dish. Arrange the dough squares snugly in the dish, standing them on their sides for a pull-apart effect. -
Step 7
Cover the baking dish loosely and let the rolls rise in a warm, draft-free spot for another 30-45 minutes, or until visibly puffy. -
Step 8
Preheat oven to 375°F (190°C). In a small bowl, whisk 1 large egg with 1 tablespoon water for an egg wash. Gently brush the tops of the risen rolls with the egg wash. Bake for 25-30 minutes, or until gloriously golden brown (internal temp 200-205°F / 93-96°C). -
Step 9
While rolls bake, prepare finishing butter: In a small bowl, combine 2 tablespoons melted butter, 1 minced garlic clove, and 1 tablespoon chopped fresh parsley. Immediately after baking, brush this mixture generously over the hot rolls. -
Step 10
Let the rolls cool in the baking dish for 5-10 minutes before serving. Enjoy warm.
Important Information
Nutrition Facts (Per Serving)
It is important to consider this information as approximate and not to use it as definitive health advice.
Allergy Information
Please check ingredients for potential allergens and consult a health professional if in doubt.

Leave a Comment